ES 101 ENGINEERING GRAPHICS Gaurav Srivastava Assistant Professor
![Last time [5. 1] bisecting a line [5. 2] to draw perpendiculars [5. 3] Last time [5. 1] bisecting a line [5. 2] to draw perpendiculars [5. 3]](https://slidetodoc.com/presentation_image_h2/b94907c5c77edb03aee435f603e49598/image-2.jpg)
![Geometric construction [3. 1] lines [4. 2] scales [6. 1. 1] ellipse [6. 2. Geometric construction [3. 1] lines [4. 2] scales [6. 1. 1] ellipse [6. 2.](https://slidetodoc.com/presentation_image_h2/b94907c5c77edb03aee435f603e49598/image-16.jpg)
- Slides: 23

ES 101 ENGINEERING GRAPHICS Gaurav Srivastava Assistant Professor Civil Engineering (gauravs@iitgn. ac. in) Fall 2017
![Last time 5 1 bisecting a line 5 2 to draw perpendiculars 5 3 Last time [5. 1] bisecting a line [5. 2] to draw perpendiculars [5. 3]](https://slidetodoc.com/presentation_image_h2/b94907c5c77edb03aee435f603e49598/image-2.jpg)
Last time [5. 1] bisecting a line [5. 2] to draw perpendiculars [5. 3] to draw parallel lines [5. 4] to divide a line [5. 6] to bisect an angle [5. 10] to construct equilateral triangles [5. 11] to construct square [5. 16] to draw tangents

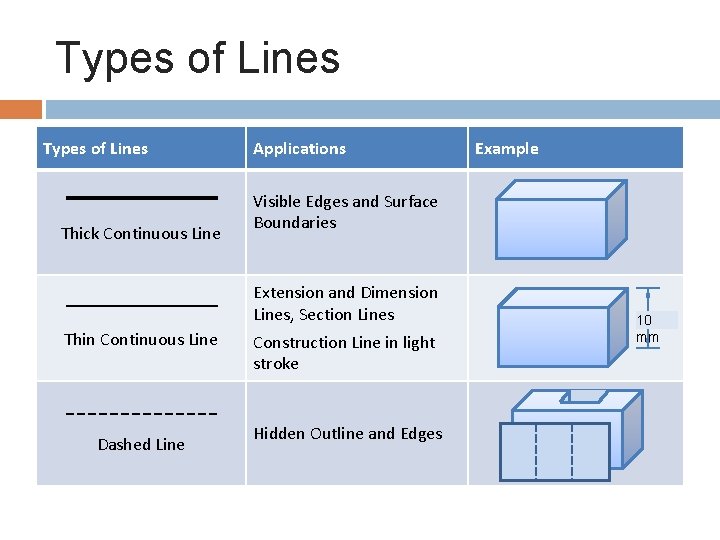
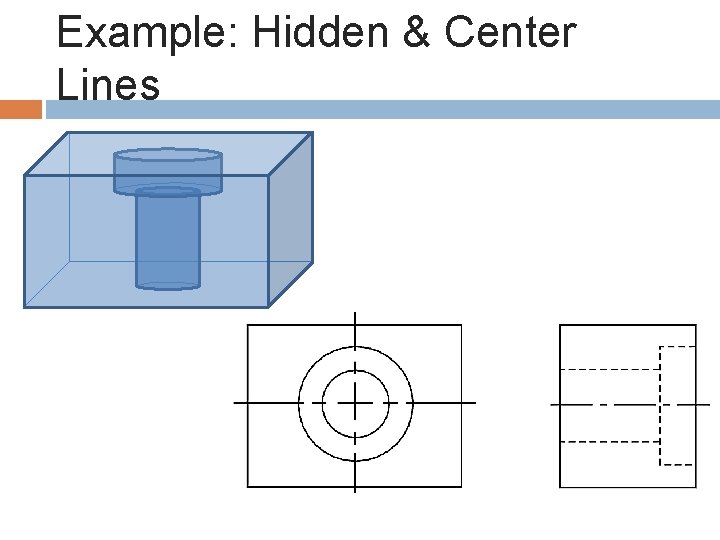
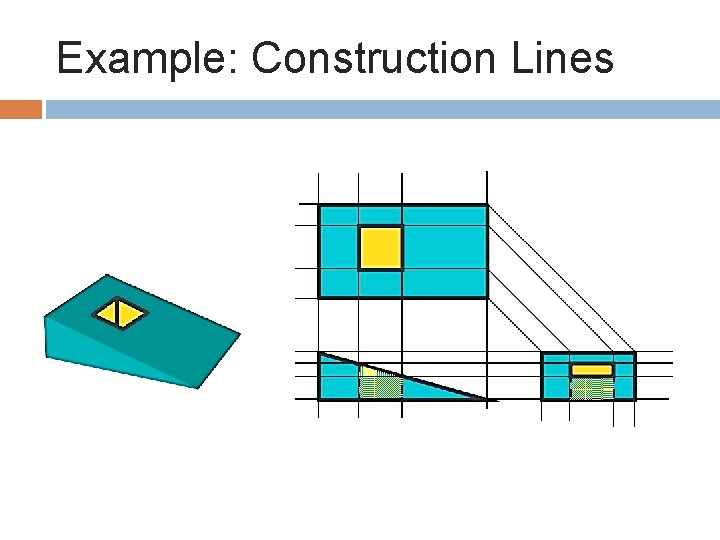
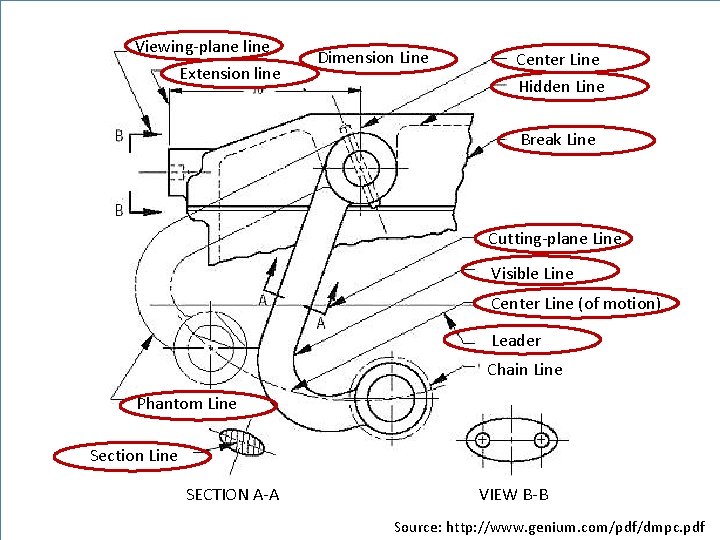
Types of Lines Thick Continuous Line Applications Visible Edges and Surface Boundaries Extension and Dimension Lines, Section Lines Thin Continuous Line Dashed Line Example Construction Line in light stroke Hidden Outline and Edges 10 mm

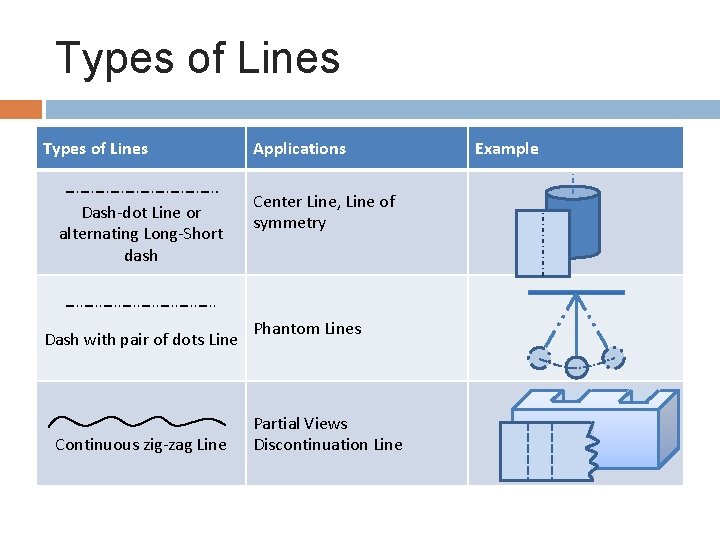
Types of Lines Dash-dot Line or alternating Long-Short dash Dash with pair of dots Line Continuous zig-zag Line Applications Center Line, Line of symmetry Phantom Lines Partial Views Discontinuation Line Example

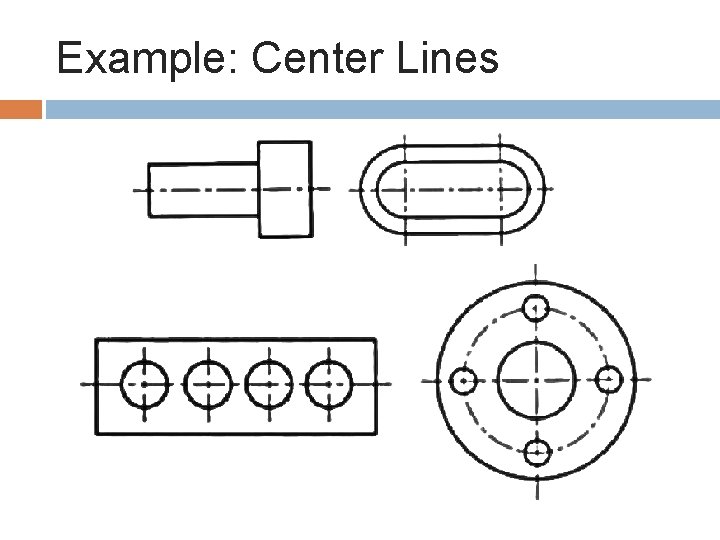
Example: Center Lines

Example: Hidden & Center Lines

Example: Construction Lines

Line 3 Dimension Example: Many Lines Viewing-plane line 1 2 Extension line 4 Center Line 5 Hidden Line 6 Break Line 7 Cutting-plane Line 8 Visible Line 9 Center Line (of motion) 10 Leader Chain Line Phantom Line 14 13 Section Line 12 SECTION A-A 11 VIEW B-B ES-101: Engineering Graphics - Amit 8 Prashant Source: http: //www. genium. com/pdf/dmpc. pdf ES 101: Lecture 2 (28 August 2014)

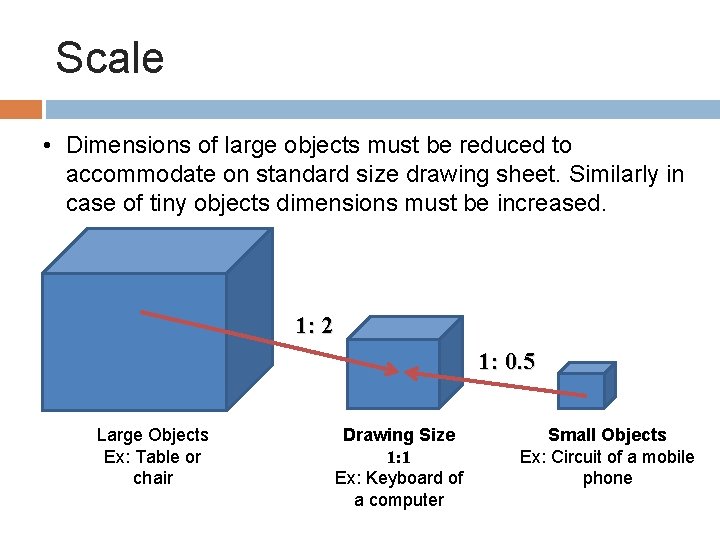
Scale • Dimensions of large objects must be reduced to accommodate on standard size drawing sheet. Similarly in case of tiny objects dimensions must be increased. 1: 2 1: 0. 5 Large Objects Ex: Table or chair Drawing Size 1: 1 Ex: Keyboard of a computer Small Objects Ex: Circuit of a mobile phone

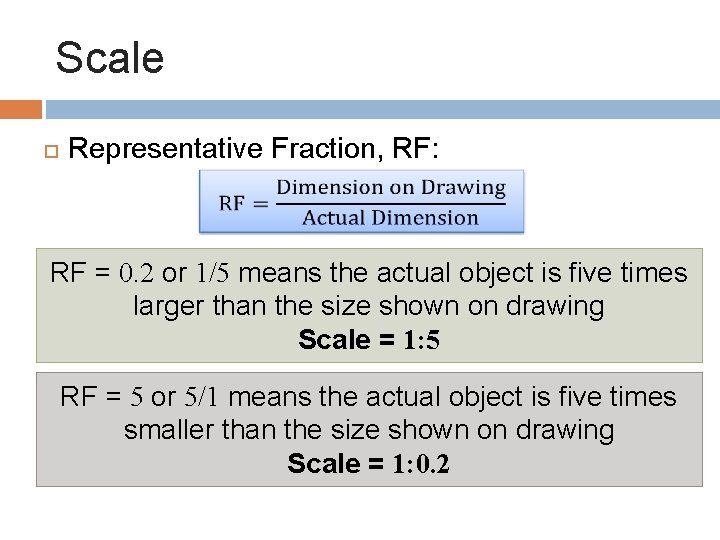
Scale Representative Fraction, RF: RF = 0. 2 or 1/5 means the actual object is five times larger than the size shown on drawing Scale = 1: 5 RF = 5 or 5/1 means the actual object is five times smaller than the size shown on drawing Scale = 1: 0. 2

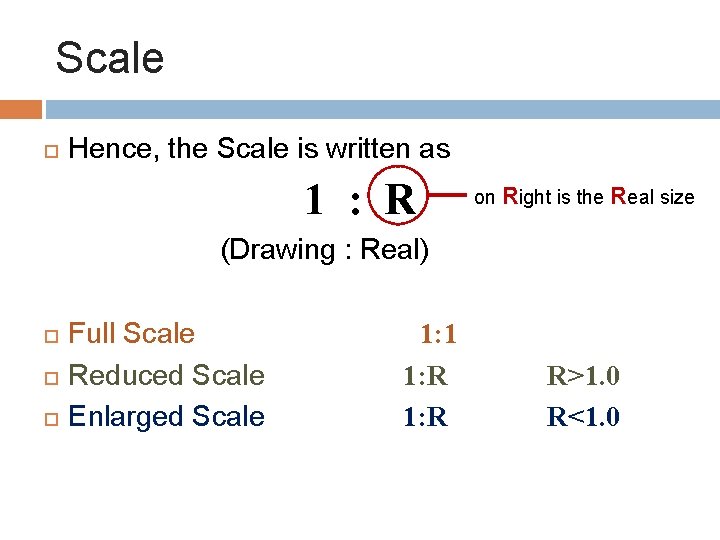
Scale Hence, the Scale is written as 1 : R (Drawing : Real) Full Scale Reduced Scale Enlarged Scale 1: 1 1: R on Right is the Real size i R>1. 0 R<1. 0

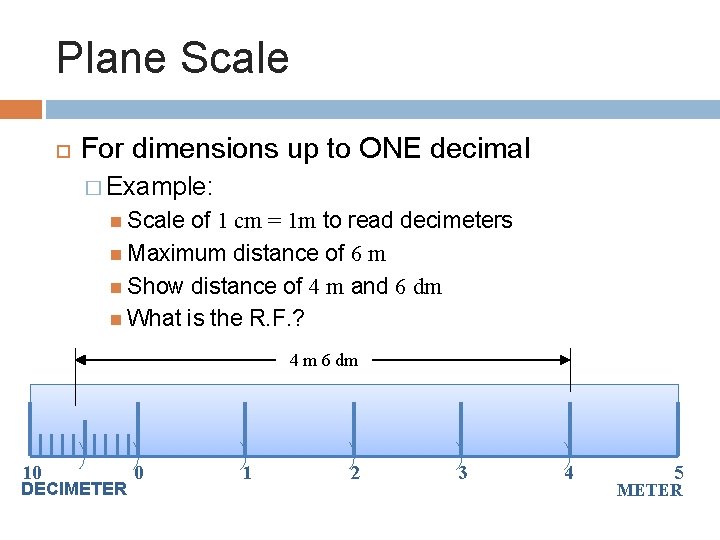
Plane Scale For dimensions up to ONE decimal � Example: Scale of 1 cm = 1 m to read decimeters Maximum distance of 6 m Show distance of 4 m and 6 dm What is the R. F. ? 4 m 6 dm 10 DECIMETER 0 1 2 3 4 5 METER

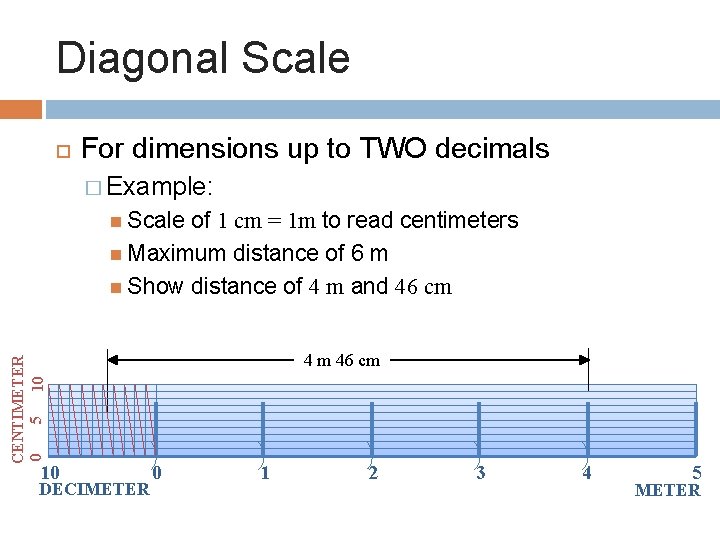
Diagonal Scale For dimensions up to TWO decimals � Example: of 1 cm = 1 m to read centimeters Maximum distance of 6 m Show distance of 4 m and 46 cm CENTIMETER 0 5 10 Scale 10 DECIMETER 4 m 46 cm 0 1 2 3 4 5 METER

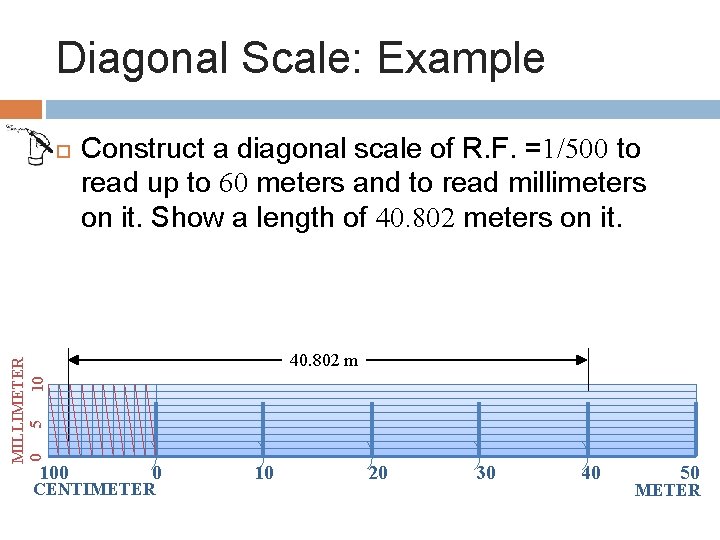
Diagonal Scale: Example MILLIMETER 0 5 10 100 Construct a diagonal scale of R. F. =1/500 to read up to 60 meters and to read millimeters on it. Show a length of 40. 802 meters on it. 40. 802 m 0 CENTIMETER 10 20 30 40 50 METER

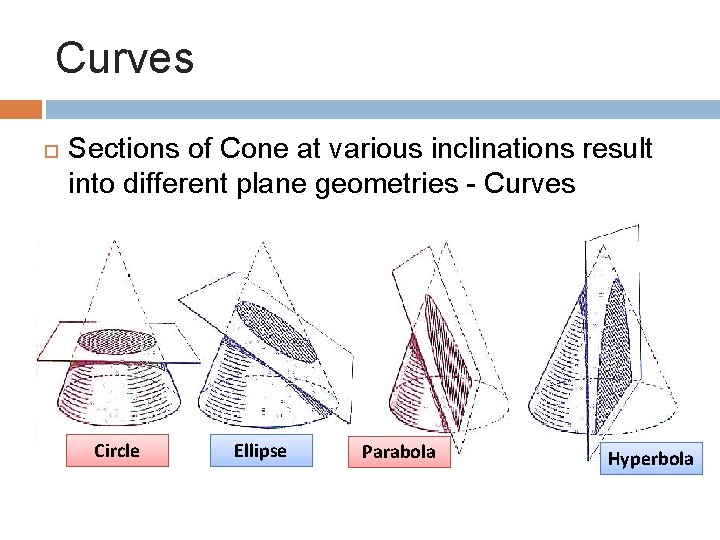
Curves Sections of Cone at various inclinations result into different plane geometries - Curves Circle Ellipse Parabola Hyperbola
![Geometric construction 3 1 lines 4 2 scales 6 1 1 ellipse 6 2 Geometric construction [3. 1] lines [4. 2] scales [6. 1. 1] ellipse [6. 2.](https://slidetodoc.com/presentation_image_h2/b94907c5c77edb03aee435f603e49598/image-16.jpg)
Geometric construction [3. 1] lines [4. 2] scales [6. 1. 1] ellipse [6. 2. 1] cycloid [6. 3] involute [6. 5. 1] Archemedian spiral [3. 3 -3. 8] dimensioning

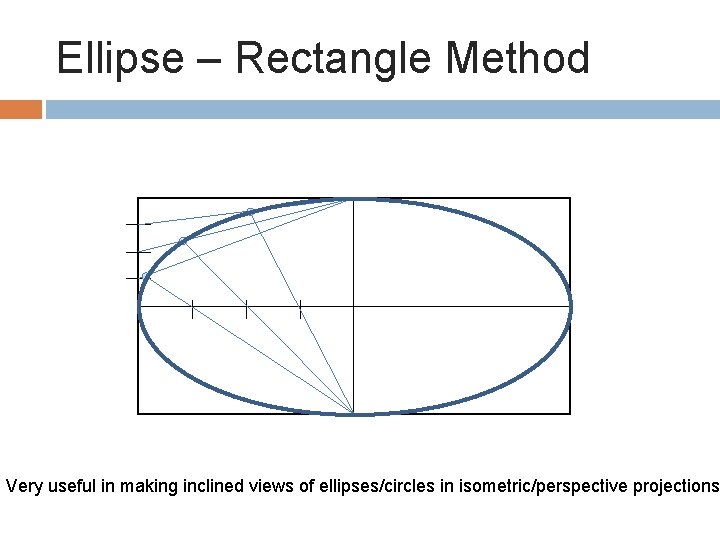
Ellipse – Rectangle Method Very useful in making inclined views of ellipses/circles in isometric/perspective projections

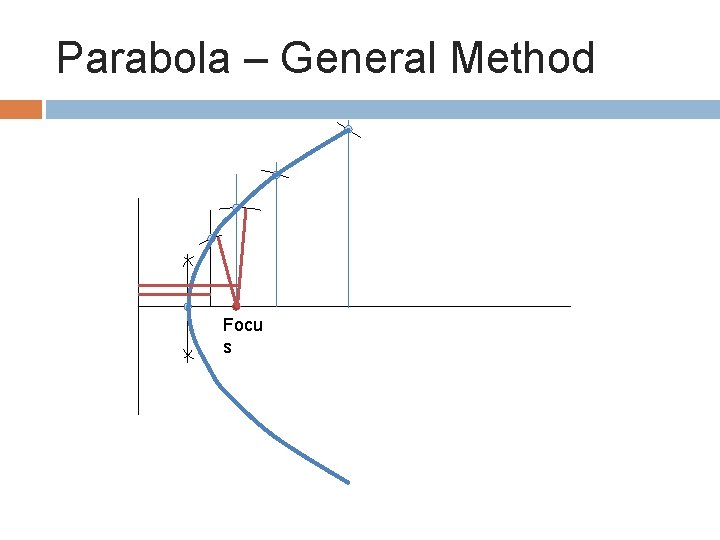
Parabola – General Method Focu s

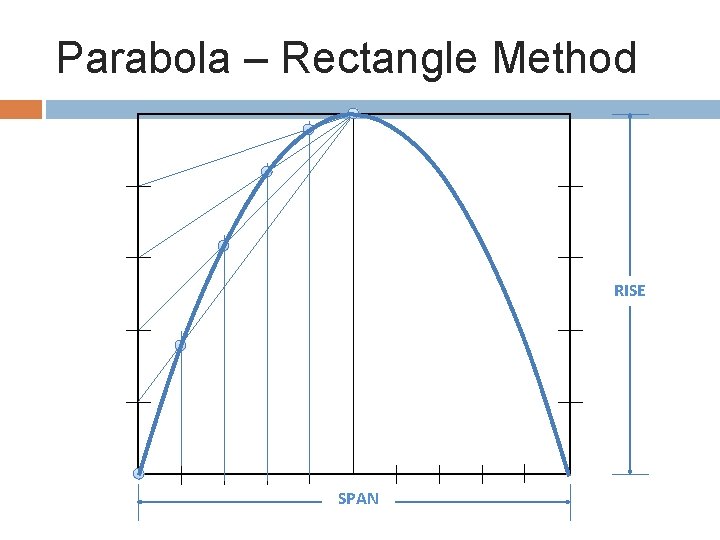
Parabola – Rectangle Method RISE SPAN

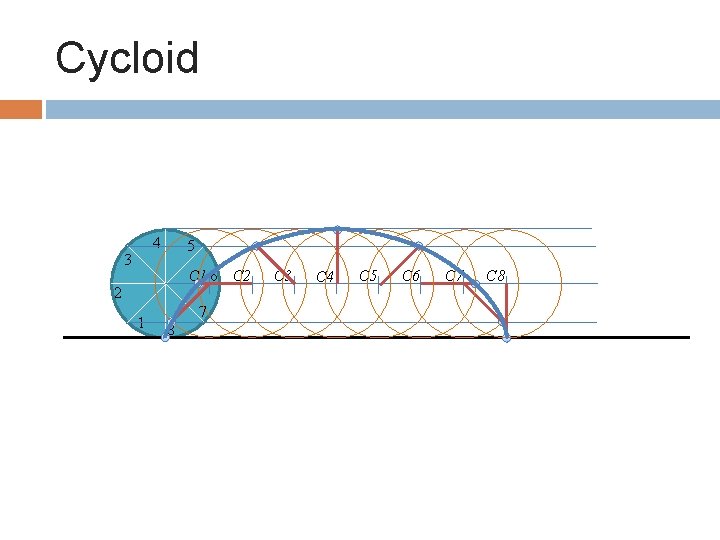
Cycloid 4 3 5 C 1 6 C 2 2 1 7 8 C 3 C 4 C 5 C 6 C 7 C 8

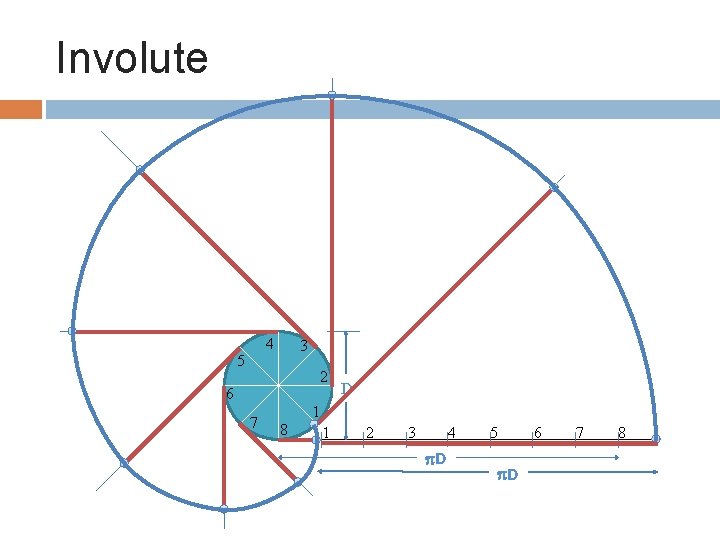
Involute 4 5 3 2 6 7 D 1 8 1 2 3 4 D 5 D 6 7 8

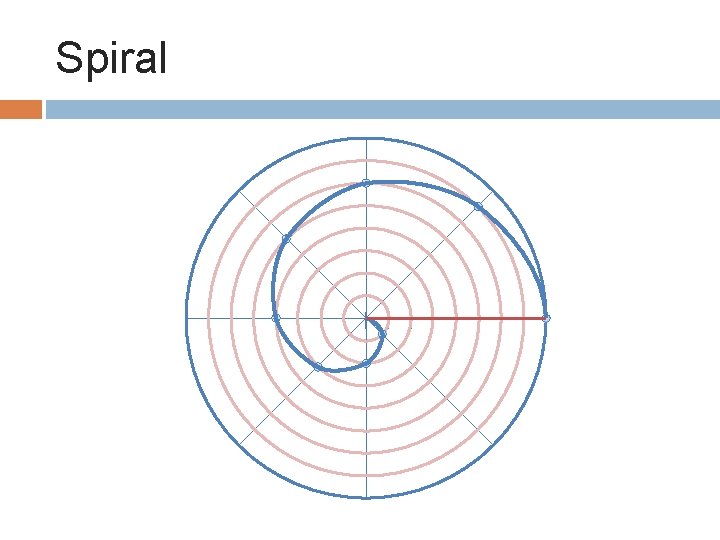
Spiral

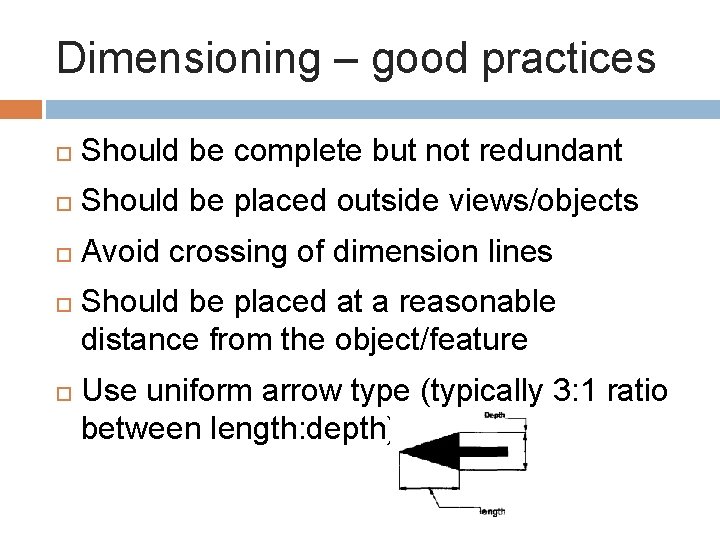
Dimensioning – good practices Should be complete but not redundant Should be placed outside views/objects Avoid crossing of dimension lines Should be placed at a reasonable distance from the object/feature Use uniform arrow type (typically 3: 1 ratio between length: depth)