Determining Conformance to Steel ProfileSurface Roughness Peak Count

![Surface Preparation “Apparatus” • Individual Blast Pot (multiple nozzles) [1] • Individual abrasive recycling/blast Surface Preparation “Apparatus” • Individual Blast Pot (multiple nozzles) [1] • Individual abrasive recycling/blast](https://slidetodoc.com/presentation_image_h/bd4d898cca13c7247e540a5bc95e3080/image-21.jpg)
- Slides: 39

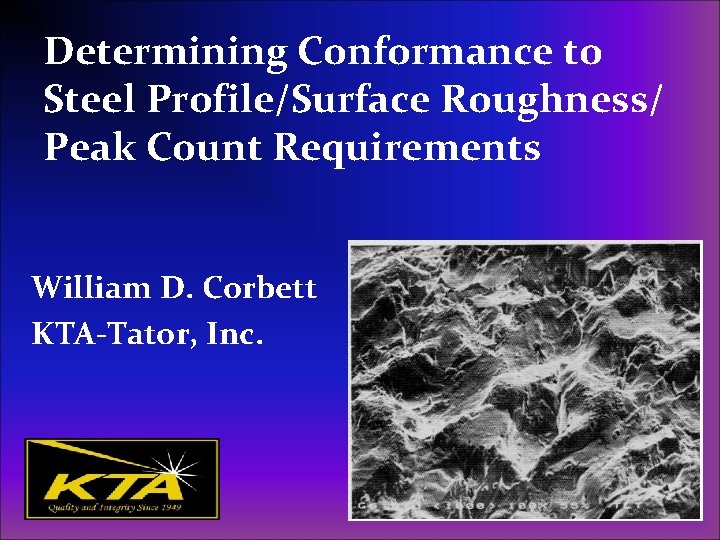
Determining Conformance to Steel Profile/Surface Roughness/ Peak Count Requirements William D. Corbett KTA-Tator, Inc.

Webinar Content • Review of industry standards • Review of instrumentation and measurement acquisition procedures • Content of Proposed SSPC Standard

Learning Objectives/Outcomes • Completion of this webinar will enable the participant to describe: Ø The industry standards for surface profile, surface roughness and peak count measurement Ø The instruments used to measure surface profile/ roughness and to quantify peak count Ø The proposed content of the SSPC standard, “Procedure for Determining Conformance to Steel Profile/Surface Roughness/Peak Count Requirements”

Industry Standards for Surface Profile, Surface Roughness and Peak Count Measurement • ASME B 46. 1, Surface Texture (Surface Roughness, Waviness and Lay) • ASTM D 4417, Standard Test Methods for Measurement of Surface Profile of Blast Cleaned Steel • ASTM D 7127, Standard Test Methods for Measurement of Surface Roughness of Abrasive Blast Cleaned Metal Surfaces Using a Portable Stylus Instrument

Industry Standards for Surface Profile, Surface Roughness and Peak Count Measurement, continued • ISO 4287, Geometrical Product Specifications (GPS) - Surface Texture: Profile Method - Terms, Definitions and Surface Texture Parameters • ISO 8503, Preparation of steel substrates before application of paints and related products - Surface roughness characteristics of blast-cleaned steel substrates Ø Part 4: Method for the calibration of ISO surface profile comparators and for the determination of surface profile - Stylus instrument procedure Ø Part 5: Replica tape method for determination of the surface profile • NACE SP 0287, Field Measurement of Surface Profile of Abrasive Blast Cleaned Steel Surfaces

Proposed SSPC Standard • Procedure for Determining Conformance to Steel Profile/Surface Roughness/Peak Count Requirements • Draft #6 b (May 21, 2012) in SSPC Standards Review Committee (SRC) • After SRC approval, SSPC Board must approve • Timeline for approval is unknown at this time

Content of Proposed SSPC Standard Ø Scope; Description; Referenced Standards; Definitions Ø Description of Instruments; Verification of Accuracy Ø Required Number & Location of Readings Ø Reporting Ø Conformance to the Specified Surface Profile Range Ø Appendix A: Calibration & Verification of Accuracy Ø Appendix B: Determining Compliance based on Process Control Procedure Ø Appendix C: Additional Considerations when Measuring Surface Profile

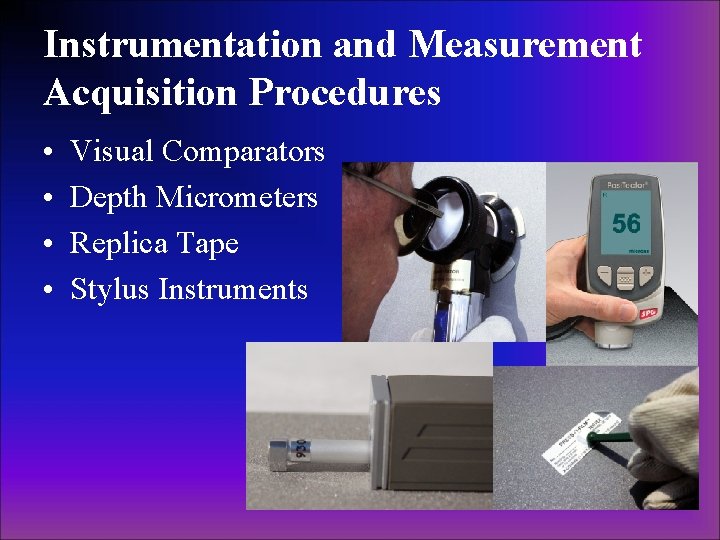
Instrumentation and Measurement Acquisition Procedures • • Visual Comparators Depth Micrometers Replica Tape Stylus Instruments

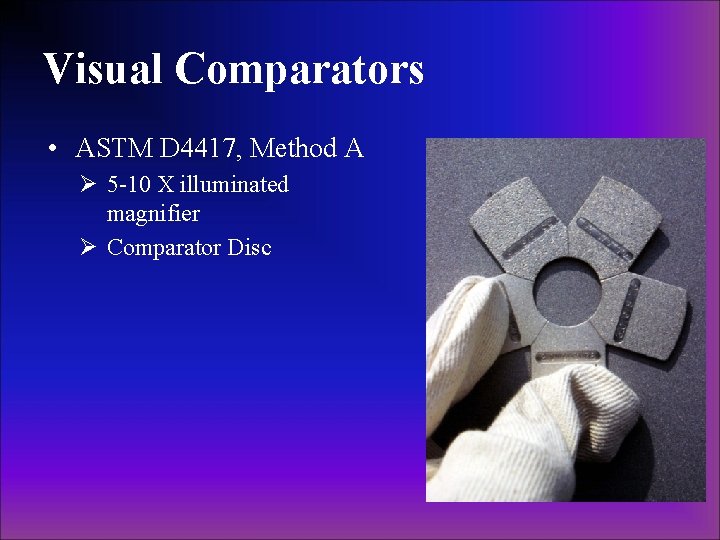
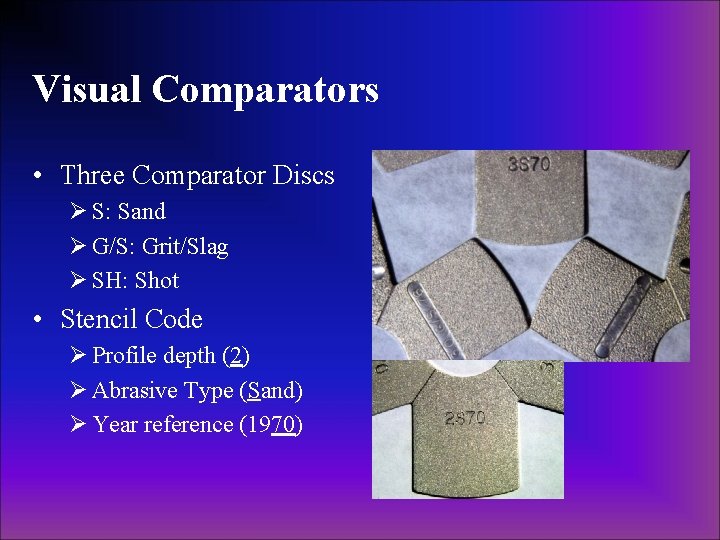
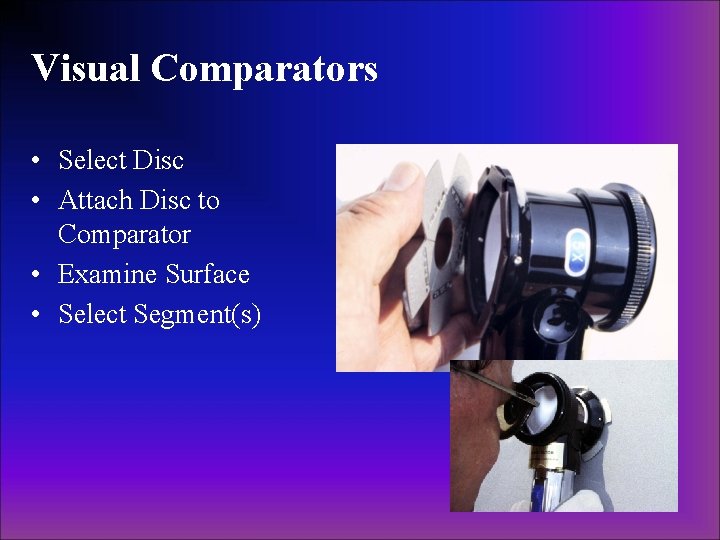
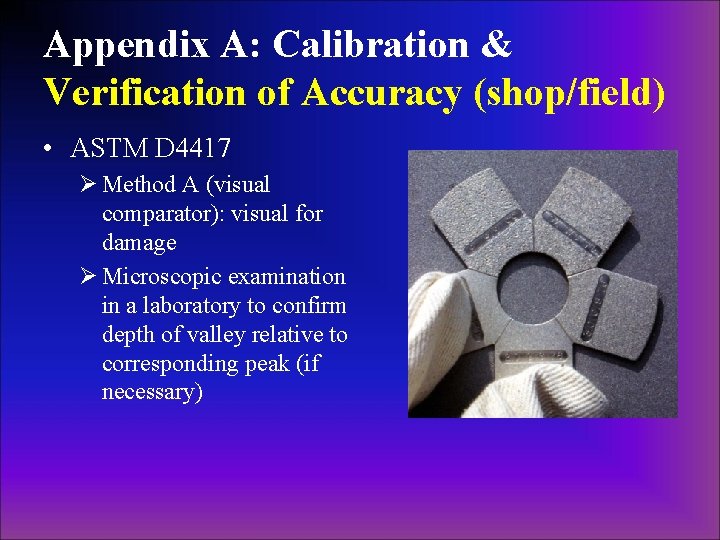
Visual Comparators • ASTM D 4417, Method A Ø 5 -10 X illuminated magnifier Ø Comparator Disc

Visual Comparators • Three Comparator Discs Ø S: Sand Ø G/S: Grit/Slag Ø SH: Shot • Stencil Code Ø Profile depth (2) Ø Abrasive Type (Sand) Ø Year reference (1970)

Visual Comparators • Select Disc • Attach Disc to Comparator • Examine Surface • Select Segment(s)

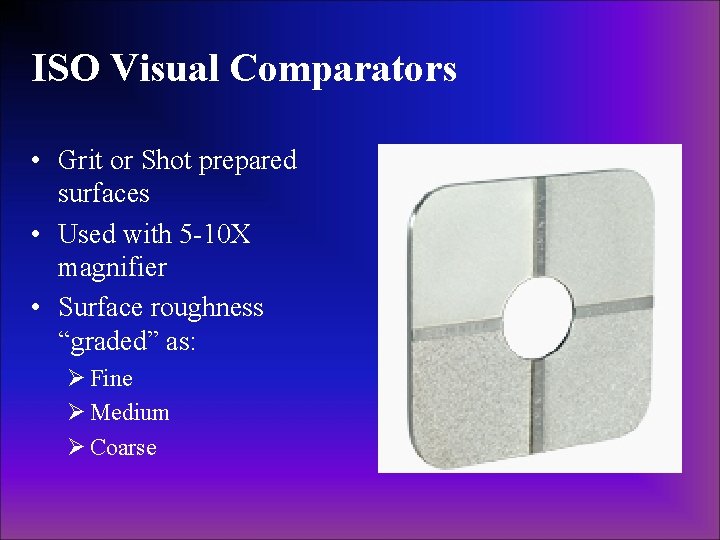
ISO Visual Comparators • Grit or Shot prepared surfaces • Used with 5 -10 X magnifier • Surface roughness “graded” as: Ø Fine Ø Medium Ø Coarse

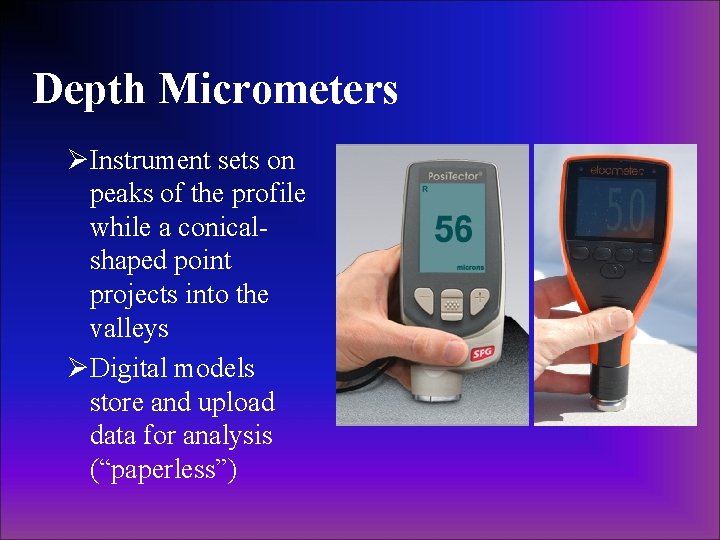
Depth Micrometers ØInstrument sets on peaks of the profile while a conicalshaped point projects into the valleys ØDigital models store and upload data for analysis (“paperless”)

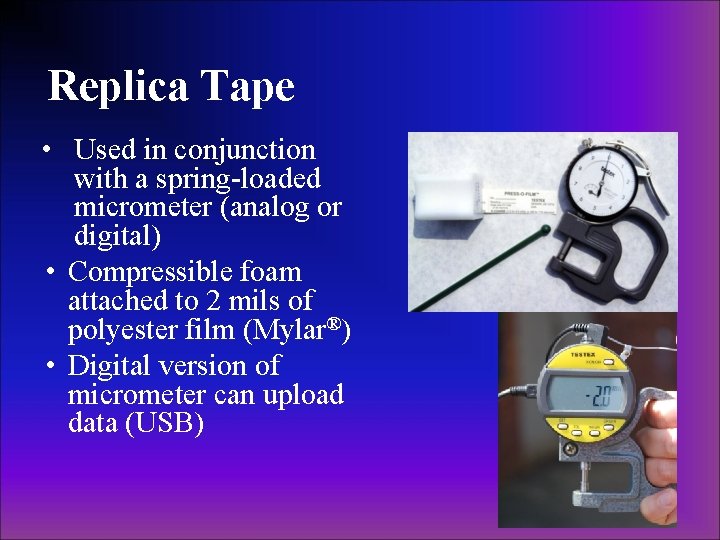
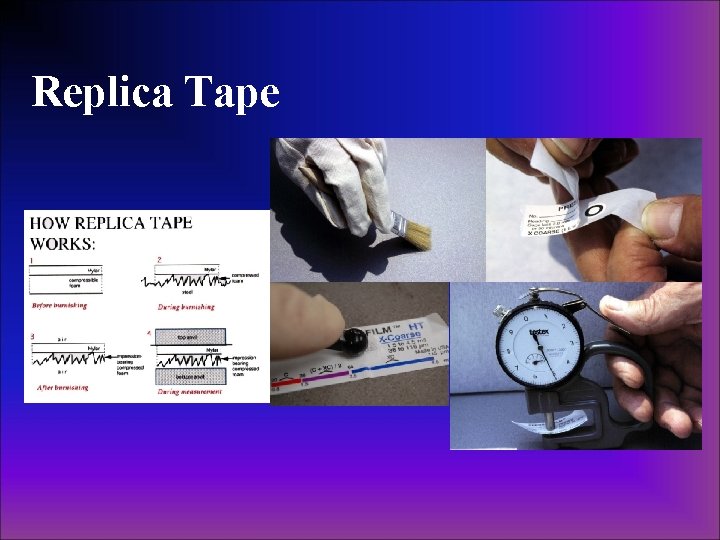
Replica Tape • Used in conjunction with a spring-loaded micrometer (analog or digital) • Compressible foam attached to 2 mils of polyester film (Mylar®) • Digital version of micrometer can upload data (USB)

Replica Tape

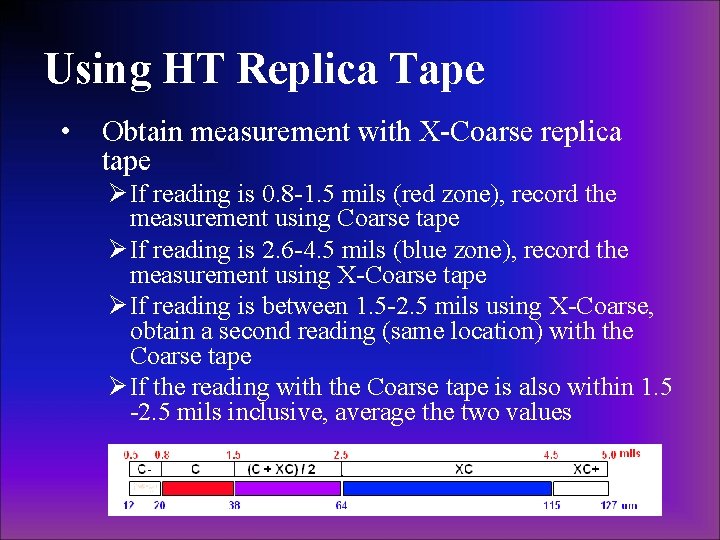
Using HT Replica Tape • Obtain measurement with X-Coarse replica tape Ø If reading is 0. 8 -1. 5 mils (red zone), record the measurement using Coarse tape Ø If reading is 2. 6 -4. 5 mils (blue zone), record the measurement using X-Coarse tape Ø If reading is between 1. 5 -2. 5 mils using X-Coarse, obtain a second reading (same location) with the Coarse tape Ø If the reading with the Coarse tape is also within 1. 5 -2. 5 mils inclusive, average the two values

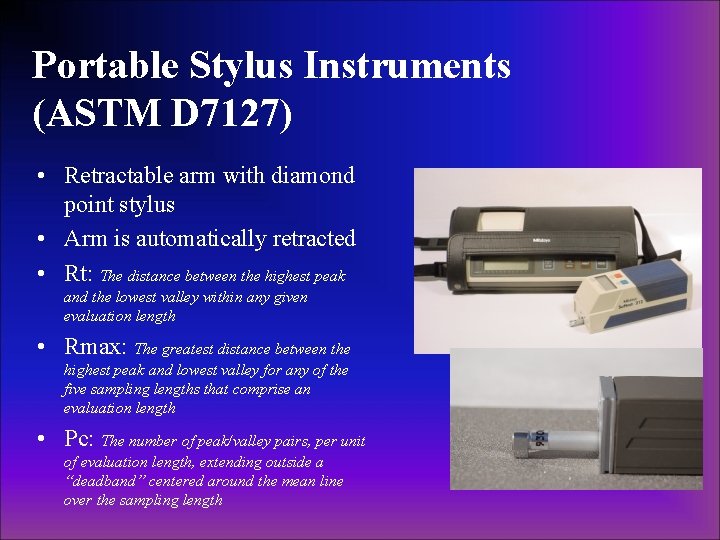
Portable Stylus Instruments (ASTM D 7127) • Retractable arm with diamond point stylus • Arm is automatically retracted • Rt: The distance between the highest peak and the lowest valley within any given evaluation length • Rmax: The greatest distance between the highest peak and lowest valley for any of the five sampling lengths that comprise an evaluation length • Pc: The number of peak/valley pairs, per unit of evaluation length, extending outside a “deadband” centered around the mean line over the sampling length

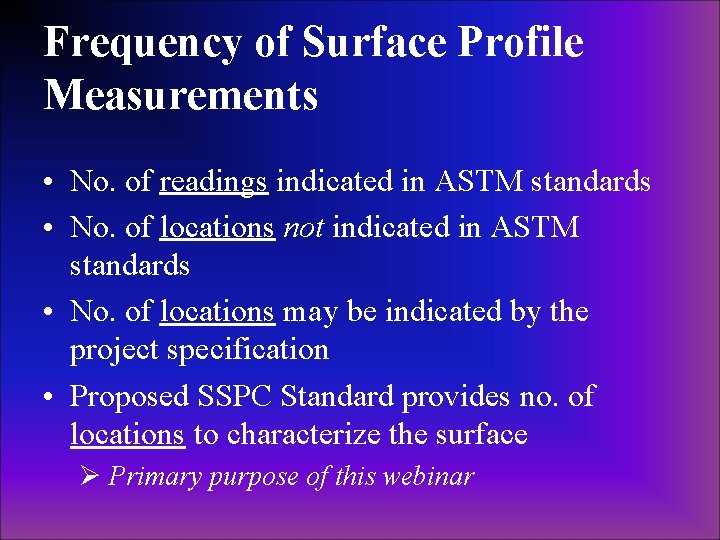
Frequency of Surface Profile Measurements • No. of readings indicated in ASTM standards • No. of locations not indicated in ASTM standards • No. of locations may be indicated by the project specification • Proposed SSPC Standard provides no. of locations to characterize the surface Ø Primary purpose of this webinar

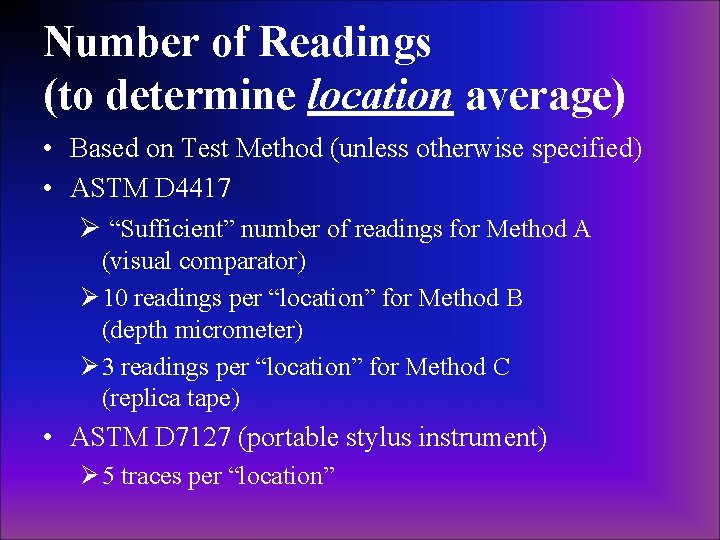
Number of Readings (to determine location average) • Based on Test Method (unless otherwise specified) • ASTM D 4417 Ø “Sufficient” number of readings for Method A (visual comparator) Ø 10 readings per “location” for Method B (depth micrometer) Ø 3 readings per “location” for Method C (replica tape) • ASTM D 7127 (portable stylus instrument) Ø 5 traces per “location”

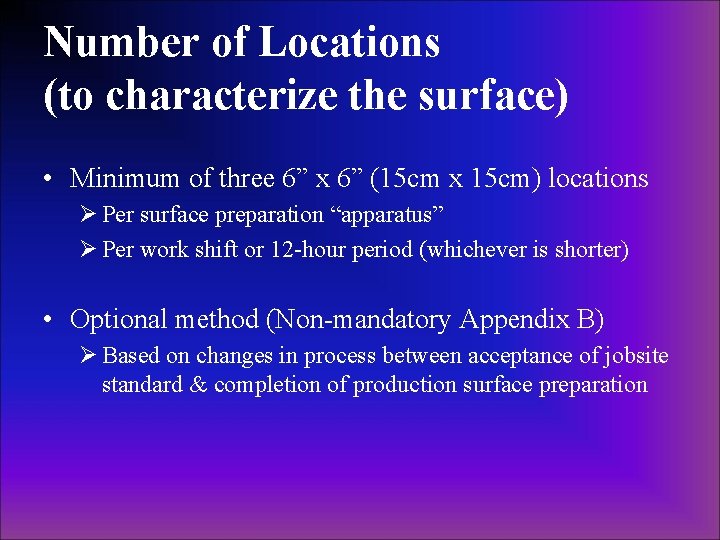
Number of Locations (to characterize the surface) • Minimum of three 6” x 6” (15 cm x 15 cm) locations Ø Per surface preparation “apparatus” Ø Per work shift or 12 -hour period (whichever is shorter) • Optional method (Non-mandatory Appendix B) Ø Based on changes in process between acceptance of jobsite standard & completion of production surface preparation
![Surface Preparation Apparatus Individual Blast Pot multiple nozzles 1 Individual abrasive recyclingblast Surface Preparation “Apparatus” • Individual Blast Pot (multiple nozzles) [1] • Individual abrasive recycling/blast](https://slidetodoc.com/presentation_image_h/bd4d898cca13c7247e540a5bc95e3080/image-21.jpg)
Surface Preparation “Apparatus” • Individual Blast Pot (multiple nozzles) [1] • Individual abrasive recycling/blast cleaning units (multiple pots) [2] • Individual centrifugal units (stationary or mobile) [3] • Individual power tool [4] 1 2 3 4

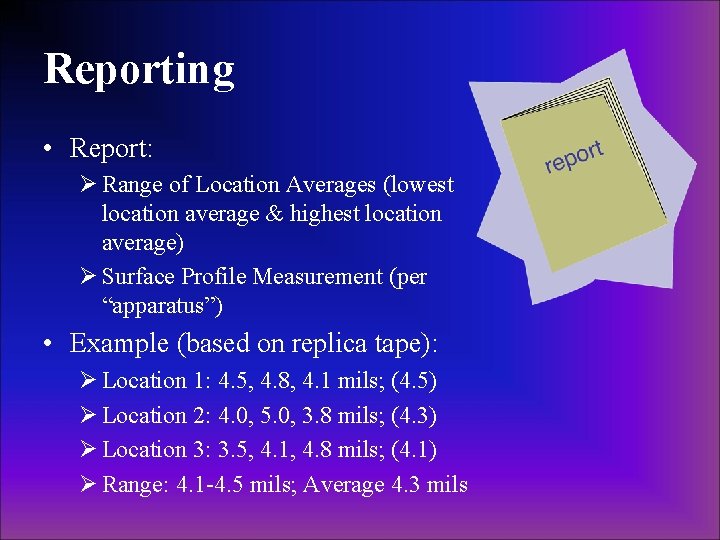
Reporting • Report: Ø Range of Location Averages (lowest location average & highest location average) Ø Surface Profile Measurement (per “apparatus”) • Example (based on replica tape): Ø Location 1: 4. 5, 4. 8, 4. 1 mils; (4. 5) Ø Location 2: 4. 0, 5. 0, 3. 8 mils; (4. 3) Ø Location 3: 3. 5, 4. 1, 4. 8 mils; (4. 1) Ø Range: 4. 1 -4. 5 mils; Average 4. 3 mils

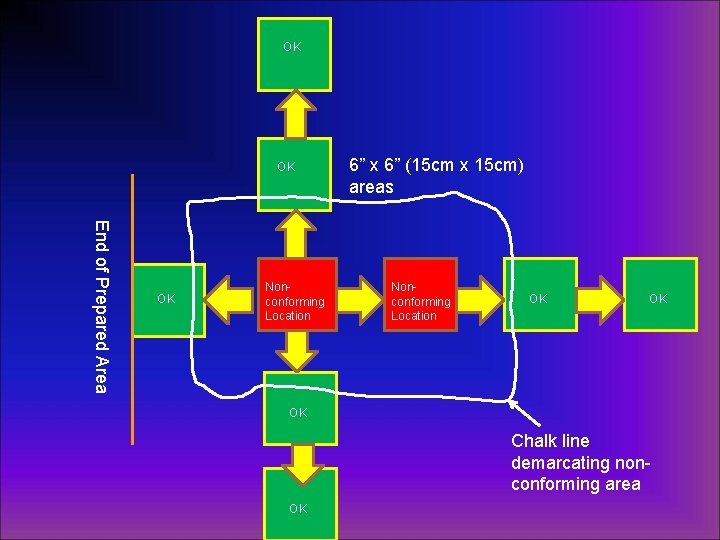
Conformance to the Specified Surface Profile Range • The average of the “location averages” must fall within the specified surface profile range • Location averages and average surface profile measurements outside of the specified range are not acceptable • The magnitude of the non-conforming surface profile measurement areas must be determined, marked and recorded

OK OK End of Prepared Area OK Nonconforming Location 6” x 6” (15 cm x 15 cm) areas Nonconforming Location OK OK OK Chalk line demarcating nonconforming area OK

Appendix A: Calibration & Verification of Accuracy (shop/field) • Calibration of instruments (applies to ASTM D 4417 methods B&C; ASTM D 7127) • Calibration by manufacturer or approved laboratory only • Recalibration per manufacturer’s recommended interval (typically annual) • Obtain a dated Certificate of Traceability

Appendix A: Calibration & Verification of Accuracy (shop/field) • ASTM D 4417 Ø Method A (visual comparator): visual for damage Ø Microscopic examination in a laboratory to confirm depth of valley relative to corresponding peak (if necessary)

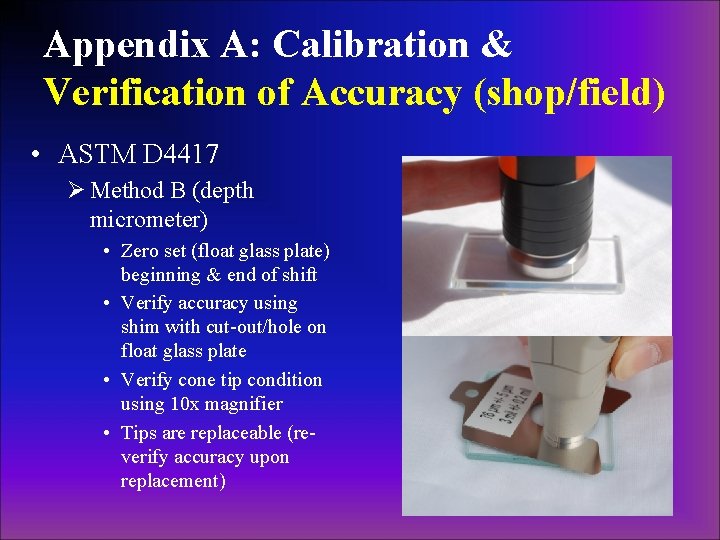
Appendix A: Calibration & Verification of Accuracy (shop/field) • ASTM D 4417 Ø Method B (depth micrometer) • Zero set (float glass plate) beginning & end of shift • Verify accuracy using shim with cut-out/hole on float glass plate • Verify cone tip condition using 10 x magnifier • Tips are replaceable (reverify accuracy upon replacement)

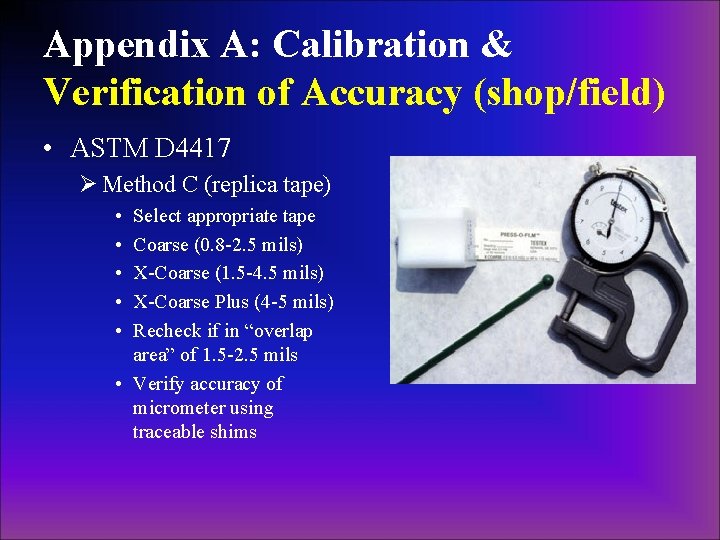
Appendix A: Calibration & Verification of Accuracy (shop/field) • ASTM D 4417 Ø Method C (replica tape) • • • Select appropriate tape Coarse (0. 8 -2. 5 mils) X-Coarse (1. 5 -4. 5 mils) X-Coarse Plus (4 -5 mils) Recheck if in “overlap area” of 1. 5 -2. 5 mils • Verify accuracy of micrometer using traceable shims

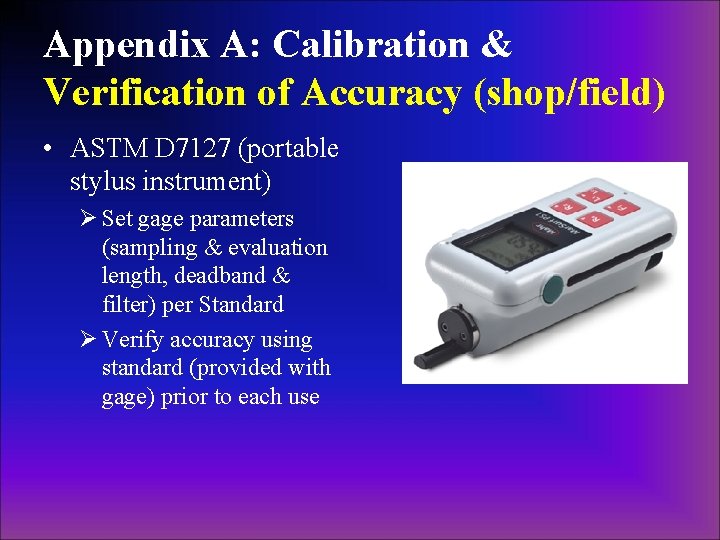
Appendix A: Calibration & Verification of Accuracy (shop/field) • ASTM D 7127 (portable stylus instrument) Ø Set gage parameters (sampling & evaluation length, deadband & filter) per Standard Ø Verify accuracy using standard (provided with gage) prior to each use

Appendix B: Determining Compliance Based on Process Control Procedure • Based on establishing a process control prior to production blast or power tool cleaning • Within 15 minutes after start of surface preparation, prepare sample area (min 2’ x 2’) • Measure surface profile. If surface profile conforms, document process control items

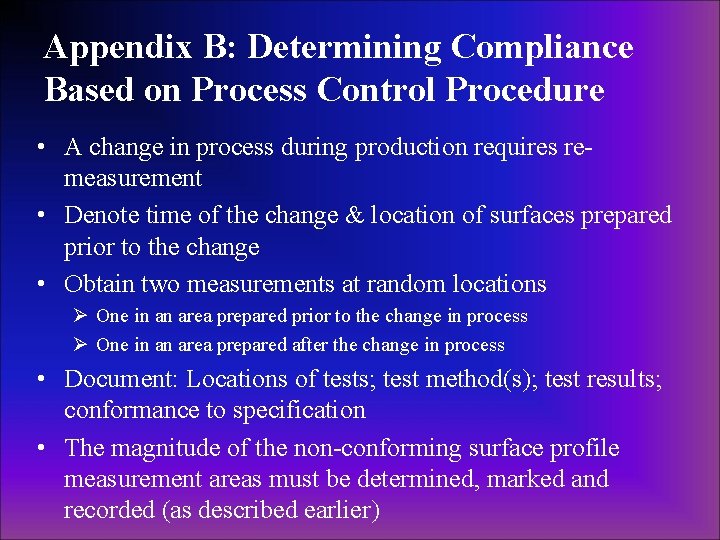
Appendix B: Determining Compliance Based on Process Control Procedure • A change in process during production requires remeasurement • Denote time of the change & location of surfaces prepared prior to the change • Obtain two measurements at random locations Ø One in an area prepared prior to the change in process Ø One in an area prepared after the change in process • Document: Locations of tests; test method(s); test results; conformance to specification • The magnitude of the non-conforming surface profile measurement areas must be determined, marked and recorded (as described earlier)

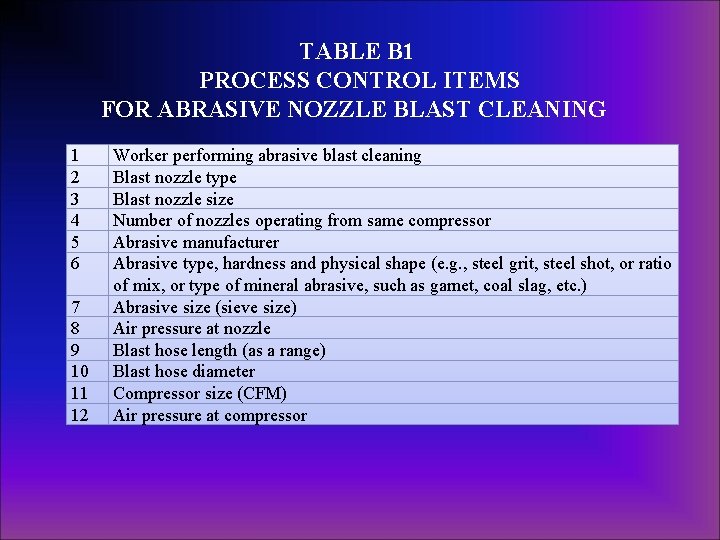
TABLE B 1 PROCESS CONTROL ITEMS FOR ABRASIVE NOZZLE BLAST CLEANING 1 2 3 4 5 6 7 8 9 10 11 12 Worker performing abrasive blast cleaning Blast nozzle type Blast nozzle size Number of nozzles operating from same compressor Abrasive manufacturer Abrasive type, hardness and physical shape (e. g. , steel grit, steel shot, or ratio of mix, or type of mineral abrasive, such as garnet, coal slag, etc. ) Abrasive size (sieve size) Air pressure at nozzle Blast hose length (as a range) Blast hose diameter Compressor size (CFM) Air pressure at compressor

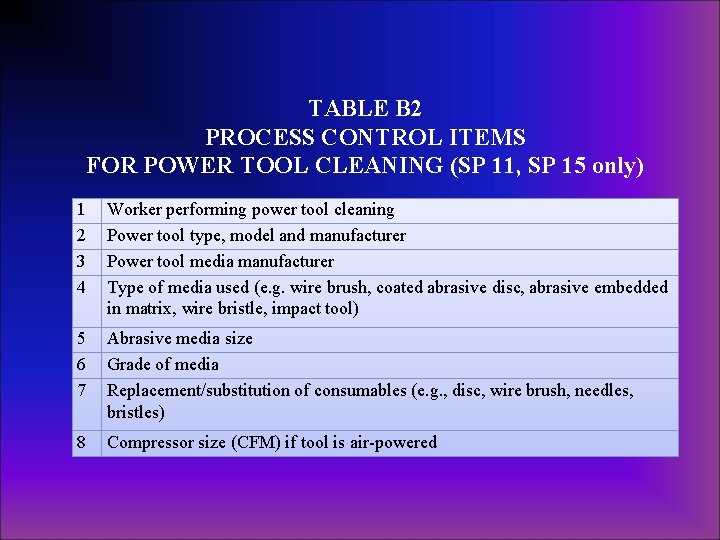
TABLE B 2 PROCESS CONTROL ITEMS FOR POWER TOOL CLEANING (SP 11, SP 15 only) 1 2 3 4 Worker performing power tool cleaning Power tool type, model and manufacturer Power tool media manufacturer Type of media used (e. g. wire brush, coated abrasive disc, abrasive embedded in matrix, wire bristle, impact tool) 5 6 7 Abrasive media size Grade of media Replacement/substitution of consumables (e. g. , disc, wire brush, needles, bristles) 8 Compressor size (CFM) if tool is air-powered

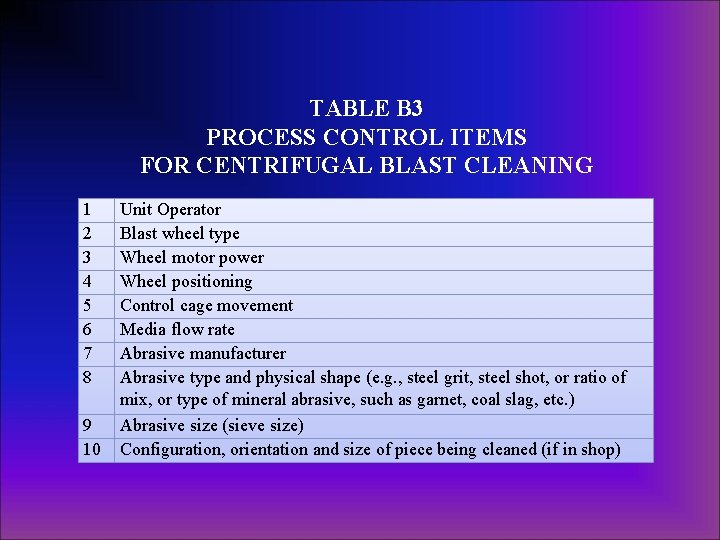
TABLE B 3 PROCESS CONTROL ITEMS FOR CENTRIFUGAL BLAST CLEANING 1 2 3 4 5 6 7 8 9 10 Unit Operator Blast wheel type Wheel motor power Wheel positioning Control cage movement Media flow rate Abrasive manufacturer Abrasive type and physical shape (e. g. , steel grit, steel shot, or ratio of mix, or type of mineral abrasive, such as garnet, coal slag, etc. ) Abrasive size (sieve size) Configuration, orientation and size of piece being cleaned (if in shop)

Appendix C: Additional Considerations • Measuring surfaces prepared in the shop using centrifugal blast cleaning units ØPotential for variability due to wheel alignment and configuration of item • Measuring surfaces prepared using portable centrifugal blast cleaning units ØPotential for variability due to uneven distribution of blast media

Appendix C: Additional Considerations • Measuring surface profile exposed by waterjetting units ØProfile may vary considerably. Additional measurement locations may be required • Measuring surfaces prepared using power tools (SSPC-SP 11; SP 15) ØConsider productive life of cleaning media; Additional measurement locations may be required ØUse ASTM D 4417, Method B only

Appendix C: Precautions • Determining surface profile on flame cut edges ØRemoval of carburization (hardening) may be required prior to blast cleaning • Effect of existing surface profile on newly generated surface profile – Existing profile beneath coating may exceed specified profile for maintenance painting. Prepare test area prior to production work • Pitted steel: Measure in non-pitted areas

Summary • During this webinar, we have described : Ø The industry standards for surface profile, surface roughness and peak count measurement Ø The instruments used to measure surface profile/ roughness and to quantify peak count Ø The proposed content of the SSPC standard, “Procedure for Determining Conformance to Steel Profile/Surface Roughness/Peak Count Requirements”

Determining Conformance to Steel Profile/Surface Roughness/ Peak Count Requirements THE END William D. Corbett KTA-Tator, Inc.