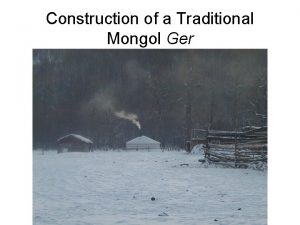
Construction of a Traditional Mongol Ger The ger


- Slides: 21

Construction of a Traditional Mongol Ger

The ger is perfectly adapted to the Mongol nomad lifestyle. • • • The ger has been in use for centuries with little change in basic design. It is covered by two layers of felt in the winter, one in the summer. This keeps it very warm in the winter and cool in the summer. A metal stove in the middle allows for heating and cooking. The door always faces south, toward the course of the sun. A group of four or five experienced men can have it assembled in less than two hours, and broken down and loaded in well under that time. A typical ger is about 15 feet across and can be purchased for well under $1, 000 USD.

Step 1. Finding a spot The ger must be built on a flat place, usually in an open space in the summer and to the south of a forest or a mountain in the winter.

Step 2. Laying the floor Most gers are built directly on the ground with a bare earth floor in the summer and cardboard, canvas and rugs in the winter. Some have wooden floors.

Step 3. Raising the wall The wall is a collapsible structure that packs and travels easily, but is strong, resistant and easy to repair.

Step 4. Assemble the Center Support The tōōn, the round wheel at the center of the roof, is tied to two poles that hold up the roof.

Step 5. Attach the door The door ties to the walls at the front of the ger. Tradition dictates that one never steps on the threshold of the door on entering.

Step 6. Starting the roof The tōōn is positioned and the radial poles are attached to the roof.

Step 6. Positioning the radials in the tōōn… The radial poles slip into holes around the circumference of the tōōn…

Step 6. …and the walls …and are tied to the top of the wall. The tension between the two holds it together.

Step 7. The frame is finished The frame is amazingly sturdy, holding up to rain, wind and even people crawling along on top.

Step 8. Reinforce the walls with strapping. Strapping is tied tightly around the walls and to the door frame to help it stay rigid.

Step 9. The cloth inner liner is placed. The inner cloth liner makes the inside of the ger look nice and keeps out dust and lint from the felt.

Step 10. Felt is draped over the frame. The felt keeps the ger cool in the summer and warm in the winter. It is made from natural sheep’s wool.

Step 11. Canvas covers the felt. Canvas helps make the ger a little more water proof and protects the wool felt.

Step 12. Plastic sheeting for summer rains. The plastic sheeting keeps the ger dry during summer rains, but is not used in the winter time. Winter snow and the need for the ger to breath make is unnecessary.

Step 13. Outer cover and outer strapping. The outer cover is of a thick white cotton muslin. The ger is tied around with two or three straps to keep it rigid. It may be tied on the sides by stakes or heavy weights.

Good morning!

The vent pipe of the stove comes out through one of the front sections of the tōōn. The front half of the tōōn is usually left open during the day to let smoke, steam and heat out. A square of canvas called the öröx is tied sides and back and can be pulled forward to cover the tōōn at night.

This photo was taken from the front door of the ger. You can see the stove in front of the two supporting poles. The beds lie around the edge of the ger, as well as chests and trunks for blankets and clothes. Drying meat is hung across the ger. Cooking pots are just to the side of the stove, and a table and stools are behind the stove.

Every family ger is laid out according to a traditional patter. Variations such as how many bed or the placement of cabinets may vary, but the essentials are most always the same.
 Tōōn
Tōōn Traditional drawer construction
 Mongols and vikings
 Mongol redő
 The mongol empire as a eurasian network
 Szupernő szindróma
 Mongol írás
 Mongol hierarchy
 What did the mongols do for the silk road
 The mongol empire spans eurasia answer key
 Mongol empire memes
 The difference between empire and kingdom
 What was the impact of russia’s “mongol years”?
 How did kublai khan organize mongol rule in china
 Mongol redő
 How did kublai khan organize mongol rule in china
 The mongol empire spans eurasia worksheet answer key
 What was the impact of russia’s “mongol years”?
 Mongol hierarchy
 Empire mongol apogée
 Nomadic peoples who herded domesticated animals
 Quá trình desamine hóa có thể tạo ra


