1 Allegro Free Viewer 15 0 Installation Download


- Slides: 25

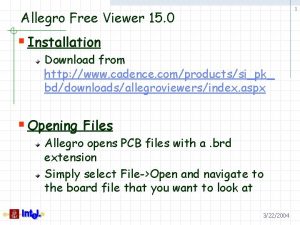
1 Allegro Free Viewer 15. 0 § Installation Download from http: //www. cadence. com/products/si_pk_ bd/downloads/allegroviewers/index. aspx § Opening Files Allegro opens PCB files with a. brd extension Simply select File->Open and navigate to the board file that you want to look at 3/22/2004

2 Allegro Free Viewer 15. 0 § Setting up the view Always best to start with a clean slate This example sets up the board for viewing from the top side Typically, start by zooming to fit the board to the window Also probably want to turn off the grid dots if they are on 3/22/2004

3 Allegro Free Viewer 15. 0 § Click zoom-fit or hit F 9 to see the whole board Click on grid toggle, or hit Shift-F 9 to toggle grid off 3/22/2004

4 Allegro Free Viewer 15. 0 § Setting up the view Next, we need to clear the screen of the last-saved view settings Select Display->Color/Visibility Set Global Visibility to “All Invisible” and hit apply 3/22/2004

5 Allegro Free Viewer 15. 0 § Select Display->Color Visibility and set to “All Invisible” 3/22/2004

6 Allegro Free Viewer 15. 0 § Setting up the view Select Group = Geometry and scroll down to check boxes next to “Outline” under Board Geometry “Silkscreen_Top” under Package Geometry “Assembly_Top” under Package Geometry Then select “Apply” 3/22/2004

7 Allegro Free Viewer 15. 0 § Turn on the listed Geometry layers 3/22/2004

Allegro Free Viewer 15. 0 8 § Setting up the view Select Group = Stack-Up and scroll down to check boxes next to “Top” under Pin “Top” under Via “Top” under Etch Then select “Apply” 3/22/2004

9 Allegro Free Viewer 15. 0 § Turn on the listed Stack-Up layers 3/22/2004

Allegro Free Viewer 15. 0 10 § Layers Allegro board files consist of many “layers” There are, for example, “etch” layers which are the actual copper connections There also soldermask and silkscreen layers which correspond to the green outer coating and white labeling respectively And, there are other information-only layers that show dimensions, part outlines, etc. You will typically be focusing on the etch layers 3/22/2004

Allegro Free Viewer 15. 0 11 § Layers There is a quicker way to set visibility for etch layers On the right hand side of the window there is a tab for “Visibility” You can use this to turn on and off signal and plane layers and the vias and device pads for those layers 3/22/2004

Allegro Free Viewer 15. 0 12 § Finding Nets You will normally want to look at a signal or set of signals, referred to in Allegro as “nets” To find a net, you can highlight it There are two ways to highlight Show Element (Temporary) Hilight (Must Dehilight to turn off) 3/22/2004

Allegro Free Viewer 15. 0 13 § Finding Nets After selecting either “Show Element” or “Hilight”, select the Find tab on the right Under “Find By Name” type in the name of the net and hit enter. You may use * as a wildcard if you are uncertain of the full net name or if you want to highlight a group of nets 3/22/2004

Allegro Free Viewer 15. 0 14 § Finding Nets Show Element will bring up an information window, zoom to the net, and highlight it 3/22/2004

Allegro Free Viewer 15. 0 15 § Finding Nets Highlight will simply zoom to the net, and highlight it You must use “De-highlight” to turn off the net highlighting 3/22/2004

Allegro Free Viewer 15. 0 16 § Finding a group of nets As mentioned, you can find multiple nets at once using a * as a wild -card For example, most clock signals include “CLK” as part of the net name. To find all clocks that have “CLK” in the net name, you can type in “*clk*” in the find filter This will highlight all such nets 3/22/2004

Allegro Free Viewer 15. 0 17 § Hilight Color You can change either the Temporary (Show Element) or Permanent (Highlight) colors Again select “Display-> Color/Visibility” then change Group to “Display” Click on the color you want from the palette and select the colored box next to the appropriate highlight type 3/22/2004

Allegro Free Viewer 15. 0 18 § Finding and following long nets Long nets that span a large section of the board will be hard to see when Allegro zooms to fit the net After highlighting one of these nets, you will need to zoom in manually Look in the lower right corner and you will see a miniature display of the board outline along with the highlighted net. Click and drag a box around the net in this window to zoom in on it Then click on “Zoom Points” to allow you to draw a box around the highlighted item in the main window and zoom in further 3/22/2004

Allegro Free Viewer 15. 0 19 3/22/2004

Allegro Free Viewer 15. 0 20 § Finding and following long nets After you have zoomed in on the net you will want to turn on all signal etch layers and shadow mode to make the net stand out First, go back to the Visibility tab on the right and check the box under “Etch” and next to “Conductors” Next, select “Display->Color/Visibility”, then the “Display” Group and turn Shadow mode “On”, check the box to “Dim active layer” and hit “Apply” 3/22/2004

Allegro Free Viewer 15. 0 21 3/22/2004

Allegro Free Viewer 15. 0 22 § Finding and following long nets To follow the net, or to pan in general, press and hold the middle mouse button and drag your cursor in the main viewing window In this way you can follow the net where ever it goes 3/22/2004

Allegro Free Viewer 15. 0 23 § Finding etch length If you need to know the length of a net or a part of a net, you can get that information from the window that appears when you use “Show Element” If you use Show Element for a net, the window will list the entire net length 3/22/2004

Allegro Free Viewer 15. 0 24 § Finding etch length If you want to find the length of a section of the net, you can get either Cline or Cline Segment lengths. A Cline is any part of a net that routes on a single layer until it runs into a pin, via, or other feature. A Cline segment is any part of a net that routes on a single layer until it runs into a bend, pin, via or other feature. Basically, any single straight segment. This time, select Show Element, but instead, check the box for Cline Segment and the click on the segment you want to measure. 3/22/2004

Allegro Free Viewer 15. 0 25 3/22/2004
 Allegro viewer
 Startteam viewer.com
 Swiss pdb viewer download
 Genivi dlt
 Integrative genomics viewer tutorial
 Jrpdf
Jrpdf Zkbio time
 Free ppt viewer
 Allegro.plfa
 Melodyka allegro
 Dynamics musical elements
 Largo lento
 Allegro con brio meaning
 O signor come vorrei che ci fosse un posto per me
 Octave allegro
 Allegro cl
 Allegro energy
 Rotatef lisp
 Teleseryeng katulad ng ibong adarna
 Ano ang kahulugan ng andante
 Sonata allegro form
 Lucio baggio
 Allegro productivity toolbox
 Allegro productivity toolbox
 Allegro networks
 Micrometer worksheet doc
