Orthographic Projection MultiView Drawing Orthographic Projection a system
- Slides: 21

Orthographic Projection – Multi-View Drawing

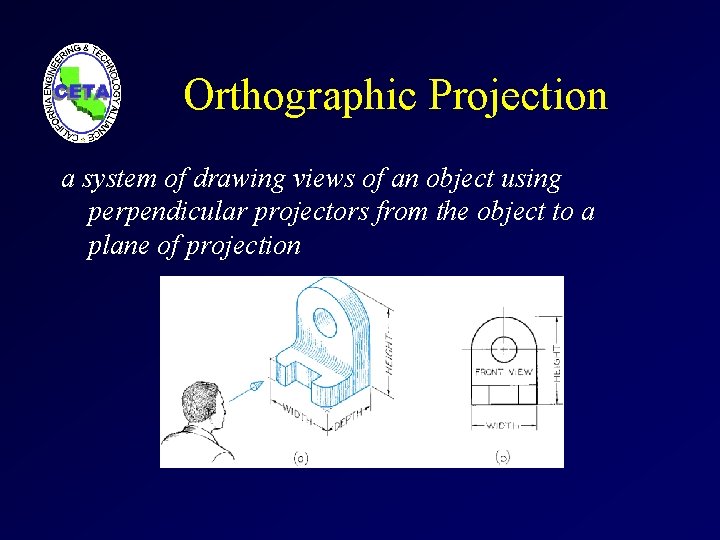
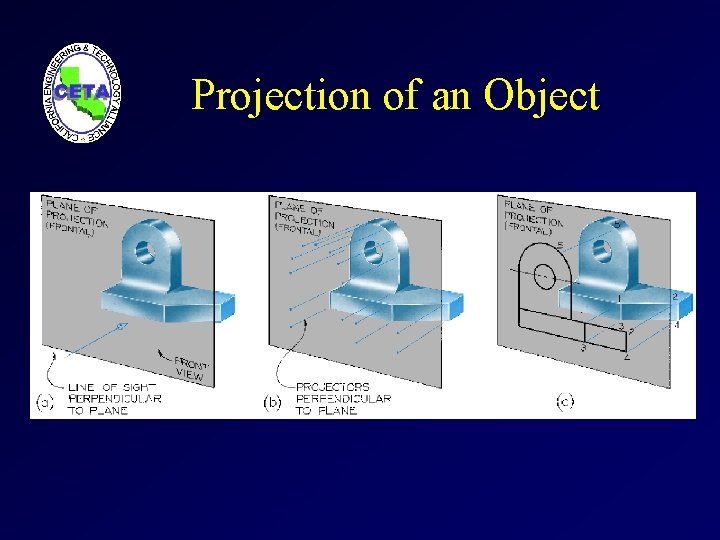
Orthographic Projection a system of drawing views of an object using perpendicular projectors from the object to a plane of projection

History • Orthographic Projection was formalized by Gaspard Monge (b. 1746). • Monge worked as a drafter in the fortification design office of the school at Mezier for French army officers • His work was kept a military secret for a number of years until he was allowed to publish in 1795. • Stone cutters were the first to adopt his methods. Later carpenters and other trades abandoned their old methods for orthographic projection.

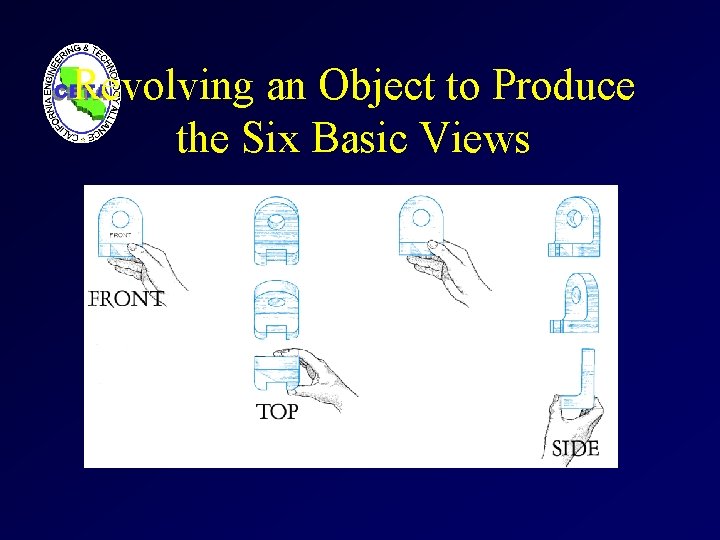
Revolving an Object to Produce the Six Basic Views

Projection of an Object

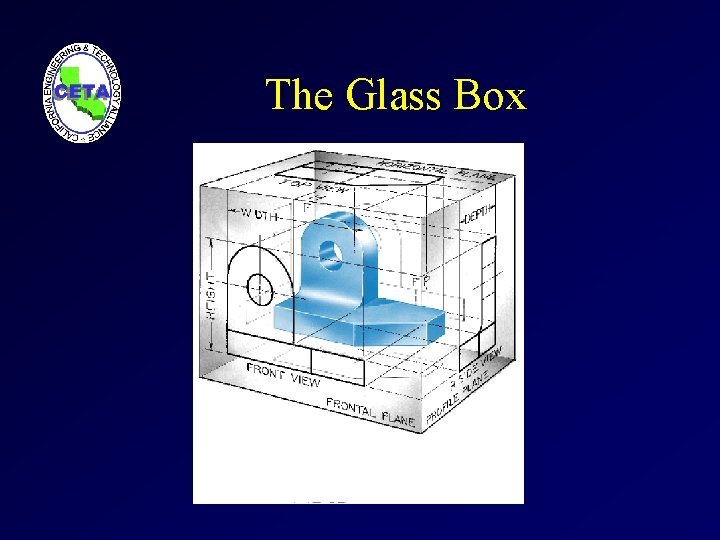
The Glass Box • Imagine that the object you are going to draw is positioned inside a glass box, so that the large flat surfaces of the object are parallel to the walls of the box. • From each point on the object, imagine a ray, or projector perpendicular to the wall of the box forming the view of the object on that wall or projection plane.

The Glass Box

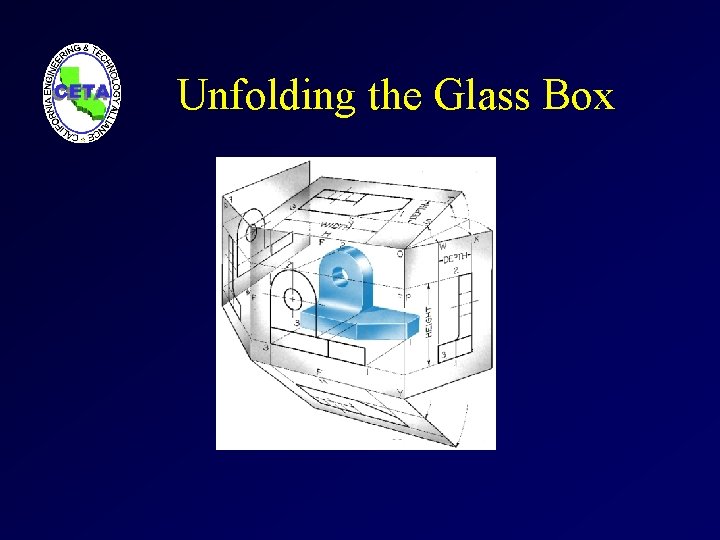
Unfolding the Glass Box

Unfolding the Glass box • For Third Angle Projection (the method in the U. S. ) • Imagine that the walls of the box are hinged and unfold the views outward around the front view. • This will give you the standard arrangement of views for 3 rd Angle Projection which is used in the US, Canada, and some other countries.

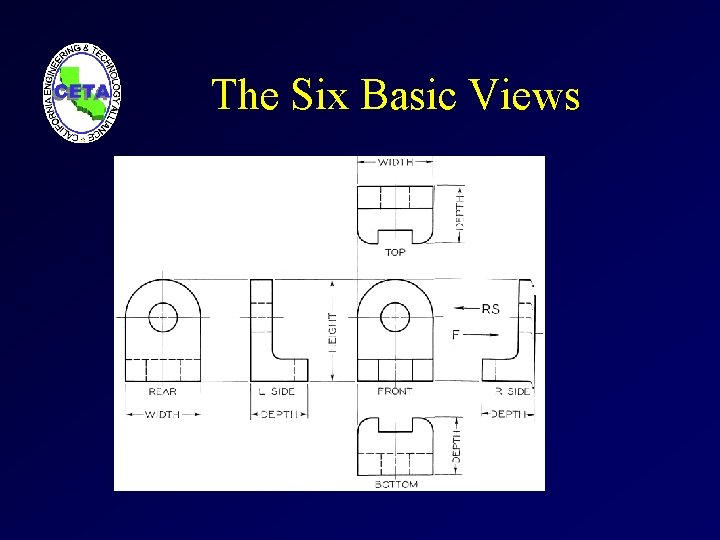
The Six Basic Views

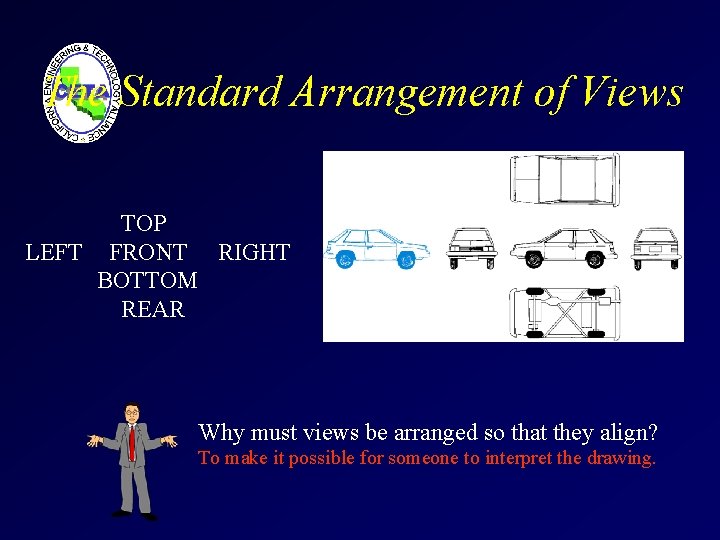
The Standard Arrangement of Views TOP LEFT FRONT RIGHT BOTTOM REAR Why must views be arranged so that they align? To make it possible for someone to interpret the drawing.

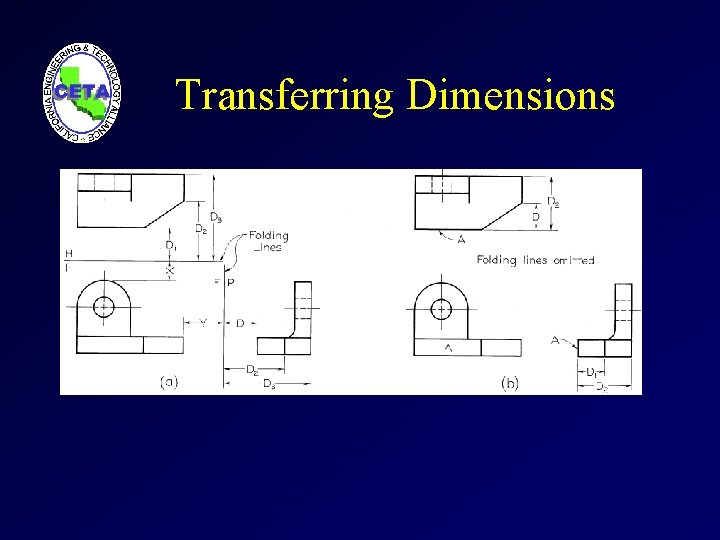
Transferring Dimensions

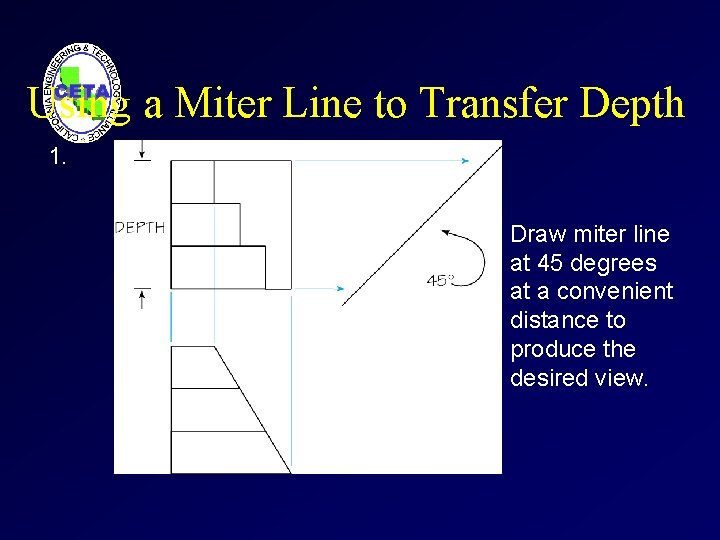
Using a Miter Line to Transfer Depth 1. Draw miter line at 45 degrees at a convenient distance to produce the desired view.

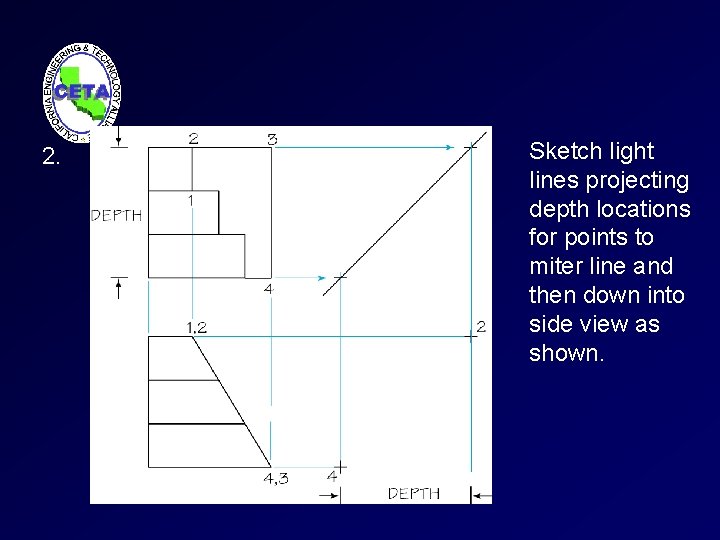
2. Sketch light lines projecting depth locations for points to miter line and then down into side view as shown.

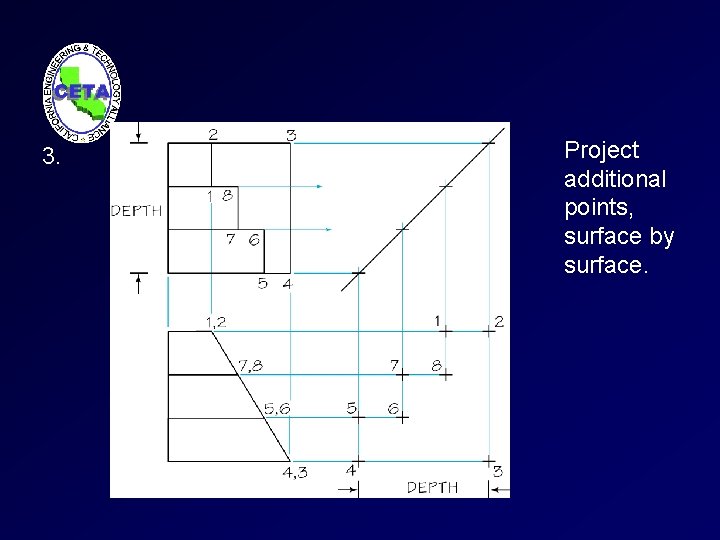
3. Project additional points, surface by surface.

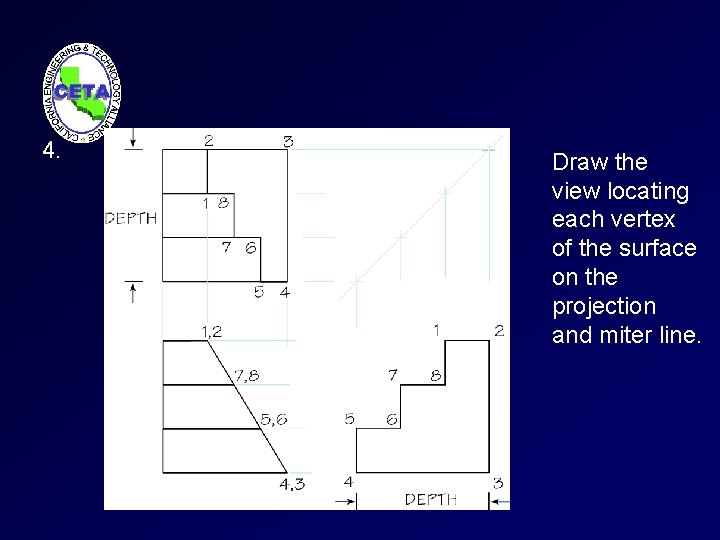
4. Draw the view locating each vertex of the surface on the projection and miter line.

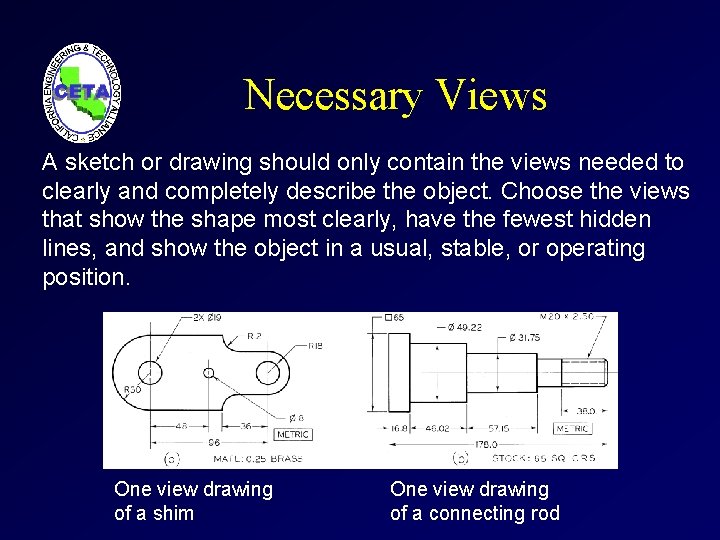
Necessary Views A sketch or drawing should only contain the views needed to clearly and completely describe the object. Choose the views that show the shape most clearly, have the fewest hidden lines, and show the object in a usual, stable, or operating position. One view drawing of a shim One view drawing of a connecting rod

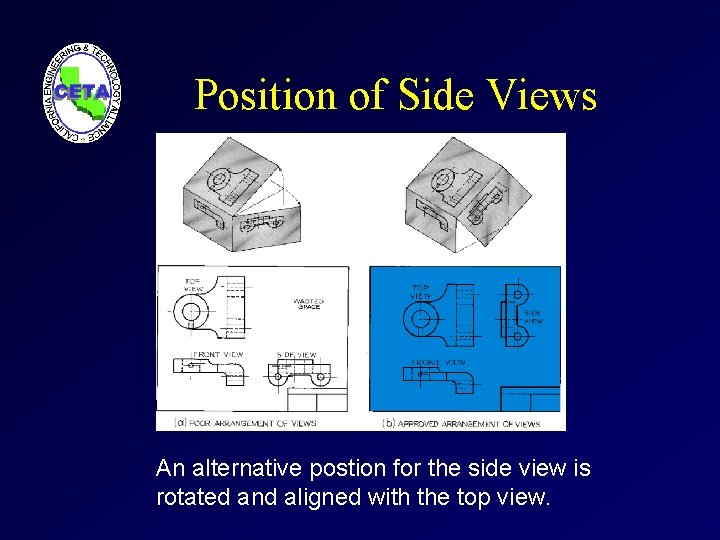
Position of Side Views An alternative postion for the side view is rotated and aligned with the top view.

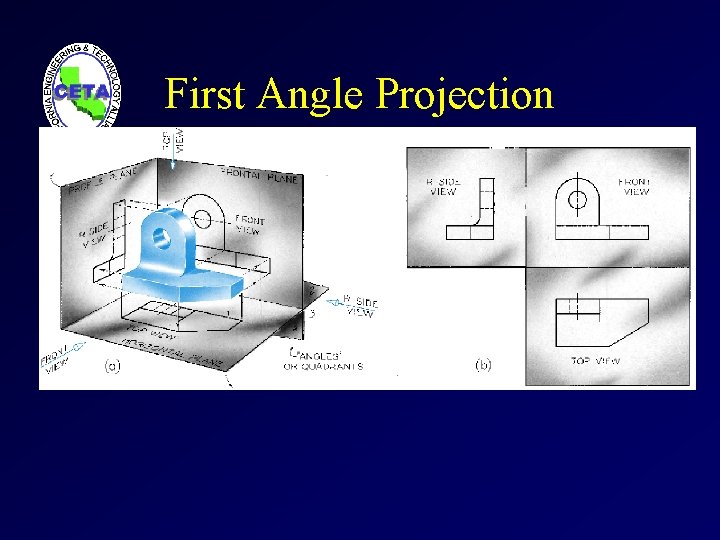
First Angle Projection

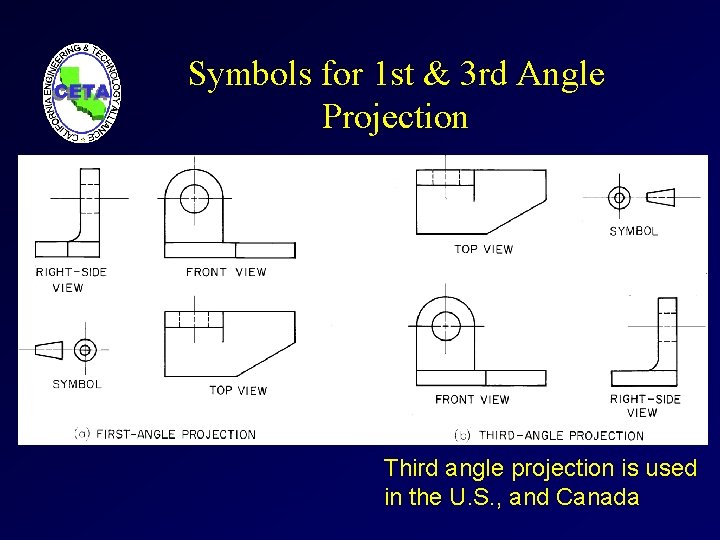
Symbols for 1 st & 3 rd Angle Projection Third angle projection is used in the U. S. , and Canada

Summary • The six standard views are often thought of as produced from an unfolded glass box. • Distances can be transferred or projected from one view to another. • Only the views necessary to fully describe the object should be drawn.