Computer Aided Design CAD Orthographic Projection Orthographic Projection
- Slides: 28

Computer Aided Design (CAD)

Orthographic Projection

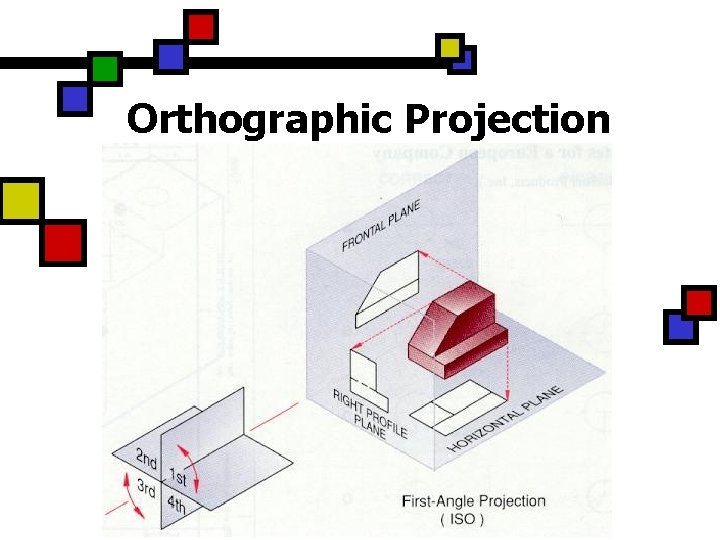
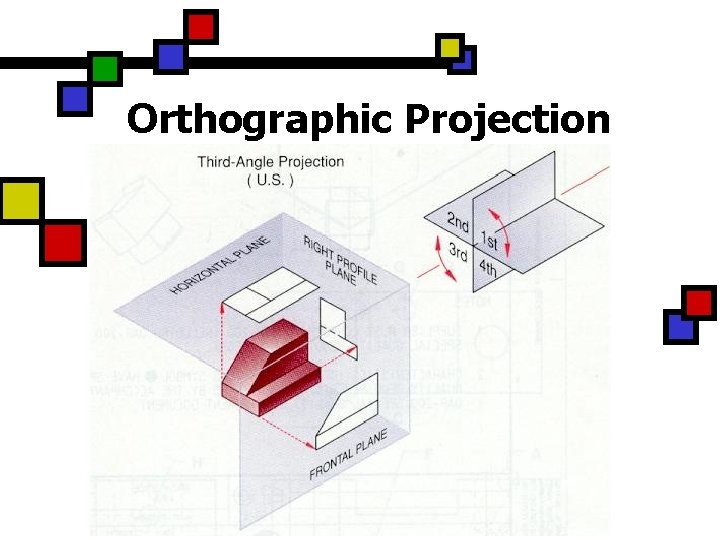
Orthographic Projection

Orthographic Projection

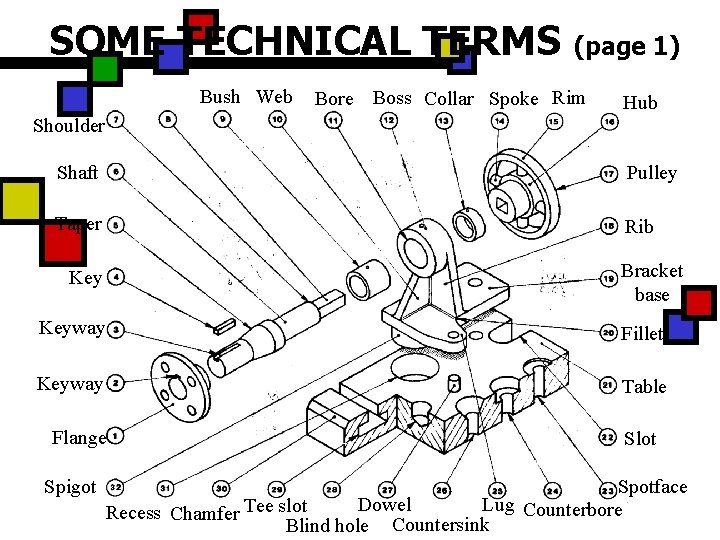
SOME TECHNICAL TERMS (page 1) Bush Web Bore Boss Collar Spoke Rim Hub Shoulder Shaft Pulley Taper Rib Bracket base Keyway Fillet Keyway Table Flange Spigot Slot Spotface Dowel Lug Counterbore Recess Chamfer Tee slot Blind hole Countersink

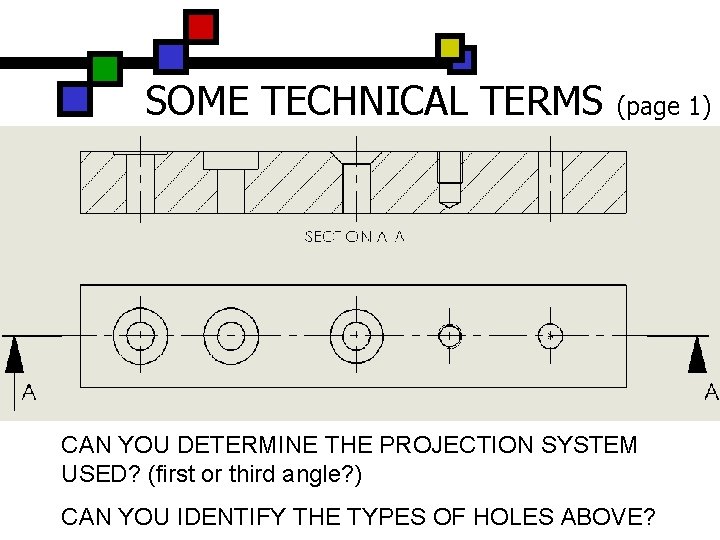
SOME TECHNICAL TERMS (page 1) CAN YOU DETERMINE THE PROJECTION SYSTEM USED? (first or third angle? ) CAN YOU IDENTIFY THE TYPES OF HOLES ABOVE?

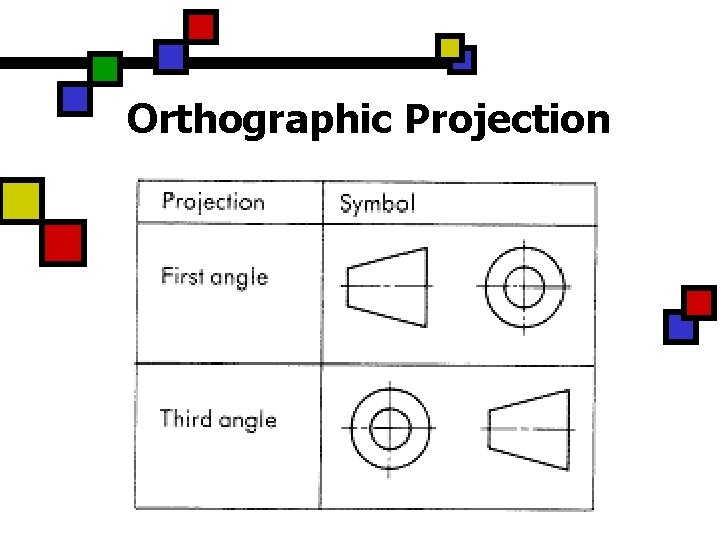
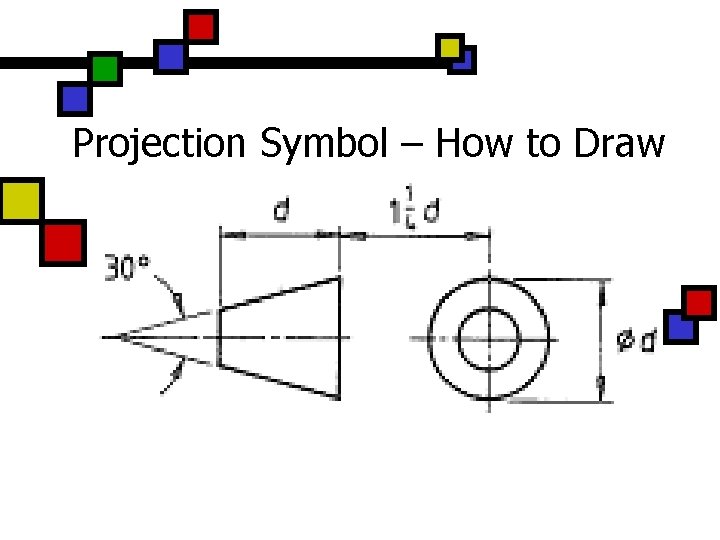
Projection Symbol – How to Draw

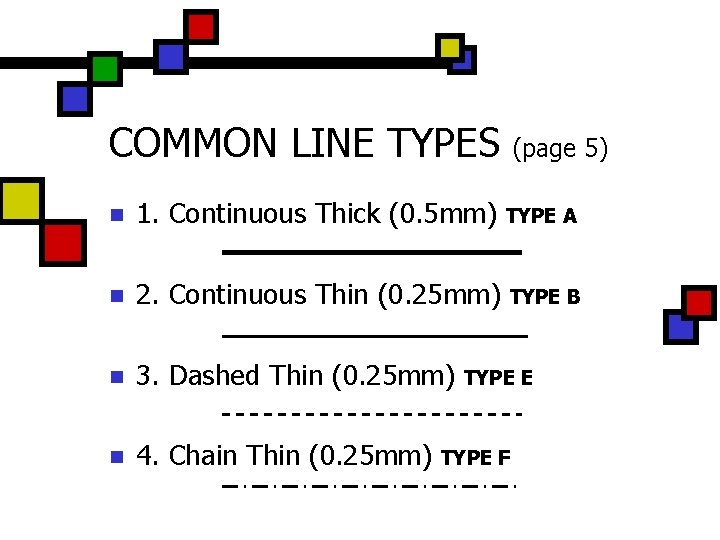
COMMON LINE TYPES (page 5) n 1. Continuous Thick (0. 5 mm) TYPE A n 2. Continuous Thin (0. 25 mm) TYPE B n 3. Dashed Thin (0. 25 mm) n 4. Chain Thin (0. 25 mm) TYPE E TYPE F

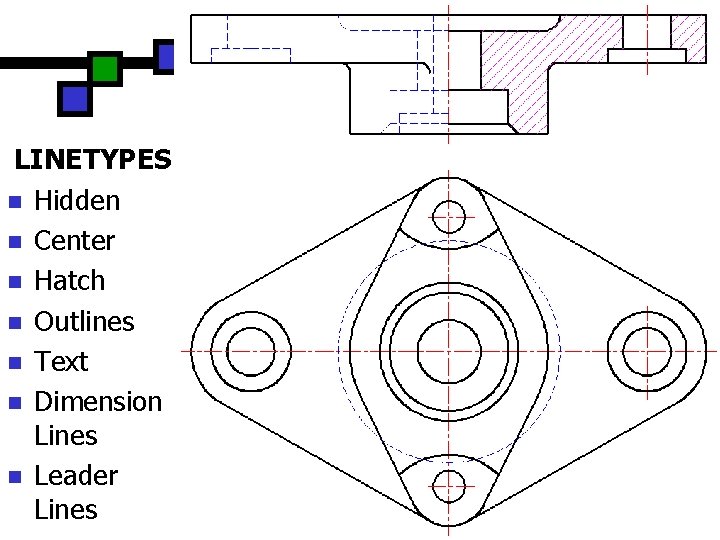
LINETYPES n Hidden n Center n Hatch n Outlines n Text n Dimension Lines n Leader Lines

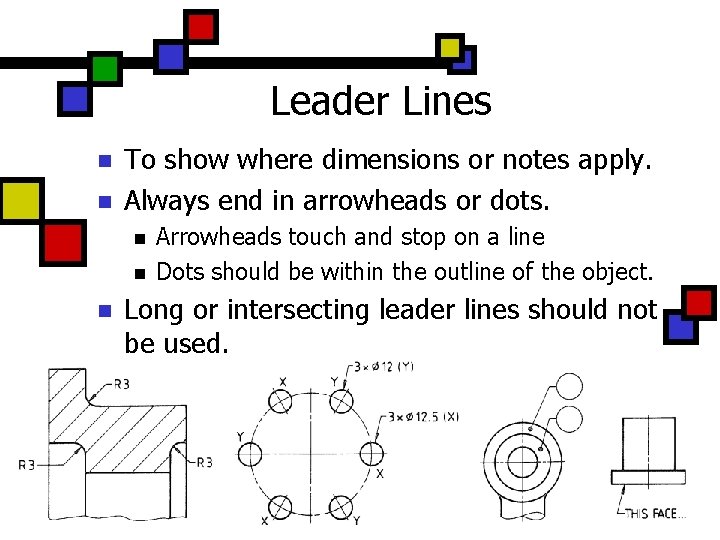
Leader Lines n n To show where dimensions or notes apply. Always end in arrowheads or dots. n n n Arrowheads touch and stop on a line Dots should be within the outline of the object. Long or intersecting leader lines should not be used.

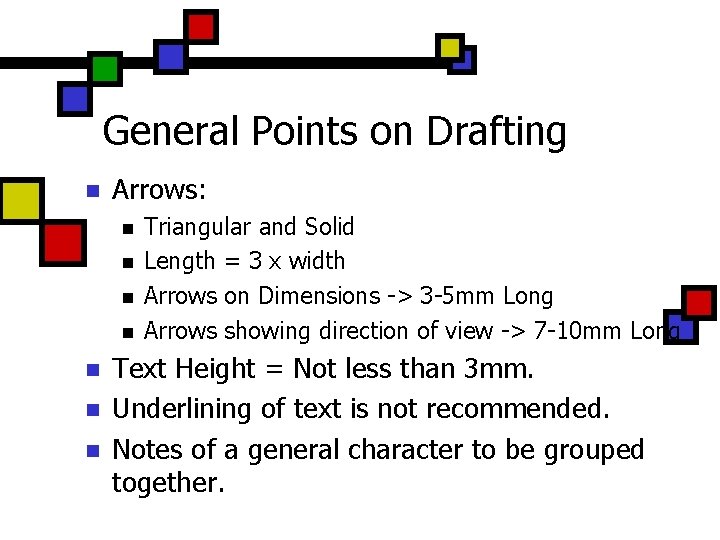
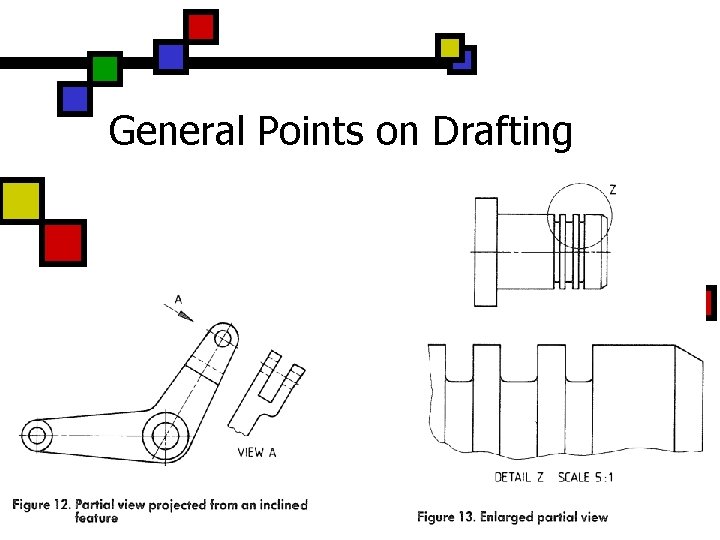
General Points on Drafting n Arrows: n n n n Triangular and Solid Length = 3 x width Arrows on Dimensions -> 3 -5 mm Long Arrows showing direction of view -> 7 -10 mm Long Text Height = Not less than 3 mm. Underlining of text is not recommended. Notes of a general character to be grouped together.

General Points on Drafting

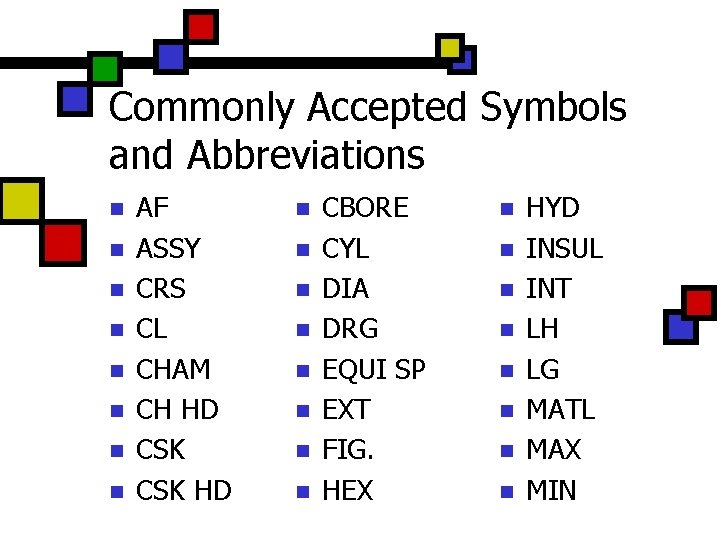
Commonly Accepted Symbols and Abbreviations n n n n AF ASSY CRS CL CHAM CH HD CSK HD n n n n CBORE CYL DIA DRG EQUI SP EXT FIG. HEX n n n n HYD INSUL INT LH LG MATL MAX MIN

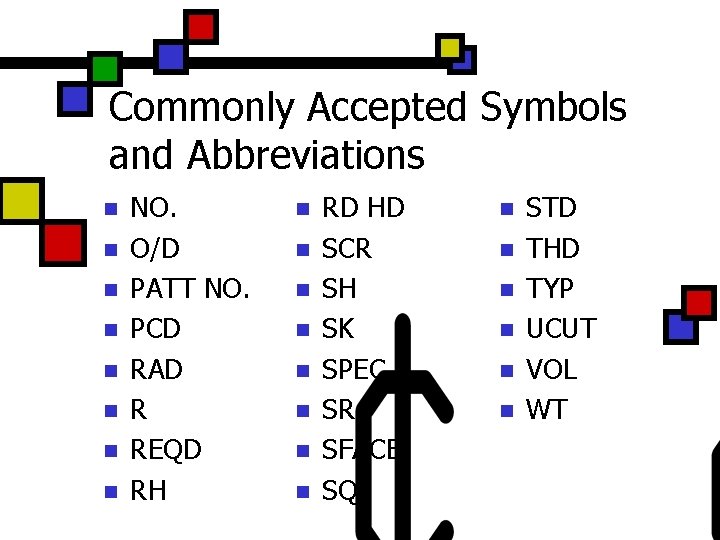
Commonly Accepted Symbols and Abbreviations n n n n NO. O/D PATT NO. PCD RAD R REQD RH n n n n RD HD SCR SH SK SPEC SR SFACE SQ n n n STD THD TYP UCUT VOL WT

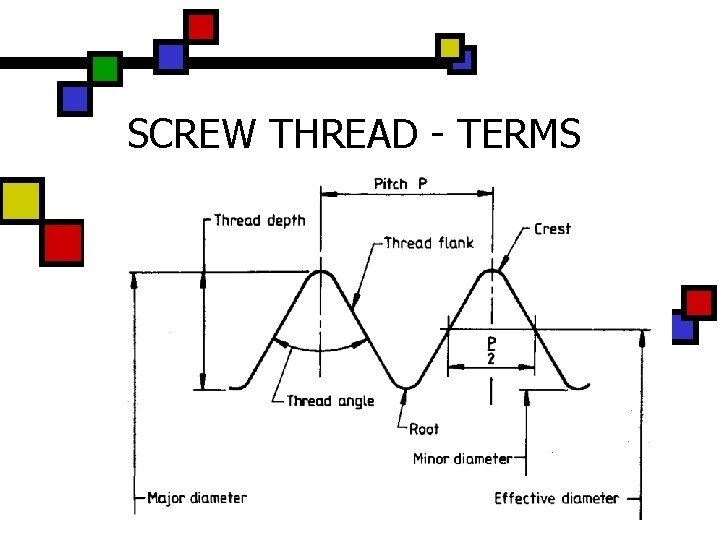
SCREW THREAD - TERMS

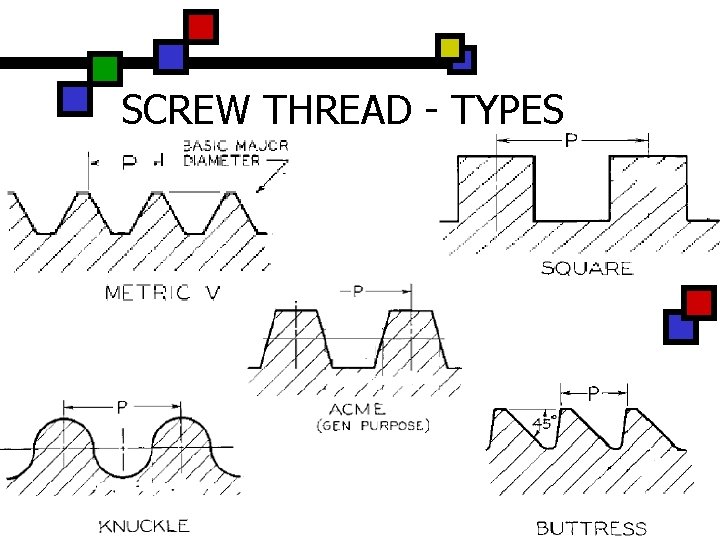
SCREW THREAD - TYPES

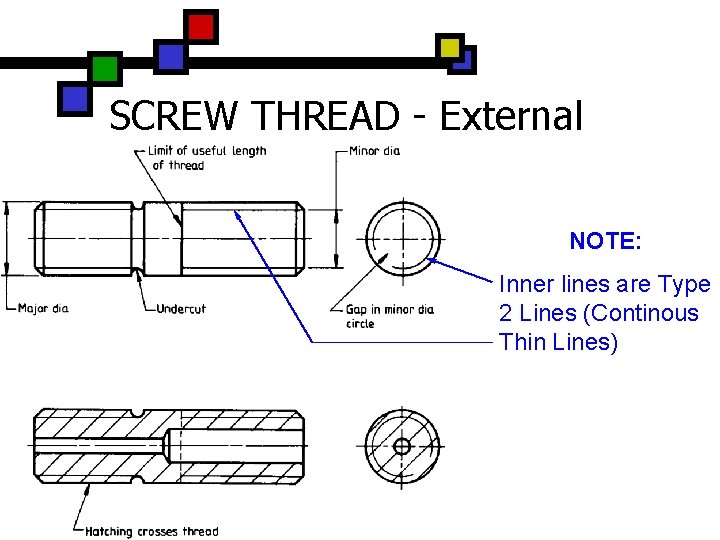
SCREW THREAD - External NOTE: Inner lines are Type 2 Lines (Continous Thin Lines)

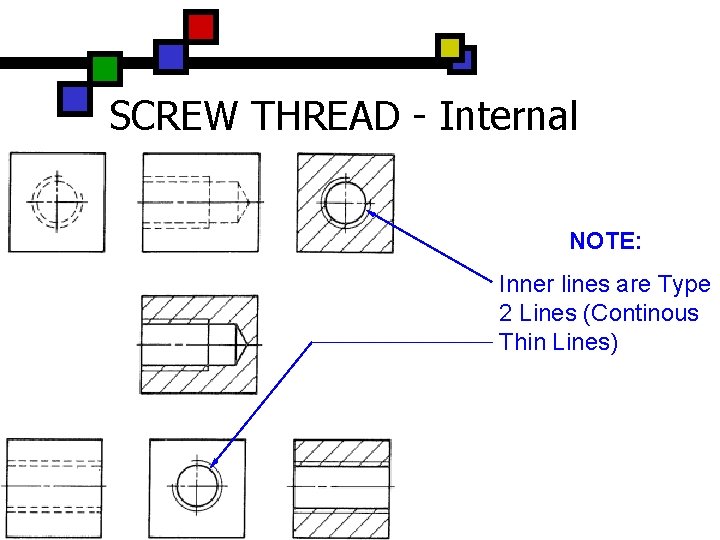
SCREW THREAD - Internal NOTE: Inner lines are Type 2 Lines (Continous Thin Lines)

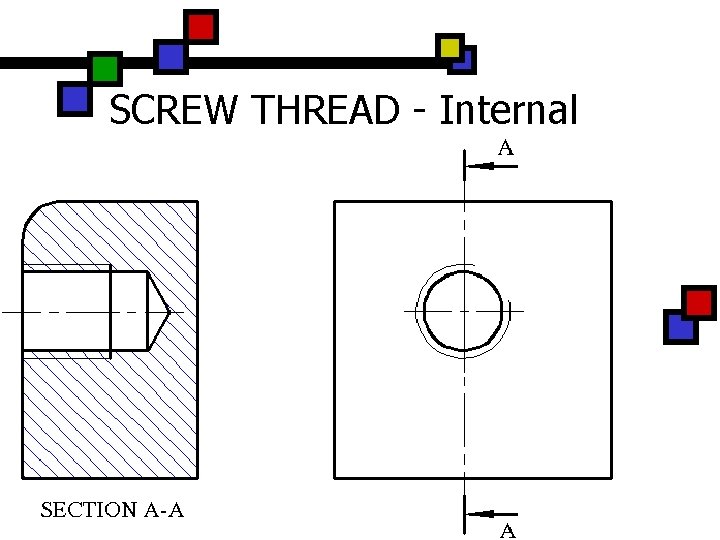
SCREW THREAD - Internal

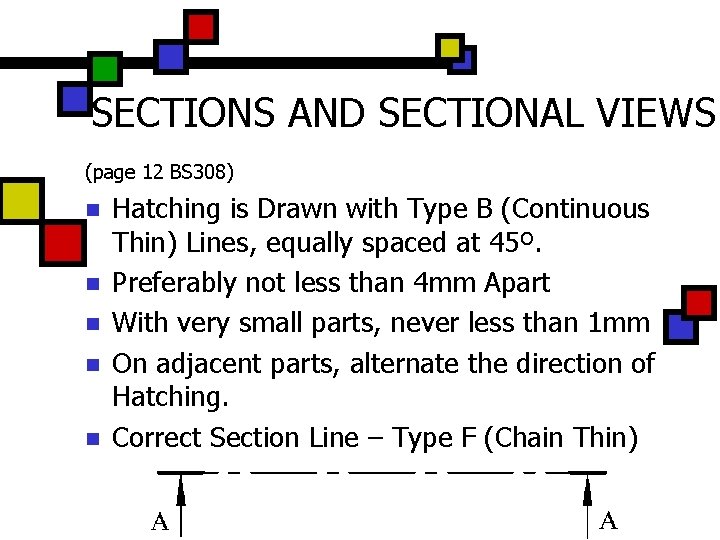
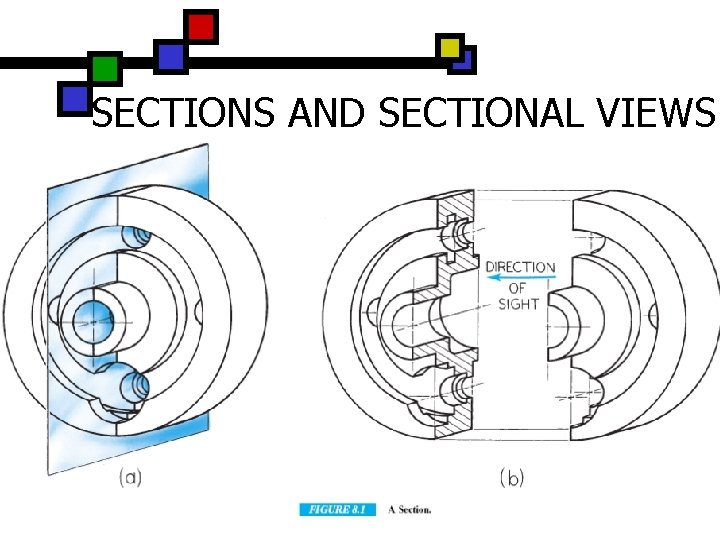
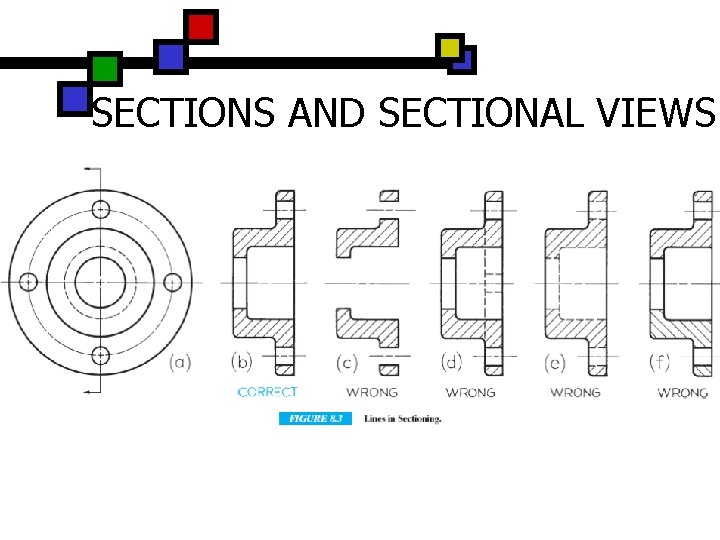
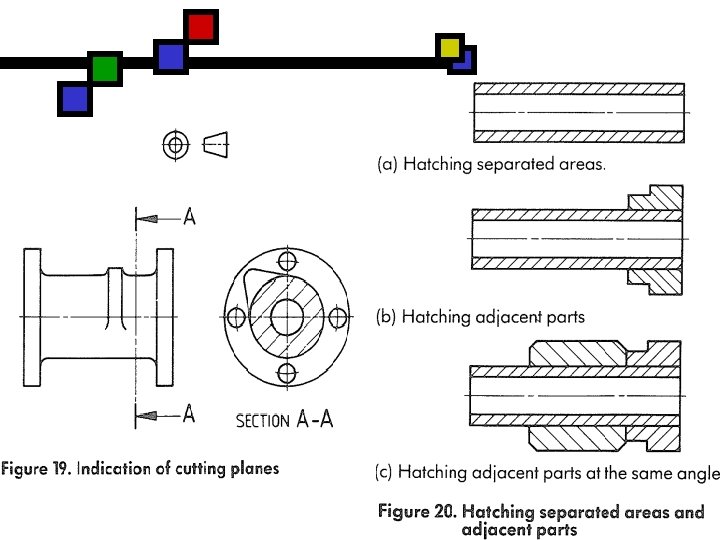
SECTIONS AND SECTIONAL VIEWS (page 12 BS 308) n n n Hatching is Drawn with Type B (Continuous Thin) Lines, equally spaced at 45º. Preferably not less than 4 mm Apart With very small parts, never less than 1 mm On adjacent parts, alternate the direction of Hatching. Correct Section Line – Type F (Chain Thin)

SECTIONS AND SECTIONAL VIEWS

SECTIONS AND SECTIONAL VIEWS

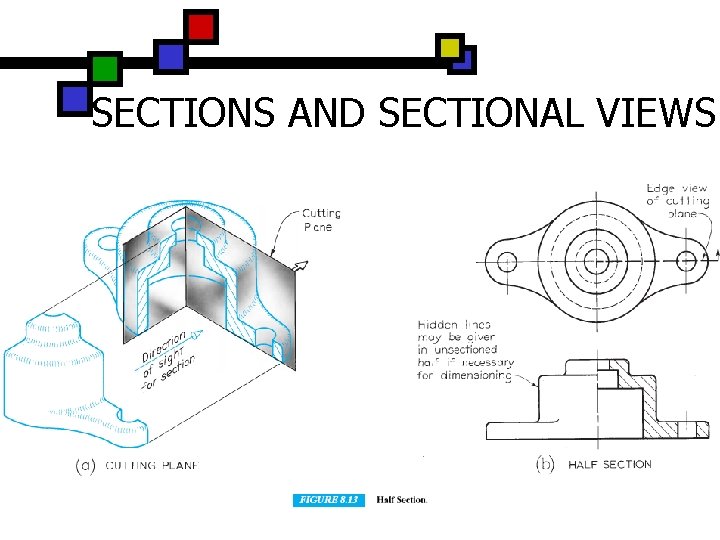
SECTIONS AND SECTIONAL VIEWS

SECTIONS AND SECTIONAL VIEWS

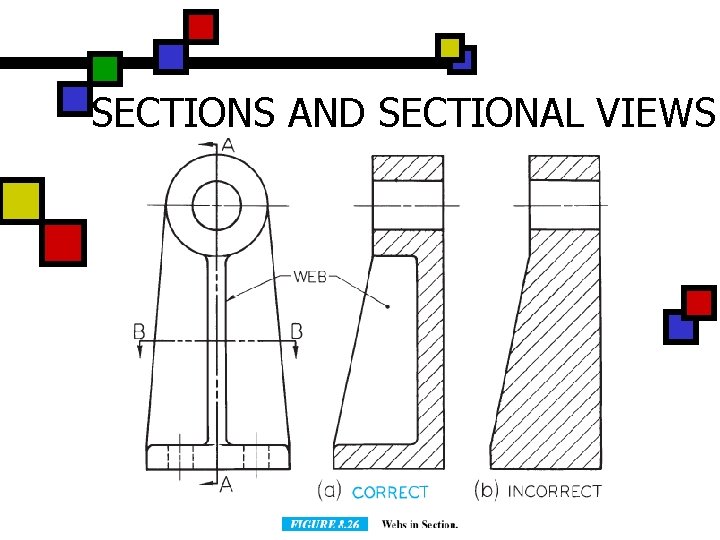
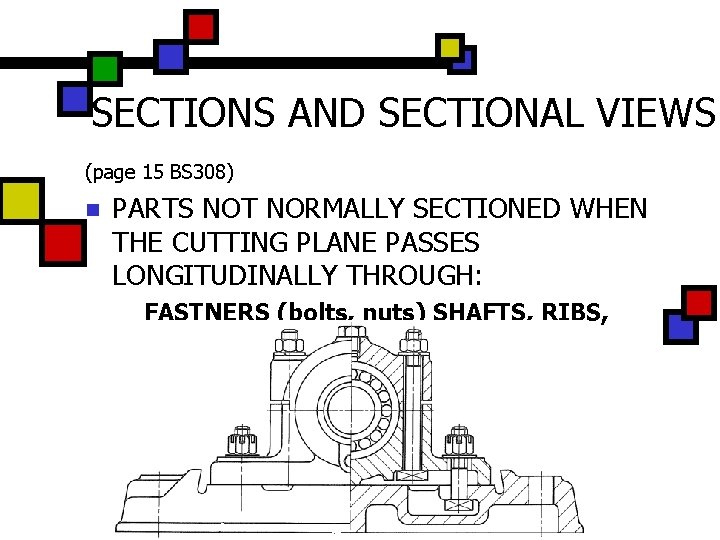
SECTIONS AND SECTIONAL VIEWS (page 15 BS 308) n PARTS NOT NORMALLY SECTIONED WHEN THE CUTTING PLANE PASSES LONGITUDINALLY THROUGH: FASTNERS (bolts, nuts) SHAFTS, RIBS, WEBS, SPOKES of WHEELS etc.

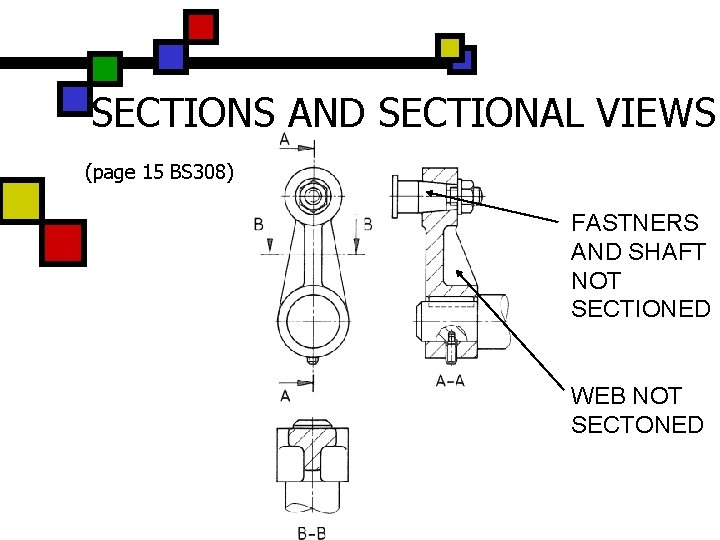
SECTIONS AND SECTIONAL VIEWS (page 15 BS 308) FASTNERS AND SHAFT NOT SECTIONED WEB NOT SECTONED


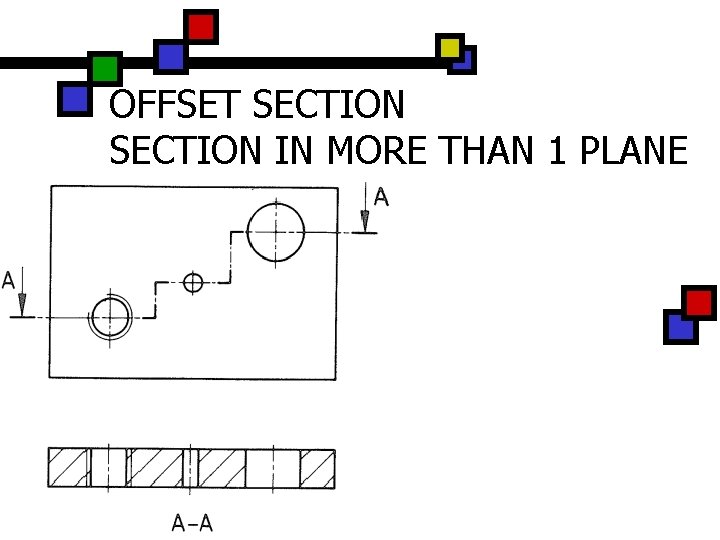
OFFSET SECTION IN MORE THAN 1 PLANE