Orthographic Projection an introduction What is Orthographic Projection
- Slides: 26

Orthographic Projection: an introduction What is Orthographic Projection?

Orthographic Projection Lesson Objectives By the end of the lesson: • Everyone will be able to produce a simple 3 rd Angle Orthographic drawing. • Most will be able to identify the 3 rd Angle Orthographic. • Some will understand hidden detail lines and their use.

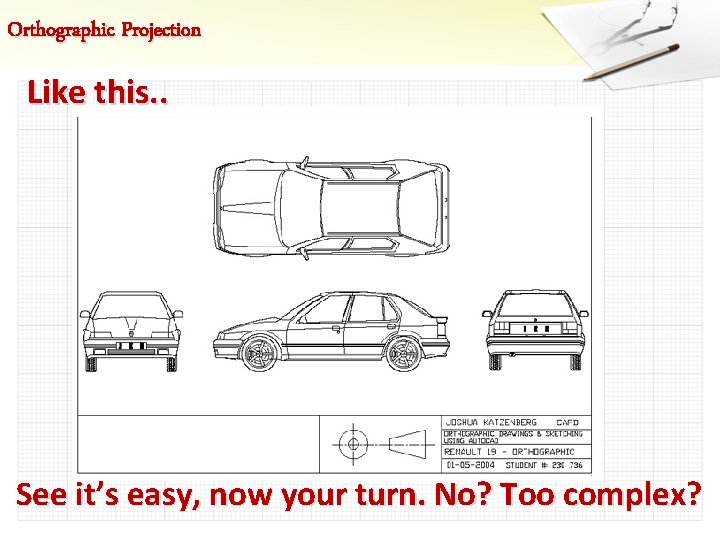
Orthographic Projection Third Angle Orthographic Projection is the most common method of producing a working drawing, made by creating at least three separate 2 D views of an object: • Front view • Plan view (above or birds-eye) • End or side view But what does this look like?

Orthographic Projection Like this. . See it’s easy, now your turn. No? Too complex?

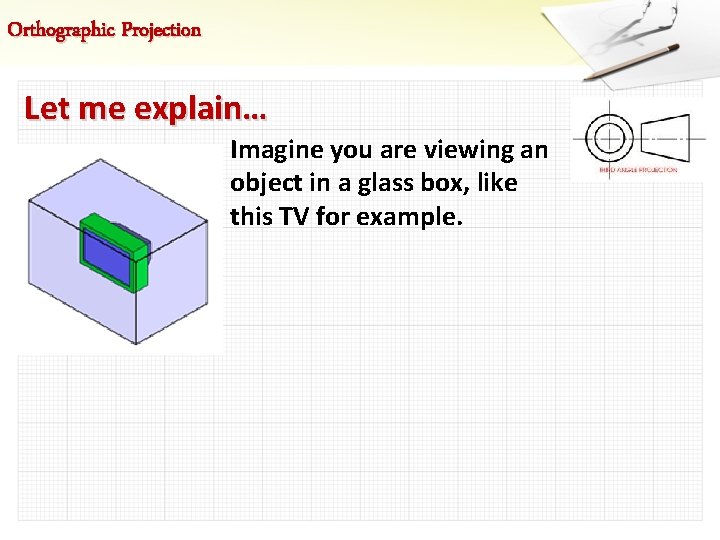
Orthographic Projection Let me explain… Imagine you are viewing an object in a glass box, like this TV for example.

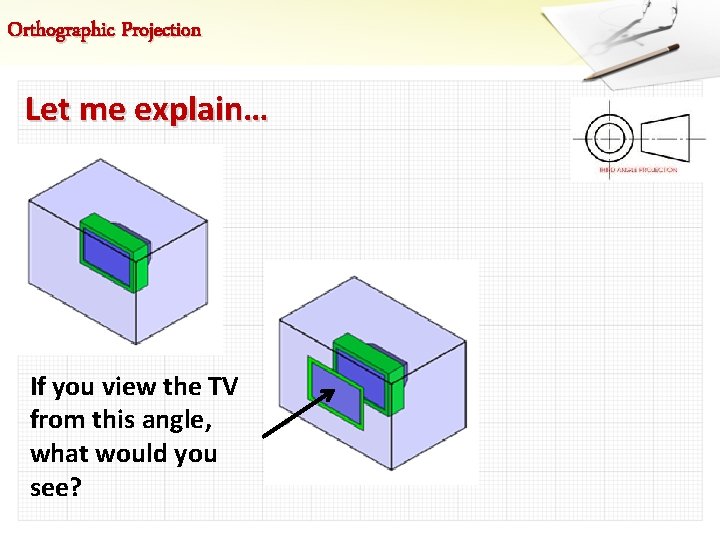
Orthographic Projection Let me explain… If you view the TV from this angle, what would you see?

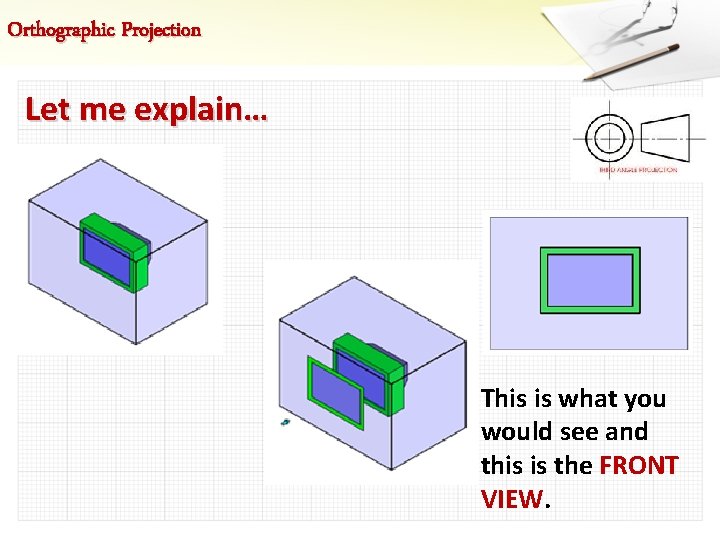
Orthographic Projection Let me explain… This is what you would see and this is the FRONT VIEW.

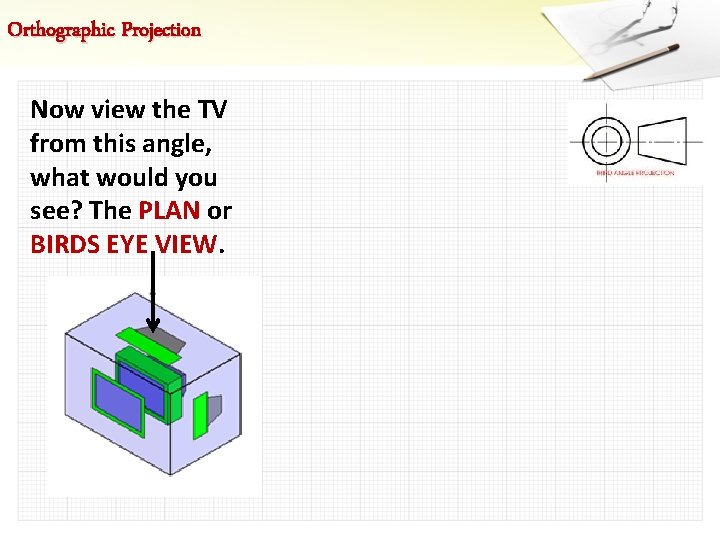
Orthographic Projection Now view the TV from this angle, what would you see? The PLAN or BIRDS EYE VIEW.

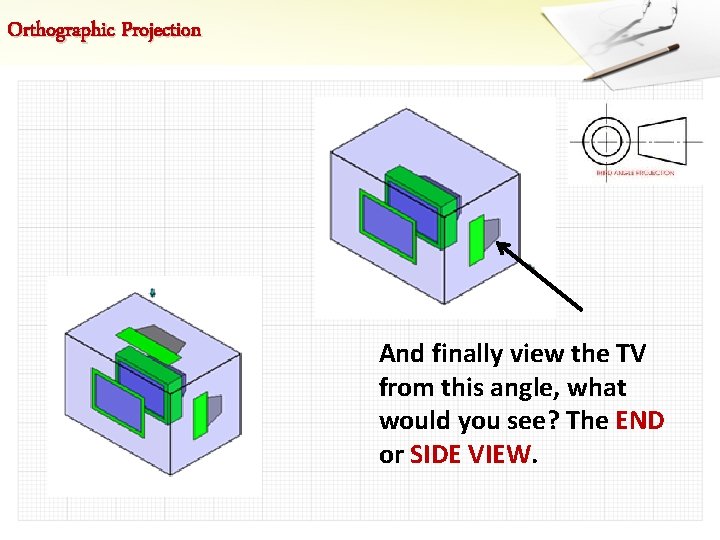
Orthographic Projection And finally view the TV from this angle, what would you see? The END or SIDE VIEW.

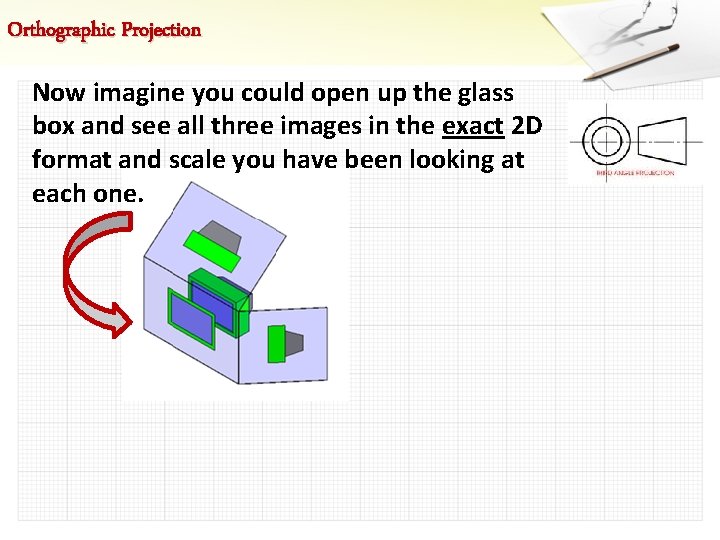
Orthographic Projection Now imagine you could open up the glass box and see all three images in the exact 2 D format and scale you have been looking at each one.

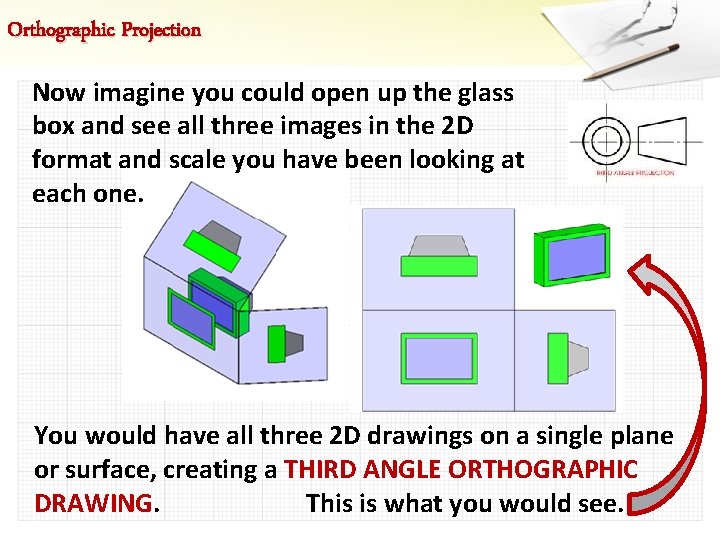
Orthographic Projection Now imagine you could open up the glass box and see all three images in the 2 D format and scale you have been looking at each one. You would have all three 2 D drawings on a single plane or surface, creating a THIRD ANGLE ORTHOGRAPHIC DRAWING. This is what you would see.

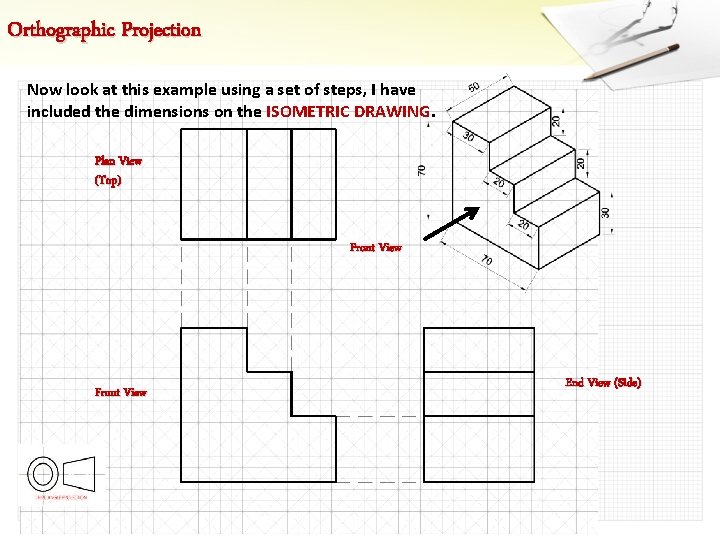
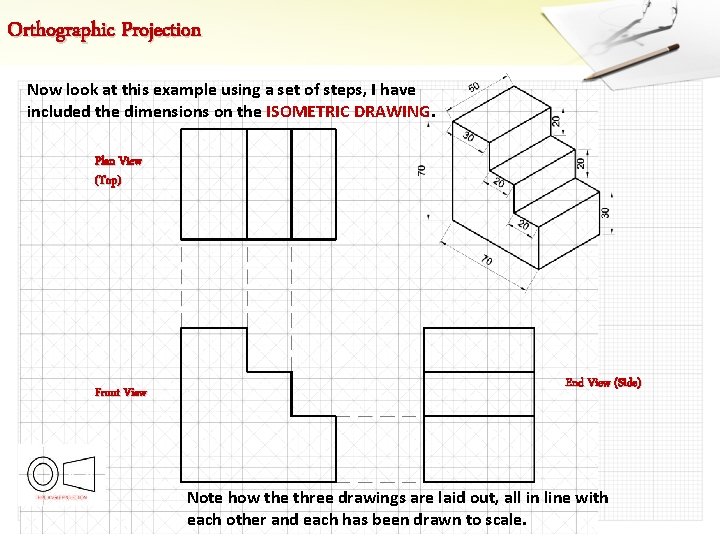
Orthographic Projection Now look at this example using a set of steps, I have included the dimensions on the ISOMETRIC DRAWING. Plan View (Top) Front View End View (Side)

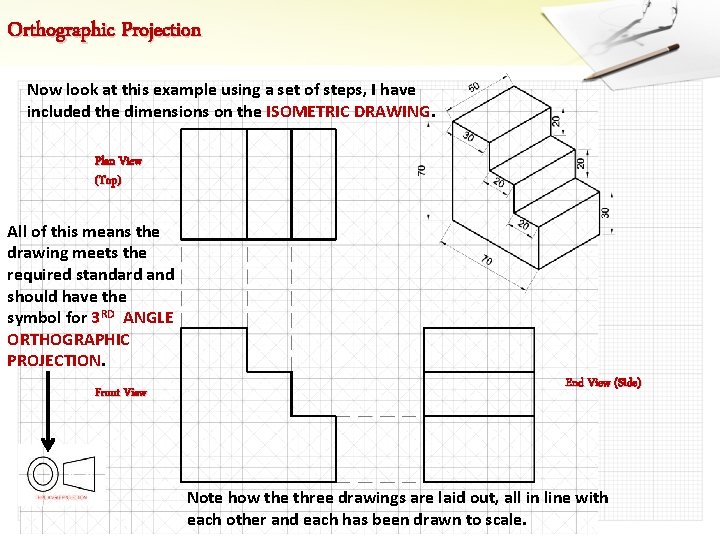
Orthographic Projection Now look at this example using a set of steps, I have included the dimensions on the ISOMETRIC DRAWING. Plan View (Top) Front View End View (Side) Note how the three drawings are laid out, all in line with each other and each has been drawn to scale.

Orthographic Projection Now look at this example using a set of steps, I have included the dimensions on the ISOMETRIC DRAWING. Plan View (Top) All of this means the drawing meets the required standard and should have the symbol for 3 RD ANGLE ORTHOGRAPHIC PROJECTION. Front View End View (Side) Note how the three drawings are laid out, all in line with each other and each has been drawn to scale.

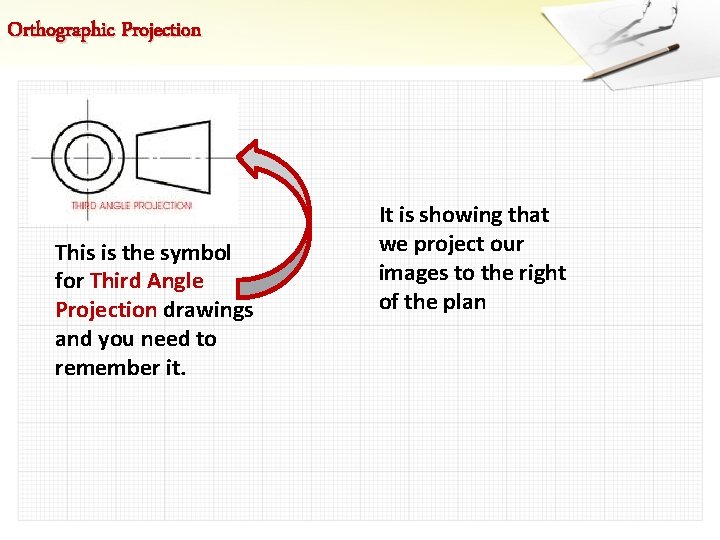
Orthographic Projection This is the symbol for Third Angle Projection drawings and you need to remember it. It is showing that we project our images to the right of the plan

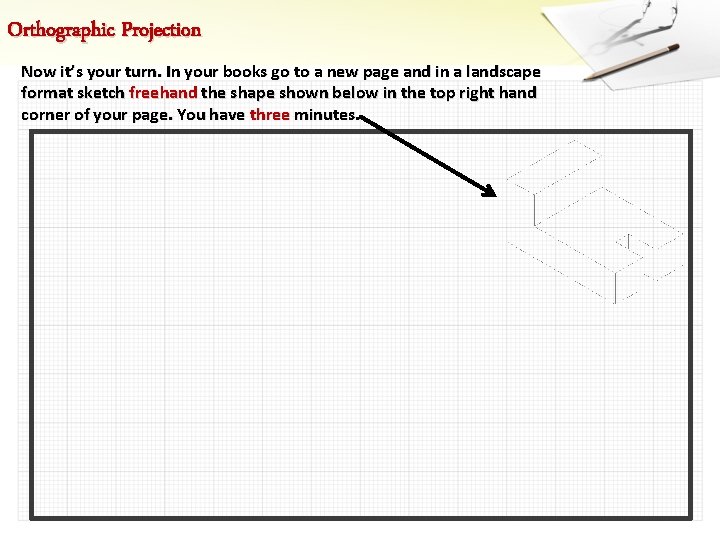
Orthographic Projection Now it’s your turn. In your books go to a new page and in a landscape format sketch freehand the shape shown below in the top right hand corner of your page. You have three minutes.

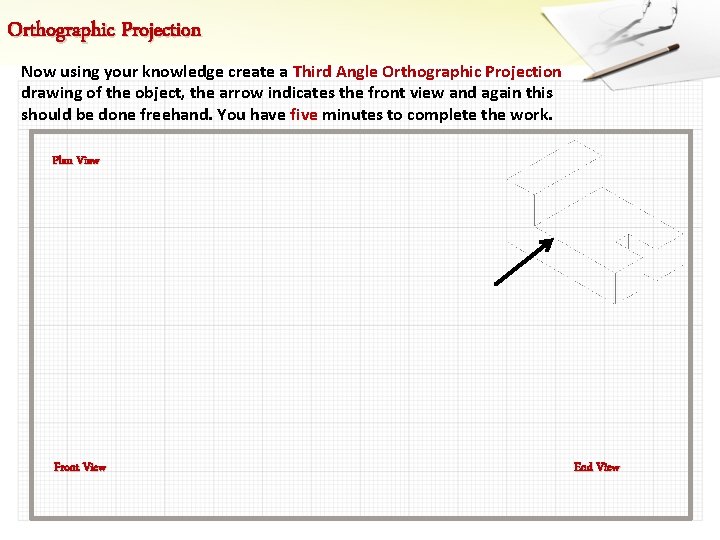
Orthographic Projection Now using your knowledge create a Third Angle Orthographic Projection drawing of the object, the arrow indicates the front view and again this should be done freehand. You have five minutes to complete the work. Plan View Front View End View

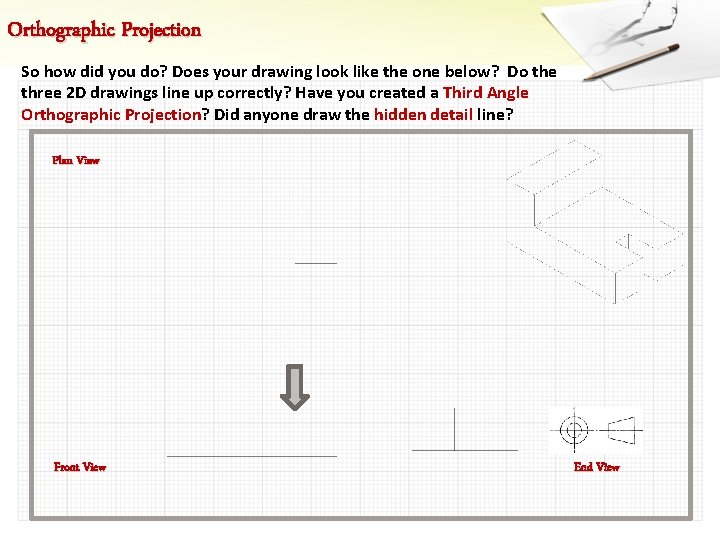
Orthographic Projection So how did you do? Does your drawing look like the one below? Do the three 2 D drawings line up correctly? Have you created a Third Angle Orthographic Projection? Did anyone draw the hidden detail line? Plan View Front View End View

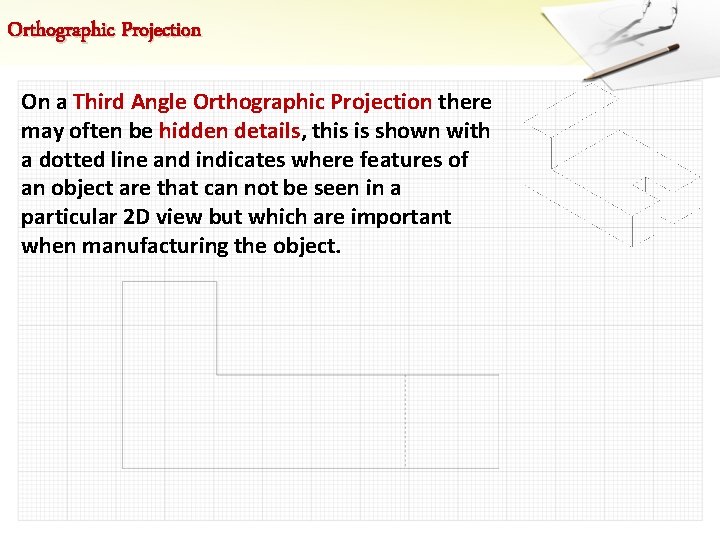
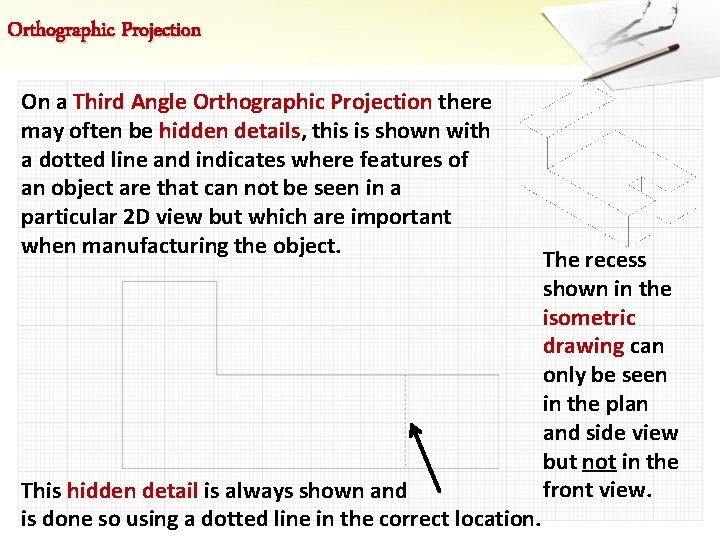
Orthographic Projection On a Third Angle Orthographic Projection there may often be hidden details, this is shown with a dotted line and indicates where features of an object are that can not be seen in a particular 2 D view but which are important when manufacturing the object.

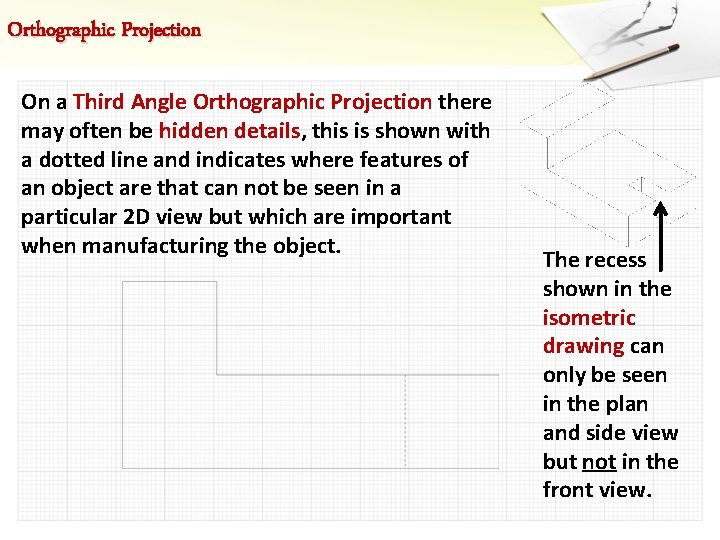
Orthographic Projection On a Third Angle Orthographic Projection there may often be hidden details, this is shown with a dotted line and indicates where features of an object are that can not be seen in a particular 2 D view but which are important when manufacturing the object. The recess shown in the isometric drawing can only be seen in the plan and side view but not in the front view.

Orthographic Projection On a Third Angle Orthographic Projection there may often be hidden details, this is shown with a dotted line and indicates where features of an object are that can not be seen in a particular 2 D view but which are important when manufacturing the object. This hidden detail is always shown and is done so using a dotted line in the correct location. The recess shown in the isometric drawing can only be seen in the plan and side view but not in the front view.

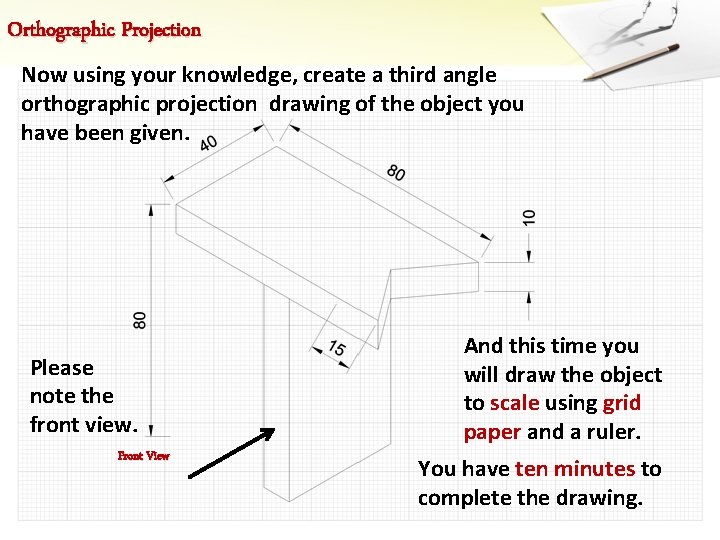
Orthographic Projection Now using your knowledge, create a third angle orthographic projection drawing of the object you have been given. Please note the front view. Front View And this time you will draw the object to scale using grid paper and a ruler. You have ten minutes to complete the drawing.

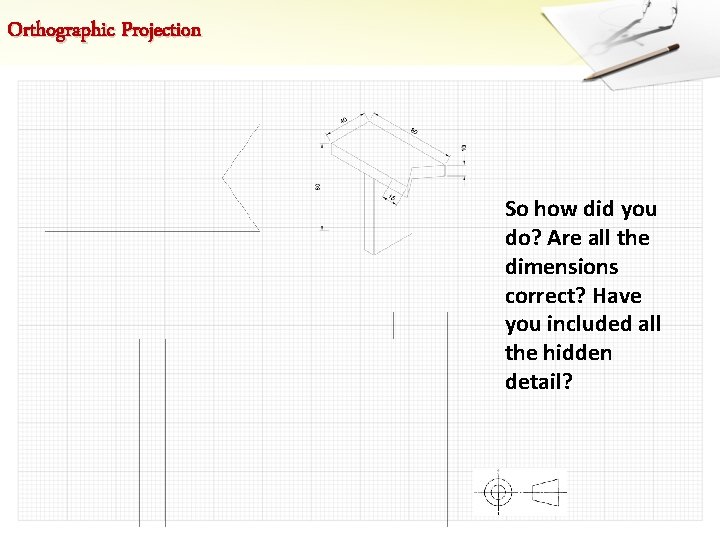
Orthographic Projection So how did you do? Are all the dimensions correct? Have you included all the hidden detail?

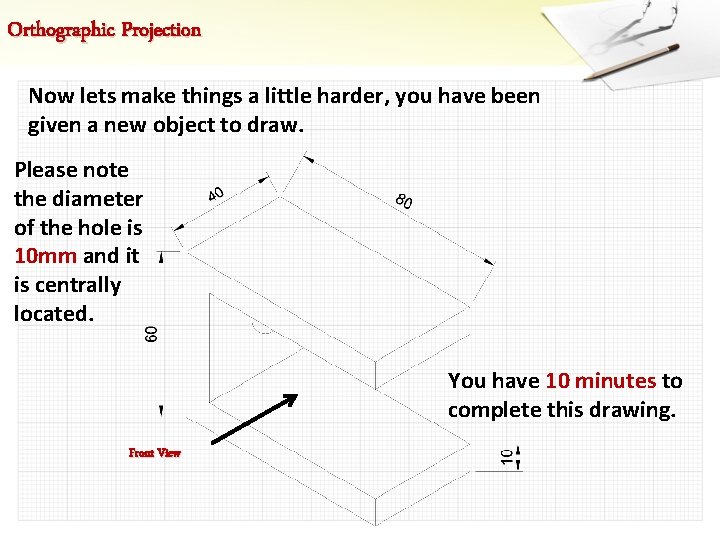
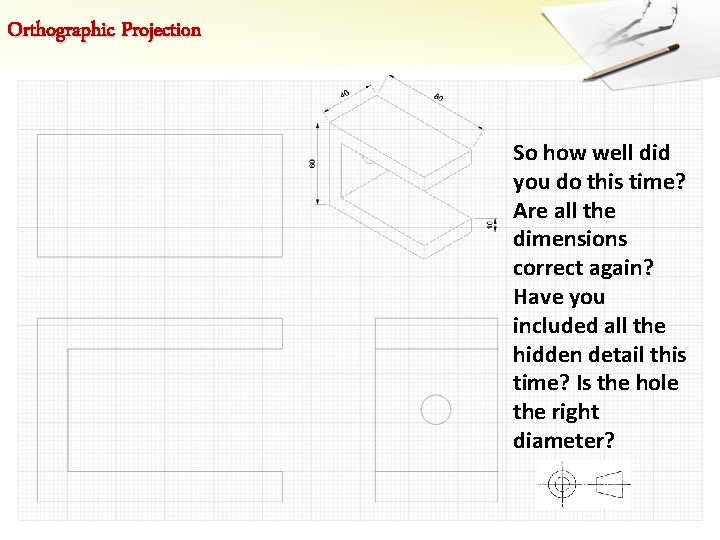
Orthographic Projection Now lets make things a little harder, you have been given a new object to draw. Please note the diameter of the hole is 10 mm and it is centrally located. You have 10 minutes to complete this drawing. Front View

Orthographic Projection So how well did you do this time? Are all the dimensions correct again? Have you included all the hidden detail this time? Is the hole the right diameter?

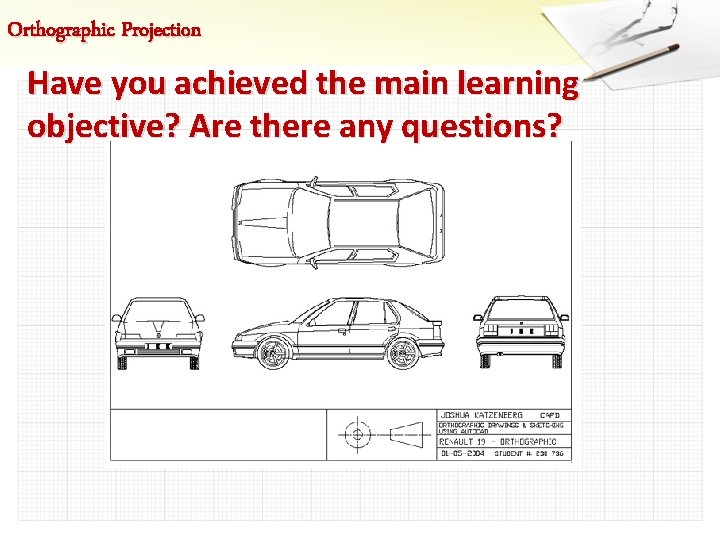
Orthographic Projection Have you achieved the main learning objective? Are there any questions?