How to Install Open LDAP Sudo aptget update


- Slides: 33
How to Install Open. LDAP • Sudo apt-get update • Sudo apt-get install slapd ldap-utils
Reconfiguring Open. LDAP • Sudo dpkg-reconfigure slapd
Reconfiguring Open. LDAP Continue
Reconfiguring Open. LDAP Continue
Reconfiguring Open. LDAP Continue
Reconfiguring Open. LDAP Continue
Reconfiguring Open. LDAP Continue
Reconfiguring Open. LDAP Continue
Reconfiguring Open. LDAP Continue
Installing and configuring Php. Ldap. Admin • Apt-get install apache 2 • Apt-get –y install php 5 libapache 2 -mod-php 5 • Service apache 2 restart • Apt-get install phpldapadmin • Vi /etc/phpldapadmin/config. php • Search for the following sections and modify them accordingly.
configuring Php. Ldap. Admin continue • Change the red value to the way you will be referencing your server, either through domain name or IP address.
configuring Php. Ldap. Admin continue • Edit the following entry to reflect the name you selected (ours is “afnog. org" as you recall):
configuring Php. Ldap. Admin continue • The next value to modify will use the same domain components that you just set up in the last entry. Add these after the "cn=admin" in the entry below:
configuring Php. Ldap. Admin continue • Search for the following section about the "hidetemplatewarning" attribute. We want to uncomment this line and set the value to "true" to avoid some annoying warnings that are unimportant.
configuring Php. Ldap. Admin continue • Login to the Php. Ldap. Admin page using a browser with your IP Address followed by phpldapadmin
configuring Php. Ldap. Admin continue • Click on login in your left pane and enter your ldap admin password
configuring Php. Ldap. Admin continue • If successfully loged in, you should see an interface as below
configuring Php. Ldap. Admin continue • Create Organizational Units , Groups, Users • Click on the “Create new entry here” link on the left-hand side • Click on the “Generic: Organizational Unit” template as below • We will be asked to create a name for our organizational unit. • Type Groups and repeat the same procedure to create users group as well. • Slides on the next slide demonstrate the process
configuring Php. Ldap. Admin continue
configuring Php. Ldap. Admin continue
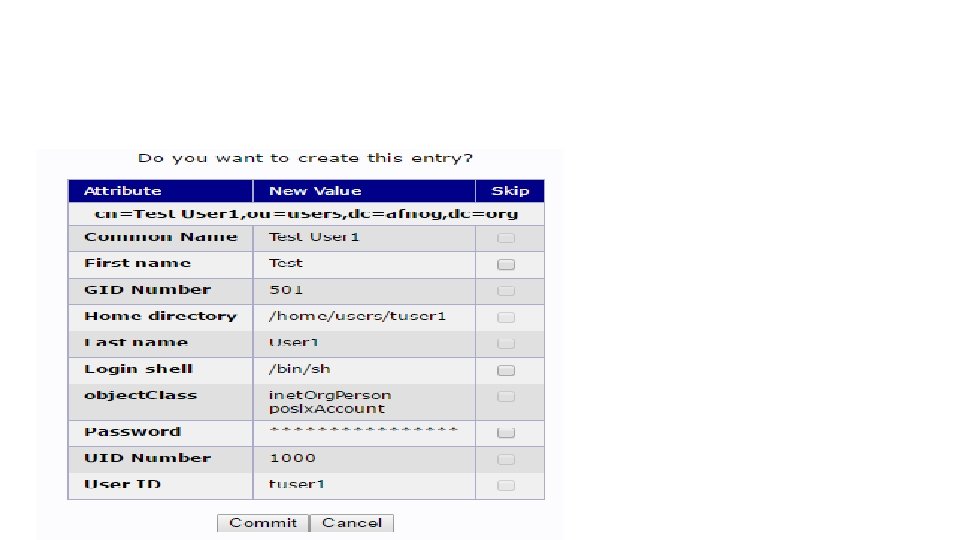
configuring Php. Ldap. Admin continue • Click on Commit to save changes
configuring Php. Ldap. Admin continue • When you are done, you should see the configuration as shown on your left hand side.
configuring Php. Ldap. Admin continue • Create Groups • We can create two different groups that could be used to organize users into different “access” groups based on their privileges they require. • Those groups are “admin” and “user” groups. • In the main pane, click on the “Create a child entry” within the groups category. • We will choose the “Generic: Posix Group” Category • The next slide shows the guidelines for creating those groups.
configuring Php. Ldap. Admin continue • Click on the “Generic: Posix Group” highlighted in yellow colour
configuring Php. Ldap. Admin continue
configuring Php. Ldap. Admin continue • Both groups after creation will look as below in the left hand side
configuring Php. Ldap. Admin continue • Click on the “view 2 children” as highlighted in yellow
configuring Php. Ldap. Admin continue • The output of the view 2 childres is as shown below •
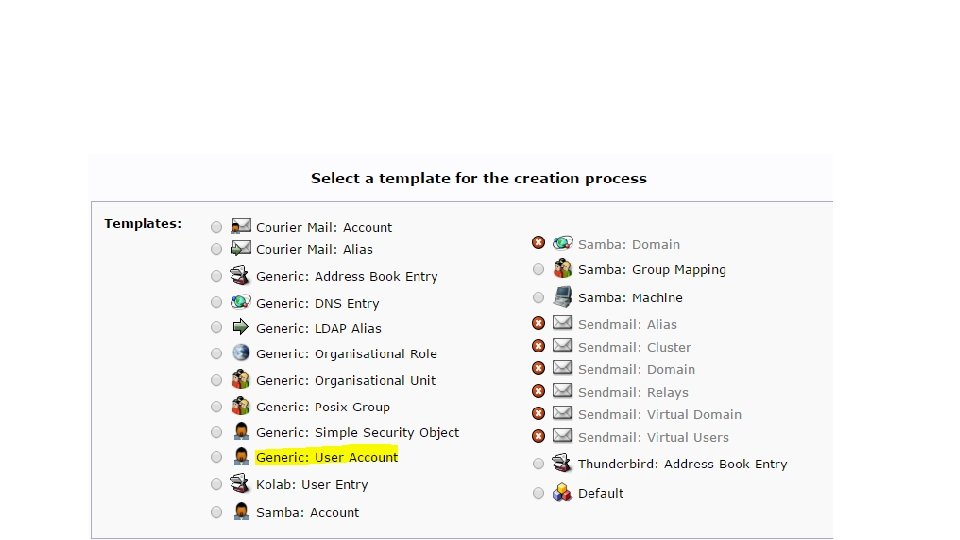
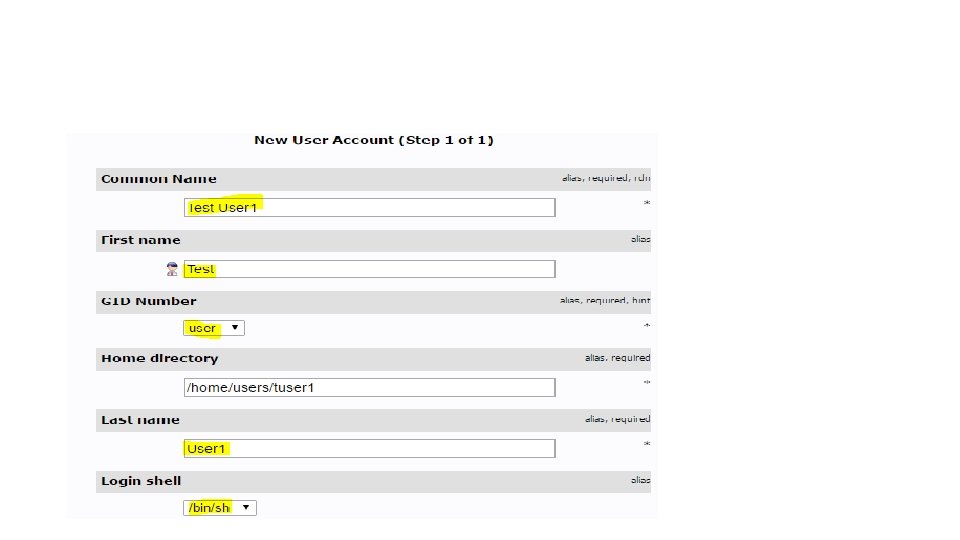
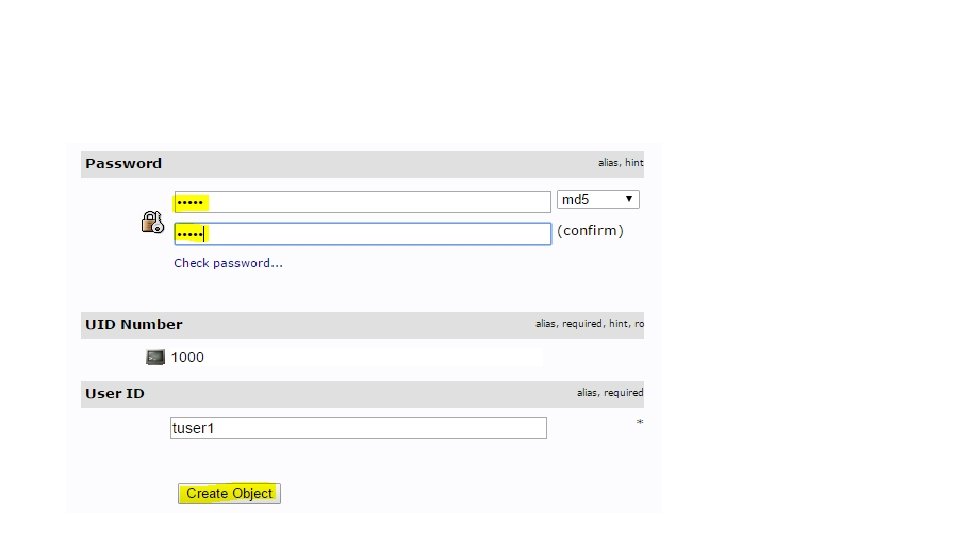
• Create Users • Next, we will create users to put in these groups. Start by clicking on “ou=users” category. Click on Create a child entry. • We will choose “Generic: User Account” for these entries • We will be given a lot of fields to fill out: • The picture below shows the template to be filled