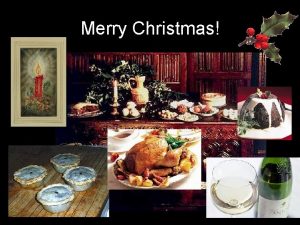
Christmas Cards A three lesson French project incorporating


- Slides: 20

Christmas Cards A three lesson French project, incorporating Design Technology. Di Russ St Mary’s CEVAP, Woodbridge

Introduction This project is based on a Christmas card design regularly used at St Mary’s school. However, instead of the usual British Christmas images, it uses images from French Christmas traditions to create a 6 x 4 grid of pictures, in a diagonal pattern. . During the project, the French vocabulary for classroom equipment, and French instructions for measuring and folding the card are also used. The aim of this project is therefore to teach French to Year 3: incorporating the history/culture of French Christmas traditions, some numeracy, some DT, songs, common classroom instructions and equipment vocabulary. (The following example used the history of the ‘Sapin de Nöel’ and the story of St Nicolas. )

Objectives French • To learn the French vocabulary for common classroom equipment, shapes and colours. • To become familiar with, and confident in using, the French vocabulary for common classroom equipment, shapes and colours. • To learn common French phrases for classroom instructions • To become familiar with, and confident in using common French phrases for classroom instructions. • To recognise and use some words in written form. Other • To create a grid pattern, measuring accurately. To identify required 2 D shapes. (Numeracy) • To learn about French culture (Christmas traditions) through stories, songs (Music), food. (RE/History) • To design a French Christmas card, using a grid, and to practise folding. (DT)

Project-specific Resources (NB other resources could be used to deliver the same objectives) (other traditions could also be used instead eg le Père Noel (Father Christmas), La Chandeleur (Candlemas/Pancake Day), Mardi Gras (Shrove Tuesday), Pâques (Easter)) (French books can be obtained online from Amazon: www. amazon. fr /www. amazon. co. uk and Proxis: www. proxis. be, and French bookshops eg FNAC: www. fnac. com. Biscuits and postcards can be bought in French Christmas markets eg Lille) (See overview for generic resources eg pencils, rulers) Sapin de Nöel – There are many useful internet sites available. Type ‘Sapin de Nöel’ into Google. Two used in 2007 were: www. joyeux-noel. com and www. noel-vert. com Also Christmas Tree / Sapin de Nöel – Wikipedia Excellent books are: • Mme Nöel – story by Roger Hargreaves, from the Mr Men series – about a brother and sister Christmas Tree, and Father Christmas. (pub Hachette Jeunesse) ISBN: 978 -2 -01 -225199 -1 • Nöel – a book on French Christmas traditions. ISBN: 2 -07 -059191 -3 St Nicolas – again, type ‘St Nicolas’ into Google. • French postcards of St Nicolas • Biscuits in the shape of St Nicolas to share, and Spéculoos biscuits (mentioned in the following book) • Bonjour, Saint-Nicolas! – wonderful story by Kathleen Amant (pub Petit train, Editions Mijade) ISBN: 2 -87142 -586 -8 • La Merveilleuse légende de Saint Nicolas - lots of information and stories about St Nicolas by Corimme Albaut and Sylvie Pierre. Includes CD of stories and songs. (pub Actes Sud Junior) ISBN: 978 -2 -7427 -7007 -6

Lesson sequence Lesson 1 - The history of the ‘Sapin de Nöel’ Lesson 2 - The story of St Nicolas Lesson 3 - Making the cards

Lesson 1 Tell the children the history of the ‘Sapin de Nöel’, but make it fun: 1 • Long ago, in the 11 th century, special Mystery plays were performed, in which a ‘branch of Paradise’ appeared, decorated with red apples, roses, fruits and wheat. Evergreen branches were said to represent the Tree of Life and the apple, from the garden of Eden, and 24 th December used to be called the night of Adam and Eve. People used to decorated their houses three days before Christmas Eve, on the night of St Thomas, 21 st December. • The Christmas tree first appeared in France in Alsace (a region of France) in 1521 (round about King Henry VIII’s time!), and as people from Alsace moved around France, they took the tradition with them. The first tree at the Palace of Versailles came in 1738. Trees were always put up on 24 th December, and taken down on 5 th January (Epiphany). Later, a star was put on the top, to represent the star the three kings followed to Bethlehem at Epiphany.

2 • Wax for candles was expensive, so instead the lights on the trees were small nut shells, filled with oil, with a lock of hair as a wick. • In 1858 there was such a bad winter that there were no apples to put on the trees. So a clever glassblower had the idea of making glass balls that looked like apples. And so the Christmas glass bauble began! • Electric lights were around from 1880 (Queen Victoria’s time), but were very expensive, so many people used candles, even until the end of the Second World War. • Draw out the differences between the old tree with apples and nut shells on, and the modern tree with baubles and electric (fairy) lights on. • Tell the children a story about a Christmas Tree (possibly ‘Mme Nöel’ – a story in French by Roger Hargreaves, from the Mr Men series – about a brother and sister Christmas Tree, and Father Christmas. )

• Talk about the shapes in a tree – triangle for the tree, square for the base, star on the top, rectangle for the trunk, and teach the French vocabulary (see overview). Revise the colours (vert-green tree, marron-brown trunk, jaune-yellow star, rouge-red base). 3 • Finally encourage the children to draw a Christmas tree, either the old type, the modern type, or even both! Ask them to draw decorations, and to colour the tree, and then to label as many of the features as possible. Assist with vocabulary, and encourage the children to use the French terms. (See example IWB page from SMART Notebook)

Example: Christmas tree IWB instructions – created in SMART Notebook

Outcome – examples of children’s pictures (to use as reference later) Top of old type of tree - with nutshells and apples. Modern tree - with tinsel and baubles. Modern tree - with baubles. (Children have also used shapes and colours. )

Lesson 2 -The story of St Nicolas • Read any story about St Nicolas (eg ‘Bonjour, Saint-Nicolas!’). Comment on the differences between Father Christmas and St Nicholas. Eg shoes for presents, special biscuits, he is a bishop, he holds a crook, he rides on a donkey, he does not have an elf but he has a helper (Père Fouettard). • Sing any songs about St Nicolas (eg from ‘La Merveilleuse légende de Saint Nicolas’ – ‘La chanson de St Nicolas’ (track 3) and ‘La chanson de l’âne’ (track 5) – great fun!) • Look at postcards or other pictures of St Nicolas, or any other information (eg from websites) • Sample biscuits (in the shape of St Nicolas, and Spéculoos biscuits (named in the story) if possible. • Finally encourage the children to draw St Nicolas, and possibly his donkey. Ask them to draw his mitre and crook, and to colour the picture correctly. Assist by reminding the children of the story, and prompting them with the differences between St Nicolas and Father Christmas.

This story can be read to the children in French, and then translated into English as you read it.

Sample page of book

Outcome 1 – examples of children’s pictures (to use later)

Outcome 2 – examples of children’s pictures, and postcards (to use as reference later)

Lesson 3 - Making the cards 1 • Revise the names of common classroom equipment with the children, such as eraser, ruler, pencil etc (see overview for vocabulary). • Revise simple instructions such as ‘Listen!’, ‘pick up the pencil!’ etc (see overview for phrases). • Show a demonstration card, already marked out. Show to fold the A 4 sheet in half to make a card, and then how to fold the front of the card in half, and then in half again, to create three equally spaced vertical lines (see sheet on following slide). • Show to measure 3. 5 cm six times along each long edge of the front of the card, to create five equally spaced horizontal lines. • Try to give all the instructions in French (!), and encourage the children to ask for equipment in French as much as possible. Try to give all measurements in French. Encourage the children, and repeat in English as required.

2 • Encourage the children to choose four pictures to use on their card. They are only allowed to use pictures from the topics they have studied (eg history of the Sapin de Nöel (tree, bauble, candle, nutshell, star) and the story of Saint Nicolas (mitre, crook, shoe, spéculoos biscuit, donkey)) for their design. (Give out the pictures they did in lessons 1 and 2 as a reference to aid their choice. ) • Demonstrate how to place each picture in a grid pattern, and then allow the children to make their card, assisting where necessary. Some children may choose to alter the grid pattern to make their cards more individual! • Finally, demonstrate how to write Merry Christmas and a Happy New Year in French inside the card (see finished example), and help the children to add the greeting to their cards. • Take photos of the finished cards for reference, and congratulate the children! Discuss what was easy/hard, and check that they can explain to their family why they chose the pictures(explain the stories/history), and what the French means!

Shows layout of card

Outcome – children create a French card, and take it home. À Maman (To Mum) Joyeux Noël et Bonne Anneé (Merry Christmas and a Happy New Year) De Alice (From Alice) Front of card Inside of card

Further examples of finished cards.
 French christmas card vocabulary
 What is a source card
 How to write a card in german
 Incorporating the change
 Picking up and incorporating dna from dead bacterial cells
 Nested quotations
 Incorporating pronunciation
 Incorporating in ohio
 Methods of incorporating risk in capital budgeting
 Christmas bells those christmas bells
 Civil war trading cards project
 Viva project black screen
 Lesson eight credit cards
 Christmas objectives
 Flossies kitten rescue
 The three estates of french revolution
 Three estates cartoon
 Three estates of french revolution
 Cause of the french revolution
 Possessive pronouns in french
 French lesson 3
