Weaving Art 2200 History of Weaving Weaving is


. Click")


- Slides: 27
Weaving Art 2200
History of Weaving • • Weaving is the method of fabric production in which two distinct sets of yarns or threads are interlaced at right angles to form a fabric or cloth. It has been around for thousands of years. Click to edit the outline text format Second Outline Level Third Outline Level Fourth Outline Level Fifth Outline Level Sixth
• Weaving looms could be found all over Asia, Africa and Europe (around 700 AD). Click to edit the outline text format Second Outline Level • By medieval times weaving was the most important of the craft trades. Third Outline Level Fourth Outline Level Fifth Outline Level Sixth
• The industrial revolution saw the invention of the power loom (before everything had been woven Click to edit the outline by hand). text format • The Jacquard loom allowed complicated patterns to be woven using punch cards to determine which threads of colored yarn should appear on the upper side of the cloth. Second Outline Level Third Outline Level Fourth Outline Level Fifth Outline Level Sixth
• • In many European countries, carpets were woven as a valuable item for trading and to show social status. Rich Persians often owned rugs made of silk or velvet. Click to edit the outline text format Second Outline Level Third Outline Level Fourth Outline Level Fifth Outline Level Sixth
• Pieces depicting flowers and other types of vegetation were made in urban areas for the elite members of society.
• Geometric patterns were usually made by craftspeople in rural areas.
Navajo Weavings
• • Navajo weavings are highly regarded and have been sought after as trade items for over 150 years. They usually have strong geometric patterns. Click to edit the outline text format Second Outline Level Third Outline Level Fourth Outline Level Fifth Outline Level Sixth
• • In 1850, these highly prized trade items sold for $50 in gold, a huge sum at that time. Today many Navajo rugs go for thousands of dollars. Click to edit the outline text format Second Outline Level Third Outline Level Fourth Outline Level Fifth Outline Level Sixth
• Navajo weaving coloration was mostly natural brown, white, and indigo (blue-purple). Click to edit the outline text format Second Outline Level • Colours eventually included red, black, green, yellow, and gray. Third Outline Level Fourth Outline Level Fifth Outline Level Sixth
• Many contemporary Navajo weavers depict imagery that relates to our society today.
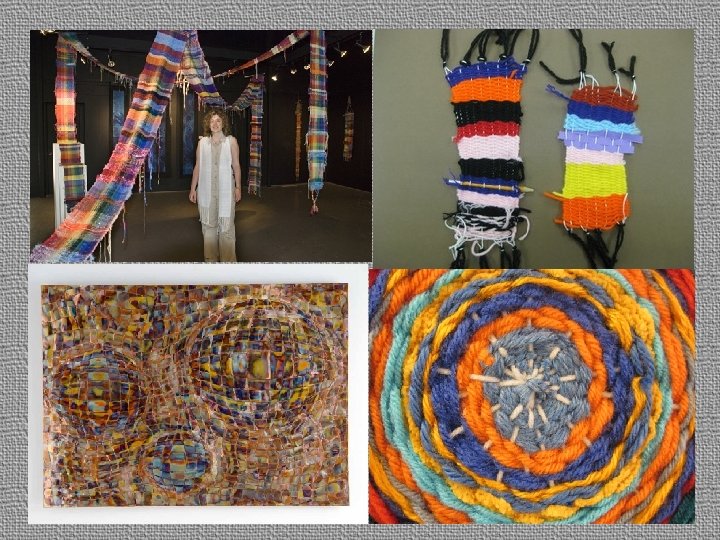
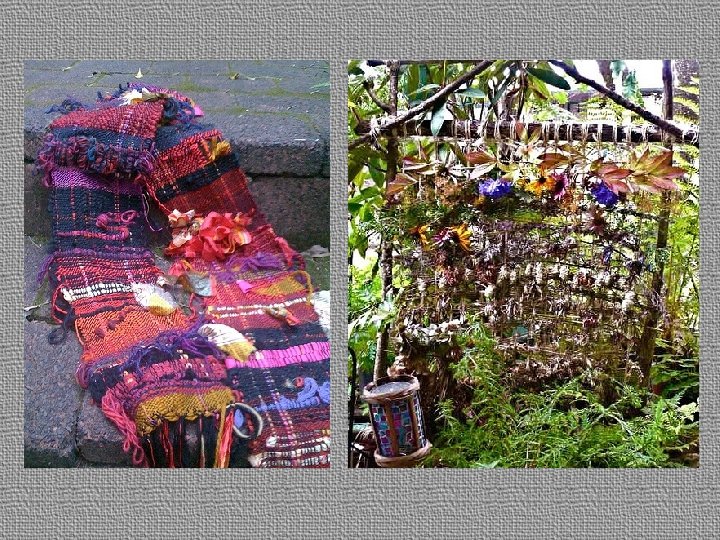
Contemporary Weavings by Textile Artists
How to Weave on a Cardboard Loom Step 1: Make your loom: Draw a line 1 cm in on every side of the loom. These will be your guides and will make holding it a little easier. Now, you'll draw the lines for the notches! In most cases you want these to be 0. 5 cm (5 mm) apart. Start at the 1 cm line, and make marks every 0. 5 cm all the way across the top and the bottom of the loom. Cut on the marks, stopping at the 1 cm line you've drawn.
Step 1: Make your loom:
Step 2: Stringing the Loom Choose a thinner, smooth yarn for this part. With the marked side of the loom facing up, thread a bit of yarn into the first notch on the upper left side. There should be a tail of a few inches on the back side of the loom. Tape this to the back of the loom. Carry the thread down to the bottom left notch on the loom and pull it into that notch. Bring the thread back over to the front by bringing it up through the notch directly to the right of the leftmost bottom notch. Continue doing this all the way across the loom. The front side of the loom with have yarn going from notch to notch, the back side of the loom will just be small segments of yarn looped around the notches. Leave a tail of the end of the yarn and also tape that to the back of the loom.
Step 2: Stringing the Loom
Step 3: Weaving Cut a length of yarn and thread the yarn through the needle. You'll be using the needle to guide the yarn through the loom in an under-over pattern. (Under the first string, over the second, under the next, etc. ) Once the needle has passed through all of the strings, pull the yarn through and leave a tail of a few inches at the end. Push the yarn up on the loom so that it's about 1 cm away from the notches. Bring the needle and yarn back through the loom from the side you just exited using an over-under pattern that's the opposite of your first line and pull the yarn through. Push the second line of yarn up to meet the first.
Step 3: Weaving
Step 4: Tucking in all the loose ends So you've filled up your loom, but now you've got lots of crazy yarn ends everywhere. We're going to use the needle to tuck these ends down into the sides of the weaving. Thread the end of the yarn through the needle. Insert the needle into the side of the weaving, on the outside edge of the string. Pull the needle through the edge of the weaving Pull the yarn through, pull it tight, and cut off the end. Use your fingers to rub the edges of the weaving and make things look nice and neat. Try to pull the ends of yarn through weaving of the same color. It'll help disguise the ends.
Step 4: Tucking in all the loose ends
Step 5: Taking it off the loom Remove the tape from the long strings on the back of the loom. Release the top loops first, and then the bottom. Hold the weaving near the top, and pull up on the top loops. You want to pull the string through the weaving, so that the bottom loops are brought up to be flush with the bottom of the weaving, and the top loops gain extra length. Once the weaving is scooted down to the very bottom of the strings, you can cut the top loops in the middle and tie those off.
Step 5: Taking it off the loom
Step 6: Finishing your weaving! After tying off the loops, you'll still have two long strings to take care of. We're going to deal with them like we did with the loose ends. The only difference here is that you will want to bring the string over the first row of the weaving and then push it through the side. By looping it over the top row of the weaving, you keep the string from getting pulled completely out of the weaving. You kinda have to anchor it in there. And now you're done! Enjoy your coaster, placemat, loincloth, pin cushion or other completely awesome thing you've just woven.
Step 6: Finishing your weaving!