The prototype of high stiffness load cell for
- Slides: 14

The prototype of high stiffness load cell for Rockwell hardness testing machine calibration according to ISO 6508 -2: 2015 M Pakkratoke 1 and T Sanponpute 2 1, 2 National Institute of Metrology (Thailand), 3/4 -5 Moo 3, Klong 5, Klong Luang, Pathumthani, Thailand 12120 email: 1 montree@nimt. or. th, 2 tassanai@nimt. or. th 1 “I AM NIMT”

Outline “I AM NIMT” 1. Introduction to the verification of hardness machine 2. Force verification of hardness testing machine 3. Conceptual design of High Stiffness Load Cell 4. Experiment results 5. Conclusion 2

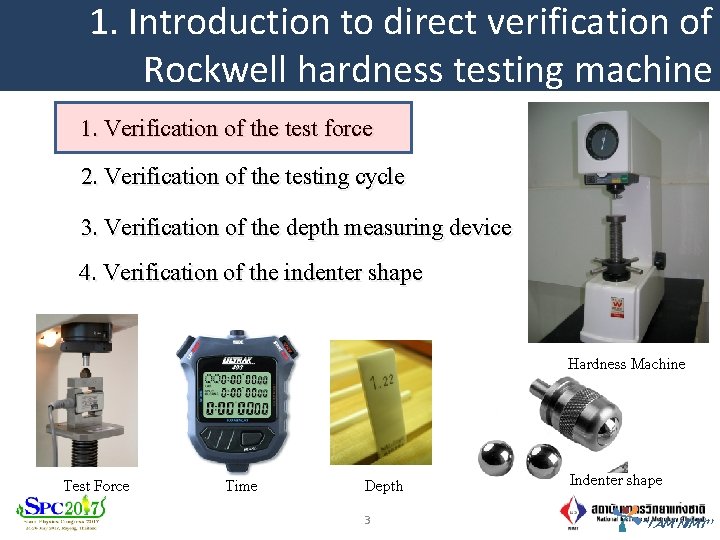
1. Introduction to direct verification of Rockwell hardness testing machine 1. Verification of the test force 2. Verification of the testing cycle 3. Verification of the depth measuring device 4. Verification of the indenter shape Hardness Machine Test Force Time Depth 3 Indenter shape “I AM NIMT”

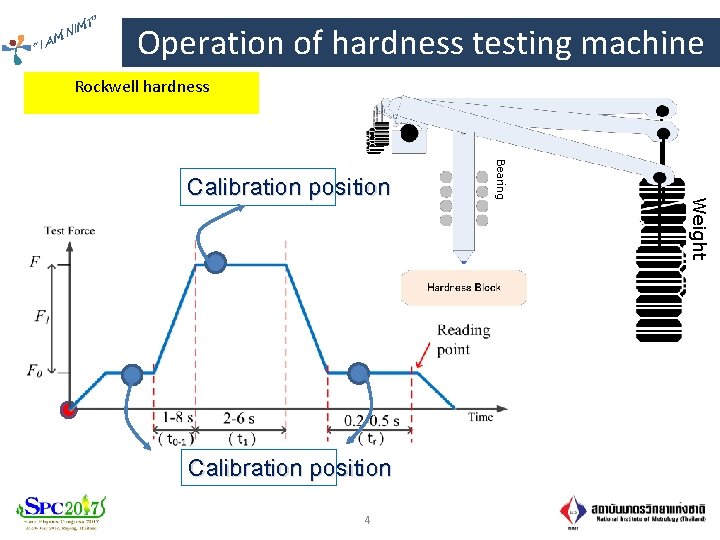
” IMT N M “I A Operation of hardness testing machine Rockwell hardness 4 Weight Calibration position Bearing Calibration position

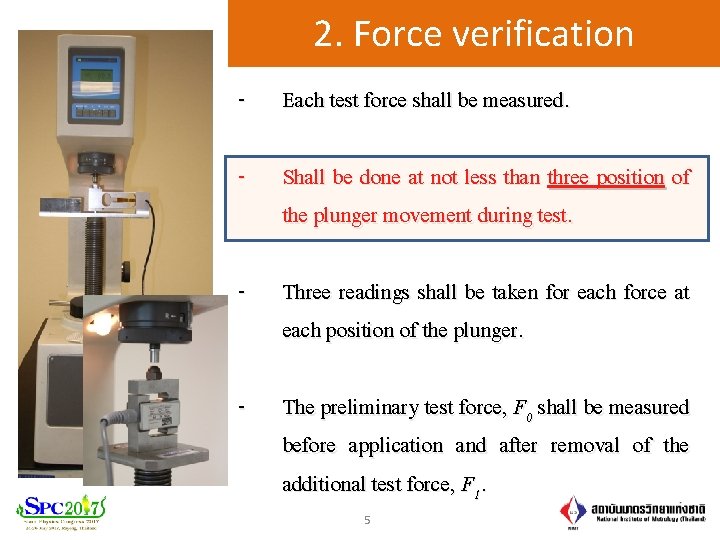
2. Force verification “I AM NIMT” - Each test force shall be measured. - Shall be done at not less than three position of the plunger movement during test. - Three readings shall be taken for each force at each position of the plunger. - The preliminary test force, F 0 shall be measured before application and after removal of the additional test force, F 1. 5

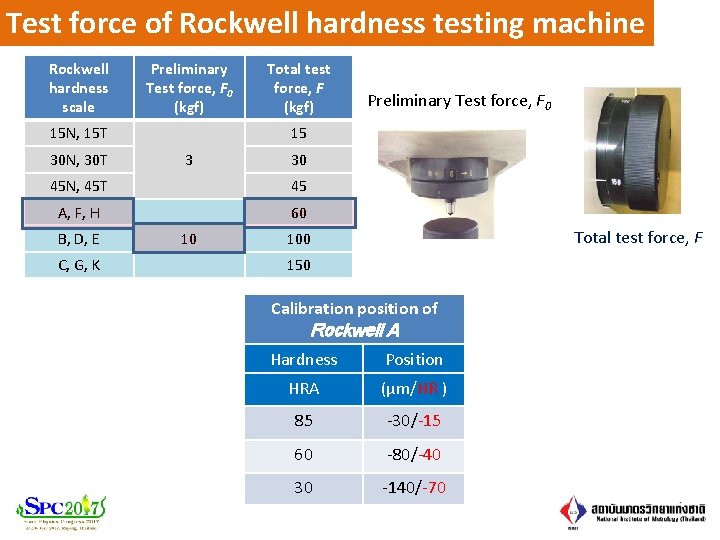
Test force of Rockwell hardness testing machine Rockwell hardness scale Preliminary Test force, F 0 (kgf) 15 N, 15 T 30 N, 30 T Total test force, F (kgf) 15 3 30 45 N, 45 T 45 A, F, H 60 B, D, E C, G, K Preliminary Test force, F 0 10 Total test force, F 100 150 Calibration position of Rockwell A Hardness Position HRA (µm/HR ) 85 -30/-15 60 -80/-40 30 -140/-70

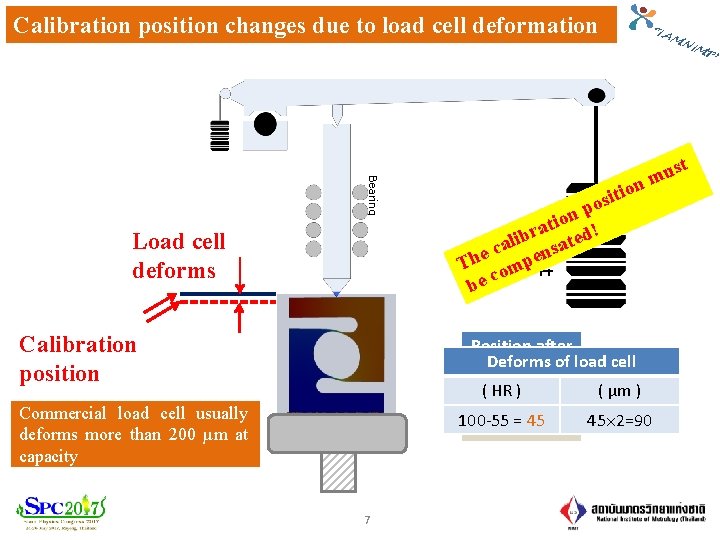
Calibration position changes due to load cell deformation Calibration position Position after Reference Deforms. F of load cell applied position 1 ( HR(HR) ) ( µm ) 100 -55 55 = 45 45 2=90 100 Commercial load cell usually deforms more than 200 µm at capacity 7 NIM T” st u m p n o i at d! r b li te a a c s n The ompe c be Weight Bearing Load cell deforms on i t i os “I A M

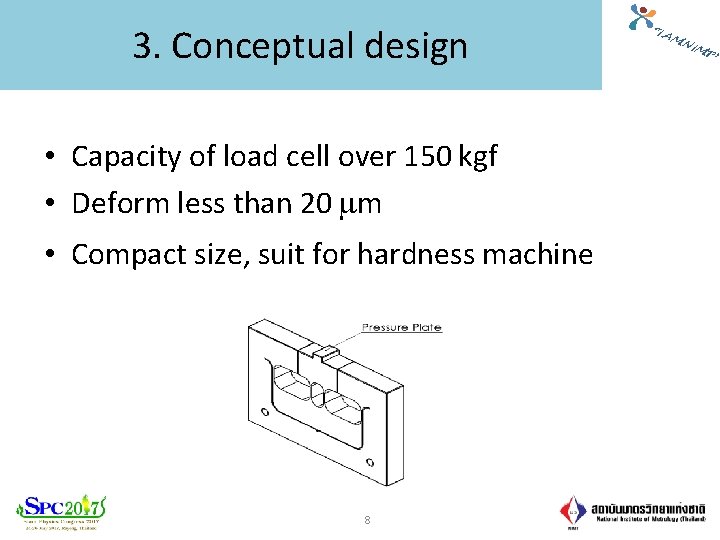
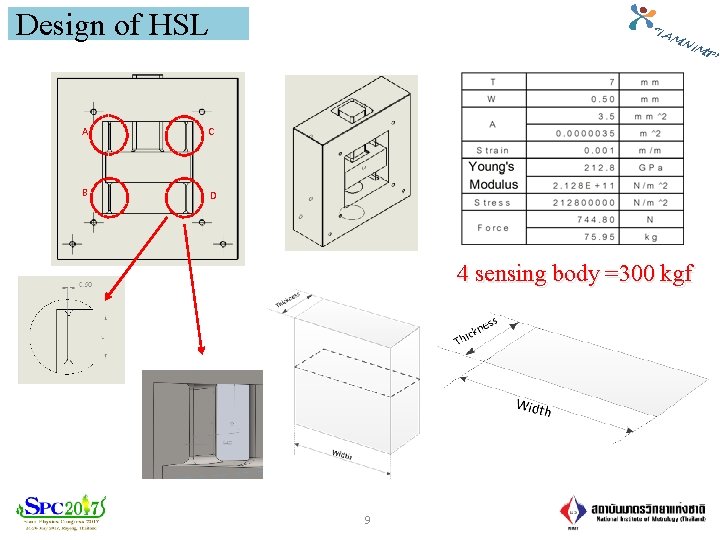
3. Conceptual design • Capacity of load cell over 150 kgf • Deform less than 20 m • Compact size, suit for hardness machine 8 “I A M NIM T”

Design of HSL “I A M A C B D NIM T” 4 sensing body =300 kgf 9

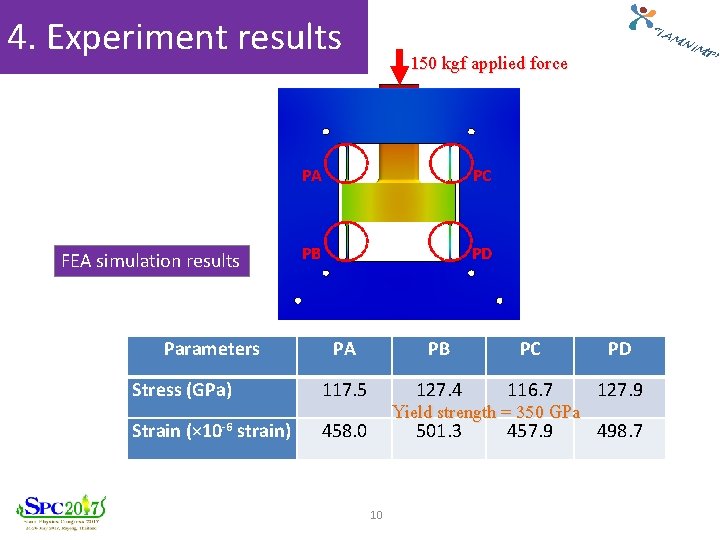
4. Experiment results FEA simulation results Parameters Stress (GPa) Strain (× 10 -6 strain) “I A M 150 kgf applied force PA PC PB PD PA PB PC PD 117. 5 127. 4 116. 7 127. 9 501. 3 457. 9 498. 7 Yield strength = 350 GPa 458. 0 10 NIM T”

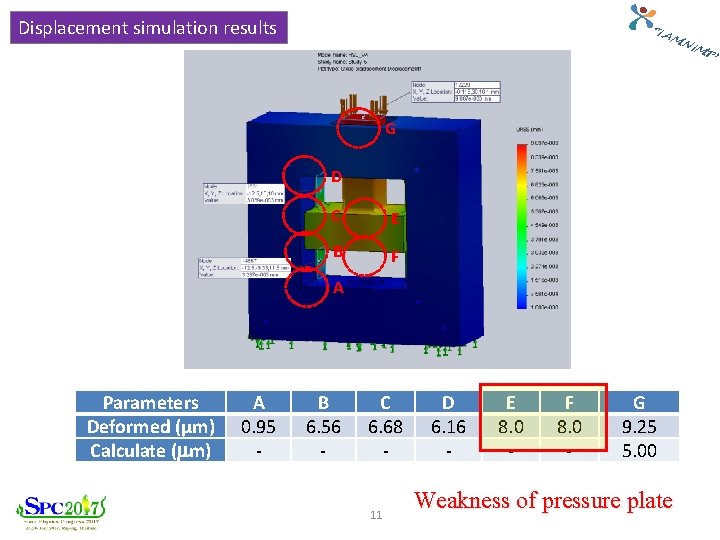
Displacement simulation results “I A M G D C E B F A Parameters Deformed (µm) Calculate (mm) A 0. 95 - B 6. 56 - C 6. 68 11 D 6. 16 - E 8. 0 - F 8. 0 - G 9. 25 5. 00 Weakness of pressure plate NIM T”

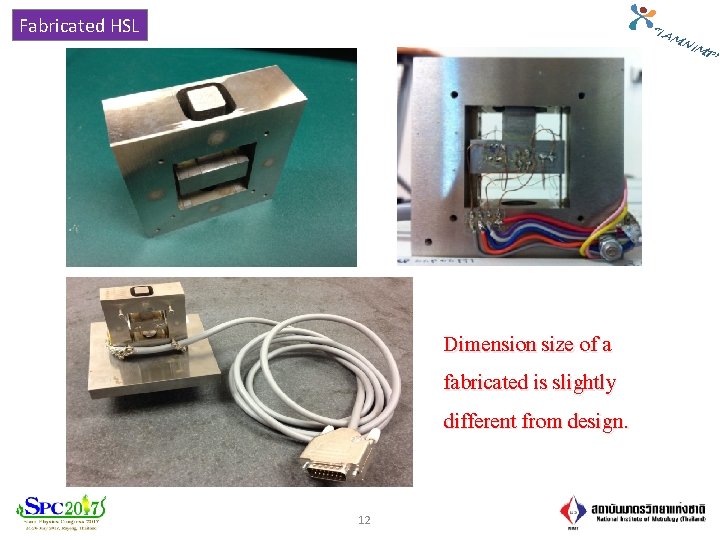
Fabricated HSL “I A M Dimension size of a fabricated is slightly different from design. 12 NIM T”

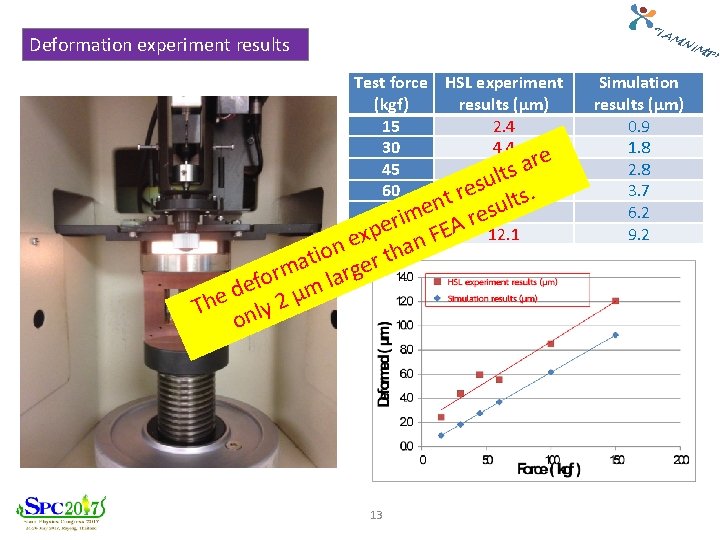
“I A M Deformation experiment results Test force HSL experiment (kgf) results (µm) 15 2. 4 30 4. 4 e r a 45 5. 9 lts u s 60 re 5. 6 lts. t n u 100 ime 8. 5 s e r er FEA 12. 1 p 150 x e n n a o h i t t a er m g r r efo µm la d The nly 2 o 13 NIM T” Simulation results (µm) 0. 9 1. 8 2. 8 3. 7 6. 2 9. 2

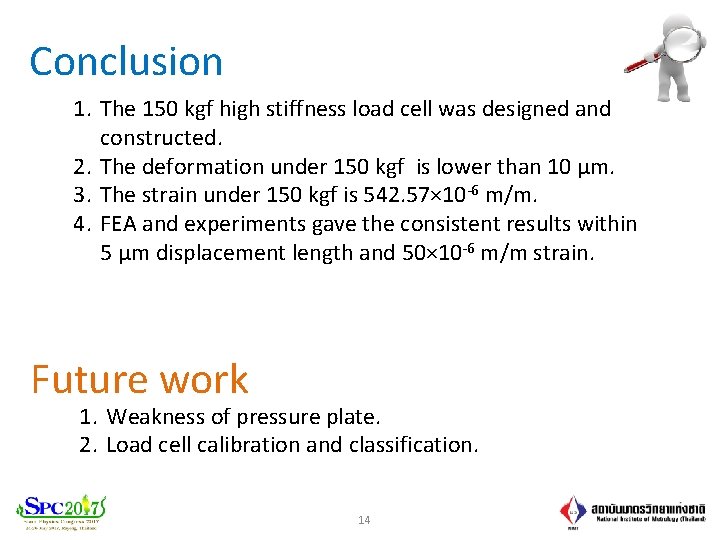
Conclusion 1. The 150 kgf high stiffness load cell was designed and constructed. 2. The deformation under 150 kgf is lower than 10 µm. 3. The strain under 150 kgf is 542. 57× 10 -6 m/m. 4. FEA and experiments gave the consistent results within 5 µm displacement length and 50× 10 -6 m/m strain. Future work 1. Weakness of pressure plate. 2. Load cell calibration and classification. 14