Straw manufacturing conditions and QC tape and straw
- Slides: 22

Straw manufacturing conditions and QC • tape and straw parameters specification • conditions of straw production • QC: • straw parameters measurement results • overpressure test at d. P=3 Bar • seam QC by microscope • conclusion Presented by S. Movchan 07 -Oct-20 S. Movchan Straw manufacturing and QC 1

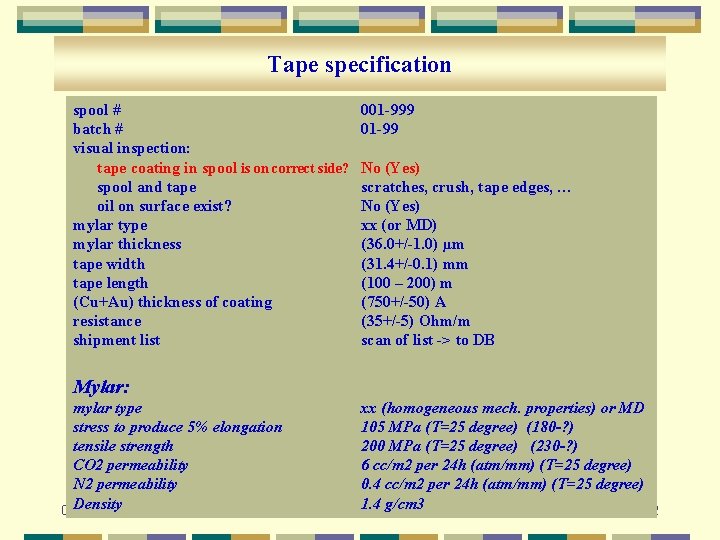
Tape specification spool # batch # visual inspection: tape coating in spool is on correct side? spool and tape oil on surface exist? mylar type mylar thickness tape width tape length (Cu+Au) thickness of coating resistance shipment list 001 -999 01 -99 No (Yes) scratches, crush, tape edges, … No (Yes) xx (or MD) (36. 0+/-1. 0) µm (31. 4+/-0. 1) mm (100 – 200) m (750+/-50) A (35+/-5) Ohm/m scan of list -> to DB Mylar: mylar type xx (homogeneous mech. properties) or MD stress to produce 5% elongation 105 MPa (T=25 degree) (180 -? ) tensile strength 200 MPa (T=25 degree) (230 -? ) CO 2 permeability 6 cc/m 2 per 24 h (atm/mm) (T=25 degree) N 2 permeability 0. 4 cc/m 2 per 24 h (atm/mm) (T=25 degree) S. Movchan Straw manufacturing Density 1. 4 g/cm 3 07 -Oct-20 and QC 2

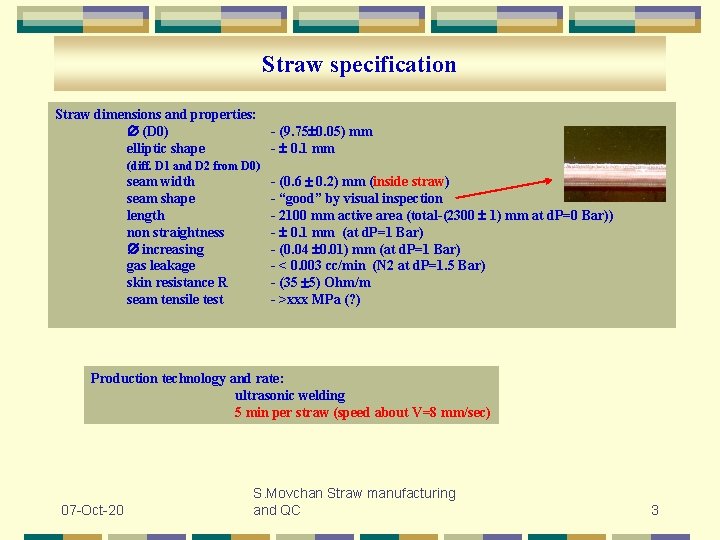
Straw specification Straw dimensions and properties: (D 0) elliptic shape - (9. 75 0. 05) mm - 0. 1 mm (diff. D 1 and D 2 from D 0) seam width seam shape length non straightness increasing gas leakage skin resistance R seam tensile test - (0. 6 0. 2) mm (inside straw) - “good” by visual inspection - 2100 mm active area (total-(2300 1) mm at d. P=0 Bar)) - 0. 1 mm (at d. P=1 Bar) - (0. 04 0. 01) mm (at d. P=1 Bar) - < 0. 003 cc/min (N 2 at d. P=1. 5 Bar) - (35 5) Ohm/m - >xxx MPa (? ) Production technology and rate: ultrasonic welding 5 min per straw (speed about V=8 mm/sec) 07 -Oct-20 S. Movchan Straw manufacturing and QC 3

Conditions of straw manufacturing 07 -Oct-20 S. Movchan Straw manufacturing and QC 4

Conditions of straw manufacturing • set up of the welding machine: • ultrasonic generator: clock F=38. 5 MHz, P=30% • head temperature: Troom+(10 -15) degree • ultrasonic head pressure to Cu/Au tape: about 270 g (position II of ribbon cord) • spool friction: ? ? (30 -50) g • tape friction: ? ? (200 -300) g • speed of straw transport mechanics: about 8 mm/sec • flush of welding zone by ionization gun at low flow • manual check seam quality by microscope with video chamber (simultaneously with welding, write file for each straw) • for each straw cut 2 samples (start and end) and to do seam test by hand (like tensile machine, across and along seam) • measurement seam width by optic microscope (requirement: W=(0. 4 -0. 8) mm) • straw internal diameter check by gouge • straw round shape check by eyes Straw manufacturing S. Movchan 07 -Oct-20 and QC 5

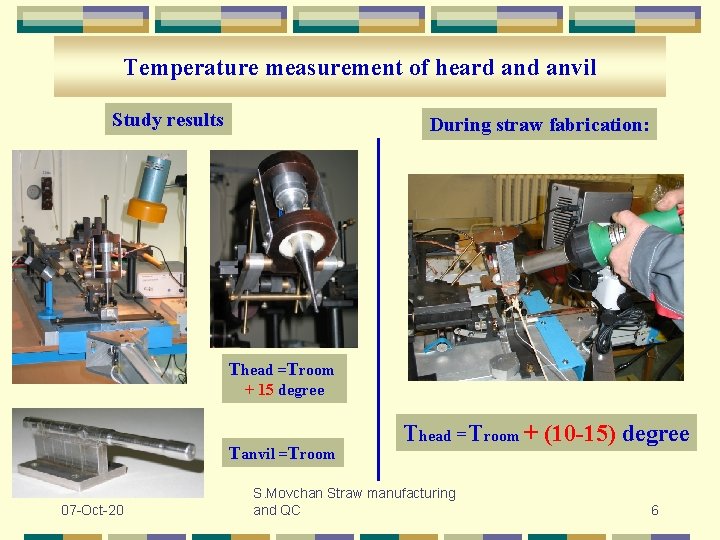
Temperature measurement of heard anvil Study results During straw fabrication: Thead =Troom + 15 degree Tanvil =Troom 07 -Oct-20 Thead =Troom + (10 -15) degree S. Movchan Straw manufacturing and QC 6

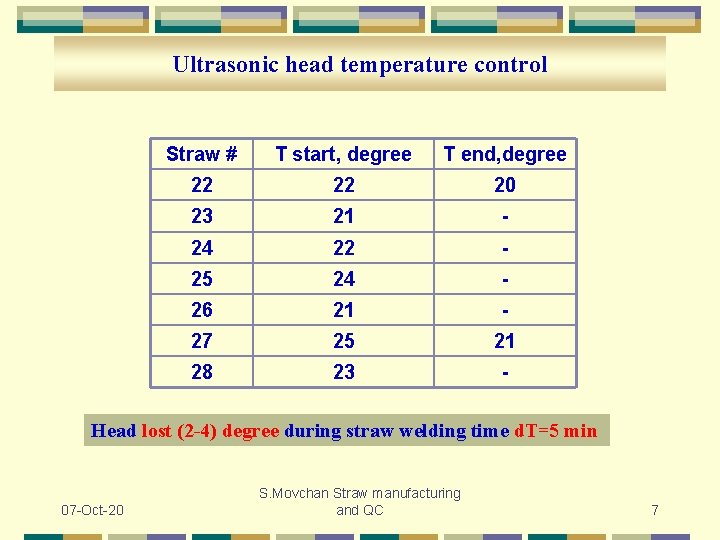
Ultrasonic head temperature control Straw # T start, degree T end, degree 22 22 20 23 21 - 24 22 - 25 24 - 26 21 - 27 25 21 28 23 - Head lost (2 -4) degree during straw welding time d. T=5 min 07 -Oct-20 S. Movchan Straw manufacturing and QC 7

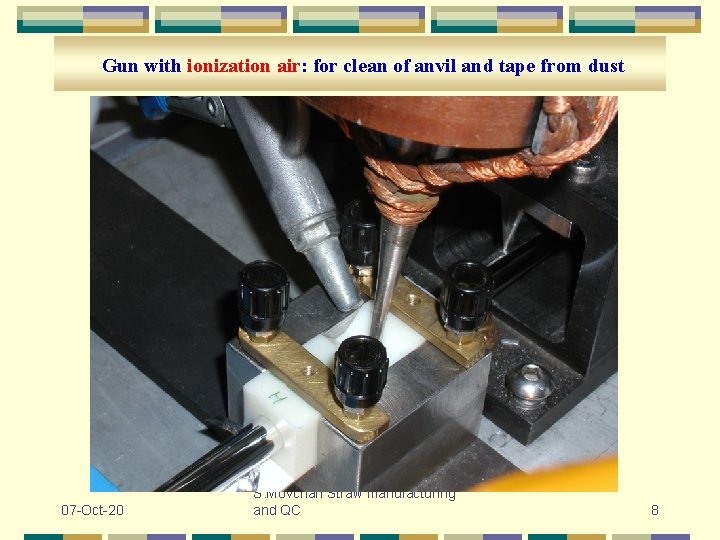
Gun with ionization air: for clean of anvil and tape from dust 07 -Oct-20 S. Movchan Straw manufacturing and QC 8

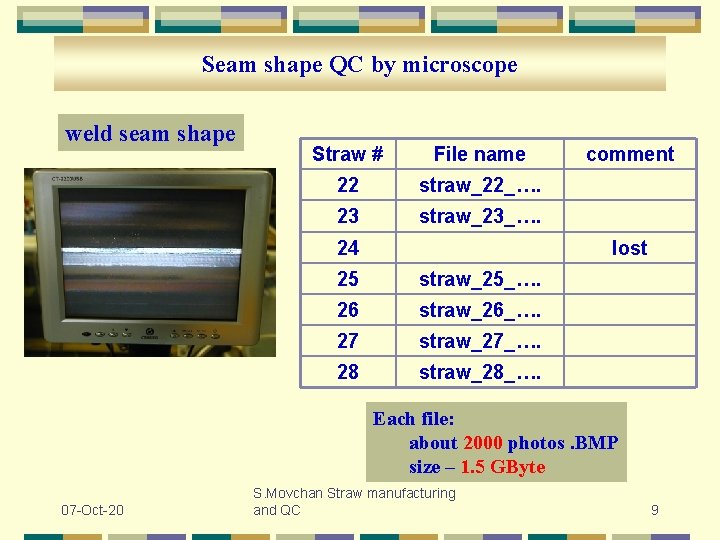
Seam shape QC by microscope weld seam shape Straw # File name 22 straw_22_…. 23 straw_23_…. 24 comment lost 25 straw_25_…. 26 straw_26_…. 27 straw_27_…. 28 straw_28_…. Each file: about 2000 photos. BMP size – 1. 5 GByte 07 -Oct-20 S. Movchan Straw manufacturing and QC 9

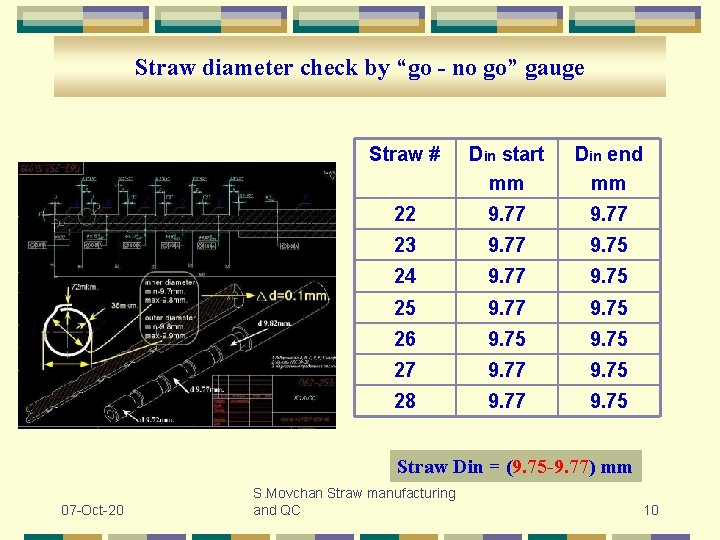
Straw diameter check by “go - no go” gauge Straw # Din start mm Din end mm 22 9. 77 23 9. 77 9. 75 24 9. 77 9. 75 25 9. 77 9. 75 26 9. 75 27 9. 75 28 9. 77 9. 75 Straw Din = (9. 75 -9. 77) mm 07 -Oct-20 S. Movchan Straw manufacturing and QC 10

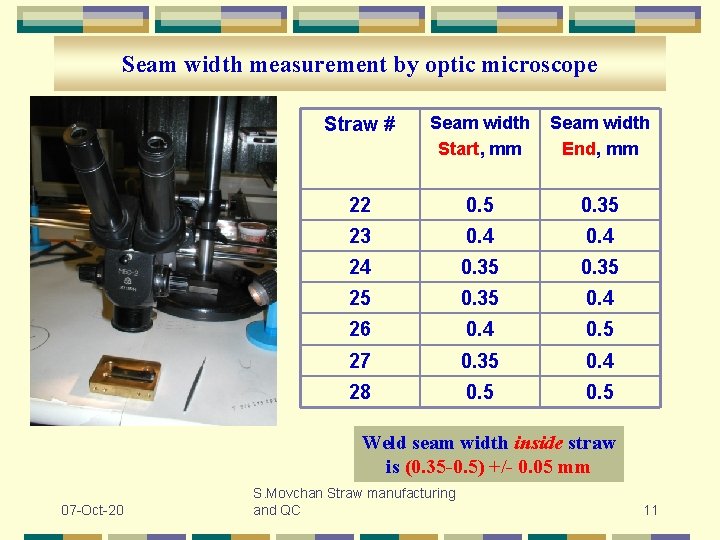
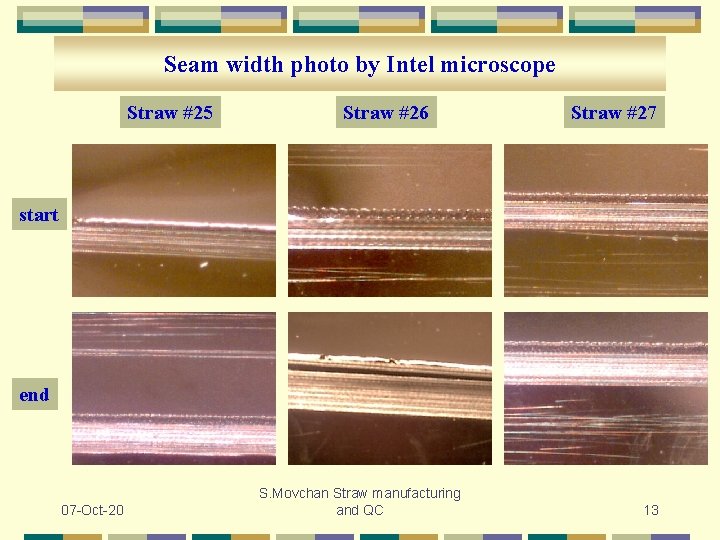
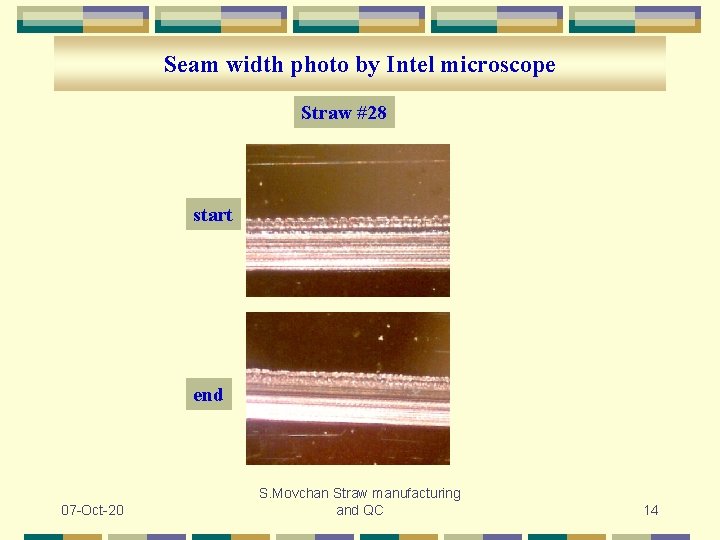
Seam width measurement by optic microscope Straw # Seam width Start, mm Seam width End, mm 22 0. 5 0. 35 23 0. 4 24 0. 35 25 0. 35 0. 4 26 0. 4 0. 5 27 0. 35 0. 4 28 0. 5 Weld seam width inside straw is (0. 35 -0. 5) +/- 0. 05 mm 07 -Oct-20 S. Movchan Straw manufacturing and QC 11

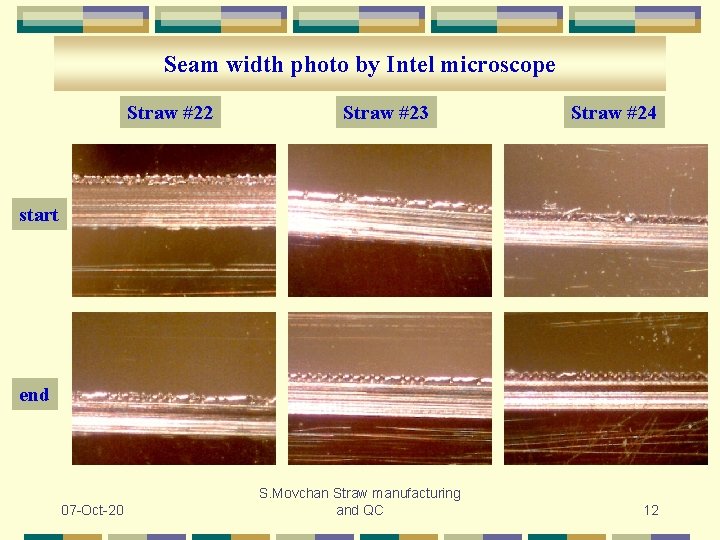
Seam width photo by Intel microscope Straw #22 Straw #23 Straw #24 start end 07 -Oct-20 S. Movchan Straw manufacturing and QC 12

Seam width photo by Intel microscope Straw #25 Straw #26 Straw #27 start end 07 -Oct-20 S. Movchan Straw manufacturing and QC 13

Seam width photo by Intel microscope Straw #28 start end 07 -Oct-20 S. Movchan Straw manufacturing and QC 14

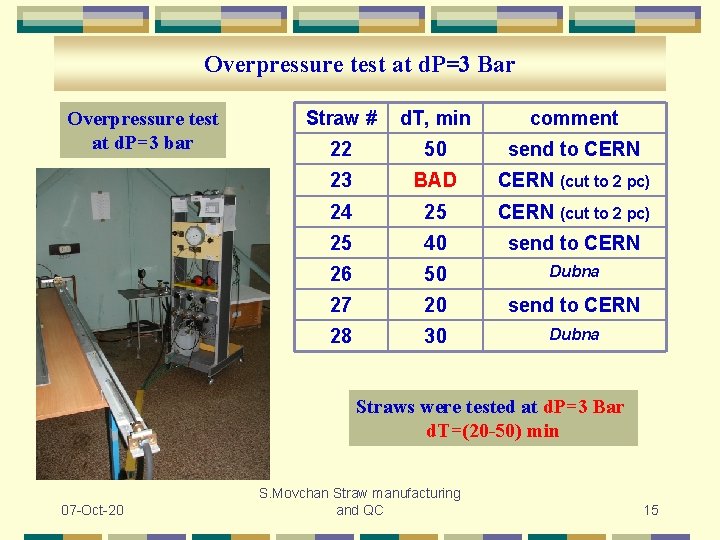
Overpressure test at d. P=3 Bar Overpressure test at d. P=3 bar Straw # d. T, min comment 22 50 send to CERN 23 BAD CERN (cut to 2 pc) 24 25 CERN (cut to 2 pc) 25 40 send to CERN 26 50 Dubna 27 20 send to CERN 28 30 Dubna Straws were tested at d. P=3 Bar d. T=(20 -50) min 07 -Oct-20 S. Movchan Straw manufacturing and QC 15

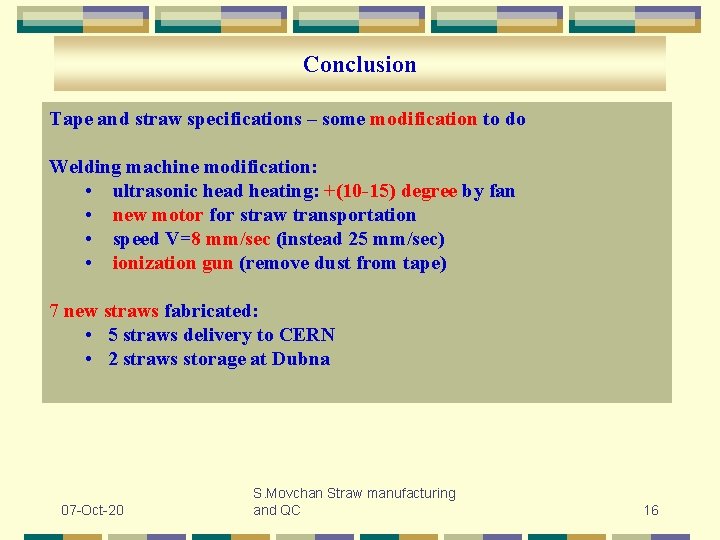
Conclusion Tape and straw specifications – some modification to do Welding machine modification: • ultrasonic head heating: +(10 -15) degree by fan • new motor for straw transportation • speed V=8 mm/sec (instead 25 mm/sec) • ionization gun (remove dust from tape) 7 new straws fabricated: • 5 straws delivery to CERN • 2 straws storage at Dubna 07 -Oct-20 S. Movchan Straw manufacturing and QC 16

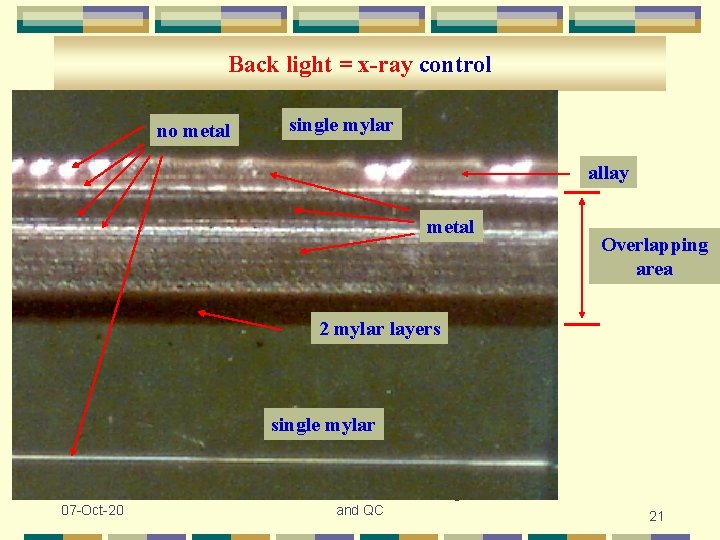
Spare Seam control by microscope: back light = x-ray control 07 -Oct-20 S. Movchan Straw manufacturing and QC 17

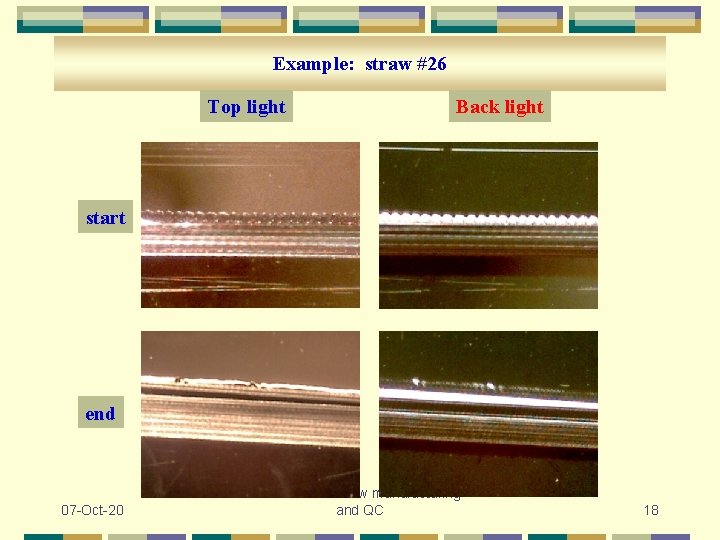
Example: straw #26 Top light Back light start end 07 -Oct-20 S. Movchan Straw manufacturing and QC 18

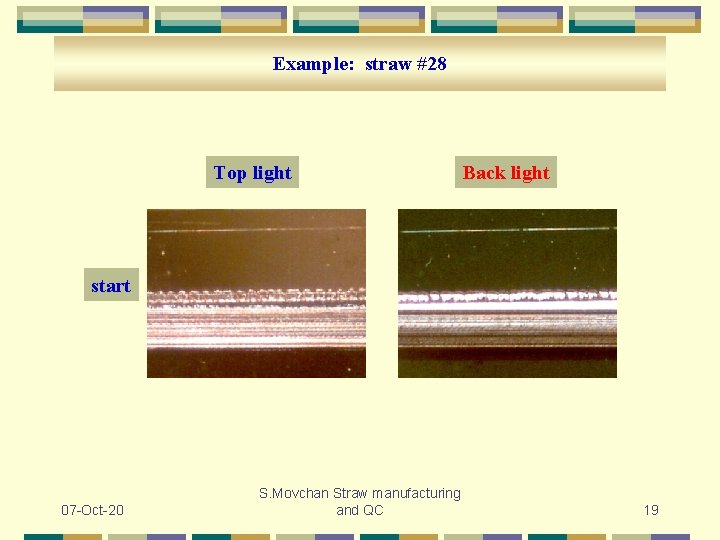
Example: straw #28 Top light Back light start 07 -Oct-20 S. Movchan Straw manufacturing and QC 19

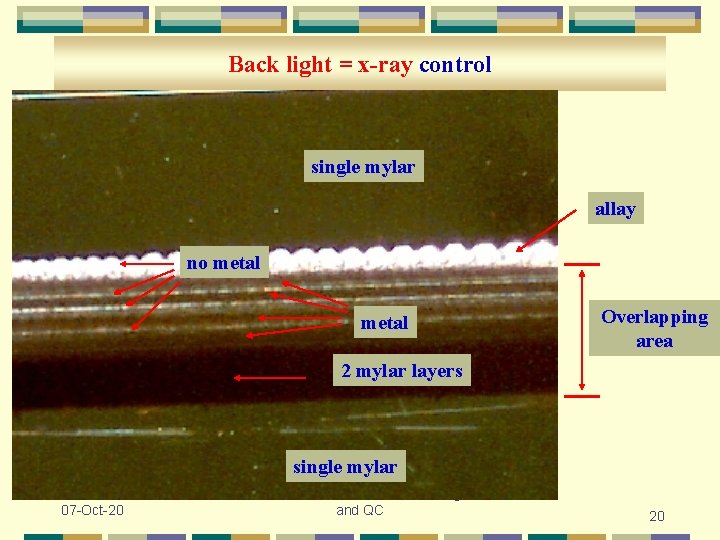
Back light = x-ray control single mylar allay no metal Overlapping area 2 mylar layers single mylar 07 -Oct-20 S. Movchan Straw manufacturing and QC 20

Back light = x-ray control no metal single mylar allay metal Overlapping area 2 mylar layers single mylar 07 -Oct-20 S. Movchan Straw manufacturing and QC 21

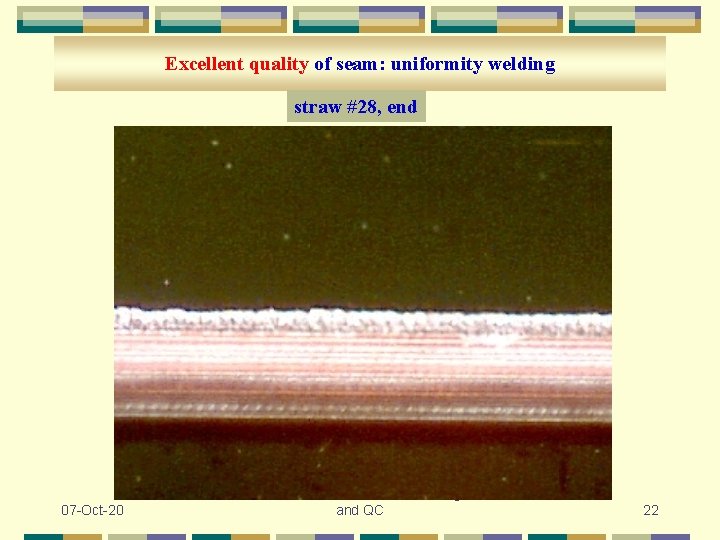
Excellent quality of seam: uniformity welding straw #28, end 07 -Oct-20 S. Movchan Straw manufacturing and QC 22