Industrial Informatics Course 6 Windows Presentation Foundation WPF
")


 - allows developers to easily build")


![Ø References: [1] WPF Tutorial: https: //www. tutorialspoint. com/wpf/ [2] Connection to a database:](https://slidetodoc.com/presentation_image_h2/5859e50db159ed3afb4b5cf9931e4e50/image-25.jpg "Ø References: [1] WPF Tutorial: https: //www. tutorialspoint. com/wpf/ [2] Connection to a database:")

- Slides: 26
Industrial Informatics Course 6 Windows Presentation Foundation (WPF)
Topics Ø WPF – Overview Ø WPF – Hello World Ø WPF – XAML Overview Ø WPF - Controls Ø WPF – Layouts Ø WPF – Data Binding
q WPF - Overview https: //www. tutorialspoint. com/wpf/ Ø WPF – Windows Presentation Foundations – a powerful framework for developing Windows applications Ø WPF was first introduced in. NET Framework 3. 0, then so many other features were added in the subsequent. NET framework versions Ø WPF – advantages: • Separate behaviour from the designer code - UI elements designed in XAML - behaviours – implemented in procedural languages – C# or VB. NET => programmers can work in parallel with the designers • The possibility to define styles on the interface elements
Ø WPF Features: Feature Control inside a Control Description Allows to define a control inside another control as a content. Data binding Mechanism to display and interact with data between UI elements and data object on user interface. Media services Provides an integrated system for building user interfaces with common media elements like images, audio, and video. Templates In WPF you can define the look of an element directly with a Template Animations Building interactivity and movement on user Interface Alternative input Supports multi-touch input on Windows 7 and above. Direct 3 D Allows to display more complex graphics and custom themes
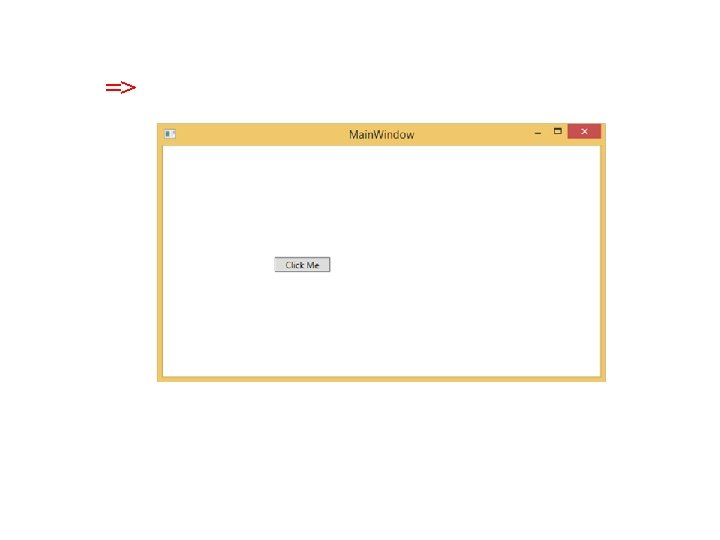
q WPF – Hello World § Develop a simple Hello World WPF application § Steps: 1. Menu: File -> New -> Project 2. Templates – Visual C# Middle Pane – WPF application 3. Give the project a name. Type Hello. World in the name field and click the OK button. 4. By default, two files are created: (a) the XAML file (mainwindow. xaml) and (b) the other one is the CS file (mainwindow. cs) 5. On mainwindow. xaml => two sub-windows: (a) the design window and (b) the source (XAML) window 6. By default, a Grid is set as the first element after page. 7. Go to the toolbox and drag a Text. Block to the design window 8. Change the Text property of Text. Block in XAML code from Text. Block to Hello World
• Type – “Hello World” within the text block =>
q WPF – XAML Overview: Ø XAML - Extensible Application Markup Language Ø In XAML - very easy to create, initialize, and set properties of objects with hierarchical relations Ø Basic Syntax: § When you create your new WPF project, you will encounter some of the XAML code by default in Main. Window. xaml as shown below <Window x: Class = "Resources. Main. Window" xmlns = "http: //schemas. microsoft. com/winfx/2006/xaml/presentation" xmlns: x = "http: //schemas. microsoft. com/winfx/2006/xaml" Title = "Main. Window" Height = "350" Width = "525"> <Grid> </Window>
Information Description <Window It is the opening object element or container of the root. x: Class = "Resources. Main. Window" It is a partial class declaration which connects the markup to the partial class code defined behind. xmlns = Maps the default XAML namespace for "http: //schemas. microsoft. com/ WPF client/framework win fx/2006/xaml/presentation" xmlns: x = XAML namespace for XAML language "http: //schemas. microsoft. com/ which maps it to x: prefix w infx/2006/xaml" > End of object element of the root <Grid> </Grid> It is starting and closing tags of an empty grid object. </Window> Closing the object element
Ø Example of simple object with no child element: § Example of object element with some attributes: <Button Content = "Click Me" Height = "30" Width = "60" /> § Alternative syntax to define properties: <Button> <Button. Content>Click Me</Button. Content> <Button. Height>30</Button. Height> <Button. Width>60</Button. Width> </Button>
Ø Example of object with child element <Stack. Panel Orientation = "Horizontal"> <Text. Block Text = "Hello"/> </Stack. Panel> OR - integrate a button: <Window x: Class = "WPFXAMLOverview. Main. Window" xmlns = "http: //schemas. microsoft. com/winfx/2006/xaml/presentation" xmlns: x = http: //schemas. microsoft. com/winfx/2006/xaml Title = "Main. Window" Height = "350" Width = "604"> <Stack. Panel> <Button x: Name = "button" Content = "Click Me" Horizontal. Alignment = "Left" Margin = "150" Vertical. Alignment = "Top" Width = "75" /> </Stack. Panel> </Window>
Ø Alternative – use C# code instead of XAML using System. Windows; using System. Windows. Controls; namespace WPFXAMLOverview { /// <summary> /// Interaction logic for Main. Window. xaml /// </summary> public partial class Main. Window : Window { public Main. Window() { Initialize. Component(); // Create the Stack. Panel stack. Panel = new Stack. Panel(); this. Content = stack. Panel; // Create the Button button = new Button(); button. Content = "Click Me"; button. Horizontal. Alignment = Horizontal. Alignment. Left; button. Margin = new Thickness(150); button. Vertical. Alignment = Vertical. Alignment. Top; button. Width = 75; stack. Panel. Children. Add(button); } } }
q WPF Controls • Windows Presentation Foundation (WPF) - allows developers to easily build and create visually enriched UI based applications • The classical UI elements or controls in other UI frameworks - also enhanced in WPF applications. • All of the standard WPF controls can be found in the Toolbox - a part of the System. Windows. Controls. • These controls - can also be created in XAML markup language.
Ø The complete inheritance hierarchy of WPF controls:
q WPF Layout § The layout of controls - very important and critical for application usability § Used to arrange a group of GUI elements in your application. § Important things to consider while selecting layout panels: • Positions of the child elements • Sizes of the child elements • Layering or overlapping child elements on top of each other § XAML - provides a rich set of built-in layout panels to arrange GUI elements in an appropriate way
Str. No. Description 1. Stack panel - a simple and useful layout panel in XAML - stack panel, child elements can be arranged in a single line either horizontally or vertically, based on the orientation property. 2. Wrap panel - child elements are positioned in sequential order, from left to right or from top to bottom based on the orientation property 3. Dock panel - defines an area to arrange child elements relative to each other, either horizontally or vertically - you can easily dock child elements to top, bottom, right, left and center using the Dock property 4. Canvas panel - the basic layout panel in which the child elements can be positioned explicitly using coordinates that are relative to the Canvas any side such as left, right, top and bottom 5. Grid panel - provides a flexible area which consists of rows and columns; - in a Grid, child elements can be arranged in tabular form.
q WPF – Data Binding Ø Data binding - a mechanism in WPF applications that provides a simple and easy way for Windows Runtime apps to display and interact with data Ø Allows the flow of data between UI elements and data object on user interface Ø When a binding is established and the data or your business model changes => it reflects the updates automatically to the UI elements and vice versa Ø Data binding – two types: one-way data binding and two-way data binding
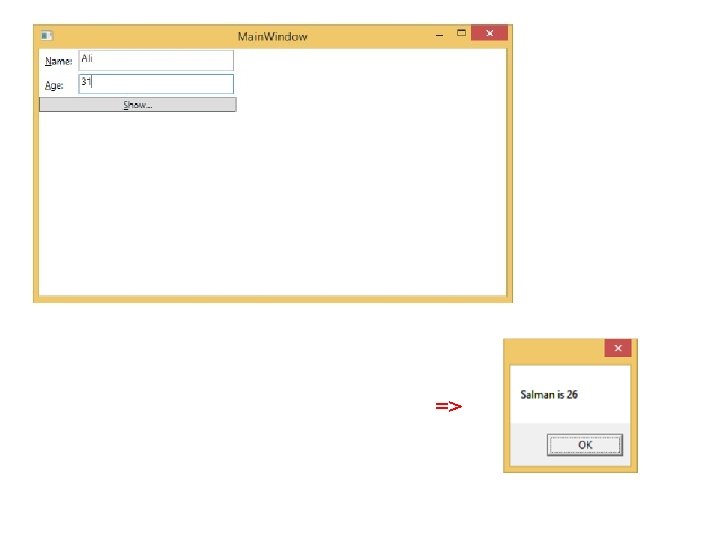
Ø One-Way Data Binding • Data is bound from its source (that is the object that holds the data) to its target (that is the object that displays the data) • XAML code - creates two labels, two textboxes, and one button and initializes them with some properties • In Person class - just two variables Name and Age, and its object is initialized in Main. Window class. • In XAML code - we are binding to a property Name and Age, but we have not selected what object that property belongs to. • The easier way is to assign an object to Data. Context whose properties we are binding in the following C# code in Main. Windowconstructor.
<Window x: Class = "WPFData. Binding. Main. Window" xmlns = "http: //schemas. microsoft. com/winfx/2006/xaml/presentation" xmlns: x = "http: //schemas. microsoft. com/winfx/2006/xaml" xmlns: d ="http: //schemas. microsoft. com/expression/blend/2008" xmlns: mc = "http: //schemas. openxmlformats. org/markup-compatibility/2006" xmlns: local = "clr-namespace: WPFData. Binding" mc: Ignorable = "d" Title = "Main. Window" Height = "350" Width = "604"> <Grid. Row. Definitions> <Row. Definition Height = "Auto" /> <Row. Definition Height = "*" /> </Grid. Row. Definitions> <Grid. Column. Definitions> <Column. Definition Width = "Auto" /> <Column. Definition Width = "200" /> </Grid. Column. Definitions> <Label Name = "name. Label" Margin = "2">_Name: </Label> <Text. Box Name = "name. Text" Grid. Column = "1" Margin = "2" Text = "{Binding Name, Mode = One. Way}"/> <Label Name = "age. Label“ Margin = "2“ Grid. Row = "1">_Age: </Label> <Text. Box Name = "age. Text" Grid. Column = "1" Grid. Row = "1" Margin = "2" Text = "{Binding Age, Mode = One. Way}"/> <Stack. Panel Grid. Row = "2" Grid. Column. Span = "2"> <Button Content = "_Show. . . " Click="Button_Click" /> </Stack. Panel> </Grid> </Window>
using System. Windows; namespace WPFData. Binding { public partial class Main. Window : Window { Person person = new Person { Name = "Salman", Age = 26 }; public Main. Window() { Initialize. Component(); this. Data. Context = person; } private void Button_Click(object sender, Routed. Event. Args e) { string message = person. Name + " is " + person. Age; Message. Box. Show(message); } } public class Person { private string name. Value; public string Name { get { return name. Value; } set { name. Value = value; } } private double age. Value; public double Age { get { return age. Value; } set { if (value != age. Value) { age. Value = value; } } }}}
Ø Two-Way Data Binding • In two-way binding => the user can modify the data through the user interface and have that data updated in the source. • If the source changes while the user is looking at the view => the view will be updated =>
<Window x: Class = "WPFData. Binding. Main. Window" xmlns = "http: //schemas. microsoft. com/winfx/2006/xaml/presentation" xmlns: x = "http: //schemas. microsoft. com/winfx/2006/xaml" xmlns: d ="http: //schemas. microsoft. com/expression/blend/2008" xmlns: mc = "http: //schemas. openxmlformats. org/markup-compatibility/2006" xmlns: local = "clr-namespace: WPFData. Binding" mc: Ignorable = "d" Title = "Main. Window" Height = "350" Width = "604"> <Grid. Row. Definitions> <Row. Definition Height = "Auto" /> <Row. Definition Height = "*" /> </Grid. Row. Definitions> <Grid. Column. Definitions> <Column. Definition Width = "Auto" /> <Column. Definition Width = "200" /> </Grid. Column. Definitions> <Label Name = "name. Label" Margin = "2">_Name: </Label> <Text. Box Name = "name. Text" Grid. Column = "1" Margin = "2" Text = "{Binding Name, Mode = Two. Way}"/> <Label Name = "age. Label“ Margin = "2“ Grid. Row = "1">_Age: </Label> <Text. Box Name = "age. Text" Grid. Column = "1" Grid. Row = "1" Margin = "2" Text = "{Binding Age, Mode = Two. Way}"/> <Stack. Panel Grid. Row = "2" Grid. Column. Span = "2"> <Button Content = "_Show. . . " Click="Button_Click" /> </Stack. Panel> </Grid> </Window>
Ø References: [1] WPF Tutorial: https: //www. tutorialspoint. com/wpf/ [2] Connection to a database: https: //readdy. net/Notes/Details/727? v=d [3] https: //www. c-sharpcorner. com/article/wpf-data-storage-using -sql-server/ [4] John Sharp, Jon Jagger, “Microsoft Visual C#. NET Step By Step”, Microsoft Corporation, 2002 [5] MSDN online library: https: //msdn. microsoft. com/enus/library/bb 655884(v=vs. 90). aspx
Thank you for your attention!