Concur Travel and Expense Management Expense Report Preparation


- Slides: 29
Concur Travel and Expense Management Expense Report Preparation
· Access Concur at Concur. Jefferson. edu · Enter your campus key and password.
· If you are redirected to a page that looks like the image below, please retype the Concur. Jefferson. edu address and access through the Jefferson authentication page. · Users cannot access Jefferson’s Concur portal from this page, nor will the links work to reset your credentials.
· Hover + NEW · Click Start a Report
· Enter information in each of the required fields (indicated by the red highlighted left border) ·Verify the charge code in the GL Segment Field (all expenses will be charged to it) ·If the GL Segment is incorrect, select the appropriate code from the dropdown list. · When searching for the proper GL Segment, be sure to select the “code” button. ·Click Next >> · Indicate if the report you are creating will include per diem meal allowances by selecting Yes or No
· If you indicated that you will be claiming per diem meal allowances, you will see this page. · If you booked your trip through Concur, you should find an Available Itinerary. If you booked outside of Concur, you must create your travel itinerary. · To assign an available itinerary to the report, click available itineraries above. · If you booked outside of Concur, create your travel itinerary by completing the information to the right. · First enter your departure and arrival times/dates and cities and click Save. · NOTE: This information pertains to the departure and arrival of the outbound flight
· Then enter the same information for your return trip ·Click Save
·Click Next >>
· Check the appropriate boxes to indicate meals that were provided by the conference or any others that did not require payment (the per diem rates will automatically adjust, accordingly) · Then, click Create Expenses
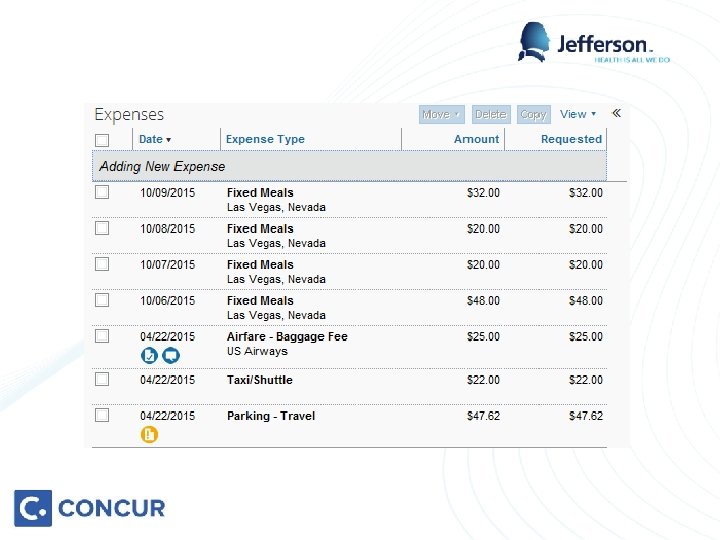
· Properly-adjusted per diem meal allowances will be added to your report. · Add additional expenses to your report by selecting the appropriate expense type from the menu on the right
Example – Airline Baggage Fee ·Select Airfare – Bagage Fee from expense type menu.
Example – Airline Baggage Fee
Example – Airline Baggage Fee
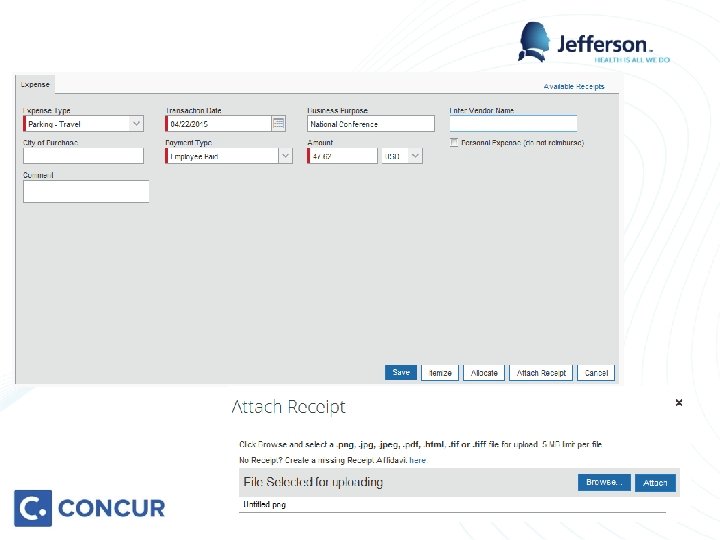
Example – Airline Baggage Fee · Enter information in each of the required fields (again indicated by the red highlighted left border). · Enter information in any of the non-required fields if you need to provide an explanation or believe that the review might require clarification. ·Click Attach Receipt
Example – Airline Baggage Fee · To attach a receipt image saved on your computer, click Browse and select the appropriate file. · If you imported an image into your profile via the Concur mobil app, find the appropriate Available Receipt. · Then, click Attach
Example – Taxi/Shuttle/Uber · Select Taxi/Shuttle from expense type menu.
Example – Taxi/Shuttle/Uber · Enter information in each of the required fields (again indicated by the red highlighted left border). · Some fields will be pre-populated, based upon the previous expense entered. Please verify this information. · Enter information in any of the non-required fields if you need to provide an explanation or believe that the review might require clarification. · Click Save
Example – Taxi/Shuttle/Uber
Example – Taxi/Shuttle/Uber
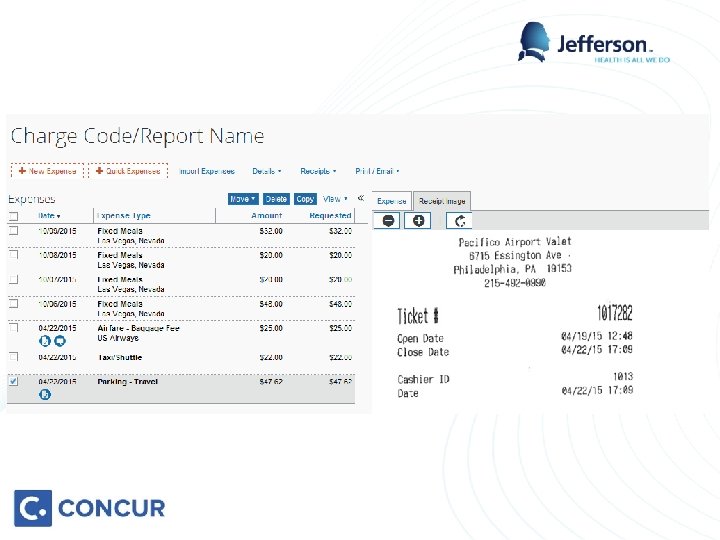
Example – Parking Travel ·Select Taxi/Shuttle from expense type menu. · Note that some expenses are duplicated · Parking – Travel = 7105 · Parking – Local Business = 7108
Example – Parking Travel
Example – Parking Travel
Example – Parking Travel
·Prior to submitting your report, you must attach a pdf copy of the full conference brochure to the report header to provide business justification for the trip and related expenses. ·Click Receipts then Attach Recipt Images ·Browse your computer for the conference brochure file and click Upload before clicking Close
·When completed with your report, click Submit Report.
·Review the acknowledgment and click Accept & Submit · Your report will automatically be routed to the assigned approver. If you would like to add another approver to the workflow, you may do so by clicking the +, clicking in the User-Added Approver box and searching for the approver by last name. · Click Submit Report