7 Lean Yeast Doughs Straight Doughs Copyright 2017





- Slides: 18
7 Lean Yeast Doughs: Straight Doughs Copyright © 2017 by John Wiley & Sons, Inc. All Rights Reserved
7 Lean Yeast Doughs: Straight Doughs Mixing Methods Copyright © 2017 by John Wiley & Sons, Inc. All Rights Reserved • Straight Dough Method: Combine all ingredients in bowl and mix. • Fresh yeast and active dry yeast should first be softened in a little of the water from the formula. • Modified Straight Dough Method: The fat, sugar, eggs, and flavorings are first blended until uniform before the dough is developed.
7 Lean Yeast Doughs: Straight Doughs Mixing Times and Speeds Copyright © 2017 by John Wiley & Sons, Inc. All Rights Reserved Short mix: short mixing time, long bulk fermentation. Improved mix: medium mixing and fermentation times. Intensive mix: long mixing, short fermentation. • Adjust yeast quantities: short fermentation requires more yeast.
7 Lean Yeast Doughs: Straight Doughs Dough Strength Copyright © 2017 by John Wiley & Sons, Inc. All Rights Reserved Extensibility: the ability of a dough to be stretched. Elasticity: the ability of a dough to spring back when stretched. Tenacity: the resistance of a dough to being stretched.
7 Lean Yeast Doughs: Straight Doughs Controlling Fermentation Copyright © 2017 by John Wiley & Sons, Inc. All Rights Reserved • Requires a balance of time, temperature, and yeast quantity. • The temperature of the dough is affected by shop temperature, flour temperature, and water temperature. • The water temperature is the easiest to control.
7 Lean Yeast Doughs: Straight Doughs Determining Water Temperature for Yeast Doughs Copyright © 2017 by John Wiley & Sons, Inc. All Rights Reserved • Multiply the desired dough temperature by 3. • Add together the flour temperature, room temperature, plus 20°F (11°C) to allow for friction caused by mixing. • Subtract the result of step 2 from that of step one. The difference is the required water temperature.
7 Lean Yeast Doughs: Straight Doughs Retarding Copyright © 2017 by John Wiley & Sons, Inc. All Rights Reserved • Slowing the fermentation or proof by refrigeration.
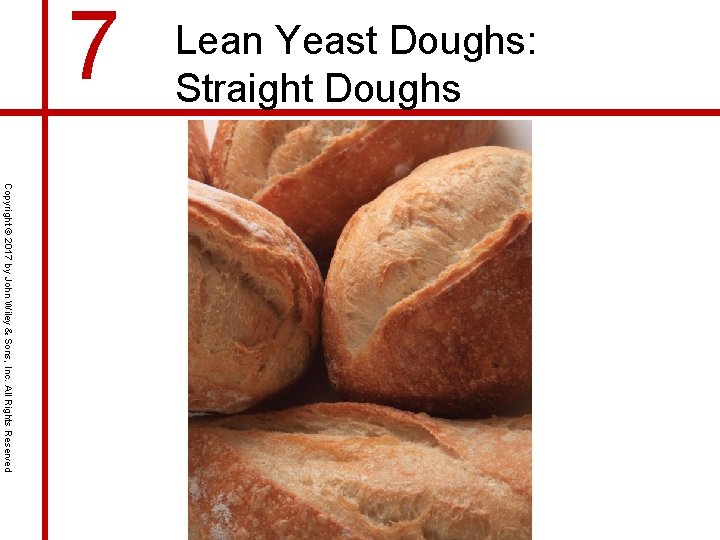
7 Lean Yeast Doughs: Straight Doughs Crisp-Crusted Bread Copyright © 2017 by John Wiley & Sons, Inc. All Rights Reserved Thin, crisp crusts are achieved by using formulas with little or no sugar and fat, and by baking with steam.
7 Lean Yeast Doughs: Straight Doughs Makeup Techniques Copyright © 2017 by John Wiley & Sons, Inc. All Rights Reserved The objective of yeast dough makeup is to shape the dough into rolls or loaves that bake properly and have an attractive appearance.
7 Lean Yeast Doughs: Straight Doughs Makeup Techniques Copyright © 2017 by John Wiley & Sons, Inc. All Rights Reserved Use of Dusting Flour • May use light rye flour or bread flour to prevent the dough from sticking to the bench and hands. • Use as little dusting flour as possible. • Excessive flour makes seams difficult to seal and shows up as streaks in the baked product.
7 Lean Yeast Doughs: Straight Doughs Scaling and Dividing Dough for Rolls Copyright © 2017 by John Wiley & Sons, Inc. All Rights Reserved A dough divider cuts a large unit of dough, called a press, into small units of equal weight. • Scale the dough into presses of desired weight. • Round the presses and allow them to relax. • Divide the press using a dough divider. Separate the pieces using dusting flour to prevent sticking. • Make up the rolls as desired.
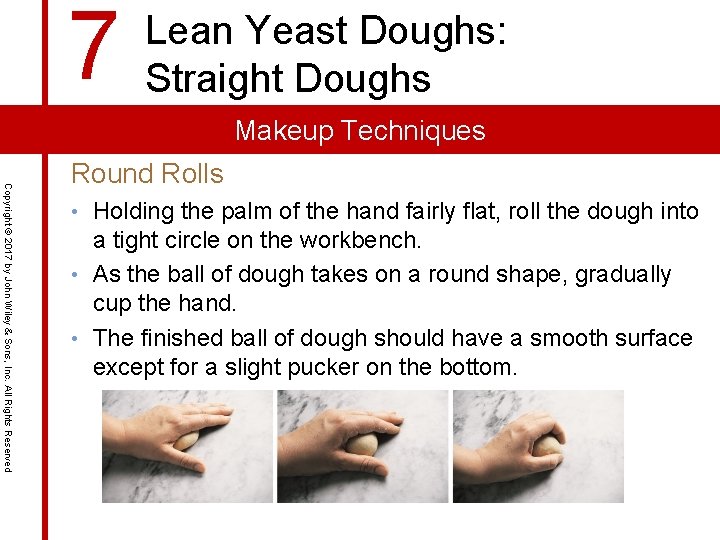
7 Lean Yeast Doughs: Straight Doughs Makeup Techniques Copyright © 2017 by John Wiley & Sons, Inc. All Rights Reserved Round Rolls • Holding the palm of the hand fairly flat, roll the dough into a tight circle on the workbench. • As the ball of dough takes on a round shape, gradually cup the hand. • The finished ball of dough should have a smooth surface except for a slight pucker on the bottom.
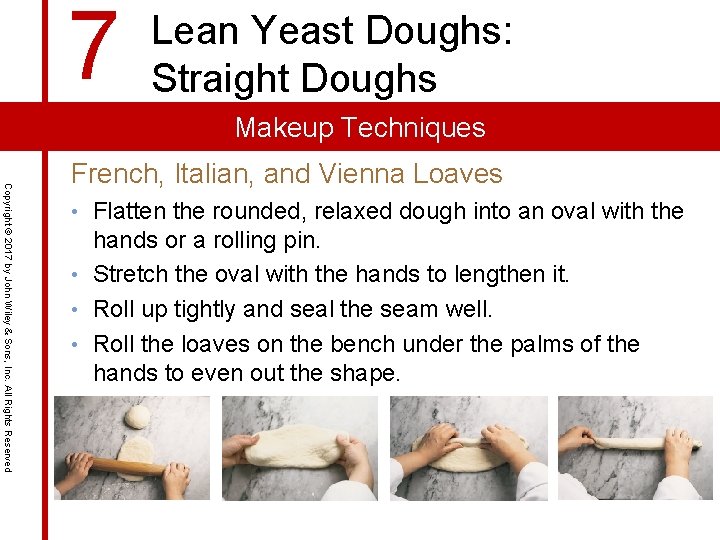
7 Lean Yeast Doughs: Straight Doughs Makeup Techniques Copyright © 2017 by John Wiley & Sons, Inc. All Rights Reserved French, Italian, and Vienna Loaves • Flatten the rounded, relaxed dough into an oval with the hands or a rolling pin. • Stretch the oval with the hands to lengthen it. • Roll up tightly and seal the seam well. • Roll the loaves on the bench under the palms of the hands to even out the shape.
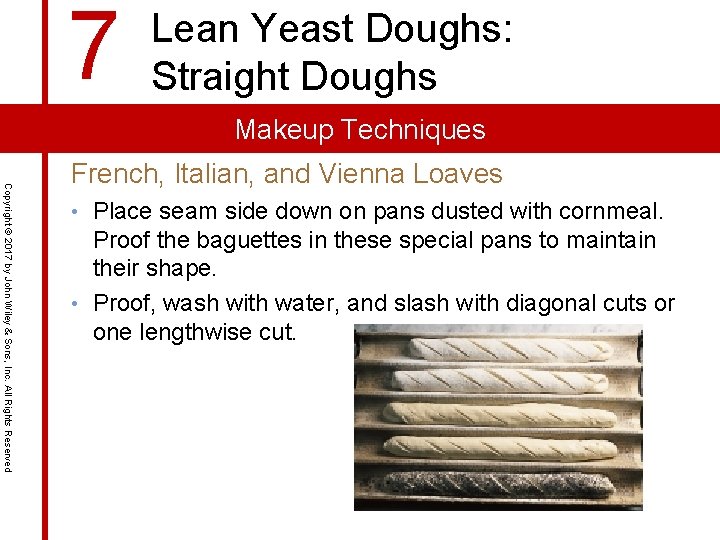
7 Lean Yeast Doughs: Straight Doughs Makeup Techniques Copyright © 2017 by John Wiley & Sons, Inc. All Rights Reserved French, Italian, and Vienna Loaves • Place seam side down on pans dusted with cornmeal. Proof the baguettes in these special pans to maintain their shape. • Proof, wash with water, and slash with diagonal cuts or one lengthwise cut.
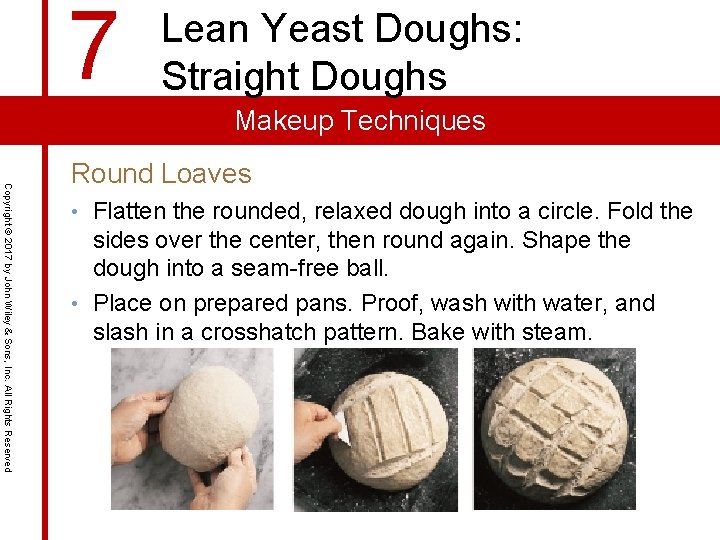
7 Lean Yeast Doughs: Straight Doughs Makeup Techniques Copyright © 2017 by John Wiley & Sons, Inc. All Rights Reserved Round Loaves • Flatten the rounded, relaxed dough into a circle. Fold the sides over the center, then round again. Shape the dough into a seam-free ball. • Place on prepared pans. Proof, wash with water, and slash in a crosshatch pattern. Bake with steam.
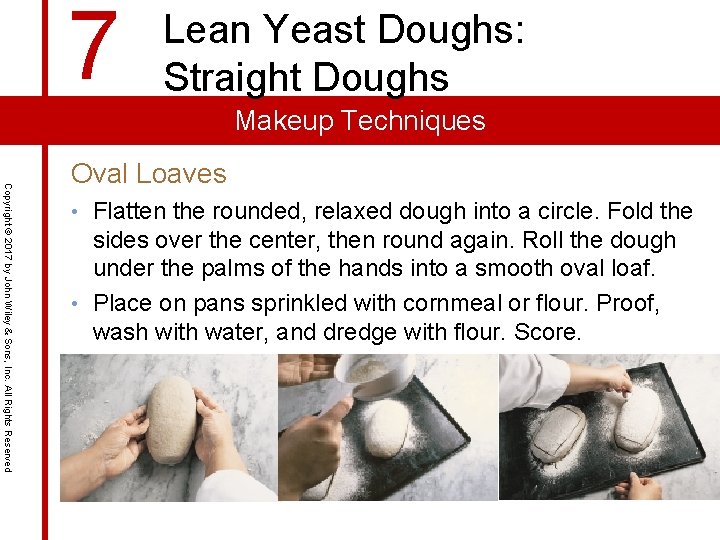
7 Lean Yeast Doughs: Straight Doughs Makeup Techniques Copyright © 2017 by John Wiley & Sons, Inc. All Rights Reserved Oval Loaves • Flatten the rounded, relaxed dough into a circle. Fold the sides over the center, then round again. Roll the dough under the palms of the hands into a smooth oval loaf. • Place on pans sprinkled with cornmeal or flour. Proof, wash with water, and dredge with flour. Score.
7 Lean Yeast Doughs: Straight Doughs Makeup Techniques Copyright © 2017 by John Wiley & Sons, Inc. All Rights Reserved Oval Loaves • Flatten the rounded, relaxed dough into a circle. Fold the sides over the center, then round again. Roll the dough under the palms of the hands into a smooth oval loaf. • Place on pans sprinkled with cornmeal or flour. Proof, wash with water, and dredge with flour. Score.
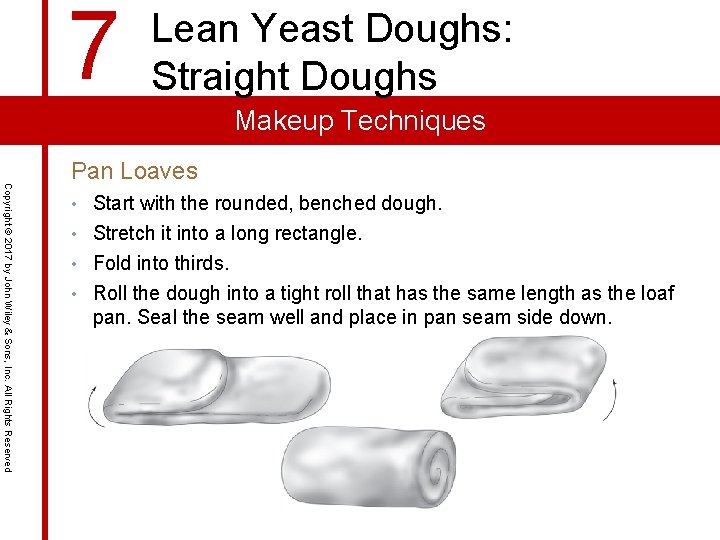
7 Lean Yeast Doughs: Straight Doughs Makeup Techniques Copyright © 2017 by John Wiley & Sons, Inc. All Rights Reserved Pan Loaves • Start with the rounded, benched dough. • Stretch it into a long rectangle. • Fold into thirds. • Roll the dough into a tight roll that has the same length as the loaf pan. Seal the seam well and place in pan seam side down.