6 3 xml version1 0 encodingutf8 Tab Host


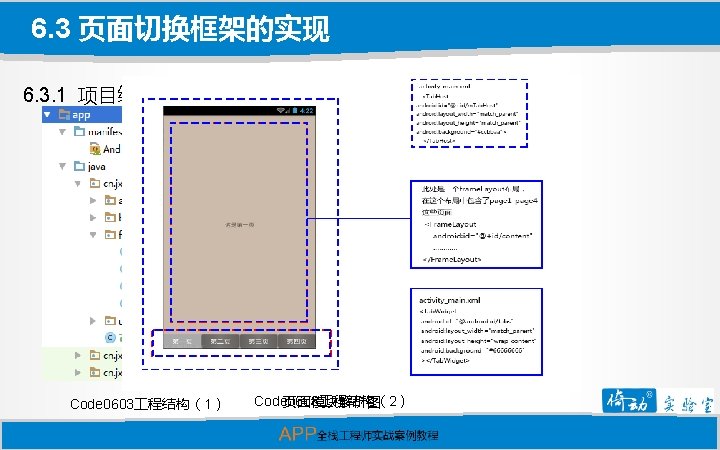
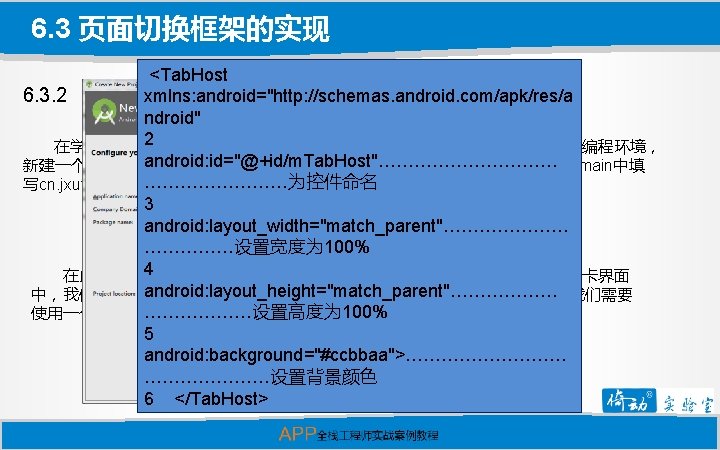
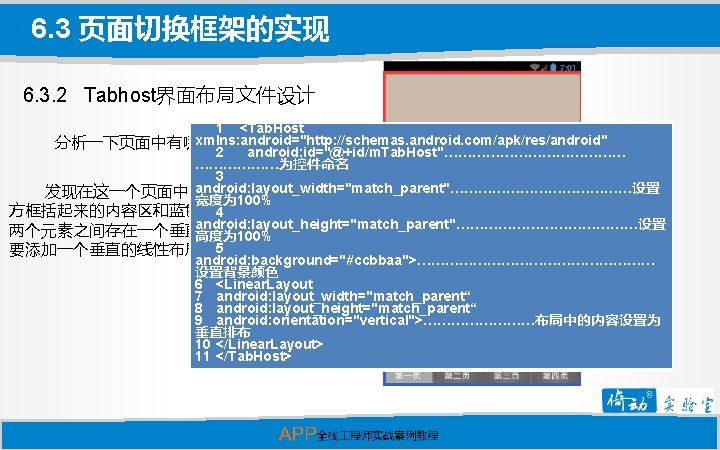

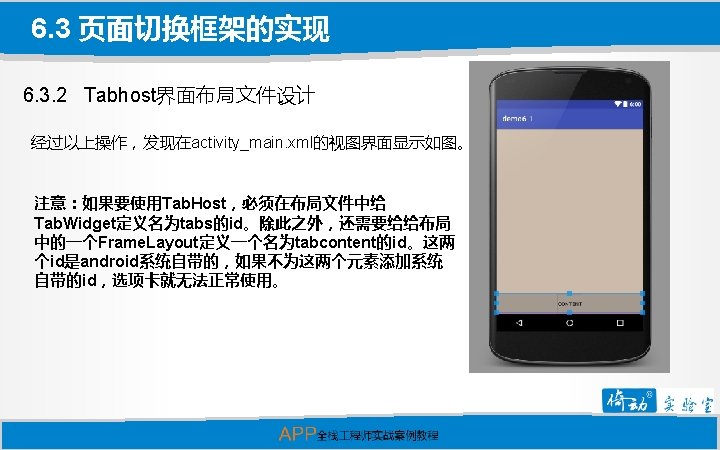
6. 3 页面切换框架的实现 <? xml version="1. 0" encoding="utf-8"? ><Tab. Host xmlns: android="http: //schemas. android. com/apk/res/android" android: id="@+id/m. Tab. Host" 6. 3. 2 Tabhost界面布局文件设计 android: layout_width="match_parent" android: layout_height="match_parent" android: background="#ccbbaa"> <Linear. Layout 接下来在线性布局中填充页面内容和选项卡,在“豹考通”教学版中,页面内容模块使用到了 android: layout_width="match_parent" Frame. Layout帧布局,而选项卡控件的标签为<Tab. Widget></Tab. Widget>, 代码如下: android: layout_height="match_parent" android: orientation="vertical"><!-- 显示单个页面的信息,这里使用了 帧布局 --!> <Frame. Layout 知识扩展:帧布局 android: id="@android: id/tabcontent"…………添加系统id: android: layout_width="match_parent" (Frame. Layout)是最简单的布 tabcontent android: layout_weight="1" 局形式。所有添加到这个布局 android: layout_height="0 dp" <Frame. Layout 中的视图都以层叠的方式显示。 >……………设置该模块填满页面剩下的位置 android: id="@+id/content" 第一个添加的控件被放在最底 android: layout_width="match_parent" 层,最后一个添加到框架布局 android: layout_height="match_parent" /> </Frame. Layout><!-中的视图显示在最顶层,上一 底部的选项卡 --!> <Tab. Widget 层的控件会覆盖下一层的控件。 android: id="@android: id/tabs"………………添加系统id: tabs android: layout_width="match_parent" 效果如图。(点击本文本框) android: layout_height="wrap_content" android: background="#6666"></Tab. Widget> </Linear. Layout></Tab. Host> Contents

")
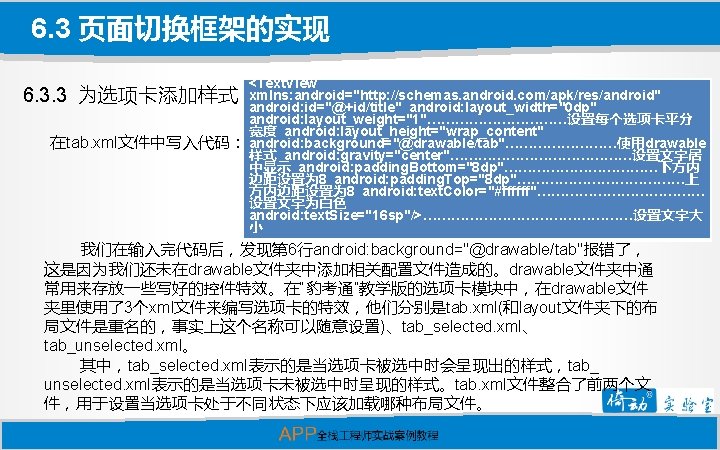
6. 3 页面切换框架的实现 6. 3. 3 为选项卡添加样式 我们只需要在res-drawable文件夹中分别建立以下三个布局文件即可: <? xml version="1. 0" encoding="utf-8"? ><!--selector标签经常用来操作控件的背景-(依次点击下面文本框序号) !><selector xmlns: android="http: //schemas. android. com/apk/res/android" ><!--当控 件 被 按 下 时 , 将 控 件 样 式 设 置 为 tab_selected. xml--!> <item android: state_pressed="true" 第一个:选项卡状态设置文件Code 0601appsrcmainresdrawabletab. xml android: drawable="@drawable/tab_selected"></item><!--当控件被选中时,将控件样 <? xml version="1. 0"<item encoding="utf-8"? ><shape 式 设 置 为 tab_selected. xml--!> android: state_selected="true" android: drawable="@drawable/tab_selected"></item><!--当控件未被按下时,将控件 xmlns: android="http: //schemas. android. com/apk/res/an 第二个:选项卡样式Code 0601appsrcmainresdrawabletab_selected. xml 样 式 设 置 为 tab_unselected. xml--!> <item android: state_pressed="false" droid" android: shape="rectangle" <? xml version="1. 0" encoding="utf-8"? ><shape ><!--设置控件为矩形-android: drawable="@drawable/tab_unselected"></item><!--当控件未被选中时,将控 !> <corners android: radius="5 dp"/><!--设置控件的圆角弧 件 样 式 设 xmlns: android="http: //schemas. android. com/apk/res/an 置 为 tab_unselected. xml--!> <item android: state_selected="false" android: drawable="@drawable/tab_unselected"></item></selector> 度--!> <solid android: color="#aaaaaa"/><!-填充的颜色 -droid" android: shape="rectangle" > <corners 第三个:选项卡未被选中/按下时的式: Code 0601appsrcmainresdrawabletab_unselected. xml ></shape> <solid android: radius="5 dp"/> android: color="#000000"/><!-- 填充的颜色 --> <gradient <!--用于设置颜色的过渡--!> android: start. Color="#aa 444444" android: center. Color="#aa 666666" android: end. Color="#aa 444444" android: type="linear"/></shape> Contents

方法。 此处要继承Fragment. Activity")
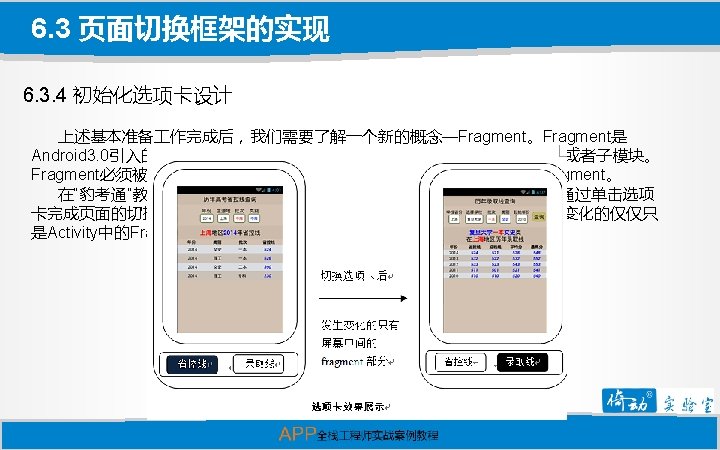
6. 3 页面切换框架的实现 6. 3. 4 初始化选项卡设计 如果希望使用fragment来完成不同选项卡之间内容的跳转,我们需要首先让Main. Activity 集成Fragment. Activity,并且声称on. Create()方法。 此处要继承Fragment. Activity public class Main. Activity extends Fragment. Activity {<!-初始化选项卡控件--!>private Tab. Host m. Tab. Host; <!--选 项卡的标记--!>private String[] tags=new String[]{"page 1", "page 2", "page 3", "page 4"}; <!--选项卡的 内容--!>private String[] titles=new String[]{"第一页", "第 二页", "第三页", "第四页"}; <!--on. Create()方法--!>protected void on. Create(Bundle saved. Instance. State) {super. on. Create(saved. Instance. State); }} Contents 此处要继承 Fragment. A ctivity

6. 3 页面切换框架的实现 public class Main. Activity extends Fragment. Activity {private Tab. Host m. Tab. Host; private String[] tags=new 6. 3. 4 初始化选项卡设计 String[]{"page 1", "page 2", "page 3", "page 4"}; private String[] titles=new String[]{"第一页", "第二页", "第三页", "第四页"}; protected void on. Create(Bundle saved. Instance. State) { super. on. Create(saved. Instance. State); 接下来,我们为每个选项卡中填充内容。 request. Window. Feature(Window. FEATURE_NO_TITLE); …………设置标题栏 不显示 set. Content. View(R. layout. activity_main); m. Tab. Host=(Tab. Host) find. View. By. Id(R. id. m. Tab. Host); ……………获取选项卡控件 m. Tab. Host. setup(); …………………………加载选项卡控件 for(int i=0; i<titles. length; i++){……………循环添加各个选项卡<!--创 建一个选项,并为其设置标记--!> Tab. Host. Tab. Spec tab. Spec=m. Tab. Host. new. Tab. Spec(tags[i]); <!--加载选项卡的样式tab. xml--!> View view=get. Layout. Inflater(). inflate(R. layout. tab, null); Text. View 通过使用模 tv 1=(Text. View) view. find. View. By. Id(R. id. title); <!--设置选项卡的标题(例如第一 拟器运行项目 页、第二页、省控线、录取线等)--!> tv 1. set. Text(titles[i]); 后,看到效果。 tab. Spec. set. Indicator(view); <!--将id为content的控件设置为选项卡对应的内容-(点击本文本框) !> tab. Spec. set. Content(R. id. content); <!--将选项添加到选项卡中--!> m. Tab. Host. add. Tab(tab. Spec); }<!--设置选项卡默认选中第二个页面--!> m. Tab. Host. set. Current. Tab(1); } Contents

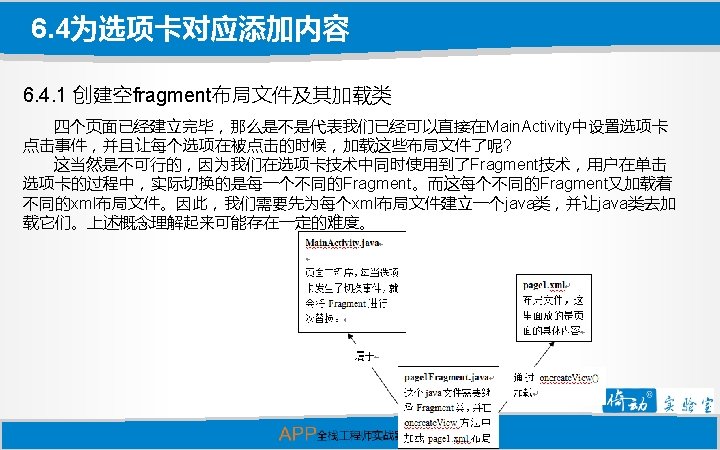
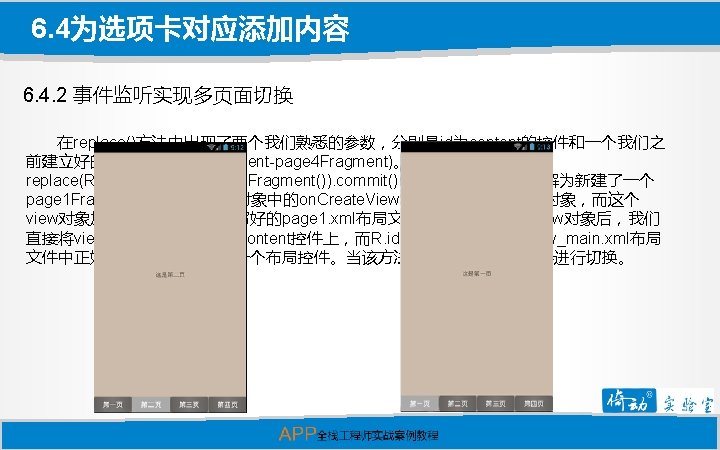
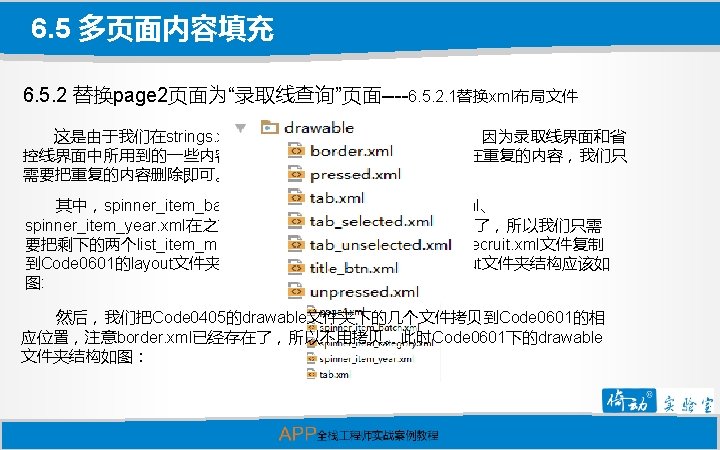
6. 4为选项卡对应添加内容 6. 4. 1 创建空fragment布局文件及其加载类 需要建立4个布局文件,这四个布局文件分别对应 4个选项卡,当某个选项卡被选中时,其对 应的布局文件也会被加载进来。我们找到res-layout文件夹,在其中建立一个xml布局文件,并将 其命名为page 1。 为了简化操作,在page 1. xml中,我们只需要加一个位于页面正中心的文字即可。 1. 2. <? xml version="1. 0" encoding="utf-8"? > <Linear. Layout xmlns: android="http: //schemas. android. com/apk/res/android " 可以在视图界面看到效果: 3. android: layout_width="match_parent" 4. android: layout_height="match_parent" 5. android: gravity="center_vertical|center"…………… 水平垂直居中 6. android: orientation="vertical" > 7. <Text. View 8. android: id="@+id/tv 1" 9. android: layout_width="wrap_content" 10. android: layout_height="wrap_content" 11. android: text="这是第一页" /> 12. </Linear. Layout> Contents

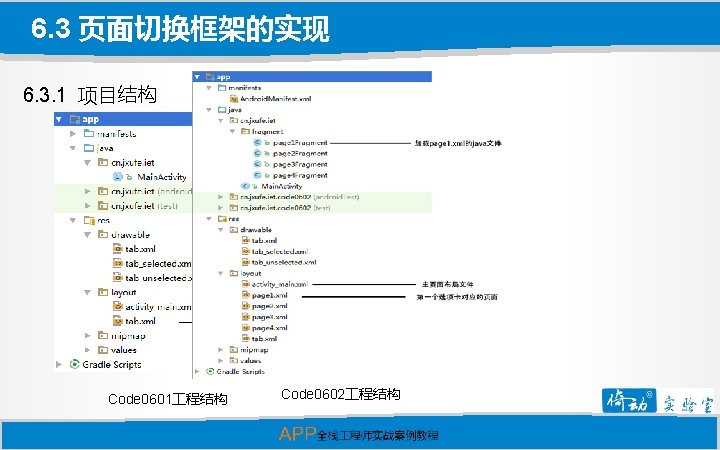
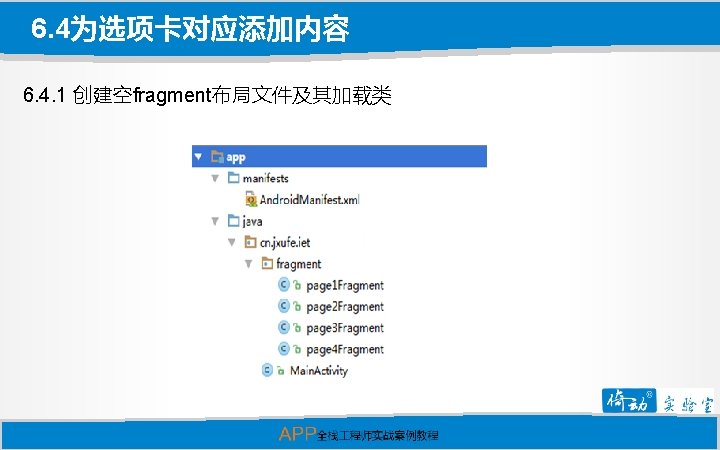
6. 4为选项卡对应添加内容 6. 4. 1 创建空fragment布局文件及其加载类 我们接下来分别为page 1. xml-page 4. xml编写对应的java文件,为了使整个项目的目录结 构更清楚,我们可以单独建一个包来存储这些java文件。右键java-cn. jxufe. iet,新建一个 Package文件夹,并给它命名为cn. jxufe. iet. fragment。 package cn. jxufe. iet. fragment; import 现在我们可以看到,在cn. jxufe. iet文件夹下多出了一个fragment包。在fragment包中 android. os. Bundle; ; import android. support. v 4. app. Fragment; import 建立一个java程序,命名为page 1 Fragment(此处命名并无特殊要求,但为了文件内容清 android. view. Layout. Inflater; import 楚明了,建议一般用这种格式命名)。page 1 Fragment用来加载page 1. xml布局文件,它需 android. view. View; import android. view. View. Group; import 要首先继承Fragment,并生成oncreate. View()方法。 com. example. cd. demo 6_1. R; public class page 1 Fragment extends Fragment { public View on. Create. View(Layout. Inflater inflater, View. Group container, Bundlesaved. Instance. State) { <!--加 载 page 1. xml布 局 文 件 --!> View view=inflater. inflate(R. layout. page 1, container, false); return view; }} Contents

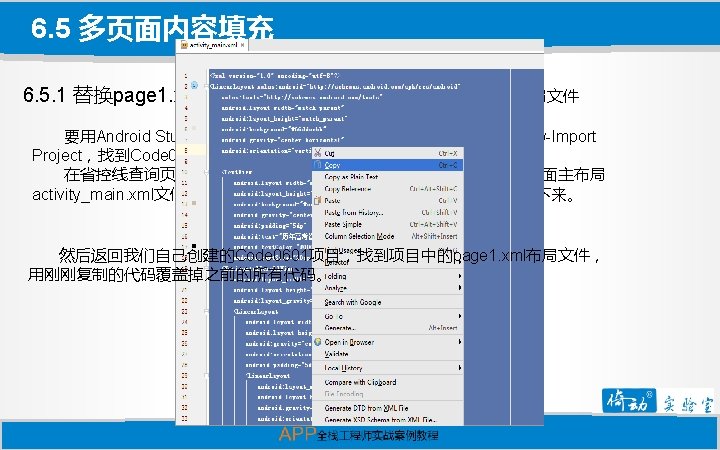

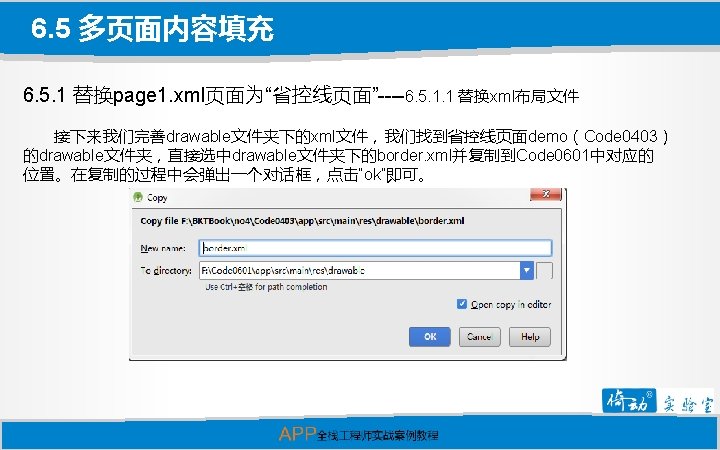
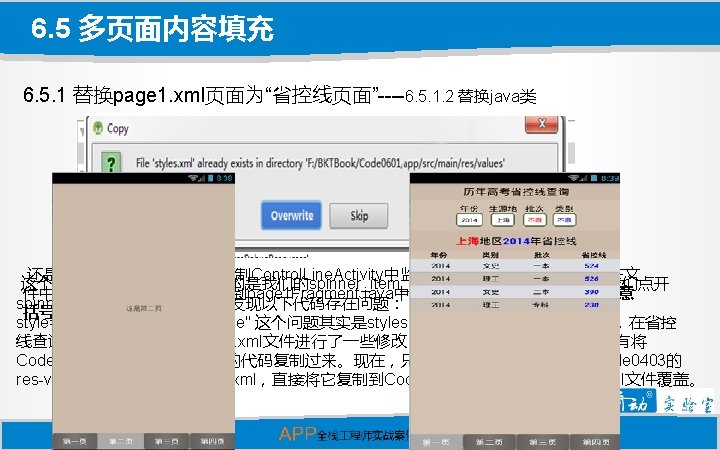
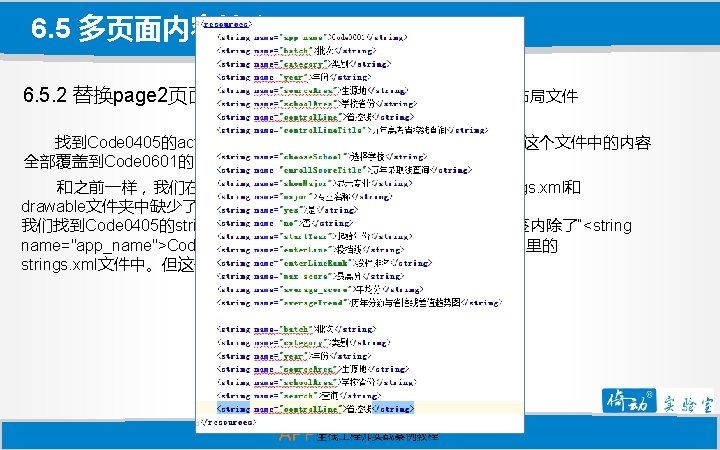
6. 5 多页面内容填充 6. 5. 1 替换page 1. xml页面为“省控线页面”----6. 5. 1. 1 替换xml布局文件 在复制完代码后,我们会发现代码中有很多像android: text="@string/control. Line Title"这样的代码报错了, 这是由于在省控线查询的demo中,在strings. xml文件中添加了一些代码,而 android: background="@drawable/border"表示的是引用了draw- able文件夹中的border. xml文件。我们现在仅仅 只是复制了省控线查询demo中的activity_main. xml的代码,一些其他的配置文件并没有进行处理。 首先我们来处理一下strings. xml文件,在省控线查询demo(Code 0403)中我们找到resvalusestrings. xml 文件,使用Ctrl+A全选,并将这些内容原封不动的覆盖掉我们自己的项目中的strings. xml文件。复制完毕后,要 注意将“<string name="app_name">Code 0403</string>”改为“<string name="app_name"> Code 0601</string>”。 1. <resources> 2. <string name="app_name">Code 0601</string> 3. <string name="batch">批次</string> 4. <string name="category">类别</string> 5. <string name="year">年份</string> 6. <string name="source. Area">生源地</string> 7. <string name="school. Area">学校省份 </string> 8. <string name="control. Line">省控线</string> 9. <string name="control. Line. Title">历年高考省 控线查询</string> 10. </resources> Contents
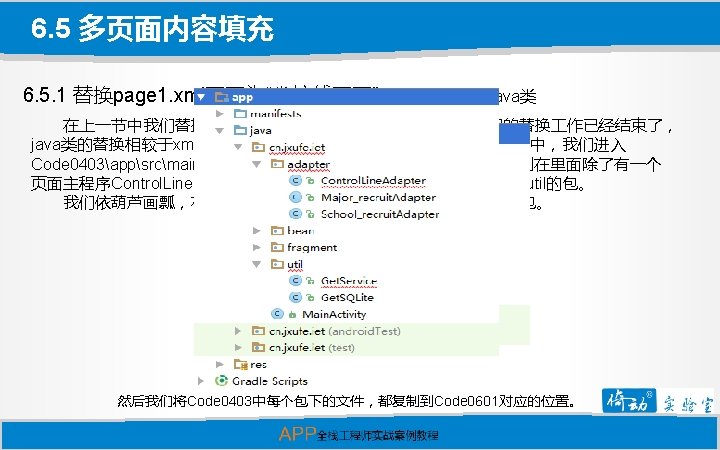

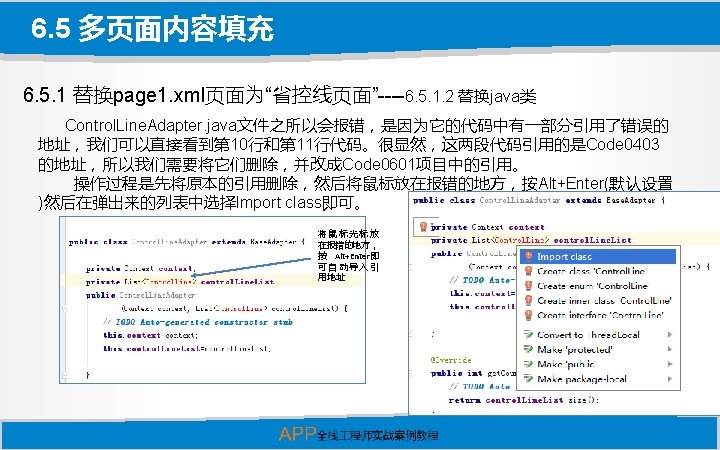
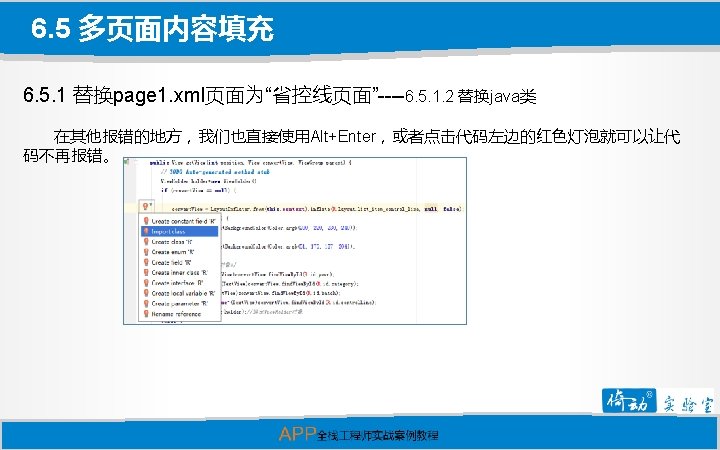
6. 5 多页面内容填充 6. 5. 1 替换page 1. xml页面为“省控线页面”----6. 5. 1. 2 替换java类 我们发现在复制后,整个项目错误百出。不用紧张,这只是有些包未正常导入导致的,我 们首先进入报错的Control. Line. Adapter文件中修改错误。 package cn. jxufe. iet. adapter; import android. content. Context; import android. graphics. Color; import android. view. Layout. Inflater; import android. view. View. Group; import android. widget. Base. Adapter; import android. widget. Text. View; import java. util. List; import cn. jxufe. iet. code 0403. R; import cn. jxufe. iet. code 0403. bean. Control. Line; public class Control. Line. Adapter extends Base. Adapter {private Context context; private List<Control. Line>control. Line. List; public Control. Line. Adapter(Context context, List<Control. Line> control. Line. List) {// TODO Auto-generated constructor stubthis. context=context; this. control. Line. List=control. Line. List; } ……略} Contents
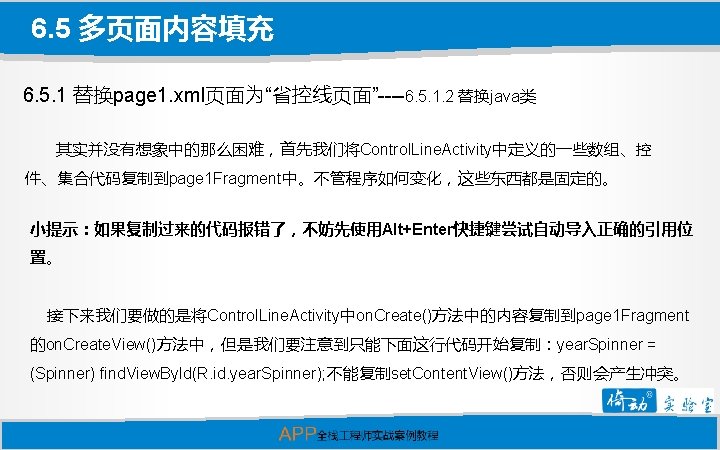


6. 5 多页面内容填充 6. 5. 1 替换page 1. xml页面为“省控线页面”----6. 5. 1. 2 替换java类 对于这种写法,我们可以理解为页面中的控件并不是存在于一个Activity中,而是存在 于一个Fragment中的,当我们使用find. View. By. Id方法去寻找控件时,应该在Fragment中寻 找,而这个Fragment已经通过代码 View view=inflater. inflate(R. layout. page 1, container, false); 包装成了一个view对象,所以我 们在find. View. By. Id()方法之前加上一个view. ,代码是在当前fragment中使用这个控件。 …………略public View on. Create. View(Layout. Inflater inflater, View. Group container, Bundle saved. Instance. State) { View 这个错误的主要原因在于“this”上,在Array. Adapter的构造方法中,this应该指向的是一个 view=inflater. inflate(R. layout. page 1, container, false); activity本身,page 1 Fragment并不是一个activity,它只是依附于activity之中的一个fragment。 year. Spinner = (Spinner) view. find. View. By. Id(R. id. year. Spinner); // 年份的下拉列表 如果此处用this则会指向这个fragment,所以代码出现了错误。我们只需要将代码 province. Spinner = (Spinner)view. find. View. By. Id(R. id. area. Spinner); // 省份的下 Array. Adapter<String> year. Adapter = new Array. Adapter<String>(this, 拉列表category. Spinner = R. layout. spinner_item_year, years); year. Spinner. set. Adapter(year. Adapter); 修改为 (Spinner)view. find. View. By. Id(R. id. category. Spinner); batch Spinner =(Spinner) Array. Adapter<String> year. Adapter = new Array. Adapter<String>(this. activity(), view. find. View. By. Id(R. id. batch. Spinner); control. Line. Title = R. layout. spinner_item_year, years); year. Spinner. set. Adapter(year. Adapter); 通过使用 (Text. View) view. find. View. By. Id(R. id. control. Line. Title); // 显 示结果标题control. Line. List. View = (List. View) this. getactivity()来获得Activity,代码就不会再报错了。 view. find. View. By. Id(R. id. control. Line. List); // 显示查询结果 …………略return view; }} Contents


教学视频 Code 0601 Code 0602 Code 0603

- Slides: 47