MAXIMIZING THE USE OF THE OVERHEAD PROJECTOR AND


- Slides: 17

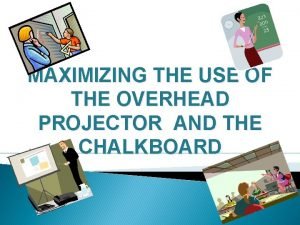
MAXIMIZING THE USE OF THE OVERHEAD PROJECTOR AND THE CHALKBOARD

Introduction New technology introduced terms like multimedia, hypermedia, etc. But let us admit that technology divide is real. Many schools especially those who have not been reached by electricity for one reason or another, do not have a computer. A few schools maybe bountifully blessed with computers and computer-literate teachers. But most schools are not as blessed. They may have at least one computer but teachers may have not been trained to use it. As a result, they resort to the chalkboard, the most available classroom equipment and the overhead projector which has become quite popular in schools.

CHALKBOARD TECHNIQUES A. Sharpen your chalk to get good line quality. B. Stand with your elbow high. Move along as you write. C. Use dots “aiming points”. This keeps writing level. D. Make all writing or printing between 2 or 4 inches high for legibility. E. When using colored chalk, use soft chalk so that it can be erased easily.

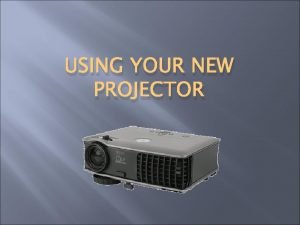
The Overhead Projector (OHP) There are other kinds of projectors like opaque projector and slide projector. The overhead projector seems more available in schools. It has a lot of advantages. Brown (1969)cites the ff. � The projector itself is simple to operate. � The overhead projector is used in the front of the room by the instructor, who has complete control of the sequence, thing and manipulation of his material. � Facing his class and observing students reactions, the instructor can guide his audience , control its attention, and regulate the flow of in formation in the representation.

� The projected image behind the instructor can be as large as necessary for all in the audience to see. � Since the transparency, as it is placed on the projector, is seen by the instructor exactly as students see it on the screen, he may point, write, or otherwise make indications upon it to facilitate communication. � The stage (projection surface) of the projector is large (10 by 10 inches). � It is especially easy for teachers and students to create their own materials for use in the overhead projector.

� An increasing number of high-quality commercial transparencies. Let’s learn how to use it properly so we all maximize its use in the classroom. Brown(1969) gives us several technique. Overhead Project Techniques Among the outstanding attitudes of overhead projection are the many techniques that can be used to present information and control the sequence of a presentation. As as you plan your own transparencies, keep in mind these features of overhead projection.

� You can show pictures and diagrams, using a pointer on the transparency to direct attention to a detail. � You can use a felt pen or way-based to add details or to make points on the transparency during projection. � You can control the rate of presenting information by covering a transparency with a sheet of paper or cardboard and then exposing data as you are ready to discuss each point. � You can superimpose additional transparency sheets as overlays on a base transparency so as to separate processes and complex ideas into elements and present them in step-by-step order.

� You can show three-dimension objects from the stage of projector-in silhouette if the object is opaque, or in color if an object is made of transparent color plastic. � You can overlays back and forth across the base in order to rearrange elements of diagrams or problems. � For special purposes you can simulate motion on parts of a transparency by using the effects of polarized light. To do thus, set a Polaroid glass spinner over the projector lens and attach a special plastic element to parts of the transparency for which motion in desired.

� You can simultaneously project on an adjacent screen other visual materials, usually slides or motion pictures, which illustrate or apply the generalizations shown on a transparency. On reminders on the effective use of the OHP are: � Stand off to one side of the OHP while you face the students. � Don’t talk to the screen. Face the students when you talk, not the screen.

� Place the OHP to your right, if you are right handed, and to your left if you are left handed. � Place the OHP on table low enough so that it does not block you or the screen. � Have the top of the screen titled forward towards the OHP to prevent the “keystone effect” (where the top of the screen is larger then the bottom. � Avoid the mistake including too much detail on each image. A simple layout makes an effective slide. If an audience needs to be given details, provide handouts to be studied later. .

� Avoid large figures. Come up with graphic presentation. � Don’t read the text on your slide. Your audience can read. � Avoid too much text. Rely sparingly on printed text. Come up with more graphs, charts, diagram or pictures. � Your presentations must be readable from afar. � Simple use of color can add effective emphasis.

We can learn from the experiences from others. Brown (1969) enumerates effective practices. Lets learn from them. Ø In primary grades, simple objects like keys, leaves, and cutout paper shapes can be placed directly on the projector to stimulate children's imagination and encourage discussion. Ø In English composition lessons, students themes or writing exercises can be reproduce in films by means of the heat or photocopy process. The teacher and students can analyze the writing for style and grammar as each example is projected.

In arithmetic, blank sheets of acetate and grease pencils can be given to selected students. Have them prepare solutions to homework problems so the class may evaluate and discuss their result. Ø In geometry and trigonometry, two-and three- dimensional diagrams can be built up gradually with carefully prepared transparencies involving color and separate overlays. Geometry theorems and complicated problems can be separated into single components and presented systematically. In other mathematical and technical subjects, plastic objects like some rulers and compasses can be shown to a group of discussion. Ø

Ø In physical education and team training, plays and game procedures may be analyzed through the use of plastic or opaque moving symbols on a transparency which shows the court or field design. Ø In homeroom activities, the secretary can use a cellophane roll (accompanying most projectors) or blank acetate sheets in write nominations, list, motion for consideration, and important discussion points for all to see and react.

Ø In a primary reading class, a picture-transfer transparency can be made from a magazine picture. Ø In art classes, a teacher can sketch on clear plastic with a felt pen. Ø In science, iron filings dusted on a clear plastic sheet over a permanent magnet can be projected clearly to illustrate lines of force. Ø In social studies, all types of maps can be enlarged after accurate but easy preparation. Overlays show key facts about particular regions.

Ø The “progressive disclosure” technique mentioned previously can be achieved by: � Placing a sheet of paper over the transparency and moving it down to expose succeeding lines of type. � Attaching strips of opaque paper to the aides of the mask in order to cover portions of the transparency image, and then flipping the strips back to expose image.

� Placing over the transparency an opaque sheet containing a cutout slit which exposes lines or copy area in sequential order as it is moved down across the copy.
 Use of overhead projector
 Principles of audio-visual aids
 Bop aktual
 Monopoly profit maximizing price
 Computer input devices drawing
 Profile projector procedure
 Projector advantages and disadvantages
 What is simultaneous multithreading
 Profit-maximizing price formula
 Single price monopoly graph
 Maximizing instructional time in the classroom
 Maximizing customer lifetime value
 Perfect competition profit maximization
 Utility maximizing combination
 Profit maximizing output
 Perineal anesthesia
 Best milk a typical profit-maximizing dairy firm
 Maximizing the spread of influence through a social network
