HORNER CHAIR WARGAME COMPETITION PICTORIAL TUTORIAL EVERYTHING YOU
- Slides: 10

HORNER CHAIR WARGAME COMPETITION PICTORIAL TUTORIAL EVERYTHING YOU NEED TO KNOW TO QUICK START PLAYING AND WINNING

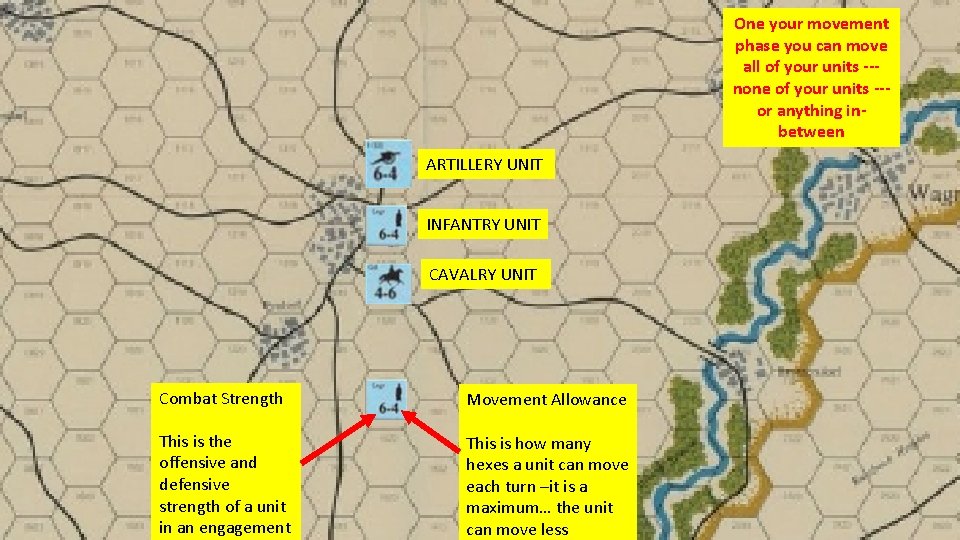
One your movement phase you can move all of your units --none of your units --or anything inbetween ARTILLERY UNIT INFANTRY UNIT CAVALRY UNIT Combat Strength Movement Allowance This is the offensive and defensive strength of a unit in an engagement This is how many hexes a unit can move each turn –it is a maximum… the unit can move less

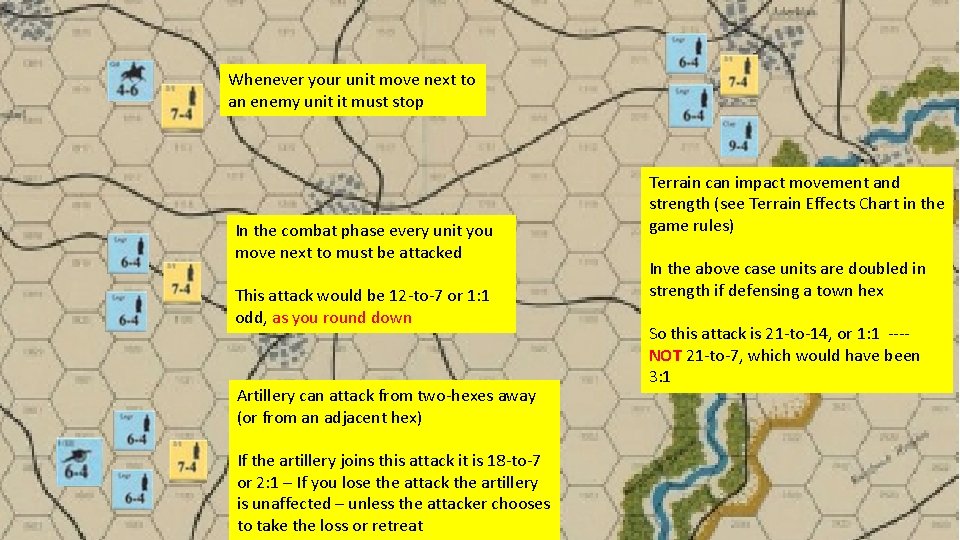
Whenever your unit move next to an enemy unit it must stop In the combat phase every unit you move next to must be attacked This attack would be 12 -to-7 or 1: 1 odd, as you round down Artillery can attack from two-hexes away (or from an adjacent hex) If the artillery joins this attack it is 18 -to-7 or 2: 1 – If you lose the attack the artillery is unaffected – unless the attacker chooses to take the loss or retreat Terrain can impact movement and strength (see Terrain Effects Chart in the game rules) In the above case units are doubled in strength if defensing a town hex So this attack is 21 -to-14, or 1: 1 ---NOT 21 -to-7, which would have been 3: 1

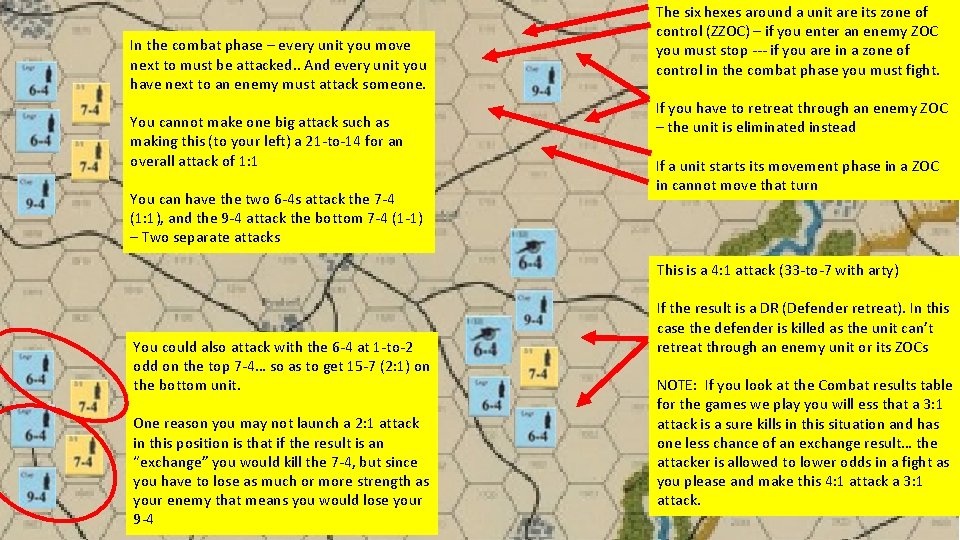
In the combat phase – every unit you move next to must be attacked. . And every unit you have next to an enemy must attack someone. You cannot make one big attack such as making this (to your left) a 21 -to-14 for an overall attack of 1: 1 You can have the two 6 -4 s attack the 7 -4 (1: 1), and the 9 -4 attack the bottom 7 -4 (1 -1) – Two separate attacks The six hexes around a unit are its zone of control (ZZOC) – if you enter an enemy ZOC you must stop --- if you are in a zone of control in the combat phase you must fight. If you have to retreat through an enemy ZOC – the unit is eliminated instead If a unit starts its movement phase in a ZOC in cannot move that turn This is a 4: 1 attack (33 -to-7 with arty) You could also attack with the 6 -4 at 1 -to-2 odd on the top 7 -4… so as to get 15 -7 (2: 1) on the bottom unit. One reason you may not launch a 2: 1 attack in this position is that if the result is an “exchange” you would kill the 7 -4, but since you have to lose as much or more strength as your enemy that means you would lose your 9 -4 If the result is a DR (Defender retreat). In this case the defender is killed as the unit can’t retreat through an enemy unit or its ZOCs NOTE: If you look at the Combat results table for the games we play you will ess that a 3: 1 attack is a sure kills in this situation and has one less chance of an exchange result… the attacker is allowed to lower odds in a fight as you please and make this 4: 1 attack a 3: 1 attack.

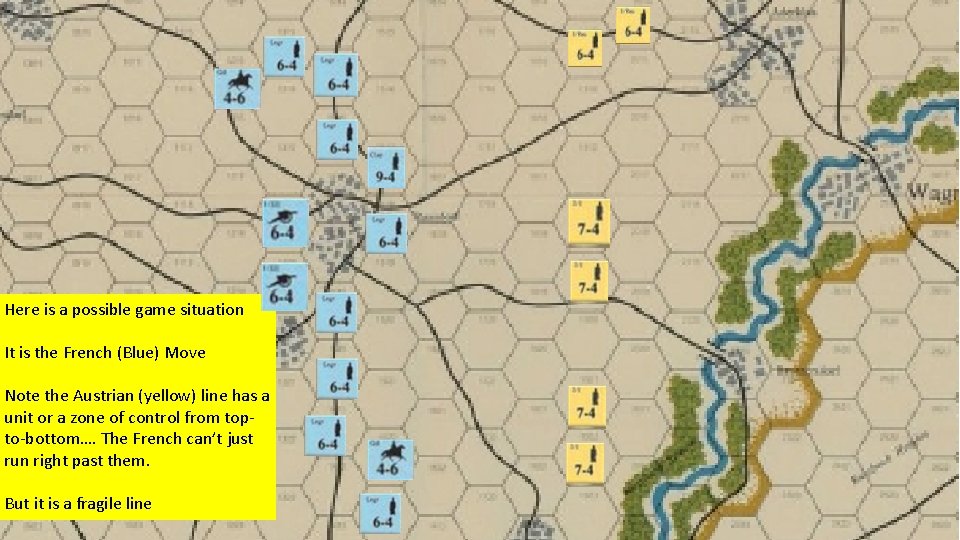
Here is a possible game situation It is the French (Blue) Move Note the Austrian (yellow) line has a unit or a zone of control from topto-bottom…. The French can’t just run right past them. But it is a fragile line

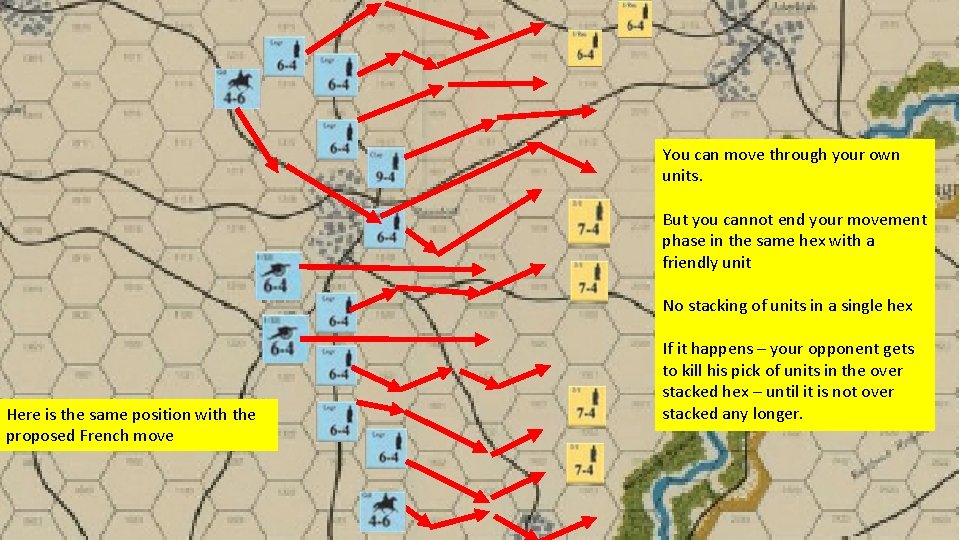
You can move through your own units. But you cannot end your movement phase in the same hex with a friendly unit No stacking of units in a single hex Here is the same position with the proposed French move If it happens – your opponent gets to kill his pick of units in the over stacked hex – until it is not over stacked any longer.

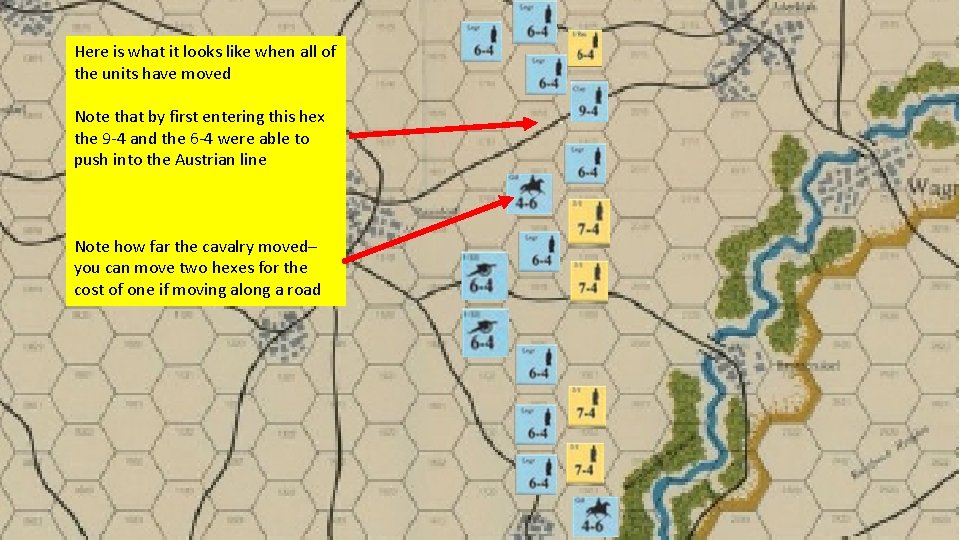
Here is what it looks like when all of the units have moved Note that by first entering this hex the 9 -4 and the 6 -4 were able to push into the Austrian line Note how far the cavalry moved– you can move two hexes for the cost of one if moving along a road

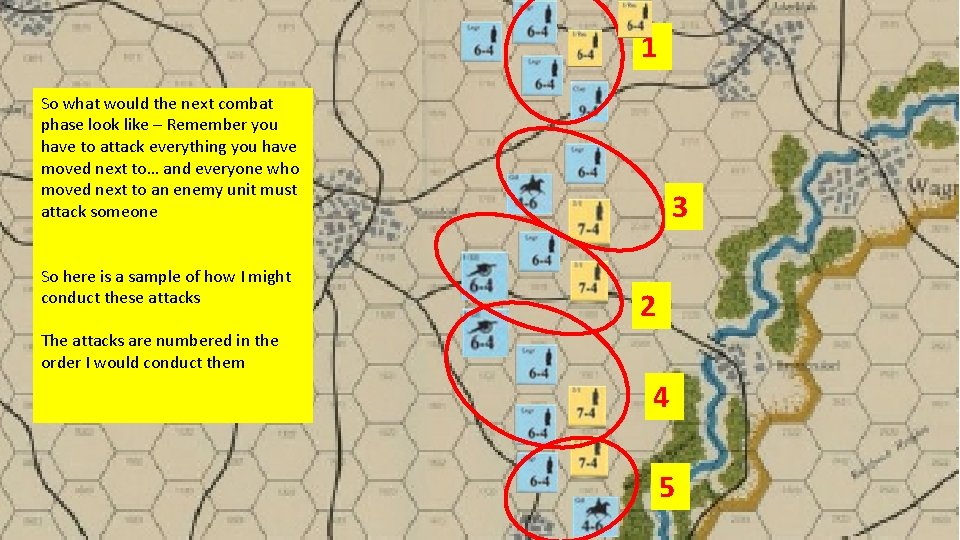
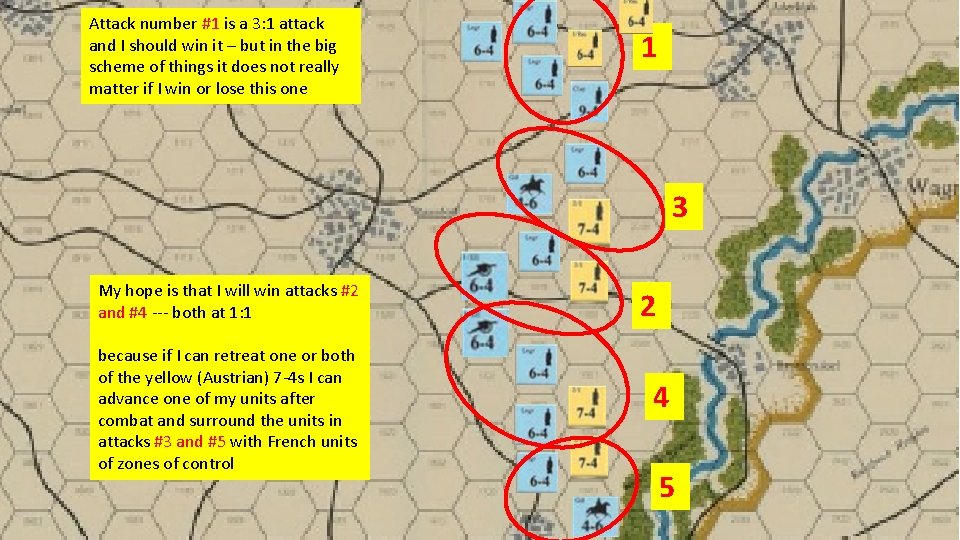
1 So what would the next combat phase look like – Remember you have to attack everything you have moved next to… and everyone who moved next to an enemy unit must attack someone So here is a sample of how I might conduct these attacks 3 2 The attacks are numbered in the order I would conduct them 4 5

Attack number #1 is a 3: 1 attack and I should win it – but in the big scheme of things it does not really matter if I win or lose this one 1 3 My hope is that I will win attacks #2 and #4 --- both at 1: 1 because if I can retreat one or both of the yellow (Austrian) 7 -4 s I can advance one of my units after combat and surround the units in attacks #3 and #5 with French units of zones of control 2 4 5

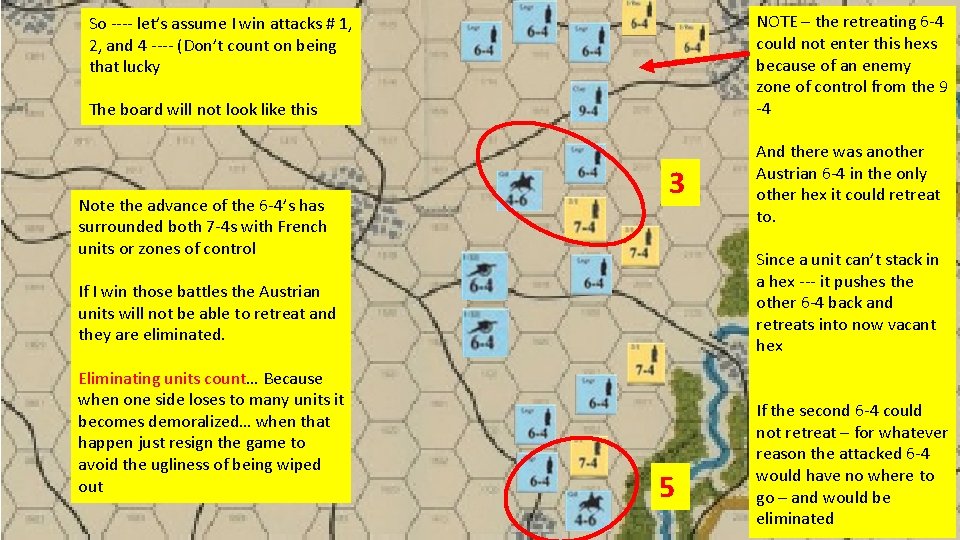
NOTE – the retreating 6 -4 could not enter this hexs because of an enemy zone of control from the 9 -4 So ---- let’s assume I win attacks # 1, 2, and 4 ---- (Don’t count on being that lucky The board will not look like this Note the advance of the 6 -4’s has surrounded both 7 -4 s with French units or zones of control 3 Since a unit can’t stack in a hex --- it pushes the other 6 -4 back and retreats into now vacant hex If I win those battles the Austrian units will not be able to retreat and they are eliminated. Eliminating units count… Because when one side loses to many units it becomes demoralized… when that happen just resign the game to avoid the ugliness of being wiped out And there was another Austrian 6 -4 in the only other hex it could retreat to. 5 If the second 6 -4 could not retreat – for whatever reason the attacked 6 -4 would have no where to go – and would be eliminated