Crime Scene Investigation Crime Scene Investigation Secure the


- Slides: 35

Crime Scene Investigation

Crime Scene Investigation Secure the Crime Scene As a criminalist/crime scene investigator, the first things you should do upon arriving at the scene is: 1) Identify and contact the office in charge (OIC) of the scene – this is likely to be a detective or ranking member of law enforcement present. 2) Identify all other persons who have or have had access to the scene – this would include: a) other law enforcement officers b) coroner’s personnel c) any public safety personnel (fire, ambulance, etc) d) any civilians present (residents, neighbors, newspersons etc. 3) Establish the scope and range of the scene –this includes: a) physical boundaries of the scene b) secondary scenes such as associated vehicles or relevant sites outside the physical boundaries of the scene

Crime Scene Investigation Secure the Crime Scene 4) Physically secure the scene with police line tape or by other means and have law enforcement officers available to enforce the scene perimeter 5) Securing the scene – this can be difficult on occasion, especially in the case of high profile cases where news persons, and onlookers may become unruly or persistent. Also, high profile cases attract high ranking law enforcement persons who, technically, have nothing to do with the case and have no business being on the scene. 6) Interview initial resoponding officers (RO’s) – this would include: a) law enforcement officers responding to the initial call b) backup officers who responded to the scene

Crime Scene Investigation Secure the Crime Scene 7) Establish the perpetrator’s path of entry and exit – this includes identifying any obvious pieces of evidence that comes to the attention of the crime scene investigator 8) Do an initial walk-through – this should be done along with the initial responding officer who can add any information they may have obtained prior to your arrival 9) Develop a strategy for systematically: a) examining/investigating the crime scene b) documenting the crime scene investigation

Crime Scene Investigation Record the Crime Scene – typically, there is only so much time available to evaluate and record the scene. The investigator must move purposfully and record the scene using a combination of methods including: 1) Photography – Crime scene photography is very important especially for establishing the physical relationships of items of interest (furniture, stains, weapons, bodies, etc) 2) Sketches – this is actually a very good way to make detailed observations about a scene. A sketch of the overall crime scene noting the relative location of items along with detailed sketches and comments about various items of evidence is extremely important. 3) Detailed notes – these are critical since often you will be asked about the scene in court long after the investigation has taken place. Contemporaneous notes are the only way you will ever be able to accurately and truthfully be able to describe and recall events and observations

Crime Scene Investigation 1) Photography – “A picture is worth a thousand words” 1) Establish overall shots of the scene – this includes: a) the entire scene b) surrounds areas c) points of exit and entry 2) Area shots showing the general relationship of items 3) medium range shots showing the aspect and positioning of items 4) Close-ups showing details of interest on the evidence items 5) make sure to keep a running log of all photos taken a) a written log including location, photo #, and description of the item/site photographed b) a “Photo map” using an overall stetch of the site or localized area is also helpful for locating the item photgraphed and where the photo was taken from

Crime Scene Investigation 1) Photography – “A picture is worth a thousand words” 6) Videotape – the use of videotape is being implemented on a widespread basis in crime scene investigation recently. The advantages of videotaping include: a) it affords an “in person” view of the scene and evidence b) it allows for a continuous narrative of the crime scene investigator especially during initial walk-through and subsequent re-construction of the crime

Crime Scene Investigation 2) Sketches – “An annotated picture is worth a ten thousand words” a) Rough sketch – this is made at the time of the investigation and doesn’t have to be exact or “pretty”. It does need to include: 1) an overall view including the relationship of items to each other 2) All recovered items of physical evidence 3) All other important items of the crime scene 4) Location of objects by use of measurements 5) Identification of all items by use of identifying numbers or letters which match with the investigator’s evidence property log. b) Finished Sketch – this is made after the fact from the rough sketch and should be neat, well-drawn with all items easily identifiable. All measurements should be as accurate as possible and should locate the item from at least two (2) landmarks (walls, doorways, fences, etc)

Crime Scene Investigation A rough sketch should be made at the time of the investigation and should include a simple depiction of all items of interest in the scene being sketched. Oftentimes a sketch will be of a small part of an overall scene. Then, there is usually a larger sketch which act as an “atlas” showing the relative locations of the smaller, more detailed sketches.

Crime Scene Investigation The finished sketch, unlike the rough sketch must be neat and presentable with items clearly delineated and recognizable. Measurements must be neatly shown and must come from the rough sketch to be admissible in court.

Crime Scene Investigation

Crime Scene Investigation

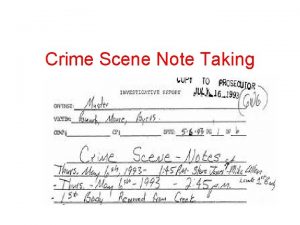
Crime Scene Investigation 3) Notes – Note taking at the scene must be a constant activity and should include: a) Scene – a detailed written description of the scene with the location of the items of physical evidence recovered. They should include: 1) time of discovery 2) who discovered it 3) how it was discovered 4) who handled the item before packaging 5) who packaged and marked the item 6) disposition of the item b) Details – this may be the only record of the scene that exists after a period of time. The note taker should put down as many details as possible at the time the notes are taken. Only contemporaneous notes are allowed as evidence in court. c) Tape recording

Crime Scene Investigation

Crime Scene Investigation

Crime Scene Investigation

Crime Scene Investigation

Crime Scene Investigation

Crime Scene Investigation

Crime Scene Investigation

Crime Scene Investigation

Crime Scene Investigation Conduct a Systematic Search for Evidence – the search for physical evidence at a crime scene must be thorough and systematic. Typically, the scene must be searched even if the solving of the crime is not at issue during the search. 1) Search Control – Typically, one person is put in charge of controlling the search to prevent duplication of effort or missed areas. 2) Search Criteria – the nature of the crime and the scene will determine what and how you search. Typically, this will differ for different crime scenes so a certain expertise must be developed by the crime scene investigator such that they recognize the scene type and can direct the search correctly. 3) Search Strategy – Often, the physical make-up of the scene will determine the search strategy. There are several different search patterns that have been developed for different environments.

Crime Scene Investigation

Crime Scene Investigation Conduct a Systematic Search for Evidence 3) Search Strategy (cont’d) – differing scenes require differing search strategies. Scene types include but are not limited to: a) buildings – houses, offices, shops, manufactories, stadiums, kiosks, jails/prisons, etc. b) open areas – lawns, yards, parking lots, streets, school grounds, maintenance yards, etc. c) vehicles – cars, trailers, buses, airplanes, etc d) persons – victim(s), suspect(s) 4) Search Evidence – again, the nature of the crime will determine what you search for. For homicides, one would search for a murder weapon (gun, shell casings, bullets; knife; garrote, etc. ) as well as searching for blood and cross-transfer evidence (trace evidence). For a burglary, one would search for evidence of forced entry, shoe marks, fingerprints, tool-marks, etc. For hit-and-run, one would search for glass, paint transfer, tire marks, etc.

Crime Scene Investigation Conduct a Systematic Search for Evidence 4) Search Evidence (cont’d) – differing scenes require a search for different types of evidence. Physical evidence can be anything from massive objects to microscopic traces. Evidence collection can take place at may levels: a) At the crime scene – large items and those smaller items visible by eye search and with the use of different reagents can be collected and inventoried at the scene. b) trace evidence and those items associated with cross-transfer usually have to be evaluated back at the laboratory. These include: 1) clothing – including victim’s clothing and suspect’s clothing 2) trace evidence collected by vacuum sweeping the crime scene area (when practicable). 3) biological evidence – including blood, skin, saliva, semen and other body fluids.

Crime Scene Investigation Conduct a Systematic Search for Evidence 4) Search Evidence (cont’d) – Body searches: These can take place at the coroner’s office or at the hospital depending on the condition of the individual. The searches should include: a) Clothing b) Fingernail scrapings c) Head and pubic hairs d) Blood and saliva (for DNA purposes) e) Vaginal, anal and oral swabs (in sex-related crimes) f) recovered foreign objects (bullets, etc) g) hand swabs

Crime Scene Investigation Collect and Package Physical Evidence – physical evidence must be handled and packaged in a way that prevents any change from occurring. The evidence must be properly packaged according to type and properly labeled and sealed with appropriate initials to maintain chain of custody. The integrity of evidence is best maintained when it is kept in its original condition as found at the crime scene. Trace evidence should not be removed from the objects they’re found on unless it is impossible to transport the item. 1) Proper Packaging – The crime scene investigator should bring several different types of packaging with them to the scene. Small packages to contain hairs, fibers, bullets, glass or other items should be available typical types of small packaging include: a) screw-cap or pressure-lid plastic bottles b) coin envelopes/manila envelopes c) small pill boxes d) “druggist fold” paper bindles

Crime Scene Investigation Collect and Package Physical Evidence 1) Proper Packaging (cont’d) – While these types of sealable packages are good for powders and other dry trace, bloodstains and bloodstained evidence is different. Bloodstained evidence should not be packaged in airtight containers due to the moisture content of the blood. The blood will start to mold very quickly and this mold will damage the evidence item and the associated bloodstains. For damp or bloody items one should use: a) brown paper bags of appropriate size b) earthguard bags c) butcher paper that can be folded and properly taped shut.

Crime Scene Investigation Collect and Package Physical Evidence 2) Proper Labeling – Once items have been properly packaged, they must be properly labeled. Proper labeling includes the following: a) The investigating agency’s case number b) the scene site (especially if more than one scene is involved) c) a brief description of the evidence or the evidence item number which correlates to an evidence log d) the location where the evidence was obtained within the scene e) the collector’s name or badge no. and initials f) the date and time collected

Crime Scene Investigation Collect and Package Physical Evidence 3) Chain of Custody – Once items have been properly packaged and labeled, they must be transported to the crime lab for further evaluation. A complete and correct chain of custody must be maintained for all items. Often it is not the evidence collector who transports the evidence to the lab so a chain of custody log must be maintained indicating the transfer of custody to and from every individual who is involved in transporting or storing the evidence until it gets to the crime lab. These include: a) the collecting officer b) the transportation officer c) any evidence storage officer if the evidence is stored prior to taking it to the lab d) any further transportation officer e) anyone who gets into the evidence for any reason f) the laboratory evidence collection person(s)

Crime Scene Investigation Crime Scene Safety – In crime scene investigation as in all other areas of law enforcement, the top priority item is officer safety. Due to changes in the social milieu, deadly, communicable diseases such as AIDS and Hepatitis are things officers can come into contact with on a frequent basis. Following proper safety guidelines is crucial for maintaining officer safety at the crime scene and beyond to the crime lab itself. 1) Minimum protection – the minimum level of protection an investigator should wear includes latex gloves (double gloved) and tyvek shoe covers. It is also strongly recommended that the investigator wear some sort of mouth covering and eye protection especially at scenes where blood or other biological materials are found. 2) Breathing protection - at scenes where contaminated dust or gas may be an issue, the investigator should wear a particle mask or respirator as well as goggles of some kind.

Crime Scene Investigation Crime Scene Safety (cont’d) – 3) Sharps – when processing or collecting evidence one should always be alert for the presence of sharp or pointed objects that can cut the skin and allow an entry point for infection or contaminated material. 4) Biohazard – The investigator should always have red, properly marked Biohazard bags available for the disposal of contaminated gloves, masks, shoe covers, etc. and Biohazard labels should always be affixed to all evidence collected which may contain blood or other biologically dangerous materials. 5) Note taking in a biohazard environment – notes should be taken only with uncontaminated gloves or by a person who is not directly handling evidence. This avoids contamination of pens and notebooks, etc.

Crime Scene Investigation Crime Scene Safety (cont’d) – 6) Eating – eating, drinking or application of make-up are prohibited at the immediate crime-scene 7) Non-disposables – All non-disposable items such as overalls or lab coats should be removed and placed in properly marked linen bags for laundering by an appropriate service. Any personal clothing that becomes contaminated should be removed for laundering also. Personal clothing that becomes contaminated should never be taken home for cleaning.

Crime Scene Investigation Legal Considerations at the Crime Scene – Since the 1960’s, the Supreme Court has been defining the circumstances under which the police can search for evidence in the absence of a search warrant. A number of allowances have been made for warrantless searches (which would normally violate the 4 th Amendment): 1) the existence of emergency circumstances 2) the need to prevent the immediate loss or destruction of evidence 3) a search of a person and property within the immediate control of the person provided it is made incident to a lawful arrest (probable cause) 4) a search made by consent of the parties involved

Crime Scene Investigation Legal Considerations at the Crime Scene – Two cases were decided in 1978 on these issues: Mincey v. Arizona – The court decided that a 4 -day search following a warrantless entry in response to an officerinvolved shooting was not legal and the evidence obtained which was used to convict Mincey was thrown out and the conviction was overturned. Michigan v. Tyler – Following the burning of a building, three additional searches of the premises turned up evidence of owner-initiated arson. The court ruled that the three subsequent trips into the premises without a warrant being obtained were illegal searches and the conviction was overturned. The search of the buildings following the initial response to the fire was allowed though warrantless since it immediately followed the initial entry by firefighters.
 Tcole 2106
 The term encompasses all objects that can establish
 What are the 5 steps in crime scene investigation
 Intermediate crime scene search #2106
 Crime scene note taking
 Tcole 2106
 Summarize locard's principle of exchange
 Tcole 2106 crime scene investigation
 Grid linear spiral and quadrant are all
 Crime scence investigator
 Subdatum points
 Forensic science chapter 2 vocabulary
 Crime scene investigation background
 Seven s of crime scene
 Secure the scene
 History scene investigation
 Historical scene investigation
 Cross projection sketch crime scene
 _____ is done with the first responding officer.
 How do investigators package dangerous sharp items
 Disadvantages of freehand sketches
 Crime scene factoring and quadratic functions answer key
 Crime scene
 Phil spector crime scene
 Robert pickton trailer
 Forensic science begins at the crime scene.
 Crime scene notes
 While the csi team is searching the crime scene, _____.
 Final sketch crime scene
 Corpus delicti
 Crime scene 2
 Csi search patterns
 What must be included on a crime scene sketch
 Sketching a crime scene
 West memphis 3 crime photos
 Crime scene

