2 MEG II experiment 3 e spectrometer and
- Slides: 16


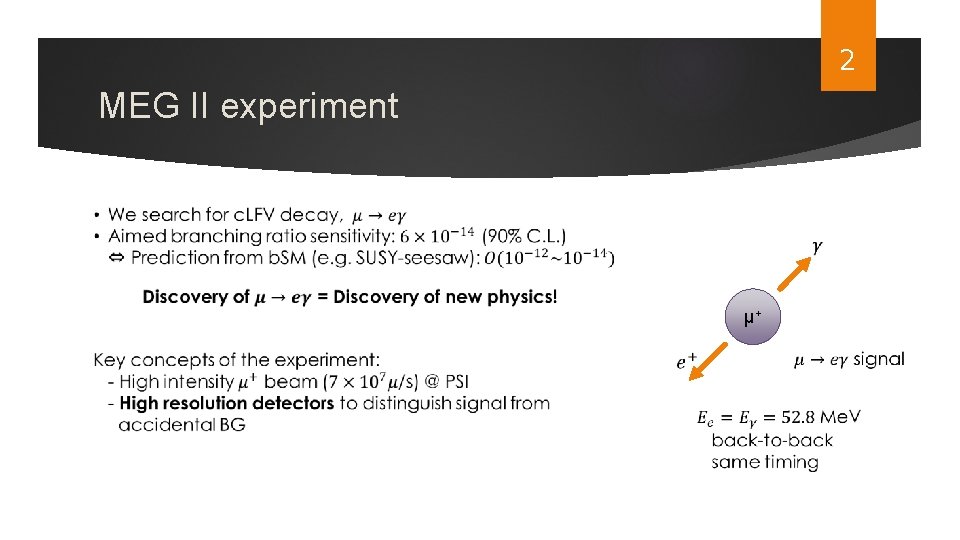
2 MEG II experiment μ+

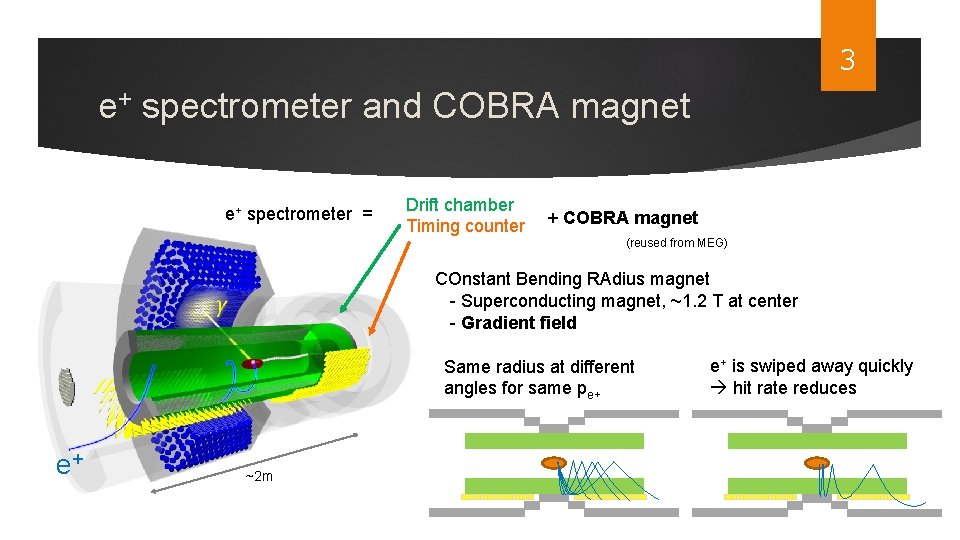
3 e+ spectrometer and COBRA magnet e+ spectrometer = Drift chamber Timing counter + COBRA magnet (reused from MEG) COnstant Bending RAdius magnet - Superconducting magnet, ~1. 2 T at center - Gradient field Same radius at different angles for same pe+ e+ ~2 m e+ is swiped away quickly hit rate reduces

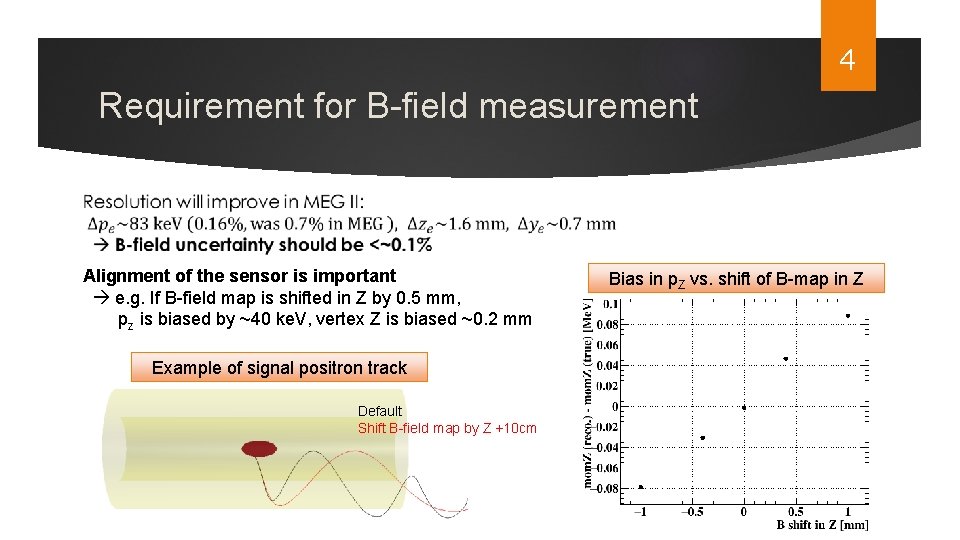
4 Requirement for B-field measurement Alignment of the sensor is important e. g. If B-field map is shifted in Z by 0. 5 mm, pz is biased by ~40 ke. V, vertex Z is biased ~0. 2 mm Example of signal positron track Default Shift B-field map by Z +10 cm Bias in p. Z vs. shift of B-map in Z

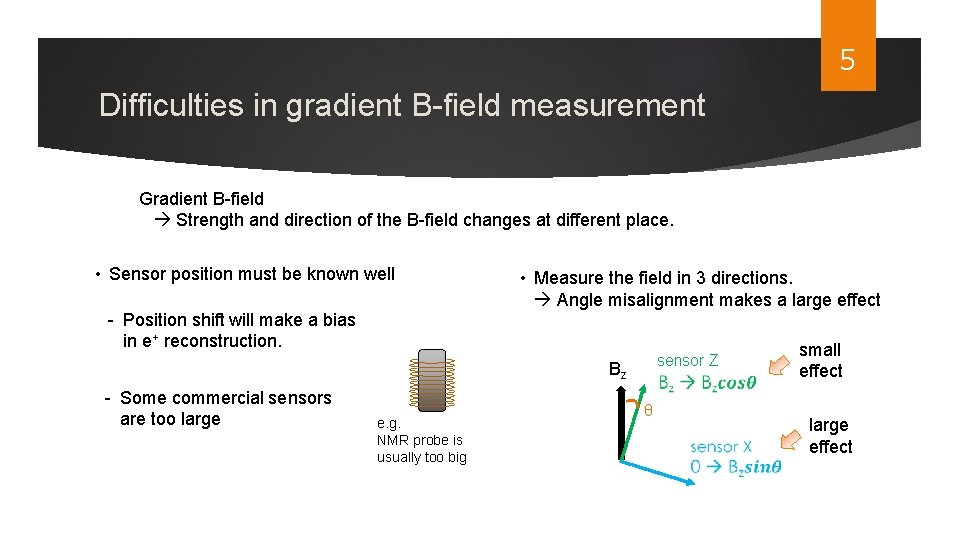
5 Difficulties in gradient B-field measurement Gradient B-field Strength and direction of the B-field changes at different place. • Sensor position must be known well - Position shift will make a bias in e+ reconstruction. • Measure the field in 3 directions. Angle misalignment makes a large effect sensor Z Bz - Some commercial sensors are too large e. g. NMR probe is usually too big θ small effect large effect

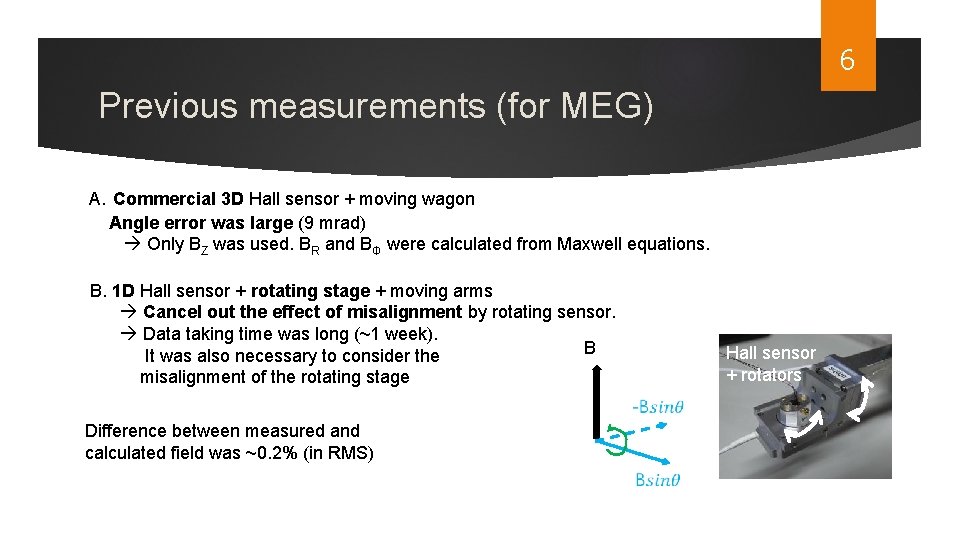
6 Previous measurements (for MEG) A. Commercial 3 D Hall sensor + moving wagon Angle error was large (9 mrad) Only BZ was used. BR and BΦ were calculated from Maxwell equations. B. 1 D Hall sensor + rotating stage + moving arms Cancel out the effect of misalignment by rotating sensor. Data taking time was long (~1 week). B It was also necessary to consider the misalignment of the rotating stage Difference between measured and calculated field was ~0. 2% (in RMS) Hall sensor Data points (XY + rotators view)

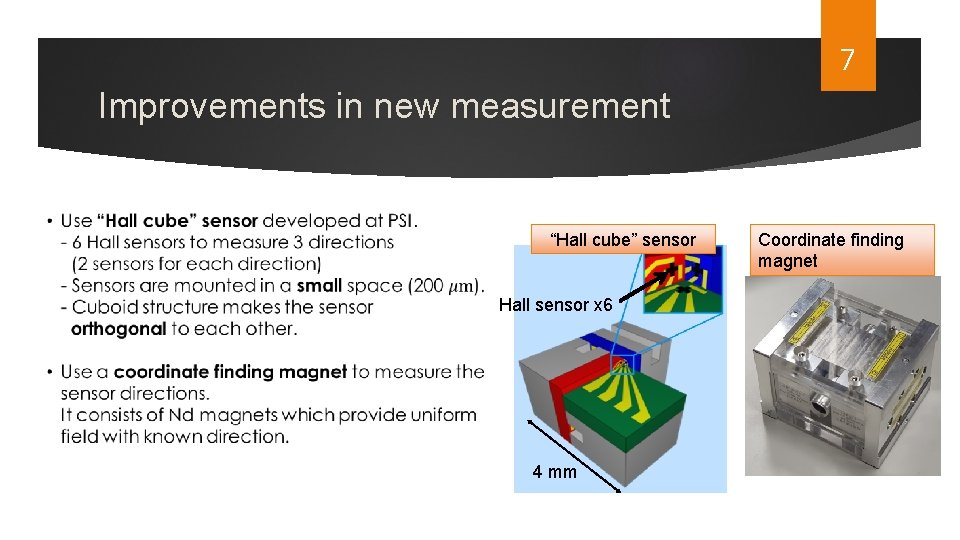
7 Improvements in new measurement “Hall cube” sensor Hall sensor x 6 4 mm Coordinate finding magnet

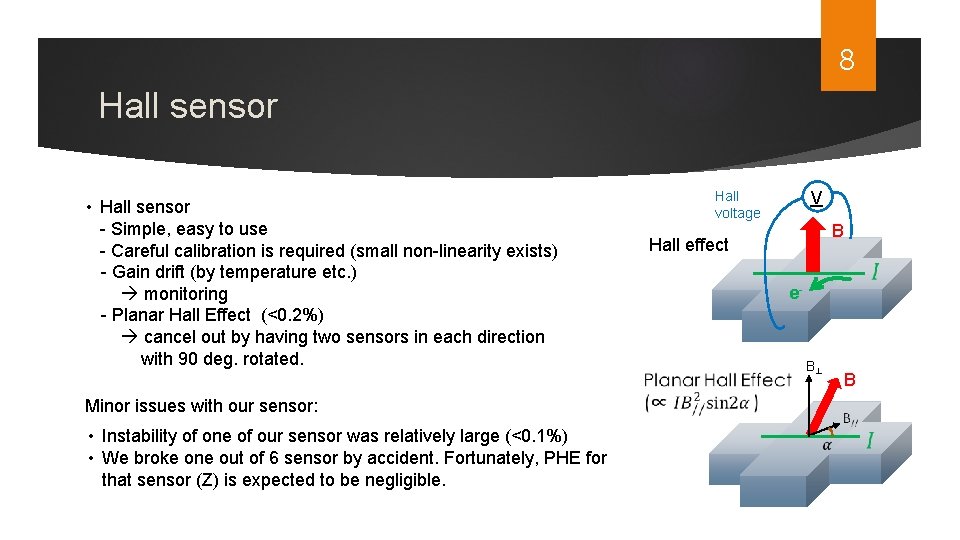
8 Hall sensor • Hall sensor - Simple, easy to use - Careful calibration is required (small non-linearity exists) - Gain drift (by temperature etc. ) monitoring - Planar Hall Effect (<0. 2%) cancel out by having two sensors in each direction with 90 deg. rotated. Minor issues with our sensor: • Instability of one of our sensor was relatively large (<0. 1%) • We broke one out of 6 sensor by accident. Fortunately, PHE for that sensor (Z) is expected to be negligible. V Hall voltage B Hall effect e- B⊥ B

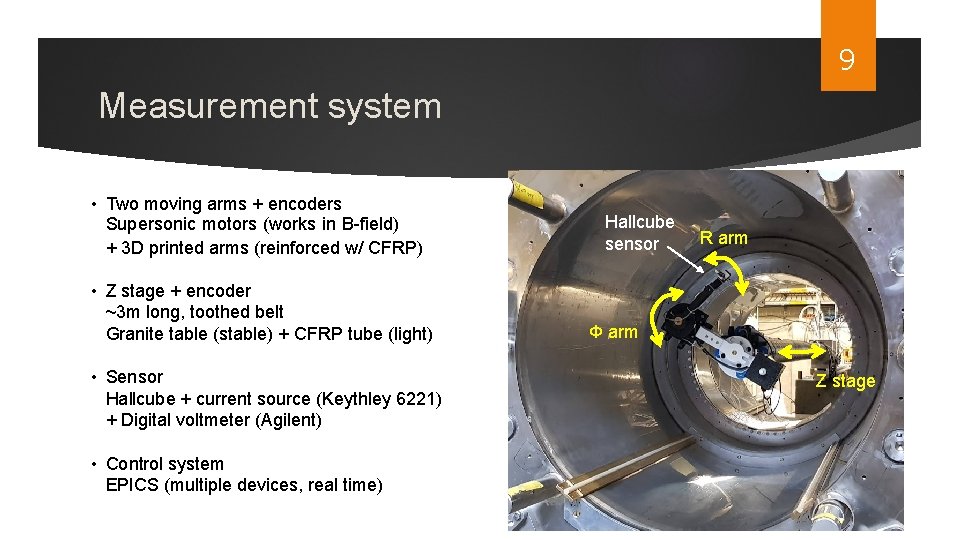
9 Measurement system • Two moving arms + encoders Supersonic motors (works in B-field) + 3 D printed arms (reinforced w/ CFRP) • Z stage + encoder ~3 m long, toothed belt Granite table (stable) + CFRP tube (light) • Sensor Hallcube + current source (Keythley 6221) + Digital voltmeter (Agilent) • Control system EPICS (multiple devices, real time) Hallcube sensor R arm Φ arm Z stage

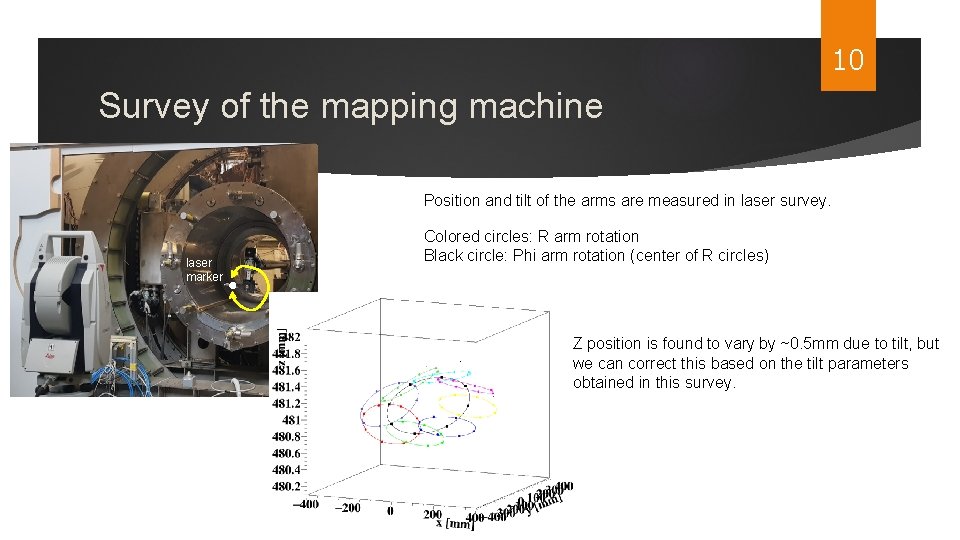
10 Survey of the mapping machine Position and tilt of the arms are measured in laser survey. laser marker Colored circles: R arm rotation Black circle: Phi arm rotation (center of R circles) Z position is found to vary by ~0. 5 mm due to tilt, but we can correct this based on the tilt parameters obtained in this survey.

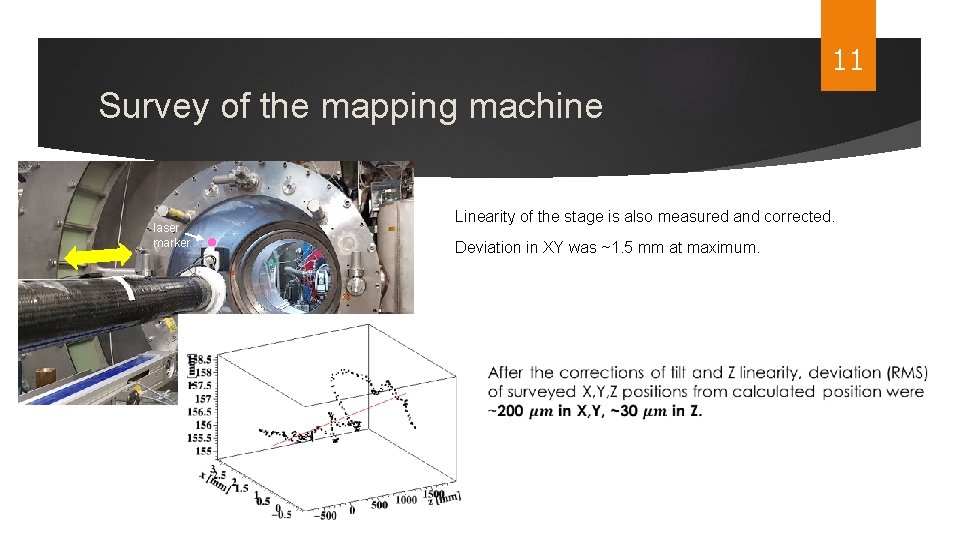
11 Survey of the mapping machine laser marker Linearity of the stage is also measured and corrected. Deviation in XY was ~1. 5 mm at maximum.

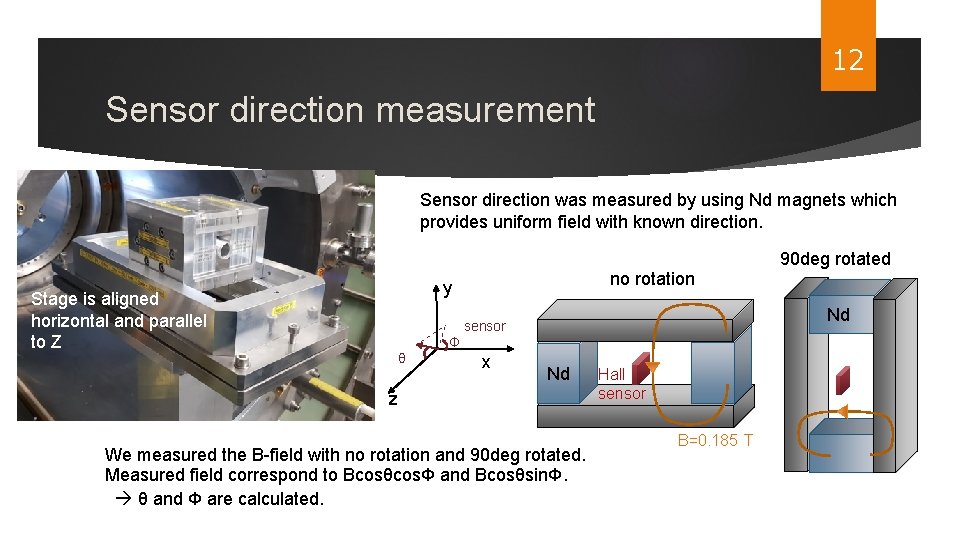
12 Sensor direction measurement Sensor direction was measured by using Nd magnets which provides uniform field with known direction. Stage is aligned horizontal and parallel to Z no rotation y Nd sensor θ Φ x 90 deg rotated Nd z We measured the B-field with no rotation and 90 deg rotated. Measured field correspond to BcosθcosΦ and BcosθsinΦ. θ and Φ are calculated. Hall sensor B=0. 185 T

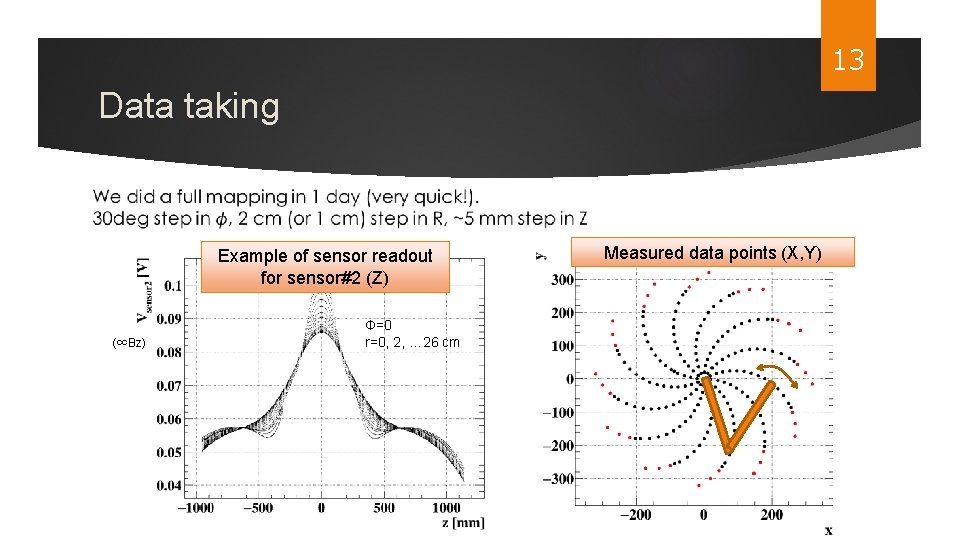
13 Data taking Example of sensor readout for sensor#2 (Z) (∝Bz) Φ=0 r=0, 2, … 26 cm Measured data points (X, Y)

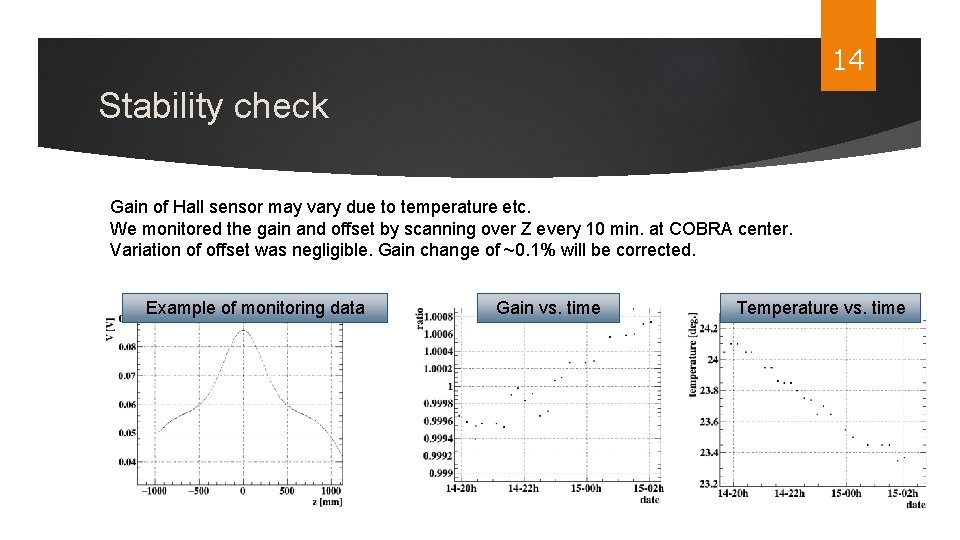
14 Stability check Gain of Hall sensor may vary due to temperature etc. We monitored the gain and offset by scanning over Z every 10 min. at COBRA center. Variation of offset was negligible. Gain change of ~0. 1% will be corrected. Example of monitoring data Gain vs. time Temperature vs. time

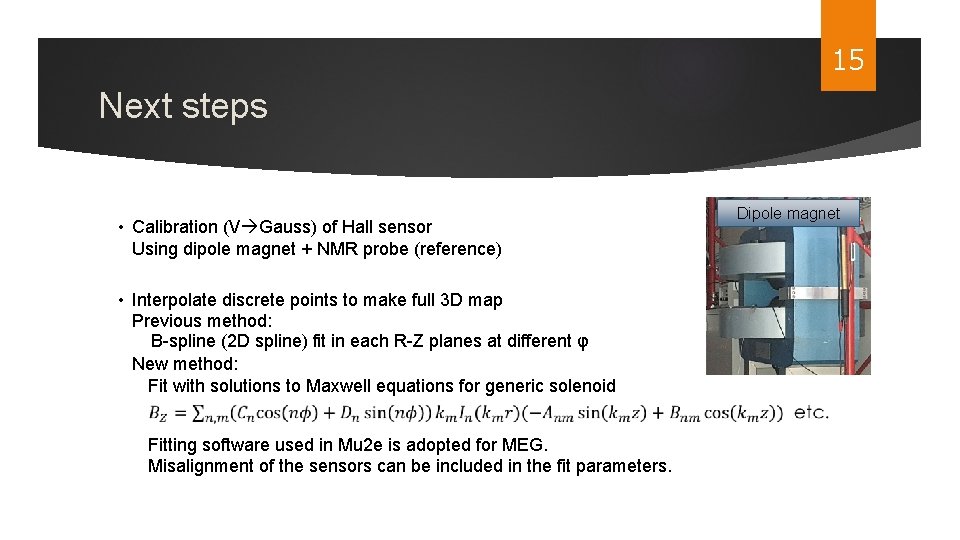
15 Next steps • Calibration (V Gauss) of Hall sensor Using dipole magnet + NMR probe (reference) • Interpolate discrete points to make full 3 D map Previous method: B-spline (2 D spline) fit in each R-Z planes at different φ New method: Fit with solutions to Maxwell equations for generic solenoid Fitting software used in Mu 2 e is adopted for MEG. Misalignment of the sensors can be included in the fit parameters. Dipole magnet

16 Summary