Physics Reading Vernier Scales MST Physics 1135 and

- Slides: 6

Physics Reading Vernier Scales MS&T Physics 1135 and 2135 Labs

Vernier Scales: Background Physics Invented in 1631 by Pierre Vernier, Vernier scales allow very accurate measurement of lengths and angles through the use of two scales. One scale (the primary or data scale) provides the base measurement, with the other (the secondary, indicating, or Vernier scale) increasing precision. The reading on the Vernier scale is added to the reading on the primary scale to increase the precision. A typical Vernier adds one or two significant figures to a given measurement. In Physics 1135 and 2135 labs, we use three main devices with Vernier scales: calipers, torsion lathes, and spectrometers. Each is covered in turn in the following slides. MS&T Physics 1135 and 2135 Labs: Reading Vernier Scales Slide 2/6

Measurement Basics: the Meterstick Physics A typical meterstick with divisions spaced 1 mm apart is accurate give or take a millimeter. In this example, x = 33 ± 1 mm To increase precision, we could add more lines, which would be very difficult to read. Next, we’ll measure the same object with calipers to see how Vernier scales circumvent this obstacle. MS&T Physics 1135 and 2135 Labs: Reading Vernier Scales Slide 3/6

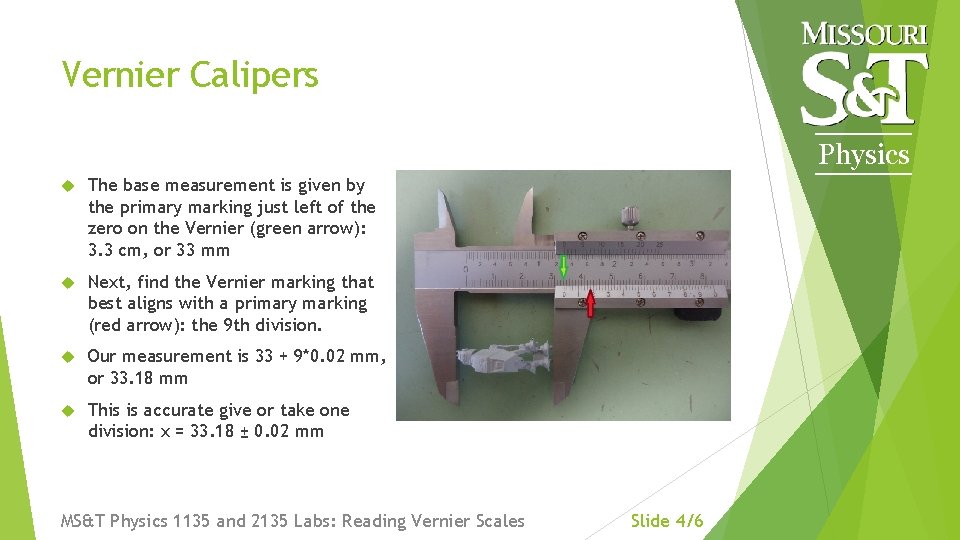
Vernier Calipers Physics The base measurement is given by the primary marking just left of the zero on the Vernier (green arrow): 3. 3 cm, or 33 mm Next, find the Vernier marking that best aligns with a primary marking (red arrow): the 9 th division. Our measurement is 33 + 9*0. 02 mm, or 33. 18 mm This is accurate give or take one division: x = 33. 18 ± 0. 02 mm MS&T Physics 1135 and 2135 Labs: Reading Vernier Scales Slide 4/6

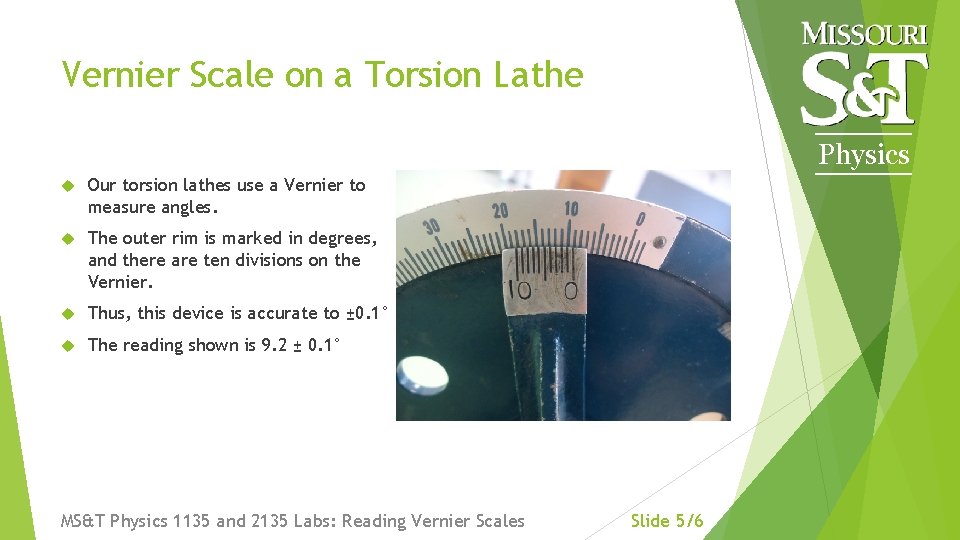
Vernier Scale on a Torsion Lathe Physics Our torsion lathes use a Vernier to measure angles. The outer rim is marked in degrees, and there are ten divisions on the Vernier. Thus, this device is accurate to ± 0. 1° The reading shown is 9. 2 ± 0. 1° MS&T Physics 1135 and 2135 Labs: Reading Vernier Scales Slide 5/6

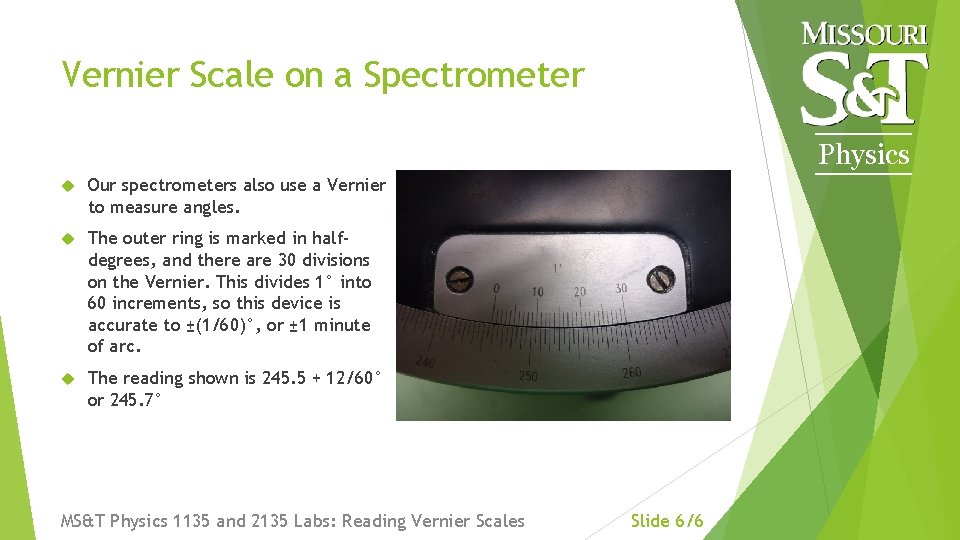
Vernier Scale on a Spectrometer Physics Our spectrometers also use a Vernier to measure angles. The outer ring is marked in halfdegrees, and there are 30 divisions on the Vernier. This divides 1° into 60 increments, so this device is accurate to ±(1/60)°, or ± 1 minute of arc. The reading shown is 245. 5 + 12/60° or 245. 7° MS&T Physics 1135 and 2135 Labs: Reading Vernier Scales Slide 6/6