Making Apple Jelly with homemade apple juice From


- Slides: 21

Making Apple Jelly with homemade apple juice

From Apples to Jelly… Step 3: Start with Apples Step 1: Step 2: Make Juice Make Jelly Boiling Water Canning Process Finished Product: Homemade Canned Apple Jelly!

Apple Jelly from So Easy To Preserve, 6 INGREDIENTS: for about 4 half-pint jars • 4 cups apple juice (about 3 pounds apples and 3 cups water) • 2 tablespoons lemon juice, if needed or desired • 3 cups sugar th ed.

EQUIPMENT: For Making Juice For Making Jelly For Canning • Stovetop range • Colander • Stovetop range with timer • Large saucepot with lid • Cutting board • Measuring cups • Boiling water canner with rack • Knife • Large stockpot with lid • Measuring cups • Stirring spoon • Jelly bag, strainer, and stand • Large mixing bowl • Ladle, funnel, and jars (with lids) • Measuring spoons • Stirring spoon • Small glass jar • Small saucepan and/or rubbing alcohol • Candy/jelly thermometer and/or metal spoon and/or small plate and freezer • Half-pint canning jars, two-piece metal canning lids and ring bands • Permanent marker • Ladle and spoon • Towel or cake-cooling rack • Jar funnel and jar lifter • Headspace tool • Paper towels

Step One: Make Juice • Prepare apples • Extract juice

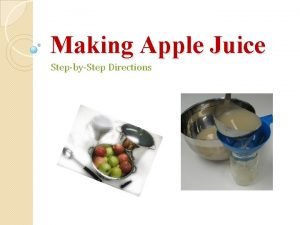
Prepare Apples • Select ¼ slightly under-ripe and ¾ fully ripe apples. Weigh them. For one batch of jelly, use 3 pounds. For best chance of getting a good gel, make only one batch at a time. Use no more than 6 -8 cups of juice (two batches). • Sort and rinse, then remove stems (and blossom ends if desired). Do NOT remove core and skin, which contain a high concentration of pectin. • Cut apples into small pieces. • Place apple pieces in a large stockpot and add one cup of water pound of apples (3 cups for 3 pounds apples). • Bring to a boil on high heat then reduce heat to simmer for 20 -25 minutes or until apples are soft.

Extract Juice • Ladle the apple mixture into a damp jelly bag, suspended over a large bowl. (Or use a fruit press. ) • To make a more clear juice, do not press or squeeze the apples while they are straining. You may re-strain as much as is needed to produce a more clear juice if desired. If a press is used, then re-strain through a jelly bag to make a more clear juice.

Step Two: Make Jelly • Prepare jars • Test for pectin • Test for acid • Cook until gelling point

Prepare Jars and Lids • Wash jars well with soap and water, rinse well. • Check ring bands and discard any with bends or rust. • Label and prepare lids as instructed by manufacturer. • Place canner rack in the bottom of a boiling water canner and fill canner half-full with clean water.

Apple jelly can be processed in boiling water for 5 minutes at sea level in pre-sterilized jars or for 10 minutes in clean jars with no pre-sterilization. So, you choose: • If you are going to process the filled jars of jelly for 10 minutes, then preheat the empty jars in the canner and leave them there to keep warm until filling. Lower empty jars onto rack in boiling water canner and heat canner water to 180°F. • Or, if you are going to process the jelly for less than 10 minutes then presterilize jars first. Pre-sterilize glass jars by placing them on the rack in your canner, completely covering them with water, and bringing the water to a boil. Boil the empty jars for 10 minutes (plus one minute for each additional 1, 000 feet above sea level). Reduce heat and keep the jars warm until filling time. The canner water should be about 180°F when it is time to add the filled jars of jelly.

Test for Pectin – Choose one: • Cooking test • Measure ⅓ cup juice and ¼ cup sugar into saucepan. Heat and stir until sugar dissolves. Bring to a boil until it gives the sheeting test (two drops form together and “sheet” off a cool spoon). Pour into a clean, hot glass jar or bowl and let cool. If the cooled mixture is jelly-like, the juice will gel. • Alcohol test • Measure 1 teaspoon juice and 1 tablespoon rubbing alcohol into a clean glass jar and stir or shake the mixture. If a solid jelly-like clump forms such that it can be picked up with a fork, then the juice will gel. E! R U T MIX S I H TE T S A T OT DO N

Test for acid • There is no objective or common home test for determining the exact acidity, but one method is a simple taste test: • Mix 1 teaspoon bottled lemon juice, 3 tablespoons water, and ½ teaspoon sugar. Taste this mixture. eciuj elpp. A eciuj nome. L erutxim • Now taste your apple juice. • If your juice is not as tart as the mixture, then add 1 tablespoon lemon juice or 1/8 teaspoon citric acid to each cup of apple juice. ? ruo. S ? tra. T ? ruo. S ero. M

Cook until Gelling Point • Measure 4 cups apple juice into a saucepot. • Add 2 tablespoons bottled lemon juice (or amount determined by acid test) and 3 cups sugar. Stir over high heat. • Test for doneness. • There are three ways to test for doneness: • Temperature test: Boil to 8°F above boiling point of water as measured by candy or jelly thermometer (220°F at sea level and 220°F minus 2°F for each 1, 000 feet above sea level). • Spoon or Sheet test: Dip a cool metal spoon into the boiling jelly mixture and lift out so the mixture runs off the side. As it thickens, it will become heavier. When two drops form together and “sheet” off the spoon, it is done. • Freezer test: Pour a small amount of the boiling jelly mixture on a plate and put in a freezer for a few minutes. If this mixture gels, the jelly is done.

Note: • When using the temperature test, first test the accuracy of thermometer by placing in boiling water. It should read 212°F when boiling at sea level and 2°F less for each 1, 000 feet of altitude (i. e. 210°F at 1, 000 feet, 208°F at 2, 000 feet, etc. ). • Also, make sure the bulb of thermometer is not touching the bottom of the saucepot and is completely submerged in jelly. • To read thermometer accurately, place thermometer at a vertical position and read at eye level.

Step Three: Boiling Water Canning • Fill hot jars • Immediately process in canner • Cool and check • Store

Fill Jars • Remove stockpot from heat (and/or turn off heat) as soon as gelling point is reached. • Skim off foam quickly, with a spoon. • Lift jars from canner using jar lifter and place on cutting board or towelcovered countertop, emptying any water in jars back into canner. • Immediately rest jar funnel in jar opening and ladle hot jelly into hot jars. Leave ¼-inch headspace. • Wipe jar rims with clean paper towel, apply lids, and adjust bands until fingertip tight.

Process in Canner • Lift jars onto rack in canner, keeping upright. Canner water should be hot but not boiling, 180°F. Make sure water covers jars by 1 -2 inches. • Turn heat to high and wait for a boil. • Begin timer when water reaches a full boil. Process for 5 minutes if jars were pre-sterilized and for 10 minutes if they were simply cleaned and kept warm (at sea level). Add one additional minute per 1, 000 feet altitude.

Cool and Check • When timer sounds, turn off heat and remove canner lid. Allow jars to sit in canner for 5 minutes. • Using jar lifter, remove jars one at a time and place them onto a towel or a cooling rack with at least 1 -inch space between each jar. Keep jars upright at all times; do not tilt even to pour water off lids. • Let jars cool for 12 -24 hours, without disturbing. • Once completely cool, remove bands and check for seals by feeling and looking for concaveness in center of lid. Put any unsealed jars in the fridge and use first.

Store • Clean jars and lids to remove any residue. • Store in a cool, dry location out of direct sunlight. • Ring bands can be washed, dried and stored separately for later re-use. • ENJOY!

Credits This recipe and step-by-step directions are adapted from the instructions for Making Jellies and Apple Jelly in "So Easy to Preserve", 6 th ed. 2014. Bulletin 989, Cooperative Extension Service, The University of Georgia, Athens. Revised by Elizabeth L. Andress. Ph. D. and Judy A. Harrison, Ph. D. , Extension Foods Specialists. This presentation was made by Kasey Christian, M. Ed. , Program Coordinator for the National Center for Home Food Preservation (NCHFP). Photos by Kasey Christian. Reviewed by Elizabeth Andress, Ph. D. , Professor and Extension Food Safety Specialist, and Carolyn Ainslie, M. Ed. , Educational Program Specialist.

Disclaimer and Document Use Disclaimer: • Trade and brand names are used only for information. The use of a trade or brand name does not imply approval of any product to the exclusion of others which may also be suitable. Document Use: • Permission is granted to reproduce these materials in whole or in part for educational purposes only (not for profit beyond the cost of reproduction) provided the author and the University of Georgia receive acknowledgment and this notice is included: • Reprinted (or Adapted) with permission of the University of Georgia. Christian, K. A. 2015. Making Apple Jelly (slides). Athens, GA: UGA Extension. This material is based upon work supported by the Cooperative State Research, Education, and Extension Service, U. S. Department of Agriculture, under Agreement No. 2011 -51110 -30995.
 How to make apple jelly from apple juice
 Describe the process of preparing apple juice in 5 steps
 Is apple juice a element compound or mixture
 Apple juice glycemic index
 Oil is uncountable noun
 Juice haccp plan
 Is hammering wood together physical or chemical
 Power tools must be fitted with guards and
 Homemade dividends
 Homemade dividend
 Homemade tracker
 Homemade leverage example
 Boltushka drug
 Homemade dividend
 Homemade leverage problems
 Eligibility for dividend
 Homemade indicators for acids and bases
 Homemade dividend
 Homemade calorimeter
 Capital structure in a perfect market
 Homemade dividend
 Homemade leverage example

