National Research Tomsk Polytechnic University Physics of High


- Slides: 17

National Research Tomsk Polytechnic University Physics of High Technology in Machine Building Department DIMENSIONAL ANALYSIS OF CONSTRUCTIVE UNITS (Links like position deviations of surfaces) Lecturer Egor Efremenkov Tomsk - 2015

Position deviations Dimension chains may be calculated with links like position deviations of surfaces following types Ø for details Ø for assemblies

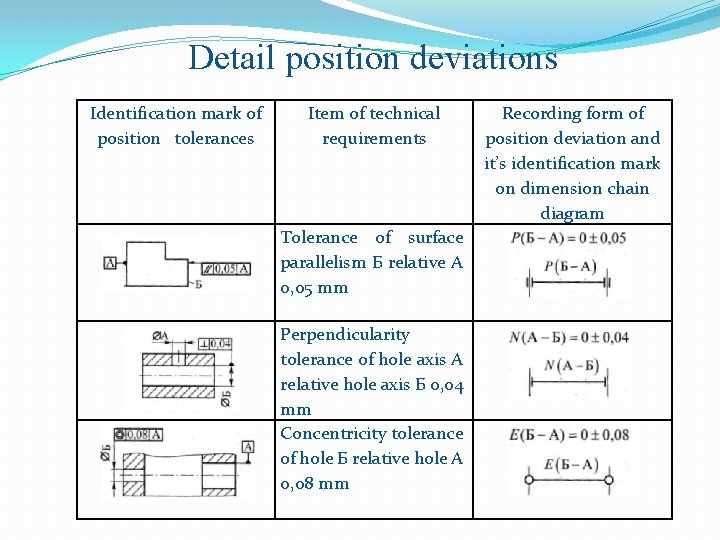
Detail position deviations Identification mark of position tolerances Item of technical requirements Tolerance of surface parallelism Б relative A 0, 05 mm Perpendicularity tolerance of hole axis A relative hole axis Б 0, 04 mm Concentricity tolerance of hole Б relative hole A 0, 08 mm Recording form of position deviation and it’s identification mark on dimension chain diagram

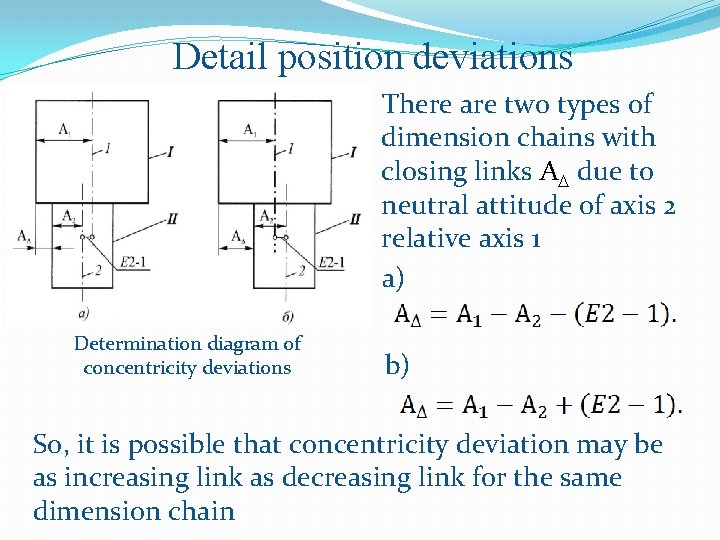
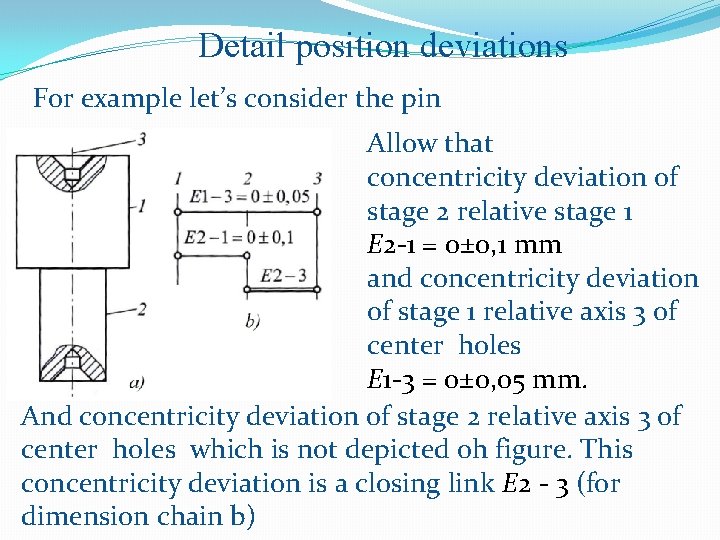
Detail position deviations There are two types of dimension chains with closing links А due to neutral attitude of axis 2 relative axis 1 a) Determination diagram of concentricity deviations b) So, it is possible that concentricity deviation may be as increasing link as decreasing link for the same dimension chain

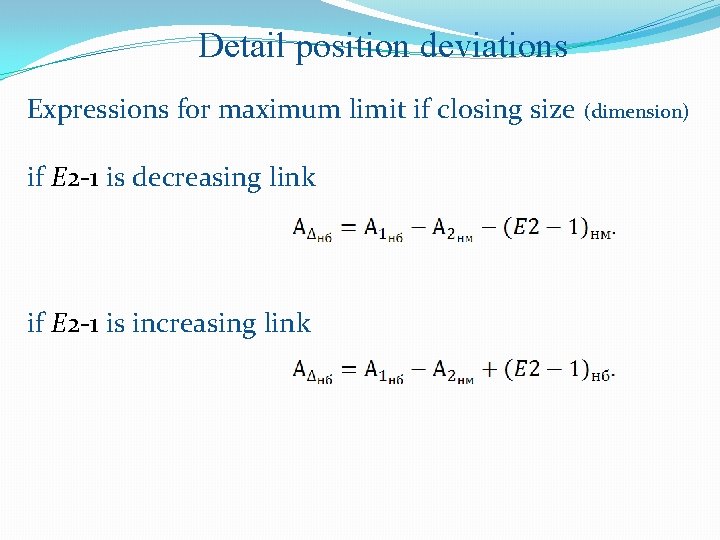
Detail position deviations Expressions for maximum limit if closing size (dimension) if Е 2 -1 is decreasing link if Е 2 -1 is increasing link

Detail position deviations For example let’s consider the pin Allow that concentricity deviation of stage 2 relative stage 1 Е 2 -1 = 0± 0, 1 mm and concentricity deviation of stage 1 relative axis 3 of center holes Е 1 -3 = 0± 0, 05 mm. And concentricity deviation of stage 2 relative axis 3 of center holes which is not depicted oh figure. This concentricity deviation is a closing link Е 2 - 3 (for dimension chain b)

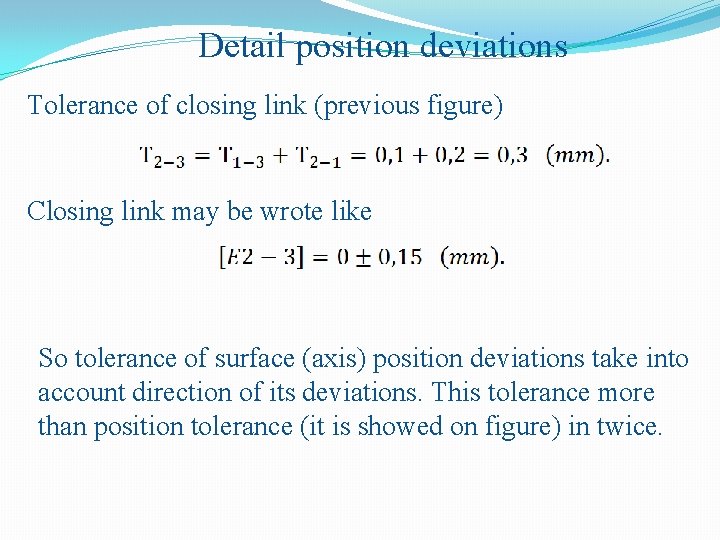
Detail position deviations Tolerance of closing link (previous figure) Closing link may be wrote like So tolerance of surface (axis) position deviations take into account direction of its deviations. This tolerance more than position tolerance (it is showed on figure) in twice.

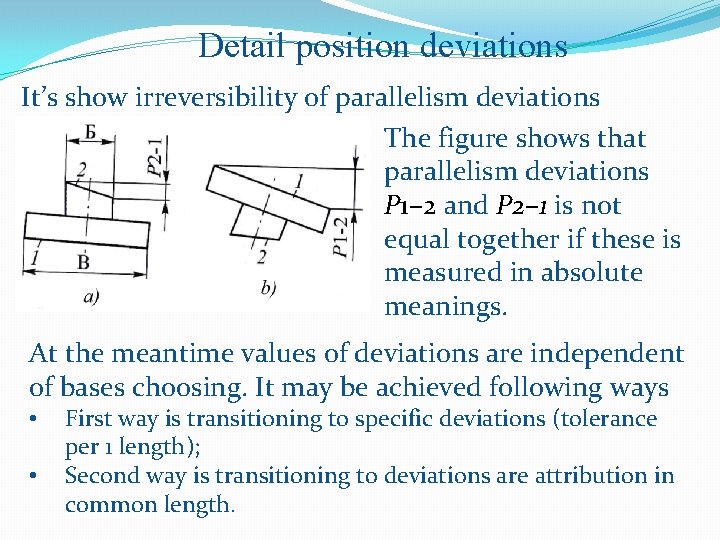
Detail position deviations It’s show irreversibility of parallelism deviations The figure shows that parallelism deviations Р 1– 2 and Р 2– 1 is not equal together if these is measured in absolute meanings. At the meantime values of deviations are independent of bases choosing. It may be achieved following ways • • First way is transitioning to specific deviations (tolerance per 1 length); Second way is transitioning to deviations are attribution in common length.

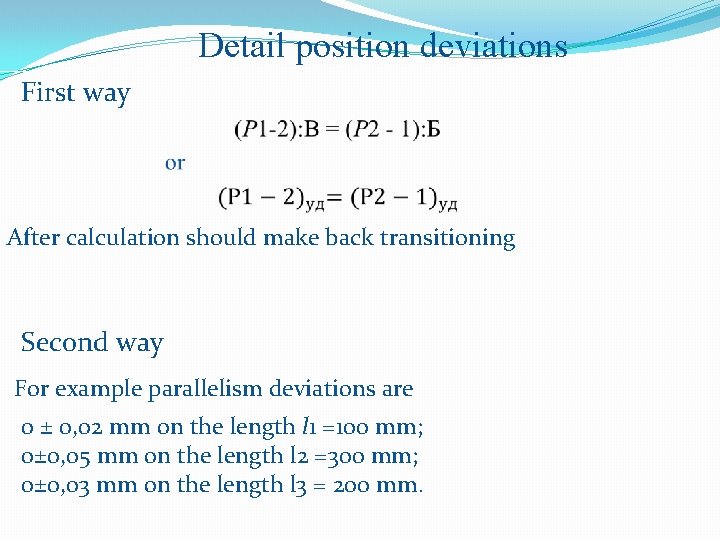
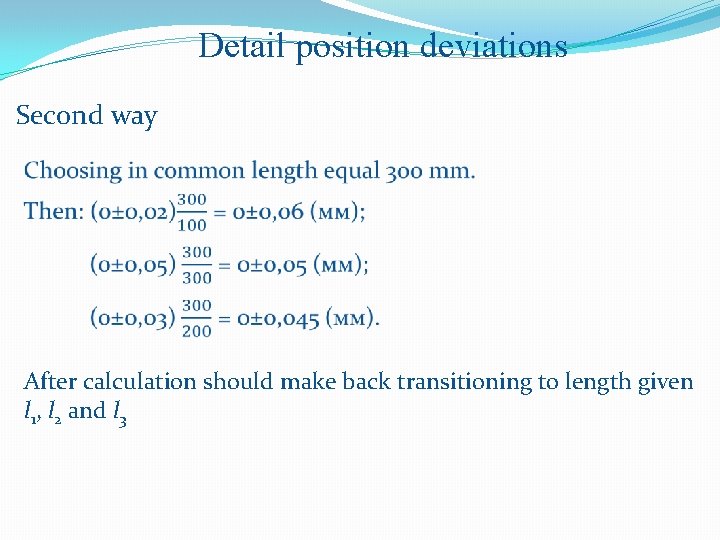
Detail position deviations First way After calculation should make back transitioning Second way For example parallelism deviations are 0 ± 0, 02 mm on the length l 1 =100 mm; 0± 0, 05 mm on the length l 2 =300 mm; 0± 0, 03 mm on the length l 3 = 200 mm.

Detail position deviations Second way After calculation should make back transitioning to length given l 1, l 2 and l 3

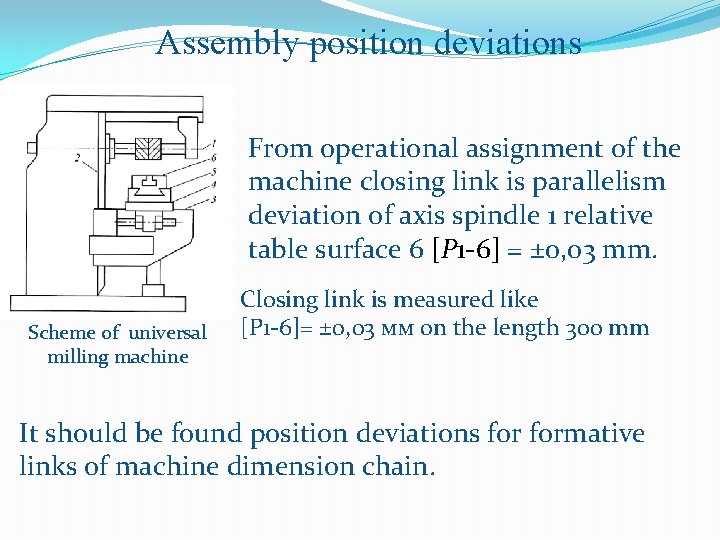
Assembly position deviations From operational assignment of the machine closing link is parallelism deviation of axis spindle 1 relative table surface 6 [P 1 -6] = ± 0, 03 mm. Scheme of universal milling machine Closing link is measured like [Р 1 -6]= ± 0, 03 мм on the length 300 mm It should be found position deviations formative links of machine dimension chain.

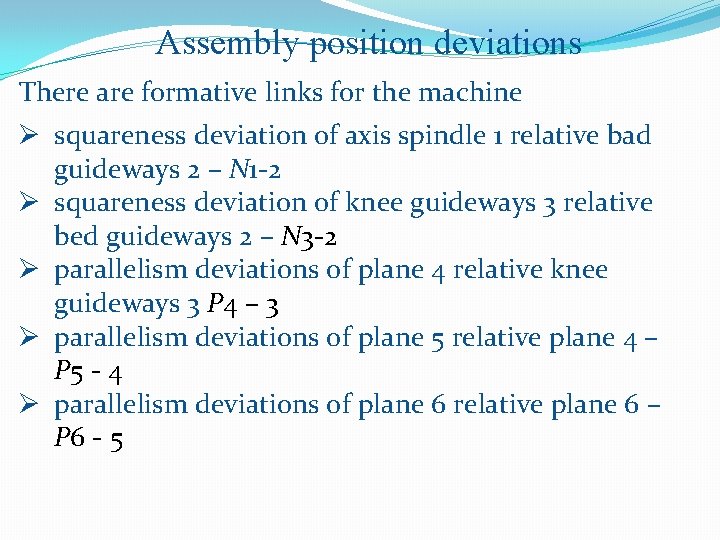
Assembly position deviations There are formative links for the machine Ø squareness deviation of axis spindle 1 relative bad guideways 2 – N 1 -2 Ø squareness deviation of knee guideways 3 relative bed guideways 2 – N 3 -2 Ø parallelism deviations of plane 4 relative knee guideways 3 Р 4 – 3 Ø parallelism deviations of plane 5 relative plane 4 – Р 5 - 4 Ø parallelism deviations of plane 6 relative plane 6 – Р 6 - 5

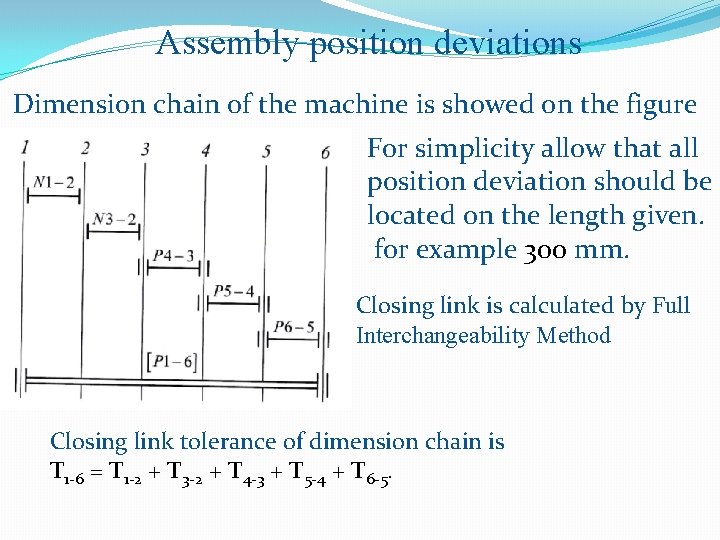
Assembly position deviations Dimension chain of the machine is showed on the figure For simplicity allow that all position deviation should be located on the length given. for example 300 mm. Closing link is calculated by Full Interchangeability Method Closing link tolerance of dimension chain is Т 1 -6 = Т 1 -2 + Т 3 -2 + Т 4 -3 + Т 5 -4 + Т 6 -5.

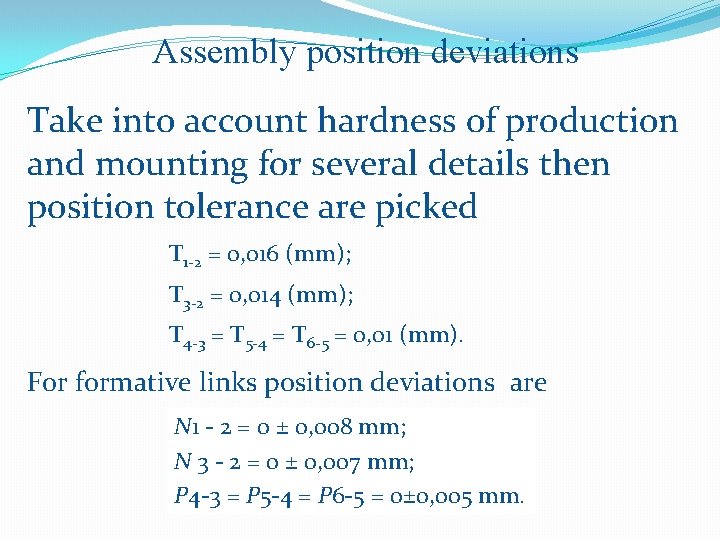
Assembly position deviations Take into account hardness of production and mounting for several details then position tolerance are picked Т 1 -2 = 0, 016 (mm); Т 3 -2 = 0, 014 (mm); Т 4 -3 = Т 5 -4 = Т 6 -5 = 0, 01 (mm). For formative links position deviations are N 1 - 2 = 0 ± 0, 008 mm; N 3 - 2 = 0 ± 0, 007 mm; Р 4 -3 = Р 5 -4 = Р 6 -5 = 0± 0, 005 mm.

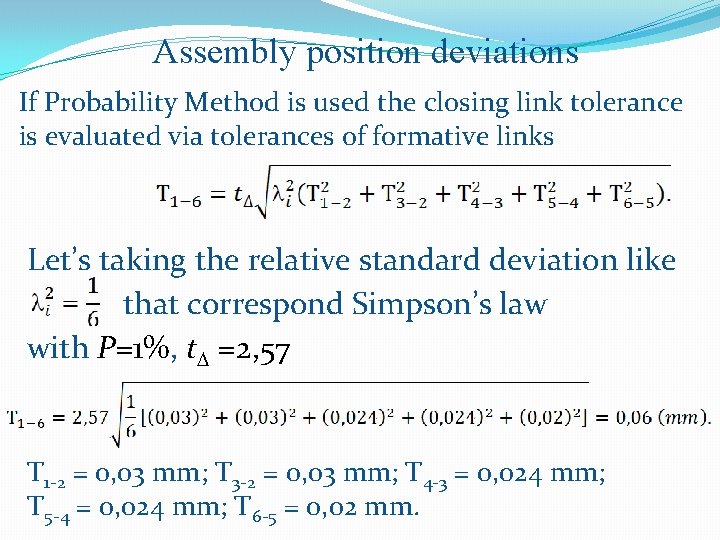
Assembly position deviations If Probability Method is used the closing link tolerance is evaluated via tolerances of formative links Let’s taking the relative standard deviation like that correspond Simpson’s law with P=1%, t =2, 57 Т 1 -2 = 0, 03 mm; Т 3 -2 = 0, 03 mm; Т 4 -3 = 0, 024 mm; Т 5 -4 = 0, 024 mm; Т 6 -5 = 0, 02 mm.

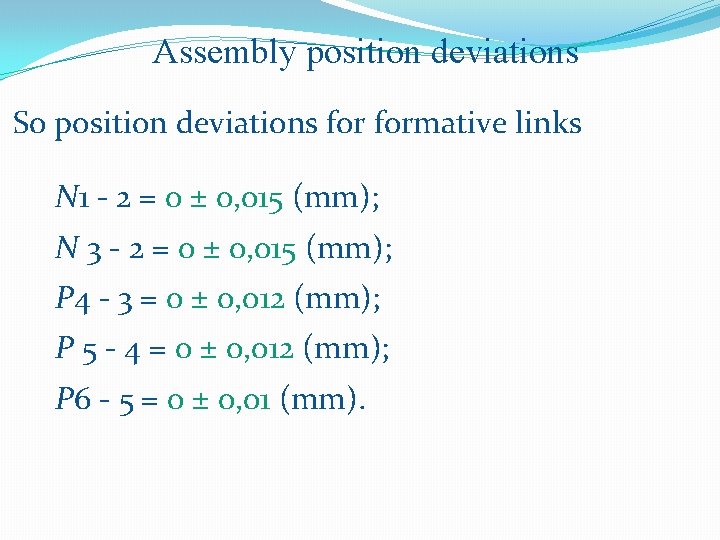
Assembly position deviations So position deviations formative links N 1 - 2 = 0 ± 0, 015 (mm); N 3 - 2 = 0 ± 0, 015 (mm); P 4 - 3 = 0 ± 0, 012 (mm); P 5 - 4 = 0 ± 0, 012 (mm); P 6 - 5 = 0 ± 0, 01 (mm).

Thanks for Your attention