Writing Pointers Part I FIGURES Bruce Logan Penn

Writing Pointers Part I: FIGURES Bruce Logan, Penn State

Figures • Nothing demonstrates the quality of the paper more than the quality of the figures! – Bad figures = bad science? • Create beautiful figures. – They provide clarity to your results, and demonstrate a professional approach and tells the reader you pay attention to details. – Do your figures have the right size fonts? A quick test is that if Excel chose them, they are too small! 2

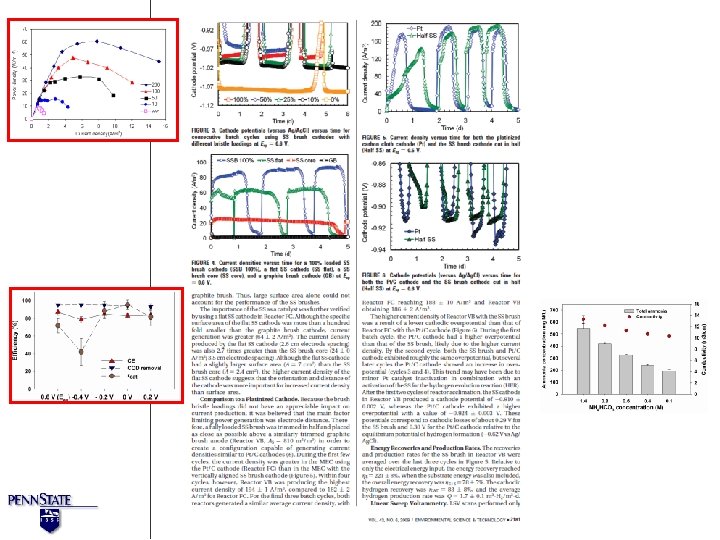
Publish great quality figures! Examples: 3 poor ones, 1 good one … Logan et al. (1987) J Wat Pollut. Control Fed. He & Mansfield, Energy & Env. Sci. , 2008. Schroder et al. (2003), Angew. Chem. Int. Ed. 2003 Redman et al. (2004) Environ. Sci. Technol. 3

Figures • Legends and notation – Keep notation simple: avoid long subscripts and superscripts – Legends should be clear (no boxes; all text inside the plot) • Reduce the figures to publication size (one column width), and you’ll see they get too small. • Figures should have: – – – Large fonts Large symbols (markers) No bold letters (they don’t reduce in size well) No grid lines Good use of symbols, colors and shapes: 4

Watch font sizes… here, the legend is impossible to read… 5

Increase font and marker sizes 6

Figures • Put all legends within the plot box, with no line around the legend box. – Either use legends or don’t; don’t mix it up within one paper. – Keep legends simple. – You only need one per figure (not in every plot if the same) • Avoid extra “non-information” – Do not use grid lines, but use inside ticks (major and minor). – Choose colors so that the symbols, lines or bars all show well in black and white and color. – Do not use smoothed lines (just connect points). – Put line around plot (i. e. connect axes). Use error bars when applicable. 7

Think about figure layout in the journal: Poor layout leads to the use of two columns for a figure that should only take 1 column 8

Figures • Figure captions go below the figure, table captions above. • Usually Tables first then figures at the end of a manuscript (although some journals specify otherwise). • Be sure that items in figures and tables are referred to in the results section. • Do you have a table that could be a figure? 10

Writing Pointers Part II: STYLE Bruce Logan, Penn State 11

Writing the paper • Keep it simple – Introduction: 3 paragraphs – Methods: short as possible, but can be reproduced – Results: * Tell a story (not a mystery or historical drama) * Put your most important figure(s) first. * Limit figures to ≤ 9. – Discussion: * Don’t speculate too much * Start out by emphasizing most important finding (I recommend that you don’t combine Results and Discussion sections) 12

Writing the paper, cont’d • Make it shorter – “I apologize for the length of this letter, but I did not have the time to make it shorter” (B. Pascal, from ES&T website) – ES&T: Has a 7000 word limit • 10 figures = 3000 words • Use supplemental information online – Avoid useless phrases • “It should be noted that…” • On the other hand, it can be seen that. . ” – Check for run-on sentences – Don’t write a conclusions section unless journal requires it (ES&T prohibits it) • When you are done, make it shorter… – I go through a dozen drafts or more for a paper. 13

General Writing Pointers • Don’t make the table or the figure the topic of the sentence. – Avoid “Figure 1 shows that…”, “Figure 2 shows that…”. – Use an intended subject. “Hydrogen production increased with applied voltage (Figure 1). – Use active statements that make points: “The maximum power increased to 3000 W/m 2 (Figure 1) by reducing the electrode spacing. . . ” • Don’t make thesis or an object do things. – Don’t write “this thesis investigates”, “microbes have a hard time”. • Avoid the passive voice. – A clear indication of passive voice is the sentence ends with the very, “…is reported”, “was determined”. • Avoid double negatives “it is not unreasonable. . ” 14

General Writing Pointers • Do not start sentences with “connectors”. – Avoid: “And”, “But”, “Meanwhile”, “Besides” and like connectors of sentences. • You can’t begin a sentence with a number – Don’t begin with “ 9 m. M”; You have to write it out “Nine millimolar. . ” in this case. – Better to reorganize the sentence “Buffer (9 m. M). . ”. • Watch for insignificant figures – “ 231. 15 ± 10. 27 m. W/m 2” vs “ 230 ± 10 m. W/m 2”. – Use the SD and good judgment to round numbers. 15

General Writing Pointers • Avoid useless words, particularly at the beginning of a sentence: – Avoid: “It is shown here that…”, “It should be noted that”, “On the other hand” • Avoid repeating words: – Example: “During startup, the startup time was reduced… to improve startup”. • Tighten up your writing: – “was found to reduce” change to “reduced” • Minimize the use of names – Try not to write “Zhang et al. (2009) show that. . ”. – Make the subject of the sentence the point, not the person. • Manuscripts: insert continuous line numbers – Makes it easier for reviewers – (Biores. Technol. makes you take them out!) 16

General Writing Pointers • The first sentence of the paragraph sets a new thought – Try reading only the first sentences of a paper. Can you follow the main points? (especially for the Results section) • Be sure that the first sentence of a new paragraph does not just continue a point made in the previous paragraph. – Avoid the first sentence that starts “However”… • One sentence is not a paragraph 17

General Writing Pointers • Avoid giving long lists of things that makes the reader backtrack into the sentence too connect topics and numbers. – In short, avoid using the word “respectively”. – Avoid: “The maximum power density in the reactor supplemented with cellulose plus enzyme, enzyme alone, and glucose was 98 ± 0. 05, 114 ± 1, and 104 ± 3, respectively, all produced with 1000 Ω resistance. ” – Instead try this: “The maximum power density in the reactor fed cellulose and enzyme was 98 ± 0. 05 m. W/m 2. This is similar to that obtained using only enzyme (114 ± 1 m. W/m 2) or with glucose (104 ± 3 m. W/m 2). ” – Note: the latter makes a point, while at the same time giving numbers (and units!) so they are right where they are needed. 18
 (See presentation")
Before you write! • Do you have a mock paper done? (yes!) (See presentation on “Advice on writing papers”) • Meet with your advisor – Bring all figures in FINAL publication format. • Tell your “story” to your advisor. – If you can’t present a good story verbally, you will have trouble writing the paper. • Writing order for the sections: 1 st - Results, 2 nd - Introduction, 3 rd - Discussion; Abstract & Methods, can be written anytime

Abstract • Many journals have word limits • A double spaced abstract should fit on one page, 12 point font. • Give specific numbers if possible from your results. • Do not put references in an Abstract. • Usually have a concluding sentence in the abstract that summarizes the worth of the study. “These findings indicate that MFCs can be…” 20

Introduction • Too many papers have overly long introductions. • If you are writing on a specialized topic, the reader probably will already know many things you put in an Abstract… otherwise, they wouldn’t be reading your paper! • Is your Introduction short, say 3 paragraphs? – P 1 introduces the topic and need for the study. – P 2 summarizes key papers and what is known about the subject. – P 3 points out the need for the study and what will be addressed here. 21

Methods • Remove as many words as possible from your Methods section, putting in critical information but not rambling on about minor details. • Refer to past papers for methods whenever possible. • Put methods in same order as results. • Notation in methods section. – Don’t use double sub- or superscripts or long superscripts; avoid using slanty divide signs, – Define all variables upon first use, then just use notation. – Keep notation simple. – You don’t have to use the same notation used in your experiment: use abbreviations that the reader will understand. • C and M (where C and M mean something, like a material) as compared to Material 1 and Material 2, where you won’t know if it is M or R. . 22

Results • I like separate Results and Discussion sections, especially in a thesis. – ES&T states combined is preferred – Biores. Technol. requires combined – Appl. Microbiol. Biotechnol. requires separate sections • Don’t put Methods in the Results section, such as equations and approaches to getting a result. • If the Results section is separate from your Discussion section, then do not speculate or draw conclusions based on the literature in the Results section. 23
 flow in an orderly way")
Results • Do your Results (or really any section) flow in an orderly way and make the points you would like it to? • Does your Results section tell a story? • We don’t want historical dramas or a mystery, but we do want information in a useful order. – Start your Results section with the most important findings first – Follow with other information (controls, things that didn’t work out so well, etc. ). – Your first figure/graph (if possible) is the main point (biggest finding) and subsequent graphs fill in the surrounding conditions or elaborate further on the topic. 24

Discussion • Many readers will scan abstract, figures and then go right to the Discussion section. • Start out by restating your most important finding – What did you conclude from all those results? – How does this compare to the literature? • Continue on with main points/findings, contrasting with the literature. • You don’t need to put in all your thoughts on the subject, and try not to speculate too much (reviewers hate that). 25

Conclusions • Requirements on this vary – ES&T does not allow you to put in a conclusions section – Biores. Technol. requires them 26

In Summary… Create beautiful figures! Keep your writing concise Avoid useless words Read the first sentence of every paragraph to check on flow • Have fun telling your story. • •

Questions ? Email: blogan@psu. edu Web page: www. sites. psu. edu/brucelogan/ 28
- Slides: 28