Working with files and folders Creating a new


- Slides: 23
Working with files and folders
Creating a new folder • Create a new folder to better organize the information stored on your computer. Creating a folder is like placing a new folder in a filing cabinet.
Steps on creating a new folder • Double click the drive or folder where you want to make a new folder. • Click Make a new folder found at the left side of the window. You can now see a new folder created on the right pane of Windows Explorer. • Type the folder name (e. g. “Exercises”). Press the Enter key on your keyboard.
Moving a file to a folder • Reorganize files stored on your computer by placing them in different locations – Position the mouse over the file you want to move. – Press and hold down the left button as you drag the mouse pointer to where you want to place the file. – Release the button and the file moves to the new location.
Rename a file/folder • Click on a Folder/file, then click Rename this folder/file • Type another name. Press Enter on your keyboard. • Note: You cannot rename a file if the file is currently open.
Deleting a file/folder • To erase or remove the file/folder that you no longer need – Click the file/folder you want to delete – Click Delete this file/folder found at the left side of the window. – A dialog box will appear. Click Yes to delete, No if you change your mind.
Deleting a file/folder
Recycle Bin • By default, all files/shortcuts that we delete from the hard disk are stored in the Recycle Bin. All of these can only be permanently deleted when you empty the Recycle Bin. • Items deleted from a flash disk, or the like, are permanently deleted and are sent to the recycle bin.
Retrieving Deleted Files or Shortcuts • Right click on the Recycle Bin on your desktop, then click Open. Or Double click the Recycle Bin. • Right click on the file or shortcut you want to retrieve, then click Restore.
Emptying Recycle Bin • On the desktop, right click on the Recycle Bin, then click Empty Recycle Bin. • Or, When the recycle bin is open, click Empty the Recycle Bin
Open the Windows Explorer • You can use windows explorer to see all the files in your computer. – Click Start button – Point to Programs, then Accessories. – Click Windows Explorer.
Open the Windows Explorer
Changing the Appearance of Items in a Folder • Click View on the menu bar, then click either Thumbnails, Tiles, Icons, List or Details. • Or • Click the Views button on the toolbar, then click to select any of the options.
Closing Windows Explorer • Click File on the Menu bar, then click Close • Click Close button from the Control buttons.
Backup your files • Backup utility helps you create a copy of information on your hard disk. In the event that the original data on your hard disk is accidentally erased or overwritten, or becomes inaccessible because of a hard disk malfunction, you can use the copy to restore your lost or damaged data.
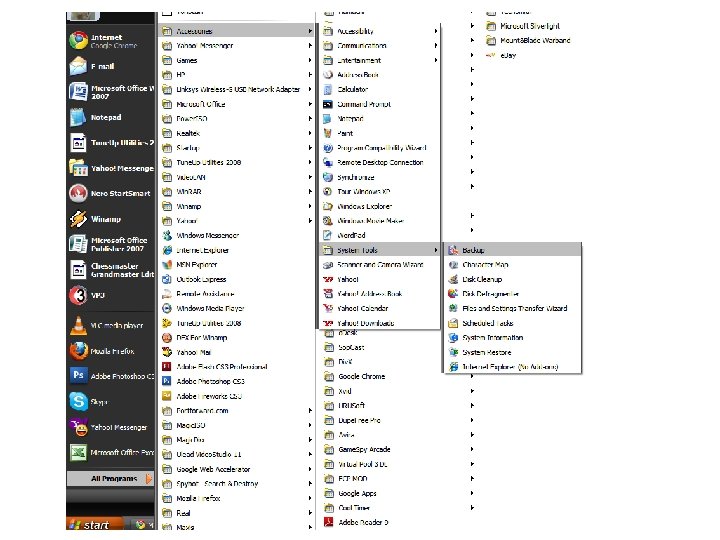
Backup Your Files • Click Start button, point to All Programs, then Accessories and then System Tools. Select Backup
Backup your files • Click Next Button • Click to select Backup files and settings • Click Next Button • Click to specify the item you want to backup. Example: Let me choose what to back-up • Click Next button.
Backup Your files
Backup your files • Click on the file or folder you want to backup. Click to check the file. • Click Next button
Backup your files • Locate the drive where you want to save your backup. • Type the name for your backup • Click save button
Backup your files • Click Next button. • Click Finish button to close the wizard and start the backup.
Backup your files • Click Close button. You can now see your backup file.