Working Drawings Exterior Elevations CMCE 1110 Construction Drawings
- Slides: 19

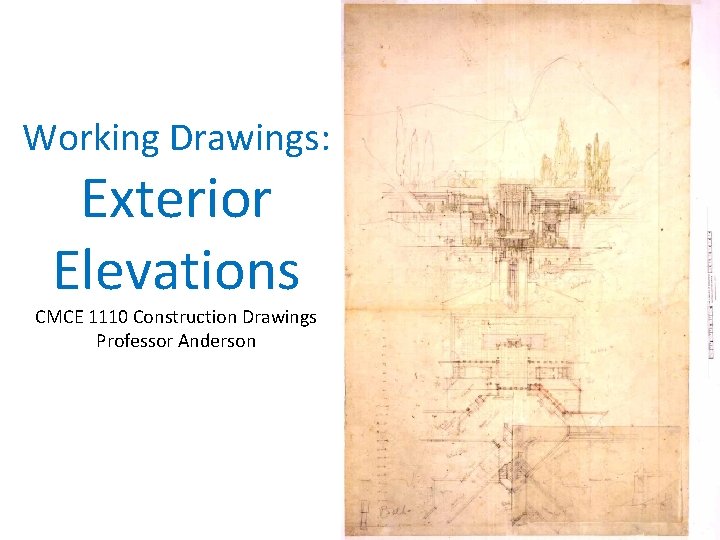
Working Drawings: Exterior Elevations CMCE 1110 Construction Drawings Professor Anderson

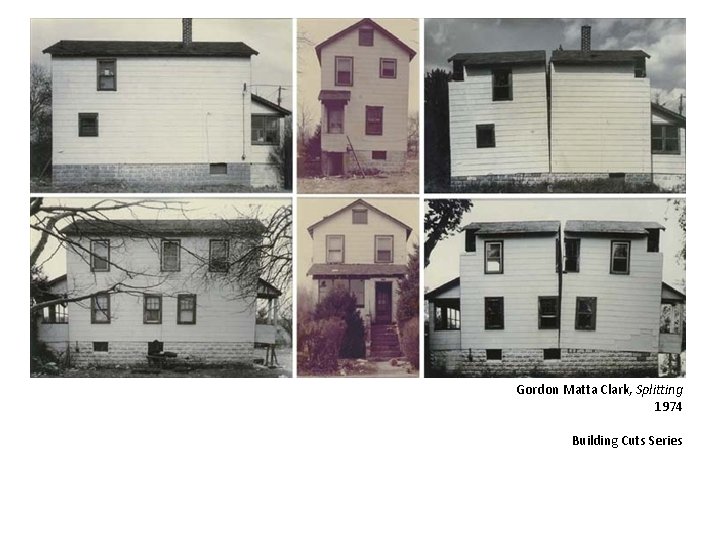
Gordon Matta Clark, Splitting 1974 Building Cuts Series

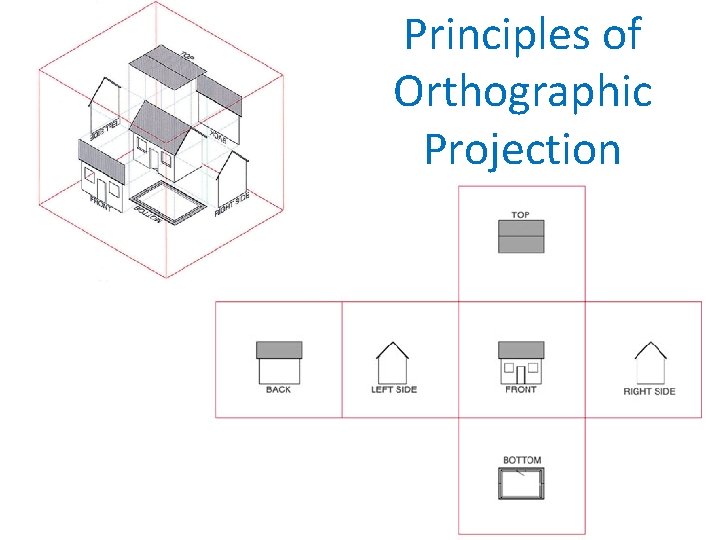
Principles of Orthographic Projection

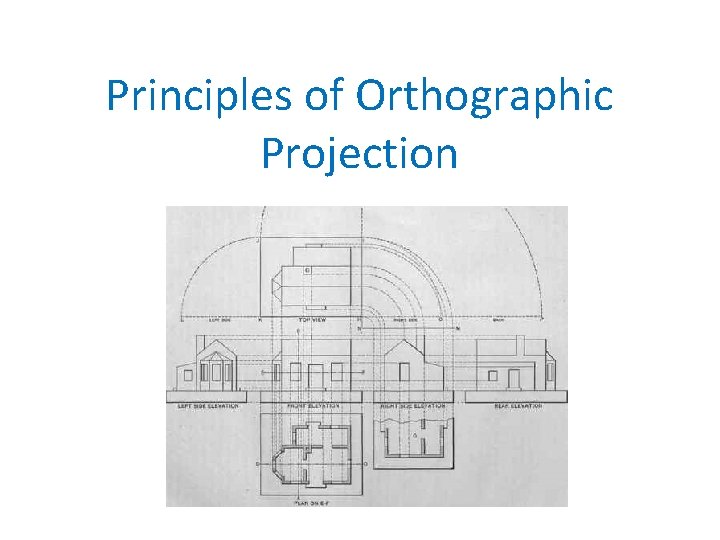
Principles of Orthographic Projection

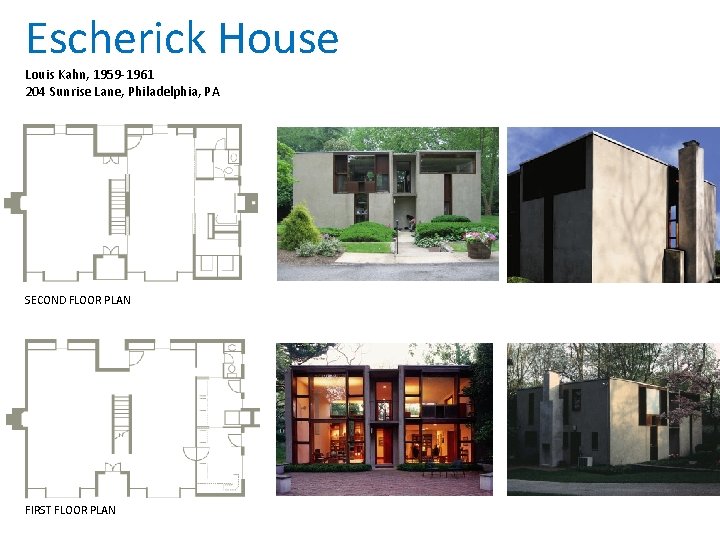
Escherick House Louis Kahn, 1959 -1961 204 Sunrise Lane, Philadelphia, PA SECOND FLOOR PLAN FIRST FLOOR PLAN

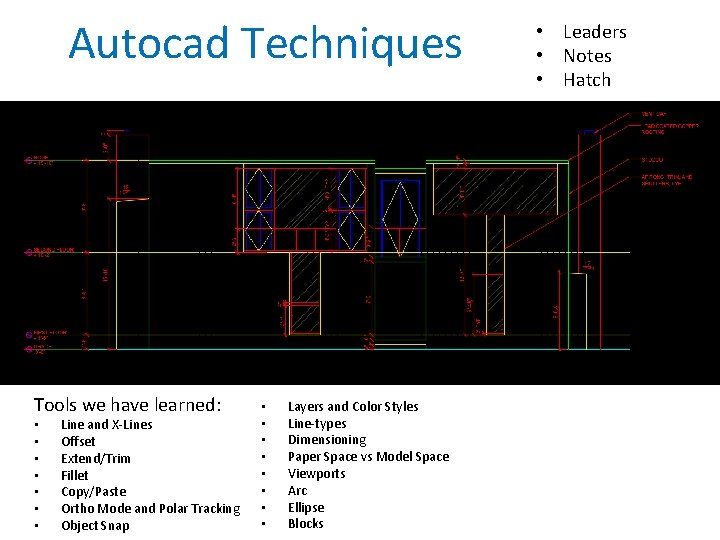
Autocad Techniques Tools we have learned: • • Line and X-Lines Offset Extend/Trim Fillet Copy/Paste Ortho Mode and Polar Tracking Object Snap • • Layers and Color Styles Line-types Dimensioning Paper Space vs Model Space Viewports Arc Ellipse Blocks • Leaders • Notes • Hatch

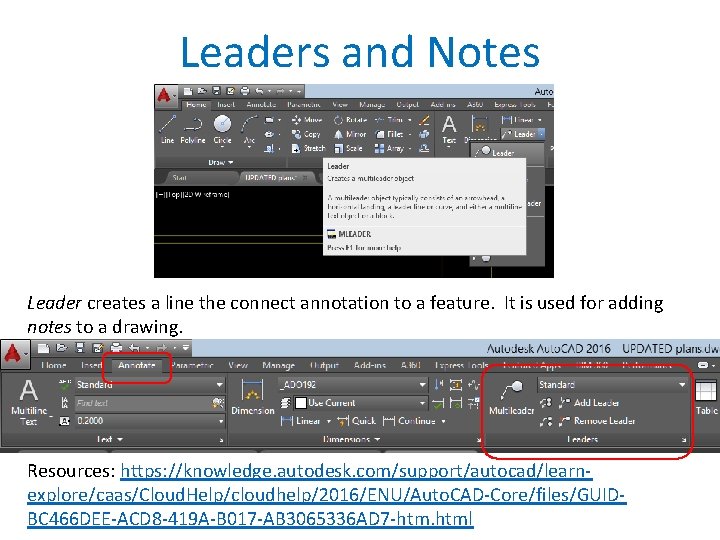
Leaders and Notes Leader creates a line the connect annotation to a feature. It is used for adding notes to a drawing. Resources: https: //knowledge. autodesk. com/support/autocad/learnexplore/caas/Cloud. Help/cloudhelp/2016/ENU/Auto. CAD-Core/files/GUIDBC 466 DEE-ACD 8 -419 A-B 017 -AB 3065336 AD 7 -htm. html

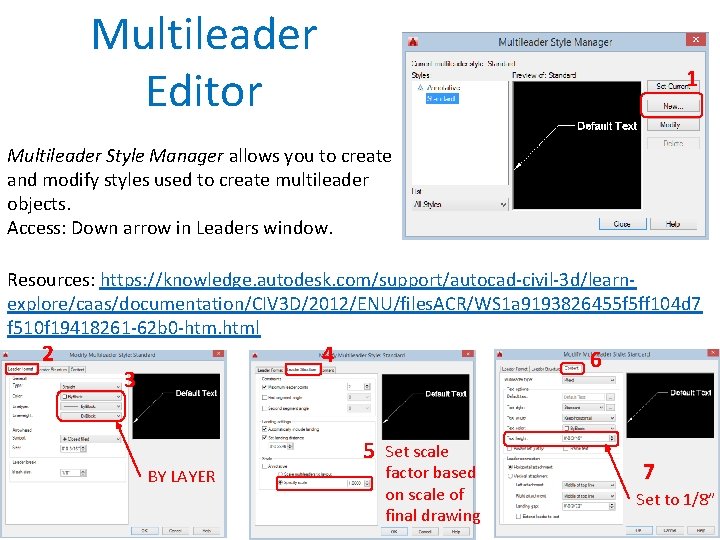
Multileader Editor 1 Multileader Style Manager allows you to create and modify styles used to create multileader objects. Access: Down arrow in Leaders window. Resources: https: //knowledge. autodesk. com/support/autocad-civil-3 d/learnexplore/caas/documentation/CIV 3 D/2012/ENU/files. ACR/WS 1 a 9193826455 f 5 ff 104 d 7 f 510 f 19418261 -62 b 0 -htm. html 2 4 3 6 5 BY LAYER Set scale factor based on scale of final drawing 7 Set to 1/8”

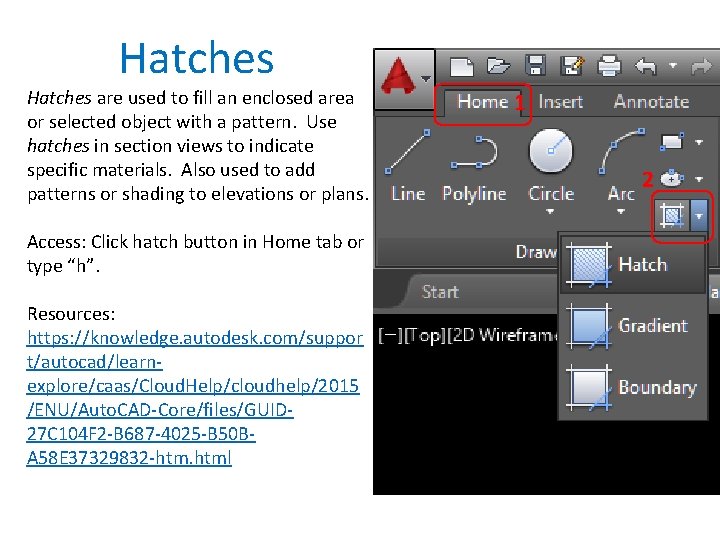
Hatches are used to fill an enclosed area or selected object with a pattern. Use hatches in section views to indicate specific materials. Also used to add patterns or shading to elevations or plans. Access: Click hatch button in Home tab or type “h”. Resources: https: //knowledge. autodesk. com/suppor t/autocad/learnexplore/caas/Cloud. Help/cloudhelp/2015 /ENU/Auto. CAD-Core/files/GUID 27 C 104 F 2 -B 687 -4025 -B 50 BA 58 E 37329832 -htm. html 1 2

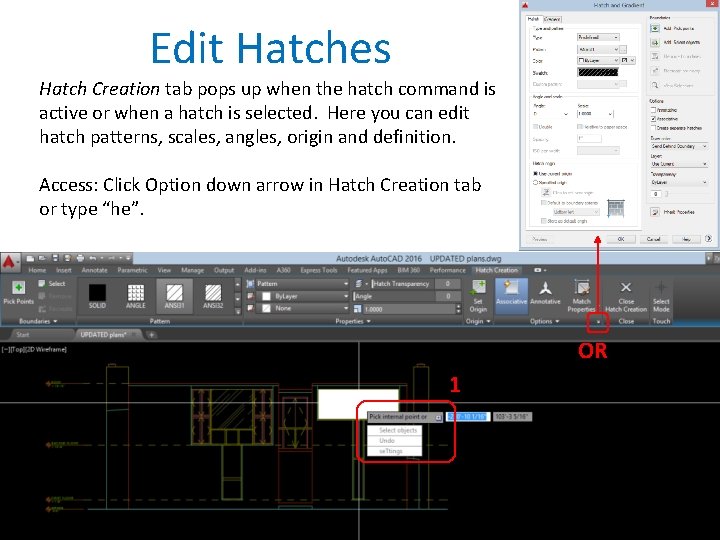
Edit Hatches Hatch Creation tab pops up when the hatch command is active or when a hatch is selected. Here you can edit hatch patterns, scales, angles, origin and definition. Access: Click Option down arrow in Hatch Creation tab or type “he”. OR 1

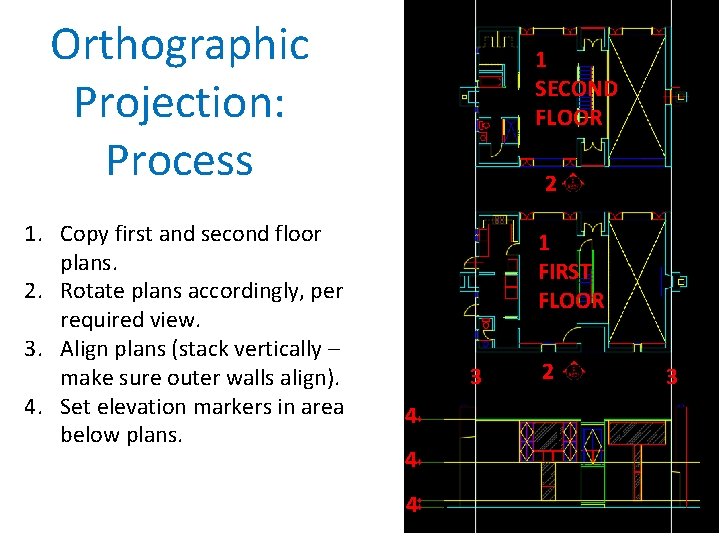
Orthographic Projection: Process 1. Copy first and second floor plans. 2. Rotate plans accordingly, per required view. 3. Align plans (stack vertically – make sure outer walls align). 4. Set elevation markers in area below plans. 1 SECOND FLOOR 2 1 FIRST FLOOR 3 4 4 4 2 3

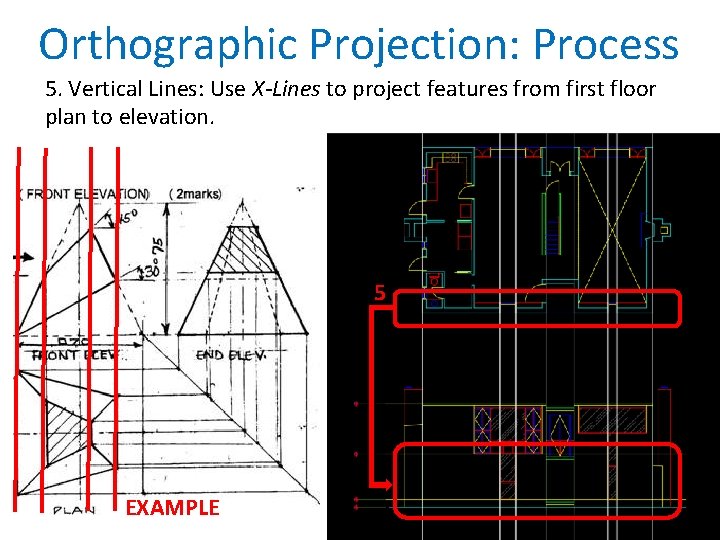
Orthographic Projection: Process 5. Vertical Lines: Use X-Lines to project features from first floor plan to elevation. 5 EXAMPLE

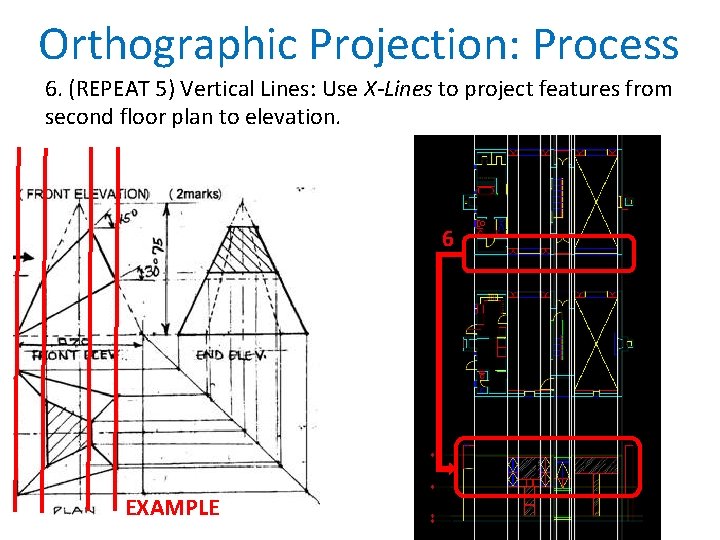
Orthographic Projection: Process 6. (REPEAT 5) Vertical Lines: Use X-Lines to project features from second floor plan to elevation. 6 EXAMPLE

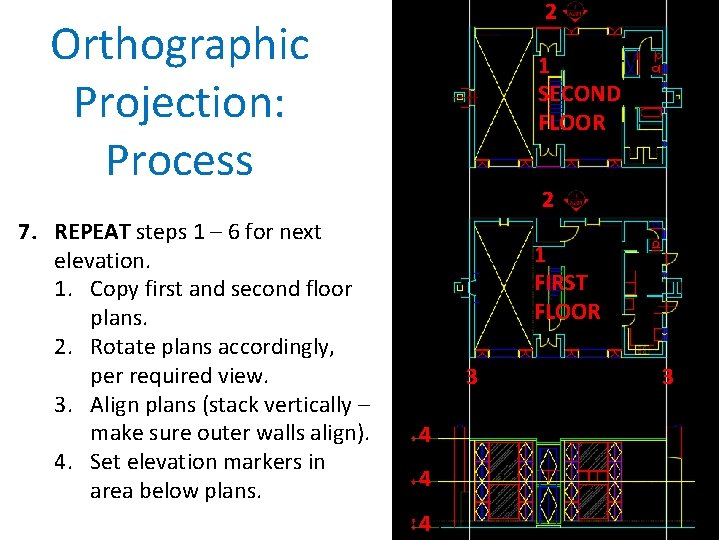
2 Orthographic Projection: Process 7. REPEAT steps 1 – 6 for next elevation. 1. Copy first and second floor plans. 2. Rotate plans accordingly, per required view. 3. Align plans (stack vertically – make sure outer walls align). 4. Set elevation markers in area below plans. 1 SECOND FLOOR 2 1 FIRST FLOOR 3 4 4 4 3

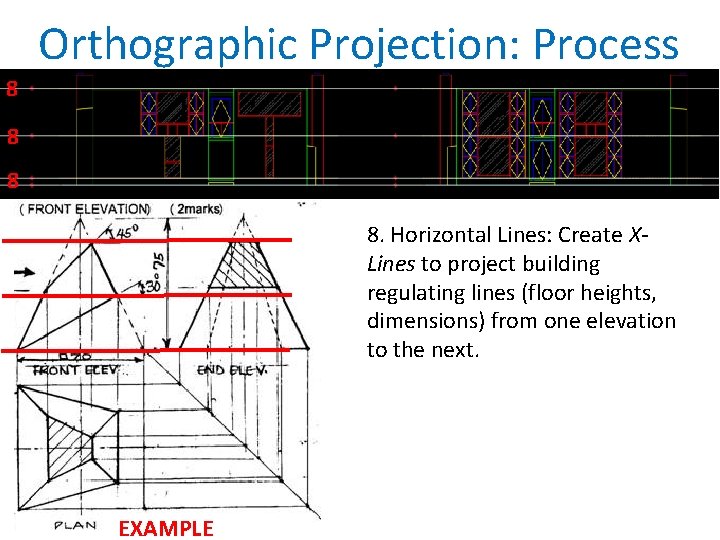
Orthographic Projection: Process 8 8. Horizontal Lines: Create XLines to project building regulating lines (floor heights, dimensions) from one elevation to the next. EXAMPLE

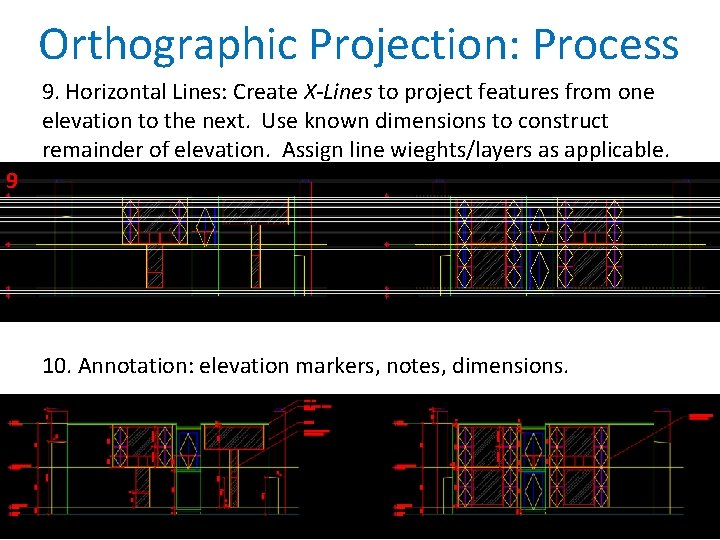
Orthographic Projection: Process 9. Horizontal Lines: Create X-Lines to project features from one elevation to the next. Use known dimensions to construct remainder of elevation. Assign line wieghts/layers as applicable. 9 10. Annotation: elevation markers, notes, dimensions.

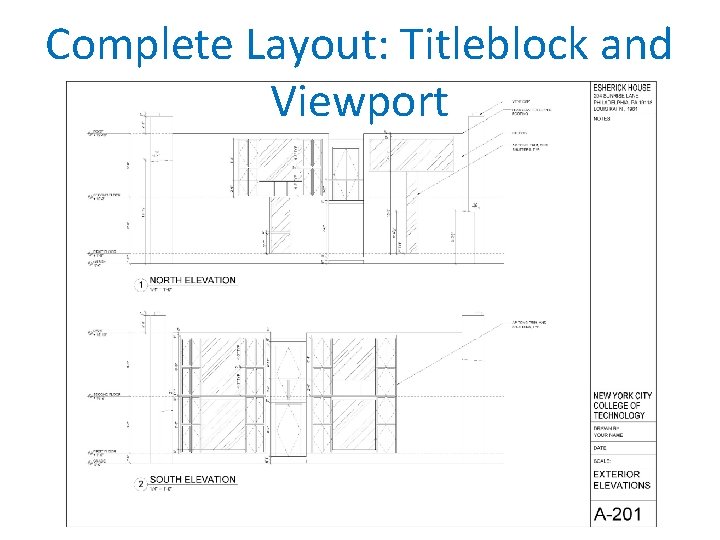
Complete Layout: Titleblock and Viewport

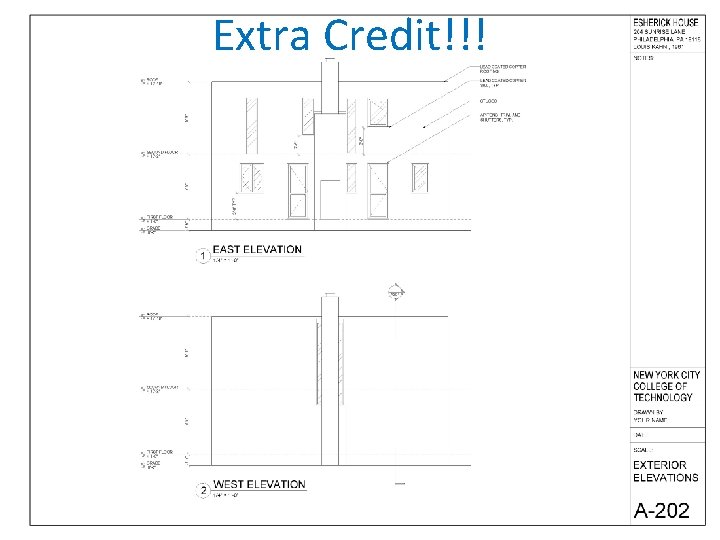
Extra Credit!!!

Assignment Specifications: • • Create a Dropbox folder “A-004” Upload your progress drawing at the end of this class to your Dropbox folder. Name files: Last Name First Name – Assignment Title. Upload final submission *BEFORE THE START OF THE NEXT CLASS* Submit 8. 5”x 11” plot of each drawing *AT THE START OF THE NEXT CLASS*