Wire Pull Test The wire pull test is
- Slides: 4

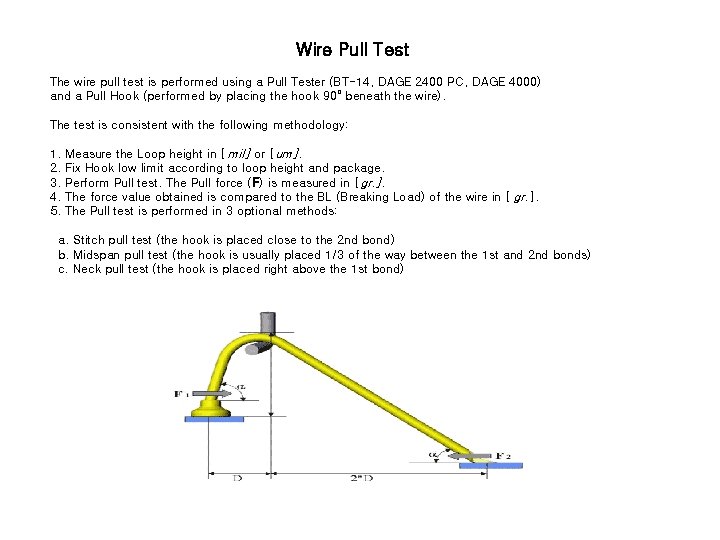
Wire Pull Test The wire pull test is performed using a Pull Tester (BT-14, DAGE 2400 PC, DAGE 4000) and a Pull Hook (performed by placing the hook 90° beneath the wire). The test is consistent with the following methodology: 1. 2. 3. 4. 5. Measure the Loop height in [ mil] or [um]. Fix Hook low limit according to loop height and package. Perform Pull test. The Pull force (F) is measured in [gr. ]. The force value obtained is compared to the BL (Breaking Load) of the wire in [ gr. ]. The Pull test is performed in 3 optional methods: a. Stitch pull test (the hook is placed close to the 2 nd bond) b. Midspan pull test (the hook is usually placed 1/3 of the way between the 1 st and 2 nd bonds) c. Neck pull test (the hook is placed right above the 1 st bond)

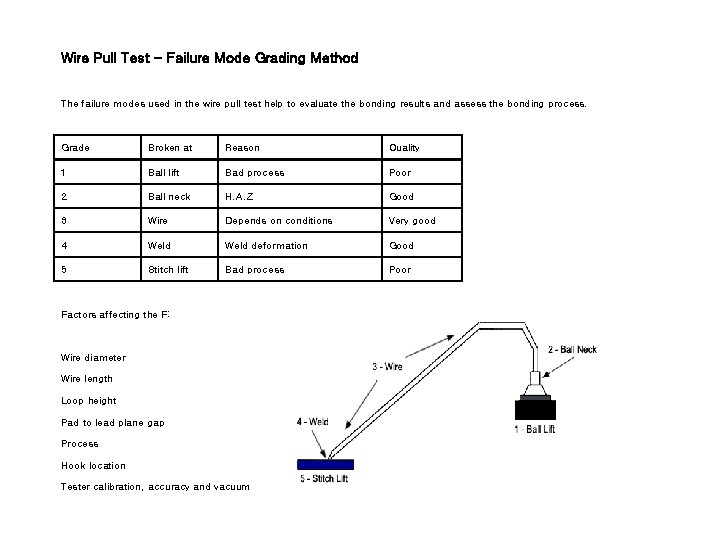
Wire Pull Test - Failure Mode Grading Method The failure modes used in the wire pull test help to evaluate the bonding results and assess the bonding process. Grade Broken at Reason Quality 1 Ball lift Bad process Poor 2 Ball neck H. A. Z Good 3 Wire Depends on conditions Very good 4 Weld deformation Good 5 Stitch lift Bad process Poor Factors affecting the F: Wire diameter Wire length Loop height Pad to lead plane gap Process Hook location Tester calibration, accuracy and vacuum

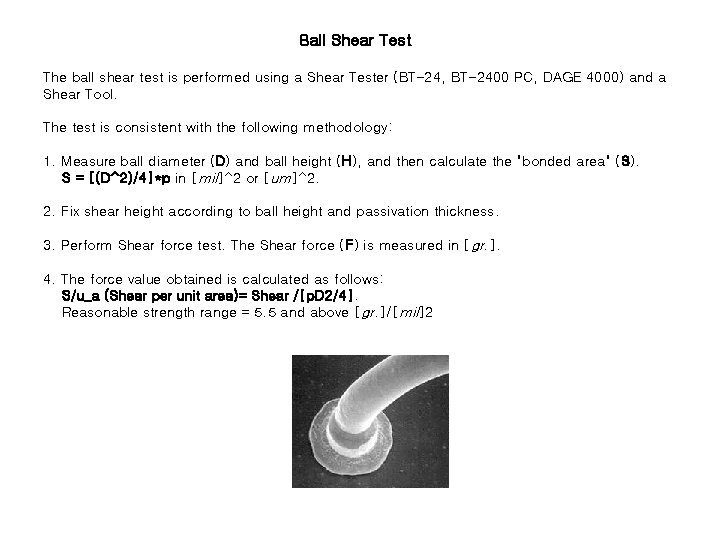
Ball Shear Test The ball shear test is performed using a Shear Tester (BT-24, BT-2400 PC, DAGE 4000) and a Shear Tool. The test is consistent with the following methodology: 1. Measure ball diameter (D) and ball height (H), and then calculate the "bonded area" (S). S = [(D^2)/4]*p in [mil]^2 or [um]^2. 2. Fix shear height according to ball height and passivation thickness. 3. Perform Shear force test. The Shear force (F) is measured in [gr. ]. 4. The force value obtained is calculated as follows: S/u_a (Shear per unit area)= Shear /[p. D 2/4]. Reasonable strength range = 5. 5 and above [gr. ]/[mil]2

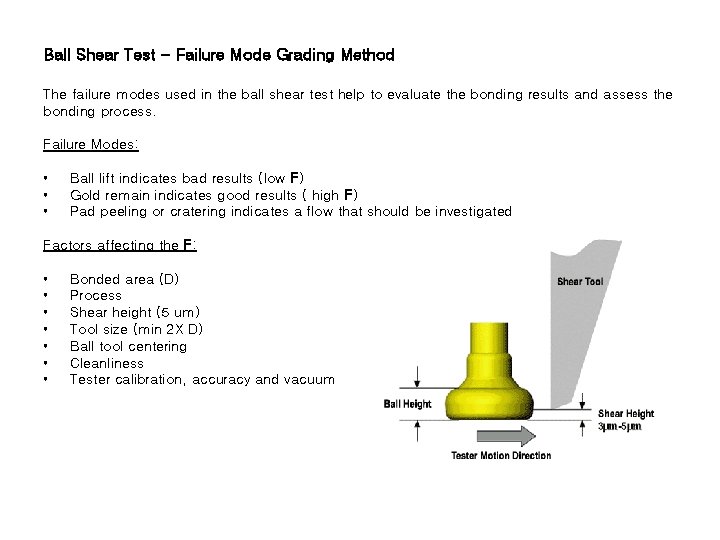
Ball Shear Test - Failure Mode Grading Method The failure modes used in the ball shear test help to evaluate the bonding results and assess the bonding process. Failure Modes: • • • Ball lift indicates bad results (low F) Gold remain indicates good results ( high F) Pad peeling or cratering indicates a flow that should be investigated Factors affecting the F: • • Bonded area (D) Process Shear height (5 um) Tool size (min 2 X D) Ball tool centering Cleanliness Tester calibration, accuracy and vacuum