Windows CE NET Device Driver Embedded System Lab

Windows CE. NET Device Driver 경희대학교 컴퓨터 공학과 조진성 Embedded System Lab. II

목차 n Overview of device driver n GPIO_LED device driver 제작 n KEYPAD, GPIO_LED를 이용한 application제작 Embedded System Lab. II 2

Overview of Device Driver Embedded System Lab. II

Device driver n OS와 application에게 적절한 인터페이스를 제공한다. n Application programmer는 device driver를 사용하여 하드웨어에 관한 지 식 없이 하드웨어를 사용할 수 있다. Embedded System Lab. II 4

WINCE device driver의 종류 Embedded System Lab. II 8

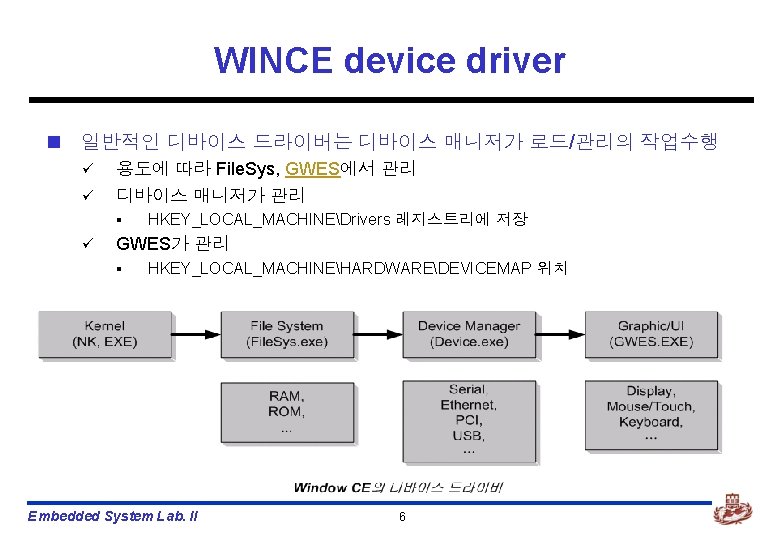
WINCE device driver의 종류 n Installable driver ü ü ü Stream device driver Application과 device driver가 데이터를 주고 받는 경우 H/W를 제어하는 방식이 특정 API를 통하는 방식 § ü ü ü Stream 관련 API : Create. File, Read. File, Write. File등 User Mode DLL파일. 디바이스 매니저(device. exe)에 의해 로딩되어 동작한다. 기본적으로 일관된 인터페이스를 가진다. Embedded System Lab. II 9

WINCE device driver의 종류 Embedded System Lab. II 10


WINCE device driver의 종류 Embedded System Lab. II 12


Stream device driver Embedded System Lab. II 14

Device Driver 제작방법 Embedded System Lab. II

Device driver 제작 n 기본적으로 필요한 파일 ü ü *. c *. def makefile sources Embedded System Lab. II – source file – definition file – target name, source files등을 설정한다. 17

GPIO_LED device driver Embedded System Lab. II

작업개요 n GPIO를 이용한 LED device driver의 제작 n PXA 255 PRO 3 board에 2개의 led가 있다. n 2개의 led는 GPIO 82와 83에 연결되어 있다. n LED가 10회 깜박거리는 application을 만들어 2개의 led를 test한다. Embedded System Lab. II 19
![n [wince 40platformPXA 255 PRO 3driversgpio_led] n 필요한 모든 파일은 위 디렉토리에 저장한다. Embedded](http://slidetodoc.com/presentation_image_h2/361f4e684d2666a021b1f4bbe2a40cc5/image-20.jpg "n [wince 40platformPXA 255 PRO 3driversgpio_led] n 필요한 모든 파일은 위 디렉토리에 저장한다. Embedded")
n [wince 40platformPXA 255 PRO 3driversgpio_led] n 필요한 모든 파일은 위 디렉토리에 저장한다. Embedded System Lab. II 20
 // gpio_led. c #include <windows. h> #include <nkintr. h> #include <drv_glob. h>")
gpio_led. c(1) // gpio_led. c #include <windows. h> #include <nkintr. h> #include <drv_glob. h> #include <oalintr. h> #include "xsc 1. h" #include "gpio. h" #define GPIO_82 #define GPIO_83 #define GPIO_LED 1 #define GPIO_LED 2 0 x 00040000 0 x 00080000 0 x 01 0 x 02 #define LED_ON #define LED_OFF Embedded System Lab. II 1 0 21
 volatile GPIO_REGS *v_p. GPIOReg; BOOL WINAPI Dll. Entry(HANDLE h. Inst. Dll, DWORD")
gpio_led. c(2) volatile GPIO_REGS *v_p. GPIOReg; BOOL WINAPI Dll. Entry(HANDLE h. Inst. Dll, DWORD dw. Reason, LPVOID lpv. Reserved) { switch ( dw. Reason ) { case DLL_PROCESS_ATTACH: DEBUGMSG(1, (TEXT("GPIO_LED : DLL_PROCESS_ATTACHrn"))); Disable. Thread. Library. Calls((HMODULE) h. Inst. Dll); break; } return (TRUE); } Embedded System Lab. II 22
 //---------------------------------------// Returns context data for this Init instance // // Arguments: //")
gpio_led. c(3) //---------------------------------------// Returns context data for this Init instance // // Arguments: // dw. Context - registry path for this device's active key // //---------------------------------------DWORD LED_Init(DWORD dw. Context) { DEBUGMSG(1, (TEXT("GPIO_LED : LED_Initrn"))); v_p. GPIOReg = (GPIO_REGS *)Virtual. Alloc(0, 0 x 80, MEM_RESERVE, PAGE_NOACCESS); if ( v_p. GPIOReg == NULL ) { ERRORMSG(1, (TEXT("LED_Init: GPIO Virtual. Alloc failed!rn"))); goto error_return; } Embedded System Lab. II 23
 if ( !Virtual. Copy((PVOID)v_p. GPIOReg, (PVOID)GPIO_BASE_U_VIRTUAL, 0 x 80, PAGE_READWRITE|PAGE_NOCACHE) ) {")
gpio_led. c(4) if ( !Virtual. Copy((PVOID)v_p. GPIOReg, (PVOID)GPIO_BASE_U_VIRTUAL, 0 x 80, PAGE_READWRITE|PAGE_NOCACHE) ) { ERRORMSG(1, (TEXT("LED_Init: GPIO Virtual. Copy failed!rn"))); goto error_return; } DEBUGMSG (1, (TEXT("LED_Init - Successrn") )); v_p. GPIOReg->GPDR_z |= GPIO_82 | GPIO_83; v_p. GPIOReg->GPSR_z |= GPIO_82 | GPIO_83; return (TRUE); error_return: DEBUGMSG (1, (TEXT("LED_Init - Fail!!rn") )); Embedded System Lab. II 24
 if (v_p. GPIOReg) Virtual. Free((PVOID) v_p. GPIOReg, 0, MEM_RELEASE); v_p. GPIOReg =")
gpio_led. c(5) if (v_p. GPIOReg) Virtual. Free((PVOID) v_p. GPIOReg, 0, MEM_RELEASE); v_p. GPIOReg = NULL; return (FALSE); } // LED_Init //-----------------------------------------------------------------------------BOOL LED_Close( DWORD Handle ) { return FALSE; } // LED_Close Embedded System Lab. II 25
 //---------------------------------------// // Device deinit - devices are expected to close down. //")
gpio_led. c(6) //---------------------------------------// // Device deinit - devices are expected to close down. // The device manager does not check the return code. // //---------------------------------------BOOL LED_Deinit( DWORD dw. Context // future: pointer to the per disk structure ) { return FALSE; } // LED_Deinit Embedded System Lab. II 26
 //---------------------------------------// // Returns handle value for the open instance. // //---------------------------------------DWORD LED_Open(")
gpio_led. c(7) //---------------------------------------// // Returns handle value for the open instance. // //---------------------------------------DWORD LED_Open( DWORD dw. Data, DWORD dw. Access, DWORD dw. Share. Mode ) { DEBUGMSG(1, (TEXT("GPIO_LED : LED_Openrn"))); return (TRUE); } // LED_Open Embedded System Lab. II 27
 DWORD LED_Write(DWORD Handle, LPCVOID p. Buffer, DWORD dw. Num. Bytes) { WORD")
gpio_led. c(8) DWORD LED_Write(DWORD Handle, LPCVOID p. Buffer, DWORD dw. Num. Bytes) { WORD i; BYTE *p. Tmp; p. Tmp = (BYTE *) p. Buffer; DEBUGMSG(1, (TEXT("GPIO_LED : LED_Writern"))); for(i=0; i<dw. Num. Bytes; i++) DEBUGMSG(1, (TEXT("Write Data[%d] = 0 x%x rn"), i, p. Tmp[i] )); if ( (p. Tmp[0] & GPIO_LED 1) == LED_ON ) v_p. GPIOReg->GPCR_z |= GPIO_82; else v_p. GPIOReg->GPSR_z |= GPIO_82; Embedded System Lab. II 28
![gpio_led. c(9) if ( ((p. Tmp[0] & GPIO_LED 2)>>1) == LED_ON ) v_p. GPIOReg->GPCR_z](http://slidetodoc.com/presentation_image_h2/361f4e684d2666a021b1f4bbe2a40cc5/image-29.jpg "gpio_led. c(9) if ( ((p. Tmp[0] & GPIO_LED 2)>>1) == LED_ON ) v_p. GPIOReg->GPCR_z")
gpio_led. c(9) if ( ((p. Tmp[0] & GPIO_LED 2)>>1) == LED_ON ) v_p. GPIOReg->GPCR_z |= GPIO_83; else v_p. GPIOReg->GPSR_z |= GPIO_83; return dw. Num. Bytes; } Embedded System Lab. II 29
 //---------------------------------------// // I/O Control function - responds to info, read and write")
gpio_led. c(10) //---------------------------------------// // I/O Control function - responds to info, read and write control codes. // The read and write take a scatter/gather list in p. In. Buf // //---------------------------------------BOOL LED_IOControl( DWORD Handle, DWORD dw. Io. Control. Code, PBYTE p. In. Buf, DWORD n. In. Buf. Size, PBYTE p. Out. Buf, DWORD n. Out. Buf. Size, PDWORD p. Bytes. Returned ) { return FALSE; } // LED_IOControl Embedded System Lab. II 30
 //-----------------------------------------------------------------------------DWORD LED_Read(DWORD Handle, LPVOID p. Buffer, DWORD dw. Num. Bytes){return 0; }")
gpio_led. c(11) //-----------------------------------------------------------------------------DWORD LED_Read(DWORD Handle, LPVOID p. Buffer, DWORD dw. Num. Bytes){return 0; } DWORD LED_Seek(DWORD Handle, long l. Distance, DWORD dw. Move. Method){return 0; } void LED_Power. Up(void){} void LED_Power. Down(void){} Embedded System Lab. II 31

gpio_led. def LIBRARY GPIO_LED EXPORTS LED_Init LED_Deinit LED_Open LED_Close LED_Read LED_Write LED_Seek LED_IOControl LED_Power. Down LED_Power. Up Embedded System Lab. II 32
 Microsoft Corporation. All rights reserved. !endif !if 0 Use")
makefile !if 0 Copyright (c) Microsoft Corporation. All rights reserved. !endif !if 0 Use of this source code is subject to the terms of the Microsoft end-user license agreement (EULA) under which you licensed this SOFTWARE PRODUCT. If you did not accept the terms of the EULA, you are not authorized to use this source code. For a copy of the EULA, please see the LICENSE. RTF on your install media. !endif # # DO NOT EDIT THIS FILE!!! Edit. sources. if you want to add a new source # file to this component. This file merely indirects to the real make file # that is shared by all the components of Windows CE. # !INCLUDE $(_MAKEENVROOT)makefile. def Embedded System Lab. II 33
 !if 0 Copyright (c) Microsoft Corporation. All rights reserved. !endif !if 0 Use")
sources(1) !if 0 Copyright (c) Microsoft Corporation. All rights reserved. !endif !if 0 Use of this source code is subject to the terms of the Microsoft end-user license agreement (EULA) under which you licensed this SOFTWARE PRODUCT. If you did not accept the terms of the EULA, you are not authorized to use this source code. For a copy of the EULA, please see the LICENSE. RTF on your install media. !endif TARGETNAME=gpio_led RELEASETYPE=PLATFORM TARGETTYPE=DYNLINK TARGETLIBS=$(_COMMONSDKROOT)lib$(_CPUINDPATH)coredll. lib SOURCELIBS=$(_TARGETPLATROOT)lib$(_CPUINDPATH)drvlib. lib Embedded System Lab. II 34
 DEFFILE=gpio_led. def PREPROCESSDEFFILE=1 DLLENTRY=Dll. Entry INCLUDES=. . inc SOURCES=gpio_led. c Embedded System Lab.")
sources(2) DEFFILE=gpio_led. def PREPROCESSDEFFILE=1 DLLENTRY=Dll. Entry INCLUDES=. . inc SOURCES=gpio_led. c Embedded System Lab. II 35
![Compile device driver n Platform builder에서 n [Build]->[Open build release directory]를 선택한다. Embedded System](http://slidetodoc.com/presentation_image_h2/361f4e684d2666a021b1f4bbe2a40cc5/image-36.jpg "Compile device driver n Platform builder에서 n [Build]->[Open build release directory]를 선택한다. Embedded System")
Compile device driver n Platform builder에서 n [Build]->[Open build release directory]를 선택한다. Embedded System Lab. II 36
![n 현재 device driver를 구현한 directory로 이동한다. n [SET WINCEREL=1]을 입력한다. ü 위 환경변수를](http://slidetodoc.com/presentation_image_h2/361f4e684d2666a021b1f4bbe2a40cc5/image-37.jpg "n 현재 device driver를 구현한 directory로 이동한다. n [SET WINCEREL=1]을 입력한다. ü 위 환경변수를")
n 현재 device driver를 구현한 directory로 이동한다. n [SET WINCEREL=1]을 입력한다. ü 위 환경변수를 설정하면, 자동으로 release directory에 복사된다. n [build –cfs]를 입력한다. Embedded System Lab. II 37

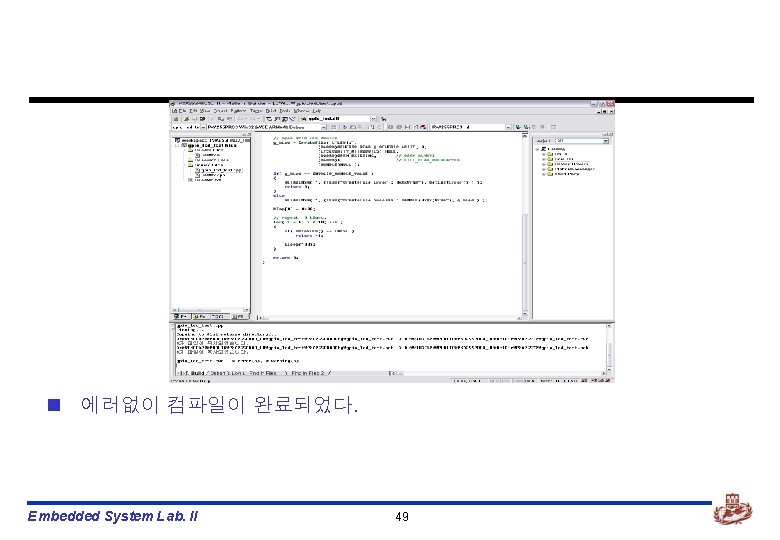
n Build가 에러없이 완료되었다. Embedded System Lab. II 38

GPIO LED Test Application 제작 Embedded System Lab. II
![gpio_led test application n Platform builder에서 n [File]->[New Project or File…]을 선택한다. Embedded System](http://slidetodoc.com/presentation_image_h2/361f4e684d2666a021b1f4bbe2a40cc5/image-40.jpg "gpio_led test application n Platform builder에서 n [File]->[New Project or File…]을 선택한다. Embedded System")
gpio_led test application n Platform builder에서 n [File]->[New Project or File…]을 선택한다. Embedded System Lab. II 40
![n [WCE Application]을 선택한다. n Project Name에는 적절한 이름을 적은 후, [OK]를 선택한다. Embedded](http://slidetodoc.com/presentation_image_h2/361f4e684d2666a021b1f4bbe2a40cc5/image-41.jpg "n [WCE Application]을 선택한다. n Project Name에는 적절한 이름을 적은 후, [OK]를 선택한다. Embedded")
n [WCE Application]을 선택한다. n Project Name에는 적절한 이름을 적은 후, [OK]를 선택한다. Embedded System Lab. II 41
![n [A simple Windows CE application]을 선택한다. n [Finish]를 선택한다. Embedded System Lab. II](http://slidetodoc.com/presentation_image_h2/361f4e684d2666a021b1f4bbe2a40cc5/image-42.jpg "n [A simple Windows CE application]을 선택한다. n [Finish]를 선택한다. Embedded System Lab. II")
n [A simple Windows CE application]을 선택한다. n [Finish]를 선택한다. Embedded System Lab. II 42
![n 위와 같이 새로운 project가 생성된 것을 볼 수 있다. n [Source Files]->[gpio_led_test. cpp]의](http://slidetodoc.com/presentation_image_h2/361f4e684d2666a021b1f4bbe2a40cc5/image-43.jpg "n 위와 같이 새로운 project가 생성된 것을 볼 수 있다. n [Source Files]->[gpio_led_test. cpp]의")
n 위와 같이 새로운 project가 생성된 것을 볼 수 있다. n [Source Files]->[gpio_led_test. cpp]의 내용을 수정해야 한다. Embedded System Lab. II 43
 // gpio_led_test. cpp : Defines the entry point for the application. //")
gpio_led_test. cpp(1) // gpio_led_test. cpp : Defines the entry point for the application. // #include "stdafx. h" HANDLE g_h. Led = INVALID_HANDLE_VALUE; BOOL Blink. LED() { BYTE DWORD BOOL i; b. Tmp; dw. Written. Num; b. Is. Written; if( g_h. Led == INVALID_HANDLE_VALUE ) return FALSE; Embedded System Lab. II 44
 for( i = 0; i < 4; ++i ) { b. Tmp")
gpio_led_test. cpp(2) for( i = 0; i < 4; ++i ) { b. Tmp = i; // Write to GPIO_LED b. Is. Written = Write. File( g_h. Led, (LPCVOID)&b. Tmp, 1, &dw. Written. Num, NULL ); Sleep(100); } return b. Is. Written; } int WINAPI Win. Main(HINSTANCE h. Instance, HINSTANCE h. Prev. Instance, LPTSTR lp. Cmd. Line, int n. Cmd. Show) { Embedded System Lab. II 45
![gpio_led_test. cpp(3) RETAILMSG( 1, (TEXT("gpio_led_test ------rn")) ); BYTE int b. Tmp[10]; i; // open](http://slidetodoc.com/presentation_image_h2/361f4e684d2666a021b1f4bbe2a40cc5/image-46.jpg "gpio_led_test. cpp(3) RETAILMSG( 1, (TEXT(\"gpio_led_test ------rn\")) ); BYTE int b. Tmp[10]; i; // open")
gpio_led_test. cpp(3) RETAILMSG( 1, (TEXT("gpio_led_test ------rn")) ); BYTE int b. Tmp[10]; i; // open GPIO_LED device g_h. Led = Create. File( L"LED 1: ", (DWORD)GENERIC_READ | GENERIC_WRITE, 0, (LPSECURITY_ATTRIBUTES) NULL, (DWORD)OPEN_EXISTING, // OPEN_ALWAYS (DWORD)0, // FILE_FLAG_OVERLAPPED (HANDLE)NULL ); if( g_h. Led == INVALID_HANDLE_VALUE ) { RETAILMSG( 1, (TEXT("Create. File Error : 0 x%xrn"), Get. Last. Error() ) ); return 0; } Embedded System Lab. II 46
 else RETAILMSG( 1, (TEXT(\"Create. File Sucesss : HANDLE(0 x%x)rn\"), g_h. Led )")
gpio_led_test. cpp(4) else RETAILMSG( 1, (TEXT("Create. File Sucesss : HANDLE(0 x%x)rn"), g_h. Led ) ); b. Tmp[0] = 0 x 00; // repeat 10 times. for( i = 0; i < 10; ++i ) { // Blink GPIO_LED if( Blink. LED() == FALSE ) return -1; Sleep(100); } return 0; } Embedded System Lab. II 47
![Build gpio_led_test app n Platform builder에서 n [Build]->[Build gpio_led_test. exe]를 선택한다. Embedded System Lab.](http://slidetodoc.com/presentation_image_h2/361f4e684d2666a021b1f4bbe2a40cc5/image-48.jpg "Build gpio_led_test app n Platform builder에서 n [Build]->[Build gpio_led_test. exe]를 선택한다. Embedded System Lab.")
Build gpio_led_test app n Platform builder에서 n [Build]->[Build gpio_led_test. exe]를 선택한다. Embedded System Lab. II 48

Making OS Image Embedded System Lab. II

Making OS image n GPIO_LED를 build한 다음, 이 device driver를 OS image에 포함 시켜야 한다. n OS image에 포함시키기 위해 platform. bib, platform. reg파일을 변경하여 야 한다. Embedded System Lab. II 51
![platform. reg, platform. bib n [wince 40platformPXA 255 Pro 3files] 밑에 있다. n Platform.](http://slidetodoc.com/presentation_image_h2/361f4e684d2666a021b1f4bbe2a40cc5/image-52.jpg "platform. reg, platform. bib n [wince 40platformPXA 255 Pro 3files] 밑에 있다. n Platform.")
platform. reg, platform. bib n [wince 40platformPXA 255 Pro 3files] 밑에 있다. n Platform. bib (gpio_sw_drvr. dll아래에 삽입) gpio_sw_drvr. dll $(_FLATRELEASEDIR)gpio_sw_drvr. dll gpio_led. dll $(_FLATRELEASEDIR)gpio_led. dll NK SH n Platform. reg(IF BSP_FPGABOARD전에 삽입) [HKEY_LOCAL_MACHINEDriversBuilt. InGPIO_LED] “Dll”=“gpio_led. dll” “Prefix”=“LED” “Index”=dword: 1 “Order”=dword: 0 IF BSP_FPGABOARD Embedded System Lab. II 52 NK SH
![dirs n [WINCE 420PLATFORMPXA 255 PRO 3DRIVERS]에 있다. n 이 파일을 수정함으로써 자동으로 gpio_led.](http://slidetodoc.com/presentation_image_h2/361f4e684d2666a021b1f4bbe2a40cc5/image-53.jpg "dirs n [WINCE 420PLATFORMPXA 255 PRO 3DRIVERS]에 있다. n 이 파일을 수정함으로써 자동으로 gpio_led.")
dirs n [WINCE 420PLATFORMPXA 255 PRO 3DRIVERS]에 있다. n 이 파일을 수정함으로써 자동으로 gpio_led. dll을 생성할 수 있다. gpio_sw_drvr gpio_led 추가 Embedded System Lab. II 53


n OS Image생성이 완료되었다. Embedded System Lab. II 55

Board에 Download하기 Embedded System Lab. II

Board에 download하기 n 먼저, OS Image를 board에 download한다. n 과정은 이전과 동일하다. Embedded System Lab. II 57
![n Platform builder가 debugging모드로 바뀌었다. n [Target]->[Run Programs…]을 선택한다. Embedded System Lab. II 58](http://slidetodoc.com/presentation_image_h2/361f4e684d2666a021b1f4bbe2a40cc5/image-58.jpg "n Platform builder가 debugging모드로 바뀌었다. n [Target]->[Run Programs…]을 선택한다. Embedded System Lab. II 58")
n Platform builder가 debugging모드로 바뀌었다. n [Target]->[Run Programs…]을 선택한다. Embedded System Lab. II 58
![n Run programs 대화상자가 뜬다. n [gpio_led_test. exe]파일을 선택하고, [Run]을 선택한다. n Board와 debugging메시지를](http://slidetodoc.com/presentation_image_h2/361f4e684d2666a021b1f4bbe2a40cc5/image-59.jpg "n Run programs 대화상자가 뜬다. n [gpio_led_test. exe]파일을 선택하고, [Run]을 선택한다. n Board와 debugging메시지를")
n Run programs 대화상자가 뜬다. n [gpio_led_test. exe]파일을 선택하고, [Run]을 선택한다. n Board와 debugging메시지를 보며 device driver가 잘 동작하는지 확인한다. Embedded System Lab. II 59

KEYPAD Device Driver 제작 Embedded System Lab. II

작업개요 n GPIO와 interrupt를 이용한 key device driver의 제작 n PXA 255 -PRO board에 12개의 key button이 있다. n Key를 눌렀을 때, interrupt를 걸어 그에 해당하는 service routine이 실행되 게 한다. n debugging창에 key 값을 출력한다. n 작업시 유의사항 ü ü ü Keypad는 interrupt를 이용해야 한다. Interrupt를 사용하기 위해서는 kernel을 수정해야 한다. Application을 실행할 때, blocking 방식을 사용하여야 한다. Embedded System Lab. II 61

Embedded System Lab. II 62

WINCE 커널에서의 인터럽트 설정 n Interrupt ID등록 ü ü ü WINCE 커널에서는 interrupt확인을 위해 interrupt ID를 사용한다. 최대 32개 까지 interrupt ID를 사용할 수 있다. (주요한 ID는 미리 정의됨) 다음을 추가한다. <WINCE 420PLATFORMPXA 255 PRO 3INCoalintr. h> <WINCE 420PLATFORMPXA 255 PRO 3INCoalintr. inc> Embedded System Lab. II 63

n Interrupt 초기화 및 Enable, Done, Disable을 구현한다. ü ü ü WINCE에서 interrupt handling은 ISR(interrupt service routine)에서 이루어지 지 않고, IST(interrupt service thread)에서 이루어진다. 따라서, 디바이스 드라이버에서 인터럽트 초기화가 요구된다. [wince 420platformpxa 255 pro 3kernelhalcfwxsc 1. c]에 다음을 추가한다. § OEMInterrupt. Enable() 함수 Embedded System Lab. II 64
 함수 § OEMInterrupt. Done() 함수 Embedded System Lab. II 65")
§ OEMInterrupt. Disable() 함수 § OEMInterrupt. Done() 함수 Embedded System Lab. II 65

n Interrupt Service Routine구현 ü ü Win. CE에서 ISR은 Physical Interrupt number을 Logical Interrupt(Interrupt ID)로 맵을 해준다. ARM의경우 Interrupt를 여러 장치 들이 공유한다. 따라서 interrupt 요구한 디바이스를 확인해야 한다. Win. CE의 커널은 device의 interrupt 요구 시 OEMInterrupt. Handler()호출 kernel device driver OEMInterrupt. Handler() Interrupt request • Interrupt Pending Reigster 체크 • Interrupt 발생지 확인 • 해당 interrupt ID 리턴 IST driver device event IST driver device IST 커널은 리턴된 interrupt ID에 따라 event를 발생 Embedded System Lab. II 66
![n [wince 420platformpxa 255 pro 3kernelhalarmintxsc 1. c]에 다음을 추가 한다. ü OEMInterrupt. Handler()](http://slidetodoc.com/presentation_image_h2/361f4e684d2666a021b1f4bbe2a40cc5/image-67.jpg "n [wince 420platformpxa 255 pro 3kernelhalarmintxsc 1. c]에 다음을 추가 한다. ü OEMInterrupt. Handler()")
n [wince 420platformpxa 255 pro 3kernelhalarmintxsc 1. c]에 다음을 추가 한다. ü OEMInterrupt. Handler() 함수 Embedded System Lab. II 67
![n [wince 40platformPXA 255 PRO 3driverskeypad] n 필요한 모든 파일은 위 디렉토리에 저장한다. n](http://slidetodoc.com/presentation_image_h2/361f4e684d2666a021b1f4bbe2a40cc5/image-68.jpg "n [wince 40platformPXA 255 PRO 3driverskeypad] n 필요한 모든 파일은 위 디렉토리에 저장한다. n")
n [wince 40platformPXA 255 PRO 3driverskeypad] n 필요한 모든 파일은 위 디렉토리에 저장한다. n 드라이버 구동 절차 ü ü ü IST생성 – Create. Thread() 각 레지스터 address 설정 – Keypad_Initialize. Addresses() Interrupt 활성화 – Keypad_Enable. Interrupt() Interrupt를 받을 event생성 – Create. Event() Interrupt와 event를 연결 – Interrupt. Initialize() Read. File()시 event가 trigger되면 값 전달 - KPD_Read() Embedded System Lab. II 68
 // keypad. c #include <windows. h> #include <nkintr. h> #include \"XSC 1.")
keypad_drvr. c(1) // keypad. c #include <windows. h> #include <nkintr. h> #include "XSC 1. h" #include "XSC 1 bd. h" #include <drv_glob. h> #include <oalintr. h> #include "bcr. h" extern PVOID Virtual. Alloc. Copy(unsigned size, char *str, PVOID p. Virtual. Address); #define PRIVATE #define PUBLIC static PRIVATE HANDLE g. Pwr. Button. Intr. Event; PRIVATE HANDLE g. Pwr. Button. Intr. Thread; PRIVATE volatile GPIO_REGS *v_p. GPIOReg = NULL; PRIVATE volatile INTC_REGS *v_p. ICReg = NULL; Embedded System Lab. II 69
 PRIVATE volatile unsigned char *v_p. Keypad = NULL; PRIVATE VOID Keypad_Enable. Interrupt(VOID)")
keypad_drvr. c(2) PRIVATE volatile unsigned char *v_p. Keypad = NULL; PRIVATE VOID Keypad_Enable. Interrupt(VOID) { v_p. GPIOReg->GPDR_x &= ~GPIO_0; v_p. GPIOReg->GEDR_x = GPIO_0; v_p. GPIOReg->GRER_x |= GPIO_0; INTC_GPIO 0_INT_EN (v_p. ICReg->icmr); RETAILMSG(1, (TEXT(": : : Enable Interrupt of GPIO 0 --- "))); } PRIVATE BOOL Keypad_Is. Pushed(VOID) { return ((v_p. GPIOReg->GPLR_x & GPIO_0) ? TRUE : FALSE); } Embedded System Lab. II 70
 PRIVATE void Keypad. Deallocate. Vm(VOID) { if (v_p. ICReg) { Virtual. Free((void")
keypad_drvr. c(3) PRIVATE void Keypad. Deallocate. Vm(VOID) { if (v_p. ICReg) { Virtual. Free((void *)v_p. ICReg, 0 x 400, MEM_RELEASE); v_p. ICReg = NULL; } if (v_p. GPIOReg) { Virtual. Free((void *)v_p. GPIOReg, 0 x 400, MEM_RELEASE); v_p. GPIOReg = NULL; } if (v_p. Keypad) { Virtual. Free((void *)v_p. Keypad, 1, MEM_RELEASE); Embedded System Lab. II 71
 v_p. Keypad = NULL; } } PRIVATE BOOL Keypad_Initialize. Addresses(VOID) { BOOL")
keypad_drvr. c(4) v_p. Keypad = NULL; } } PRIVATE BOOL Keypad_Initialize. Addresses(VOID) { BOOL Ret. Value = TRUE; if (v_p. ICReg == NULL) { v_p. ICReg = (volatile INTC_REGS *) Virtual. Alloc. Copy(0 x 400, (char *)TEXT("Keypad. Enable: INTC_BASE_U_VIRTUAL"), (PVOID)INTC_BASE_U_VIRTUAL); if (v_p. ICReg) { if (v_p. GPIOReg == NULL) { Embedded System Lab. II 72
 v_p. GPIOReg = (volatile GPIO_REGS *) Virtual. Alloc. Copy(0 x 400, (char")
keypad_drvr. c(5) v_p. GPIOReg = (volatile GPIO_REGS *) Virtual. Alloc. Copy(0 x 400, (char *)TEXT("Keypad. Enable: GPIO_BASE_U_VIRTUAL"), (PVOID)GPIO_BASE_U_VIRTUAL); } } } if (v_p. Keypad == NULL) { v_p. Keypad = (volatile unsigned char *) Virtual. Alloc. Copy(1, (char *)TEXT("Keypad. Enable: IO_BASE_U_VIRTUAL"), (PVOID)IO_BASE_U_VIRTUAL); } if ( !v_p. GPIOReg|| !v_p. ICReg || !v_p. Keypad ) { Keypad. Deallocate. Vm(); DEBUGMSG(1, (TEXT("Keypad. Enable(): Error %urn"), Get. Last. Error())); Embedded System Lab. II 73
 return (FALSE); } return(TRUE); } DWORD Keypad_Intr. Thread(PVOID p. Arg) { if")
keypad_drvr. c(6) return (FALSE); } return(TRUE); } DWORD Keypad_Intr. Thread(PVOID p. Arg) { if (!Keypad_Initialize. Addresses()) { RETAILMSG(1, (TEXT(": : : Keypad_Initialize. Addresses Failrn"))); return 0; } Keypad_Enable. Interrupt(); Embedded System Lab. II 74
 g. Pwr. Button. Intr. Event = Create. Event(NULL, FALSE, NULL); if (!(Interrupt.")
keypad_drvr. c(7) g. Pwr. Button. Intr. Event = Create. Event(NULL, FALSE, NULL); if (!(Interrupt. Initialize(SYSINTR_KEYPAD, g. Pwr. Button. Intr. Event, 0, 0))) { RETAILMSG(1, (TEXT(": : : SYSINTR_KEYPAD Init Failrn"))); } RETAILMSG(1, (TEXT(": : : Interrupt Initialize succeedd on SYSINTR_KEYPAD rn"))); while (1) { // just loop not to exit the program. Sleep(100); } return 0; } Embedded System Lab. II 75
 PUBLIC DWORD KPD_Init(DWORD dw. Context) { DWORD IDThread; g. Pwr. Button. Intr.")
keypad_drvr. c(8) PUBLIC DWORD KPD_Init(DWORD dw. Context) { DWORD IDThread; g. Pwr. Button. Intr. Thread = Create. Thread(0, 0, (LPTHREAD_START_ROUTINE) Keypad_Intr. Thread, 0, 0, &IDThread); if ( g. Pwr. Button. Intr. Thread == NULL ) { RETAILMSG(1, (TEXT("Fatal Error! Failed to create Keypad one Intterupt thread. rn"))); return (FALSE); } else { RETAILMSG(1, (TEXT(" Keypad one Intterupt Initrn"))); return TRUE; } return 0; } Embedded System Lab. II 76
 PUBLIC BOOL WINAPI Dll. Entry(HANDLE h. Inst. Dll, DWORD dw. Reason, LPVOID")
keypad_drvr. c(9) PUBLIC BOOL WINAPI Dll. Entry(HANDLE h. Inst. Dll, DWORD dw. Reason, LPVOID lpv. Reserved) { switch ( dw. Reason ) { case DLL_PROCESS_ATTACH: Disable. Thread. Library. Calls((HMODULE) h. Inst. Dll); break; } return (TRUE); } BOOL KPD_Close( DWORD Handle ) { return TRUE; } // KPD_Close Embedded System Lab. II 77
 // // Device deinit - devices are expected to close down. //")
keypad_drvr. c(10) // // Device deinit - devices are expected to close down. // The device manager does not check the return code. // BOOL KPD_Deinit( DWORD dw. Context ) // future: pointer to the per disk structure { return TRUE; } // KPD_Deinit // // Returns handle value for the open instance. // DWORD KPD_Open( DWORD dw. Data, DWORD dw. Access, DWORD dw. Share. Mode) { return TRUE; } // KPD_Open Embedded System Lab. II 78
 // // I/O Control function - responds to info, read and write")
keypad_drvr. c(11) // // I/O Control function - responds to info, read and write control codes. // The read and write take a scatter/gather list in p. In. Buf // BOOL KPD_IOControl(DWORD Handle, DWORD dw. Io. Control. Code, PBYTE p. In. Buf, DWORD n. In. Buf. Size, PBYTE p. Out. Buf, DWORD n. Out. Buf. Size, PDWORD p. Bytes. Returned ) { return FALSE; } // KPD_IOControl //--------------------------------------// Read function. DWORD KPD_Read(DWORD Handle, LPVOID p. Buffer, DWORD dw. Num. Bytes) { if( dw. Num. Bytes < 1 ) return FALSE; Embedded System Lab. II 79
 Wait. For. Single. Object(g. Pwr. Button. Intr. Event, INFINITE); if (Keypad_Is. Pushed())")
keypad_drvr. c(12) Wait. For. Single. Object(g. Pwr. Button. Intr. Event, INFINITE); if (Keypad_Is. Pushed()) { Sleep(100); // To Filter Noise if (Keypad_Is. Pushed()) { ((BYTE*)p. Buffer)[0] = (*v_p. Keypad)&0 x 0 f; RETAILMSG(1, (TEXT(" SYSINTR_KEYPAD !!! "))); } } Interrupt. Done(SYSINTR_KEYPAD); return TRUE; } Embedded System Lab. II 80
 DWORD KPD_Write(DWORD Handle, LPCVOID p. Buffer, DWORD dw. Num. Bytes) { return")
keypad_drvr. c(13) DWORD KPD_Write(DWORD Handle, LPCVOID p. Buffer, DWORD dw. Num. Bytes) { return 0; } DWORD KPD_Seek(DWORD Handle, long l. Distance, DWORD dw. Move. Method) { return 0; } void KPD_Power. Up(void) { return; } void KPD_Power. Down(void) { return; } Embedded System Lab. II 81

Keypad_drvr. def LIBRARY KEYPAD_DRVR EXPORTS KPD_Init KPD_Deinit KPD_Open KPD_Close KPD_Read KPD_Write KPD_Seek KPD_IOControl KPD_Power. Down KPD_Power. Up Embedded System Lab. II 82
 Microsoft Corporation. All rights reserved. !endif !if 0 Use")
makefile !if 0 Copyright (c) Microsoft Corporation. All rights reserved. !endif !if 0 Use of this source code is subject to the terms of the Microsoft end-user license agreement (EULA) under which you licensed this SOFTWARE PRODUCT. If you did not accept the terms of the EULA, you are not authorized to use this source code. For a copy of the EULA, please see the LICENSE. RTF on your install media. !endif # # DO NOT EDIT THIS FILE!!! Edit. sources. if you want to add a new source # file to this component. This file merely indirects to the real make file # that is shared by all the components of Windows CE. # !INCLUDE $(_MAKEENVROOT)makefile. def Embedded System Lab. II 83
 !if 0 Copyright (c) Microsoft Corporation. All rights reserved. !endif !if 0 Use")
sources(1) !if 0 Copyright (c) Microsoft Corporation. All rights reserved. !endif !if 0 Use of this source code is subject to the terms of the Microsoft end-user license agreement (EULA) under which you licensed this SOFTWARE PRODUCT. If you did not accept the terms of the EULA, you are not authorized to use this source code. For a copy of the EULA, please see the LICENSE. RTF on your install media. !endif TARGETNAME=keypad_drvr RELEASETYPE=PLATFORM TARGETTYPE=DYNLINK TARGETLIBS=$(_COMMONSDKROOT)lib$(_CPUINDPATH)coredll. lib SOURCELIBS=$(_TARGETPLATROOT)lib$(_CPUINDPATH)drvlib. lib Embedded System Lab. II 84
 DEFFILE=keypad_drvr. def PREPROCESSDEFFILE=1 DLLENTRY=Dll. Entry INCLUDES=. . inc SOURCES=keypad_drvr. c Embedded System Lab.")
sources(2) DEFFILE=keypad_drvr. def PREPROCESSDEFFILE=1 DLLENTRY=Dll. Entry INCLUDES=. . inc SOURCES=keypad_drvr. c Embedded System Lab. II 85
![Compile device driver n Platform builder에서 n [Build]->[Open build release directory]를 선택한다. Embedded System](http://slidetodoc.com/presentation_image_h2/361f4e684d2666a021b1f4bbe2a40cc5/image-86.jpg "Compile device driver n Platform builder에서 n [Build]->[Open build release directory]를 선택한다. Embedded System")
Compile device driver n Platform builder에서 n [Build]->[Open build release directory]를 선택한다. Embedded System Lab. II 86
![n 현재 device driver를 구현한 directory로 이동한다. n [SET WINCEREL=1]을 입력한다. ü 위 환경변수를](http://slidetodoc.com/presentation_image_h2/361f4e684d2666a021b1f4bbe2a40cc5/image-87.jpg "n 현재 device driver를 구현한 directory로 이동한다. n [SET WINCEREL=1]을 입력한다. ü 위 환경변수를")
n 현재 device driver를 구현한 directory로 이동한다. n [SET WINCEREL=1]을 입력한다. ü 위 환경변수를 설정하면, 자동으로 release directory에 복사된다. n [build –cfs]를 입력한다. Embedded System Lab. II 87

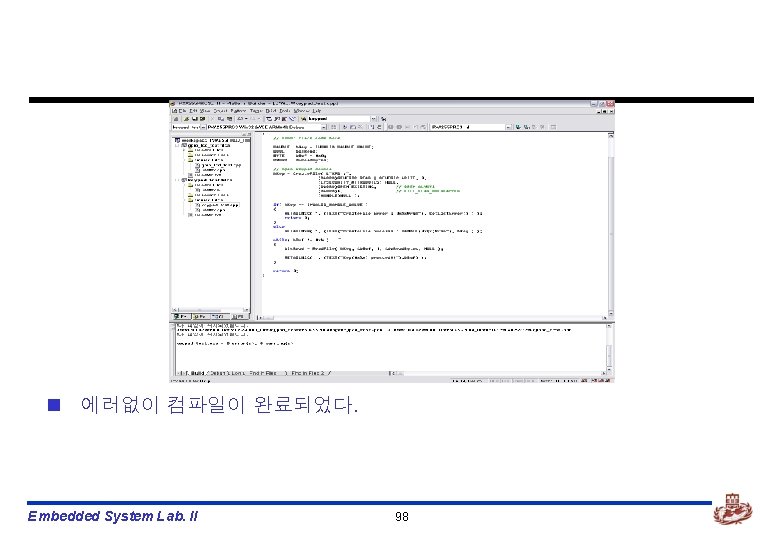
n Build가 에러없이 완료되었다. Embedded System Lab. II 88

KEYPAD Test Application Embedded System Lab. II
![KEYPAD test application n Platform builder에서 n [File]->[New Project or File…]을 선택한다. Embedded System](http://slidetodoc.com/presentation_image_h2/361f4e684d2666a021b1f4bbe2a40cc5/image-90.jpg "KEYPAD test application n Platform builder에서 n [File]->[New Project or File…]을 선택한다. Embedded System")
KEYPAD test application n Platform builder에서 n [File]->[New Project or File…]을 선택한다. Embedded System Lab. II 90
![n [WCE Application]을 선택한다. n Project Name에는 적절한 이름을 적은 후, [OK]를 선택한다. Embedded](http://slidetodoc.com/presentation_image_h2/361f4e684d2666a021b1f4bbe2a40cc5/image-91.jpg "n [WCE Application]을 선택한다. n Project Name에는 적절한 이름을 적은 후, [OK]를 선택한다. Embedded")
n [WCE Application]을 선택한다. n Project Name에는 적절한 이름을 적은 후, [OK]를 선택한다. Embedded System Lab. II 91
![n [A simple Windows CE application]을 선택한다. n [Finish]를 선택한다. Embedded System Lab. II](http://slidetodoc.com/presentation_image_h2/361f4e684d2666a021b1f4bbe2a40cc5/image-92.jpg "n [A simple Windows CE application]을 선택한다. n [Finish]를 선택한다. Embedded System Lab. II")
n [A simple Windows CE application]을 선택한다. n [Finish]를 선택한다. Embedded System Lab. II 92
![n 위와 같이 새로운 project가 생성된 것을 볼 수 있다. n [Source Files]->[keypad_test. cpp]의](http://slidetodoc.com/presentation_image_h2/361f4e684d2666a021b1f4bbe2a40cc5/image-93.jpg "n 위와 같이 새로운 project가 생성된 것을 볼 수 있다. n [Source Files]->[keypad_test. cpp]의")
n 위와 같이 새로운 project가 생성된 것을 볼 수 있다. n [Source Files]->[keypad_test. cpp]의 내용을 수정해야 한다. Embedded System Lab. II 93
 // keypad_test. cpp : Defines the entry point for the application. //")
keypad_test. cpp(1) // keypad_test. cpp : Defines the entry point for the application. // #include "stdafx. h" int WINAPI Win. Main(HINSTANCE h. Instance, HINSTANCE h. Prev. Instance, LPTSTR lp. Cmd. Line, int n. Cmd. Show) { // TODO: Place code here. HANDLE BOOL BYTE DWORD h. Key = INVALID_HANDLE_VALUE; b. Is. Read; b. Buf = 0 x 0; dw. Read. Bytes; Embedded System Lab. II 94
 // open keypad device h. Key = Create. File( L\"KPD 1: \",")
keypad_test. cpp(2) // open keypad device h. Key = Create. File( L"KPD 1: ", (DWORD)GENERIC_READ | GENERIC_WRITE, 0, (LPSECURITY_ATTRIBUTES) NULL, (DWORD)OPEN_EXISTING, // OPEN_ALWAYS (DWORD)0, // FILE_FLAG_OVERLAPPED (HANDLE)NULL ); if( h. Key == INVALID_HANDLE_VALUE ) { RETAILMSG( 1, (TEXT("Create. File Error : 0 x%xrn"), Get. Last. Error() ) ); return 0; } else RETAILMSG( 1, (TEXT("Create. File Sucesss : HANDLE(0 x%x)rn"), h. Key ) ); Embedded System Lab. II 95
 while( b. Buf != 0 x 4 ) { b. Is. Read")
keypad_test. cpp(3) while( b. Buf != 0 x 4 ) { b. Is. Read = Read. File( h. Key, &b. Buf, 1, &dw. Read. Bytes, NULL ); RETAILMSG( 1, (TEXT("Key(0 x%x) pressed!!rn"), b. Buf) ); } return 0; } Embedded System Lab. II 96
![Build keypad_test app n Platform builder에서 n [Build]->[Build keypad_test. exe]를 선택한다. Embedded System Lab.](http://slidetodoc.com/presentation_image_h2/361f4e684d2666a021b1f4bbe2a40cc5/image-97.jpg "Build keypad_test app n Platform builder에서 n [Build]->[Build keypad_test. exe]를 선택한다. Embedded System Lab.")
Build keypad_test app n Platform builder에서 n [Build]->[Build keypad_test. exe]를 선택한다. Embedded System Lab. II 97

Making OS Image Embedded System Lab. II

Making OS image n Keypad_drvr를 build한 다음, 이 device driver를 OS image에 포함 시켜야 한다. n OS image에 포함시키기 위해 platform. bib, platform. reg파일을 변경하여 야 한다. Embedded System Lab. II 100
![platform. reg, platform. bib n [Wince 40platformPXA 255 PRO 3files] 밑에 있다. n 아래의](http://slidetodoc.com/presentation_image_h2/361f4e684d2666a021b1f4bbe2a40cc5/image-101.jpg "platform. reg, platform. bib n [Wince 40platformPXA 255 PRO 3files] 밑에 있다. n 아래의")
platform. reg, platform. bib n [Wince 40platformPXA 255 PRO 3files] 밑에 있다. n 아래의 내용들은 이전 GPIO_LED에서 설정한 부분에 삽입한다. n Platform. bib keypad_drvr. dll $(_FLATRELEASEDIR)keypad_drvr. dll n Platform. reg [HKEY_LOCAL_MACHINEDriversBuilt. InKEYPAD] “Dll”=“keypad_drvr. dll” “Prefix”=“KPD” “Index”=dword: 1 “Order”=dword: 0 Embedded System Lab. II 101 NK SH
![dirs n [WINCE 420PLATFORMPXA 255 PRO 3DRIVERS]에 있다. n 이 파일을 수정함으로써 자동으로 gpio_led.](http://slidetodoc.com/presentation_image_h2/361f4e684d2666a021b1f4bbe2a40cc5/image-102.jpg "dirs n [WINCE 420PLATFORMPXA 255 PRO 3DRIVERS]에 있다. n 이 파일을 수정함으로써 자동으로 gpio_led.")
dirs n [WINCE 420PLATFORMPXA 255 PRO 3DRIVERS]에 있다. n 이 파일을 수정함으로써 자동으로 gpio_led. dll을 생성할 수 있다. gpio_sw_drvr gpio_led keypad Embedded System Lab. II 추가 102
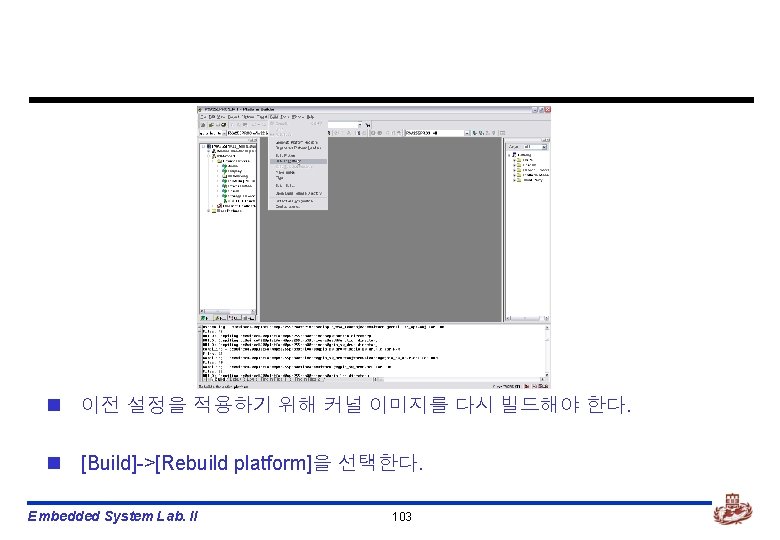

n OS Image생성이 완료되었다. Embedded System Lab. II 104

Board에 Download하기 Embedded System Lab. II

Board에 download하기 n 먼저, OS Image를 board에 download한다. n 과정은 이전과 동일하다. Embedded System Lab. II 106
![n Platform builder가 debugging모드로 바뀌었다. n [Target]->[Run Programs…]을 선택한다. Embedded System Lab. II 107](http://slidetodoc.com/presentation_image_h2/361f4e684d2666a021b1f4bbe2a40cc5/image-107.jpg "n Platform builder가 debugging모드로 바뀌었다. n [Target]->[Run Programs…]을 선택한다. Embedded System Lab. II 107")
n Platform builder가 debugging모드로 바뀌었다. n [Target]->[Run Programs…]을 선택한다. Embedded System Lab. II 107
![n Run programs 대화상자가 뜬다. n [keypad_test. exe]파일을 선택하고, [Run]을 선택한다. n Board와 debugging메시지를](http://slidetodoc.com/presentation_image_h2/361f4e684d2666a021b1f4bbe2a40cc5/image-108.jpg "n Run programs 대화상자가 뜬다. n [keypad_test. exe]파일을 선택하고, [Run]을 선택한다. n Board와 debugging메시지를")
n Run programs 대화상자가 뜬다. n [keypad_test. exe]파일을 선택하고, [Run]을 선택한다. n Board와 debugging메시지를 보며 device driver가 잘 동작하는지 확인한다. Embedded System Lab. II 108

KEYPAD, GPIO_LED를 이용한 application제작 Embedded System Lab. II
![GPIO_LED, KEYPAD test app n Platform builder에서 n [File]->[New Project or File…]을 선택한다. Embedded](http://slidetodoc.com/presentation_image_h2/361f4e684d2666a021b1f4bbe2a40cc5/image-110.jpg "GPIO_LED, KEYPAD test app n Platform builder에서 n [File]->[New Project or File…]을 선택한다. Embedded")
GPIO_LED, KEYPAD test app n Platform builder에서 n [File]->[New Project or File…]을 선택한다. Embedded System Lab. II 110
![n [WCE Application]을 선택한다. n Project Name에는 적절한 이름을 적은 후, [OK]를 선택한다. Embedded](http://slidetodoc.com/presentation_image_h2/361f4e684d2666a021b1f4bbe2a40cc5/image-111.jpg "n [WCE Application]을 선택한다. n Project Name에는 적절한 이름을 적은 후, [OK]를 선택한다. Embedded")
n [WCE Application]을 선택한다. n Project Name에는 적절한 이름을 적은 후, [OK]를 선택한다. Embedded System Lab. II 111
![n [A simple Windows CE application]을 선택한다. n [Finish]를 선택한다. Embedded System Lab. II](http://slidetodoc.com/presentation_image_h2/361f4e684d2666a021b1f4bbe2a40cc5/image-112.jpg "n [A simple Windows CE application]을 선택한다. n [Finish]를 선택한다. Embedded System Lab. II")
n [A simple Windows CE application]을 선택한다. n [Finish]를 선택한다. Embedded System Lab. II 112
![n 위와 같이 새로운 project가 생성된 것을 볼 수 있다. n [Source Files]->[gpio_led_key. cpp]의](http://slidetodoc.com/presentation_image_h2/361f4e684d2666a021b1f4bbe2a40cc5/image-113.jpg "n 위와 같이 새로운 project가 생성된 것을 볼 수 있다. n [Source Files]->[gpio_led_key. cpp]의")
n 위와 같이 새로운 project가 생성된 것을 볼 수 있다. n [Source Files]->[gpio_led_key. cpp]의 내용을 수정해야 한다. Embedded System Lab. II 113
 // gpio_led_key. cpp : Defines the entry point for the application. //")
gpio_led_key. cpp(1) // gpio_led_key. cpp : Defines the entry point for the application. // #include "stdafx. h" HANDLE g_h. Led = INVALID_HANDLE_VALUE; BOOL Blink. LED() { BYTE DWORD BOOL i; b. Tmp; dw. Written. Num; b. Is. Written; if( g_h. Led == INVALID_HANDLE_VALUE ) return FALSE; Embedded System Lab. II 114
 for( i = 0; i < 4; ++i ) { b. Tmp")
gpio_led_key. cpp(2) for( i = 0; i < 4; ++i ) { b. Tmp = i; // write to GPIO_LED b. Is. Written = Write. File( g_h. Led, (LPCVOID)&b. Tmp, 1, &dw. Written. Num, NULL ); Sleep(100); } return b. Is. Written; } int WINAPI Win. Main(HINSTANCE h. Instance, HINSTANCE h. Prev. Instance, LPTSTR lp. Cmd. Line, int n. Cmd. Show) { Embedded System Lab. II 115
 // TODO: Place code here. HANDLE h. Key = INVALID_HANDLE_VALUE; BOOL b.")
gpio_led_key. cpp(3) // TODO: Place code here. HANDLE h. Key = INVALID_HANDLE_VALUE; BOOL b. Is. Read; BYTE b. Buf = 0 x 0; DWORD dw. Read. Bytes; int i; // open GPIO_LED device g_h. Led = Create. File( L"LED 1: ", (DWORD)GENERIC_READ | GENERIC_WRITE, 0, (LPSECURITY_ATTRIBUTES) NULL, (DWORD)OPEN_EXISTING, // OPEN_ALWAYS (DWORD)0, // FILE_FLAG_OVERLAPPED (HANDLE)NULL ); if( g_h. Led == INVALID_HANDLE_VALUE ) { RETAILMSG( 1, (TEXT("Create. File(gpio_led) Error : 0 x%xrn"), Get. Last. Error() ) ); return 0; Embedded System Lab. II 116
 } else RETAILMSG( 1, (TEXT(\"Create. File(gpio_led) Sucesss : HANDLE(0 x%x)rn\"), g_h. Led")
gpio_led_key. cpp(4) } else RETAILMSG( 1, (TEXT("Create. File(gpio_led) Sucesss : HANDLE(0 x%x)rn"), g_h. Led ) ); // open keypad device h. Key = Create. File( L"KPD 1: ", (DWORD)GENERIC_READ | GENERIC_WRITE, 0, (LPSECURITY_ATTRIBUTES) NULL, (DWORD)OPEN_EXISTING, // OPEN_ALWAYS (DWORD)0, // FILE_FLAG_OVERLAPPED (HANDLE)NULL ); if( h. Key == INVALID_HANDLE_VALUE ) { RETAILMSG( 1, (TEXT("Create. File(keypad) Error : 0 x%xrn"), Get. Last. Error() ) ); return 0; } else RETAILMSG( 1, (TEXT("Create. File(keypad) Sucesss : HANDLE(0 x%x)rn"), h. Key ) ); Embedded System Lab. II 117
 // read keypad and repeat writing to GPIO_LED while( b. Buf !=")
gpio_led_key. cpp(5) // read keypad and repeat writing to GPIO_LED while( b. Buf != 0 x. B ) { b. Is. Read = Read. File( h. Key, &b. Buf, 1, &dw. Read. Bytes, NULL ); //RETAILMSG( 1, (TEXT("Key(0 x%x) pressed!!rn"), b. Buf) ); for( i = b. Buf; i >= 0; --i ) { RETAILMSG( 1, (TEXT("remaining count : %drn"), i) ); if( Blink. LED() == FALSE ) return -1; } } return 0; } Embedded System Lab. II 118
![Build gpio_led_key app n Platform builder에서 n [Build]->[Build gpio_led_key. exe]를 선택한다. Embedded System Lab.](http://slidetodoc.com/presentation_image_h2/361f4e684d2666a021b1f4bbe2a40cc5/image-119.jpg "Build gpio_led_key app n Platform builder에서 n [Build]->[Build gpio_led_key. exe]를 선택한다. Embedded System Lab.")
Build gpio_led_key app n Platform builder에서 n [Build]->[Build gpio_led_key. exe]를 선택한다. Embedded System Lab. II 119

n 에러없이 컴파일이 완료되었다. Embedded System Lab. II 120

Board에 Download하기 Embedded System Lab. II

Board에 download하기 n 먼저, OS Image를 board에 download한다. n 과정은 이전과 동일하다. Embedded System Lab. II 122
![n Platform builder가 debugging모드로 바뀌었다. n [Target]->[Run Programs…]을 선택한다. Embedded System Lab. II 123](http://slidetodoc.com/presentation_image_h2/361f4e684d2666a021b1f4bbe2a40cc5/image-123.jpg "n Platform builder가 debugging모드로 바뀌었다. n [Target]->[Run Programs…]을 선택한다. Embedded System Lab. II 123")
n Platform builder가 debugging모드로 바뀌었다. n [Target]->[Run Programs…]을 선택한다. Embedded System Lab. II 123
![n Run programs 대화상자가 뜬다. n [gpio_led_key. exe]파일을 선택하고, [Run]을 선택한다. n Board와 debugging메시지를](http://slidetodoc.com/presentation_image_h2/361f4e684d2666a021b1f4bbe2a40cc5/image-124.jpg "n Run programs 대화상자가 뜬다. n [gpio_led_key. exe]파일을 선택하고, [Run]을 선택한다. n Board와 debugging메시지를")
n Run programs 대화상자가 뜬다. n [gpio_led_key. exe]파일을 선택하고, [Run]을 선택한다. n Board와 debugging메시지를 보며 application이 잘 동작하는지 확인한다. Embedded System Lab. II 124

n Debug message로 application이 잘 동작하는 것을 확인할 수 있다. Embedded System Lab. II 125
- Slides: 125