
Whittle Designs presents How2 Paint Eyes Project Samples

- Slides: 31
Whittle Designs presents How-2: Paint Eyes
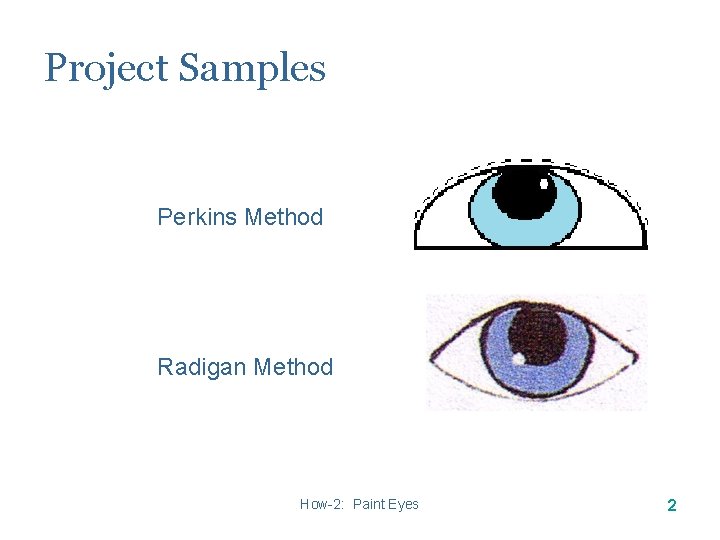
Project Samples Perkins Method Radigan Method How-2: Paint Eyes 2
Overview This presentation provides: • Tools and materials needs • Step-by-step instruction more • Finishing tips more • References more • Resources more How-2: Paint Eyes 3
Introduction At a recent carving club meeting I was asked how I painted my eyes. My technique is borrowed from two class handouts; one from Carving Santa with Lee and Lillian Perkins and the other from Fantasy Caricatures from Floyd Radigan. This presentation shows each of these two methods. How-2: Paint Eyes 4
Objective & Scope This presentation describes two popular methods for caricature painting eyes. The painting techniques may be used for carved eyes or when painting eyes on small caricatures without the carved details. The methods show the painting of blue eyes, but green or brown eyes may be painted using the same techniques. How-2: Paint Eyes 5
Tools No tools are required to paint eyes. A ceramic cleanup tool is handy for clearing small chips in the eye cuts. How-2: Paint Eyes 6
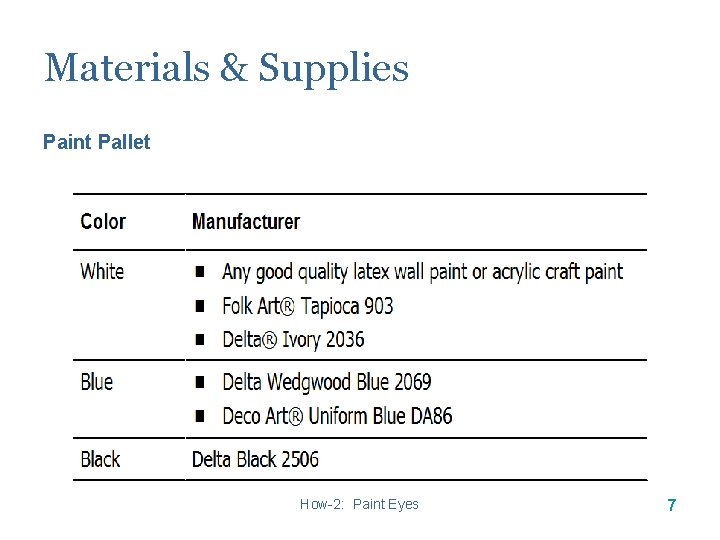
Materials & Supplies Paint Pallet How-2: Paint Eyes 7
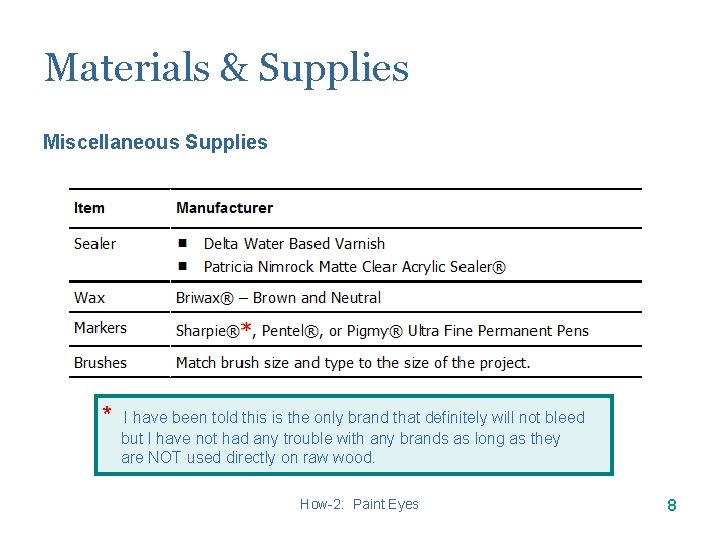
Materials & Supplies Miscellaneous Supplies * I have been told this is the only brand that definitely will not bleed but I have not had any trouble with any brands as long as they are NOT used directly on raw wood. How-2: Paint Eyes 8
General Instructions Before painting, review the following: • Using an old toothbrush, wash carving with suds only from a liquid detergent— rinse well, towel dry, and then let dry completely. • Pick all "fuzzies" (chips) out of deep cuts. • Acrylic paint dries rapidly. Make sure paint stays thin while painting. Add drops of water if necessary. If the paint is too thick it can leave "ridges" in work and it also is hard to apply. How-2: Paint Eyes 9
General Instructions— 2 Before painting, review the following: • Paint all white areas with white first. Put second coat of white on as appropriate. • Using desired colors, determine remainder of painting order by trying to paint from the inside out and top to bottom when possible. This order will keep touch ups to a minimum. • Check for uneven paint lines and touch up these areas. How-2: Paint Eyes 10
General Instructions— 3 • Spray with matte finish, if desired, before waxing or applying antique finishes. • Scrub on wax with old toothbrush. Wipe and buff to a shine. If the wax is too dark, rub some neutral wax on the desired areas. Wipe and buff again. • Using desired colors, determine remainder of painting order by trying to paint from the inside out and top to bottom when possible. This order will keep touch ups to a minimum. How-2: Paint Eyes 11
General Instructions— 4 • Check for uneven paint lines and touch up these areas. • Spray with matte finish, if desired, before waxing or applying antique finishes. • Scrub on wax with old toothbrush. Wipe and buff to a shine. If the wax is too dark, rub some neutral wax on the desired areas. Wipe and buff again. How-2: Paint Eyes 12
Perkins Method The eye-painting techniques used in this section were developed by Lillian Perkins for use on her husband’s Old World Santa carvings. The contents are used with permission of the Perkins. How-2: Paint Eyes 13
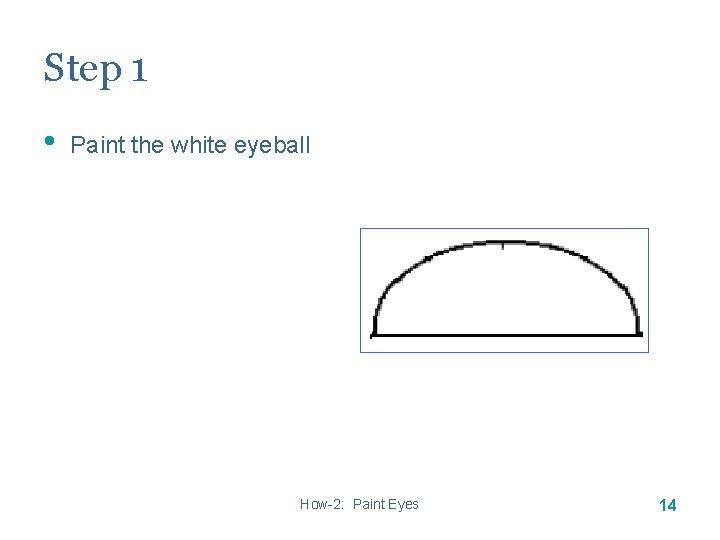
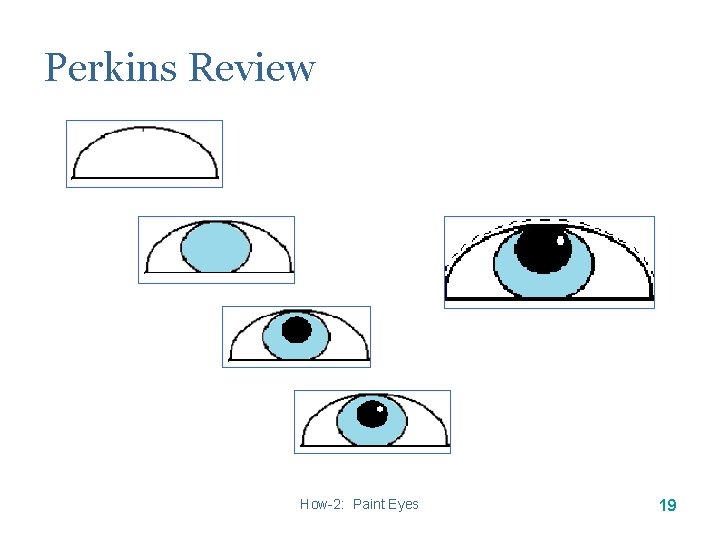
Step 1 • Paint the white eyeball How-2: Paint Eyes 14
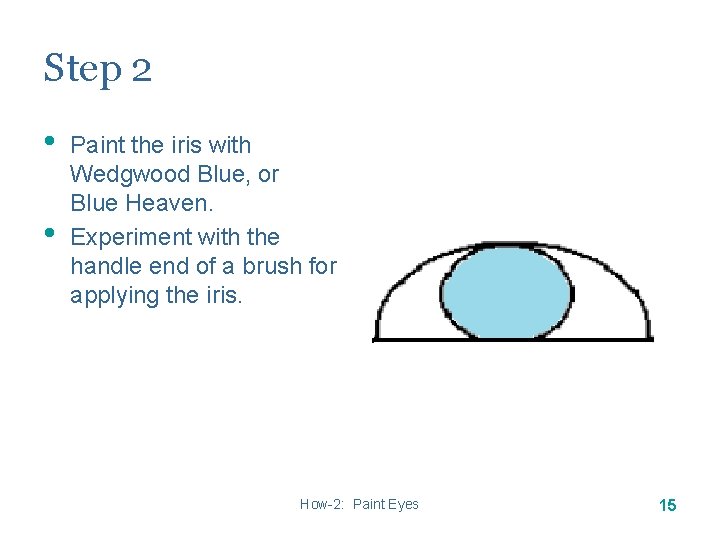
Step 2 • • Paint the iris with Wedgwood Blue, or Blue Heaven. Experiment with the handle end of a brush for applying the iris. How-2: Paint Eyes 15
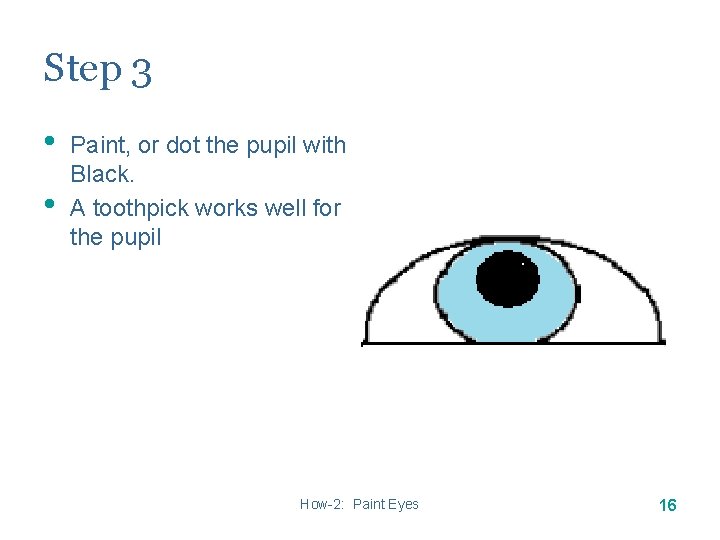
Step 3 • • Paint, or dot the pupil with Black. A toothpick works well for the pupil How-2: Paint Eyes 16
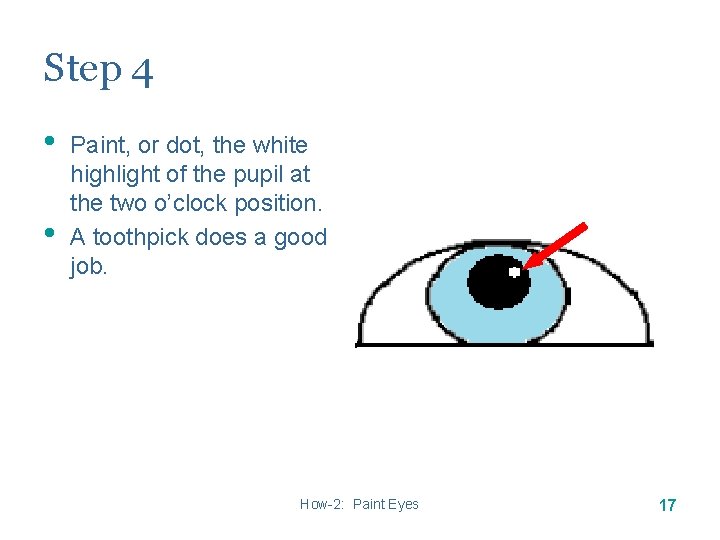
Step 4 • • Paint, or dot, the white highlight of the pupil at the two o’clock position. A toothpick does a good job. How-2: Paint Eyes 17
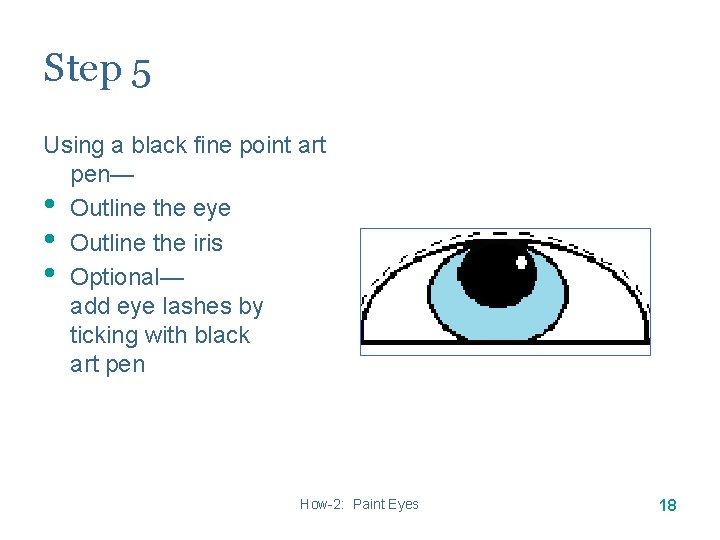
Step 5 Using a black fine point art pen— • Outline the eye • Outline the iris • Optional— add eye lashes by ticking with black art pen How-2: Paint Eyes 18
Perkins Review How-2: Paint Eyes 19
Radigan Method This method is used by Floyd Radigan and is based upon a class handout. For more information, see one of Floyd’s books or visit: http: //fantasycarving. com How-2: Paint Eyes 20
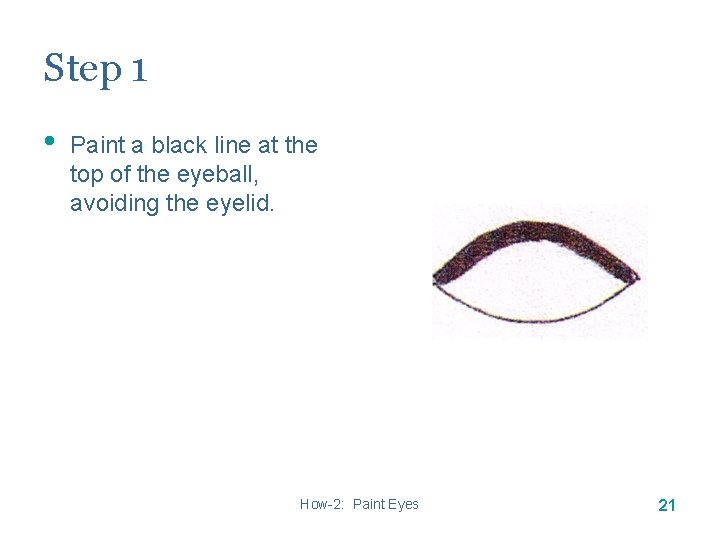
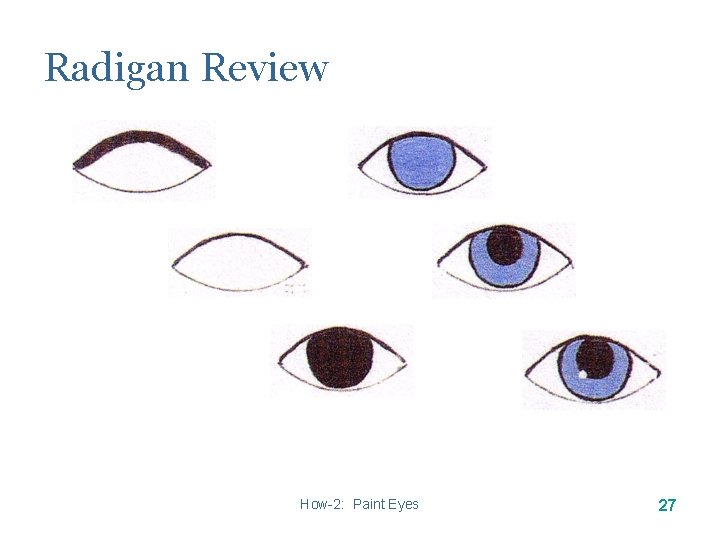
Step 1 • Paint a black line at the top of the eyeball, avoiding the eyelid. How-2: Paint Eyes 21
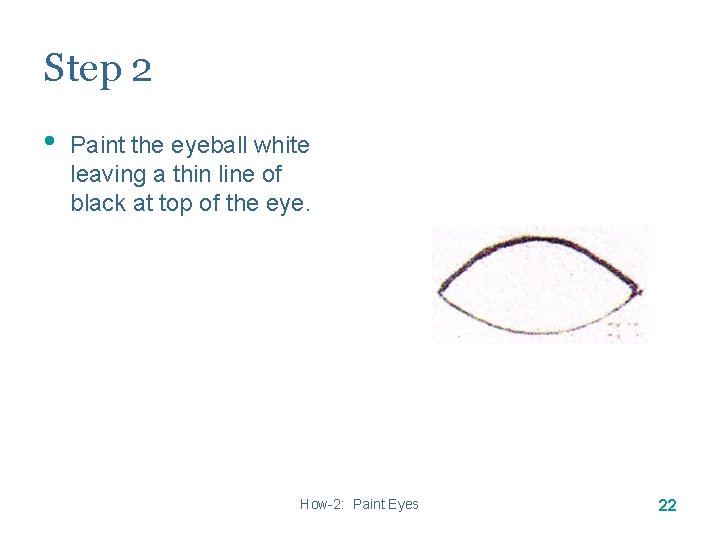
Step 2 • Paint the eyeball white leaving a thin line of black at top of the eye. How-2: Paint Eyes 22
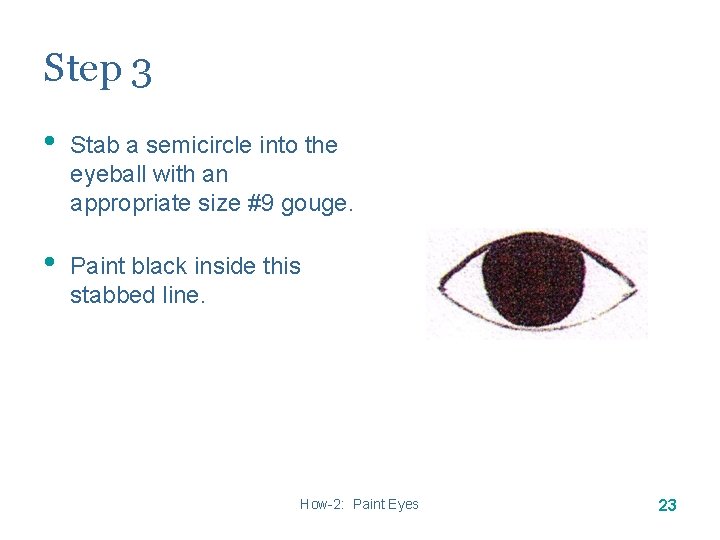
Step 3 • Stab a semicircle into the eyeball with an appropriate size #9 gouge. • Paint black inside this stabbed line. How-2: Paint Eyes 23
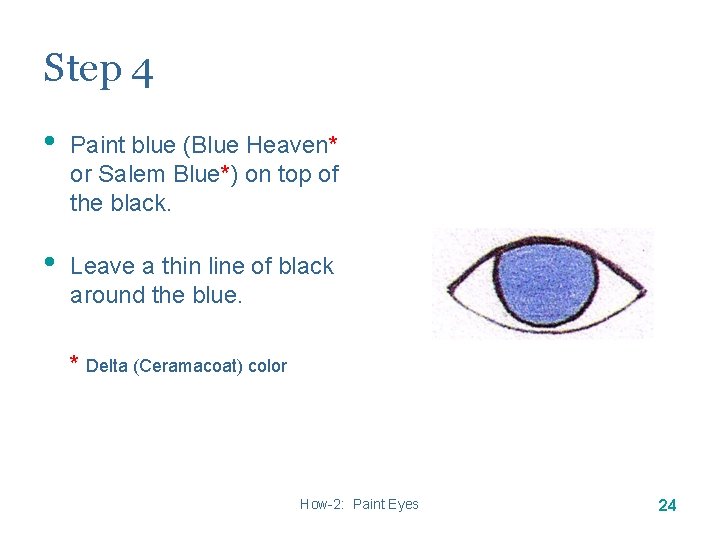
Step 4 • Paint blue (Blue Heaven* or Salem Blue*) on top of the black. • Leave a thin line of black around the blue. * Delta (Ceramacoat) color How-2: Paint Eyes 24
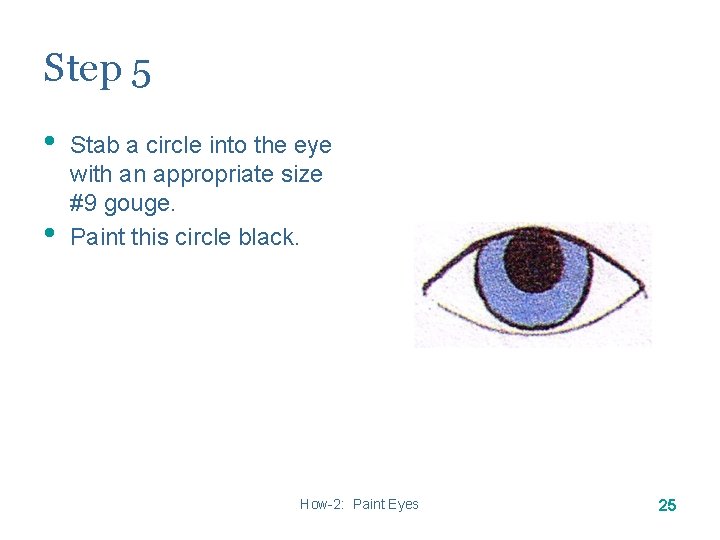
Step 5 • • Stab a circle into the eye with an appropriate size #9 gouge. Paint this circle black. How-2: Paint Eyes 25
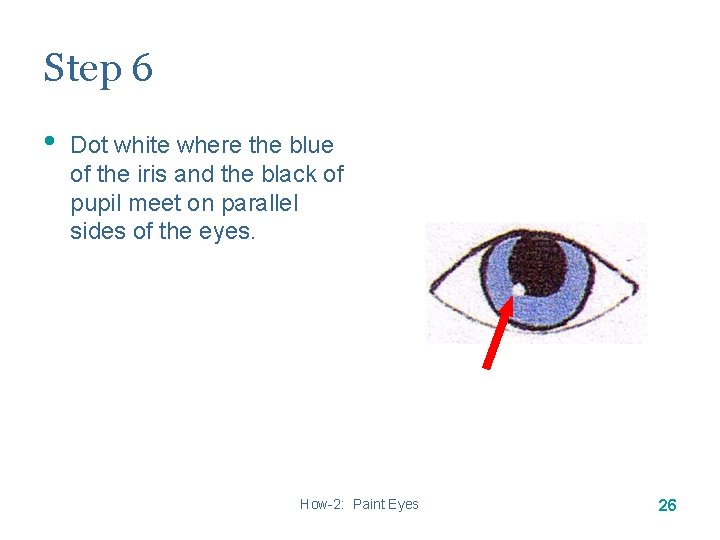
Step 6 • Dot white where the blue of the iris and the black of pupil meet on parallel sides of the eyes. How-2: Paint Eyes 26
Radigan Review How-2: Paint Eyes 27
References • Painting Santa, Lillian Perkins, 1999, handout • Painting Eyes, Floyd Radigan, 2011, handout NOTE: For copies of these handouts, email Whittle Designs. How-2: Paint Eyes 28
Terms • grain • pattern • • the direction, texture, or pattern of fibers produced by the fibers in wood decorative design, form, or model considered for or deserving of imitation; SEE template • Stop cut • template Pull cut knife cut made by drawing the blade toward the thumb on the knife hand; AKA: Thumb cut, Paring cut, Cut Back; See Push and Vcuts Push cut knife cut made by pushing the blade away from the knife hand; AKA: Levering cut, Push-Away cut; See: Pull and V-cuts • • • knife cut that is very similar to a V-cut, incorporating two cuts—the first cut is straight (perpendicular); the other cut slopes or slants into the first cutout of a pattern used to transfer the design to the wood; gauge, such with a cut pattern, used as a guide in making something accurately for carving projects or profiles; SEE pattern V-cut knife cut that uses the Pull and Push cuts to form a V-shaped feature in the wood; SEE Push cut and Pull cuts whittling any carving done with a knife; SEE woodcarving with chisels, gouges, and mallets; SEE whittling How-2: Paint Eyes 29
Summary In this presentation you learned: • The required tools and materials • The steps to complete the project • Tips to finish the project • References related to the project • Resources to help with this or other projects • Patterns for other projects How-2: Paint Eyes 30
Whittle Designs Carved Art from Virginia’s Heartland whittle. designs@gmail. com http: //whittle. designs. tripod. com/ http: //whittledesigns. wordpress. com/ How-2: Paint Eyes 31