WELD DEFECTS WELD DISCONTINUITIES DISTORTION AND ITS CONTROLS

- Slides: 47

WELD DEFECTS ( WELD DISCONTINUITIES ), DISTORTION AND ITS CONTROLS Ramanatha C. Scientist ‘F’ (Retd. ) Gas Turbine Research Establishment Bangalore

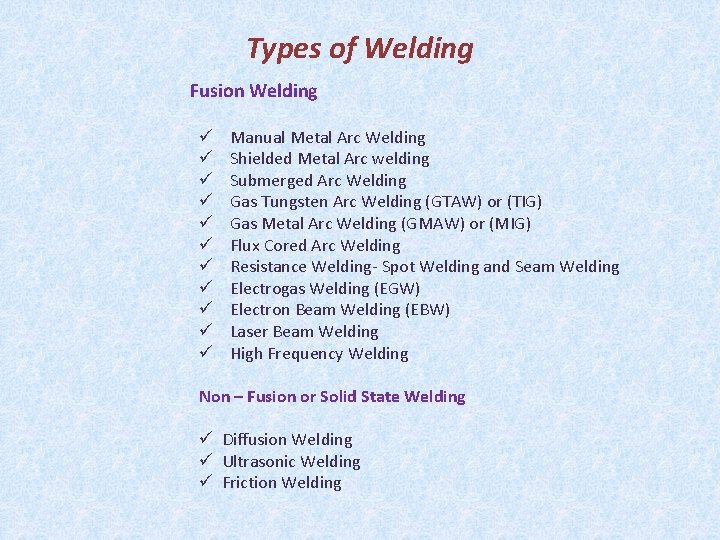
Types of Welding Fusion Welding ü ü ü Manual Metal Arc Welding Shielded Metal Arc welding Submerged Arc Welding Gas Tungsten Arc Welding (GTAW) or (TIG) Gas Metal Arc Welding (GMAW) or (MIG) Flux Cored Arc Welding Resistance Welding- Spot Welding and Seam Welding Electrogas Welding (EGW) Electron Beam Welding (EBW) Laser Beam Welding High Frequency Welding Non – Fusion or Solid State Welding ü Diffusion Welding ü Ultrasonic Welding ü Friction Welding

Definition The word “Defect “ should be used carefully, as it implies that a weld is defective and requires corrective measures or rejection, In some cases repairs may be made unnecessarily and solely by implication without a critical engineering assessment. Consequently the engineering community has recently begun to use the word “Discontinuity” or “Flaw” instead of “Defect”, Discontinuity may be defined as interruptions in the desirable physical structure of a weld. The significance of a weld discontinuity should be viewed in the context of the fitness-for-purpose of the welded construction. Fitness-for-purpose is a concept of weld evaluation that seeks a balance between quality, reliability and economy of welding procedure. It is not a constant varies depending in the service requirements of a particular welded structure as well as on the properties of the material involved.

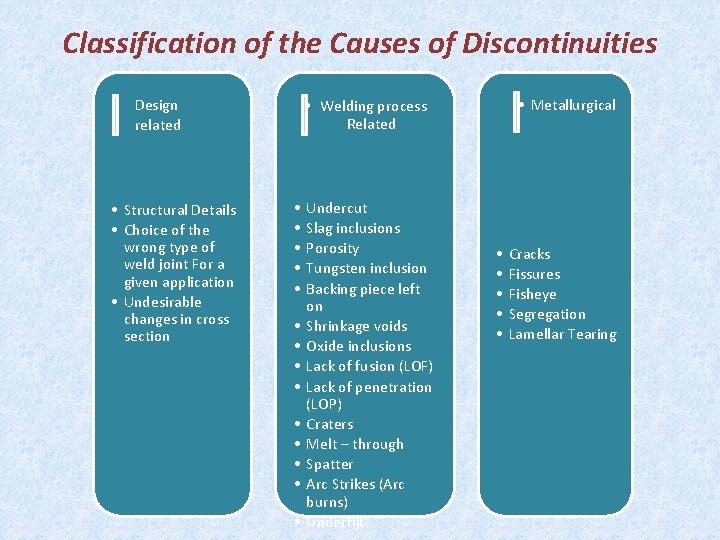
Classification of the Causes of Discontinuities • Design • related • Structural Details • Choice of the wrong type of weld joint For a given application • Undesirable changes in cross section • Metallurgical • Welding process Related • • • • Undercut Slag inclusions Porosity Tungsten inclusion Backing piece left on Shrinkage voids Oxide inclusions Lack of fusion (LOF) Lack of penetration (LOP) Craters Melt – through Spatter Arc Strikes (Arc burns) Underfill • • • Cracks Fissures Fisheye Segregation Lamellar Tearing

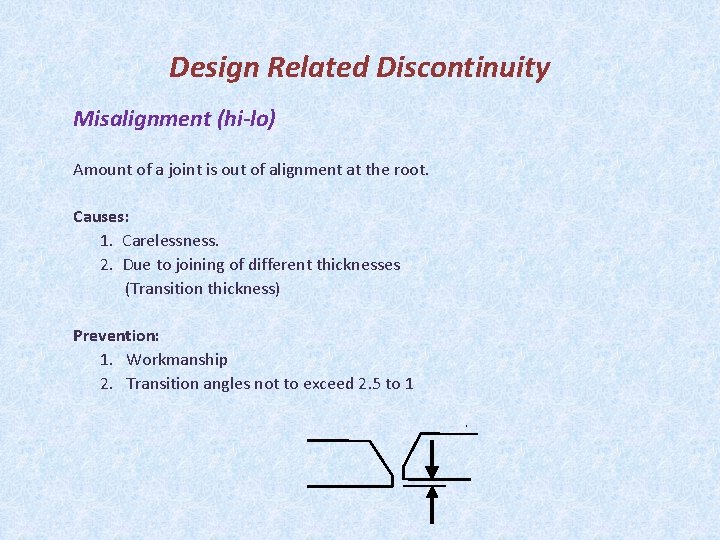
Design Related Discontinuity Misalignment (hi-lo) Amount of a joint is out of alignment at the root. Causes: 1. Carelessness. 2. Due to joining of different thicknesses (Transition thickness) Prevention: 1. Workmanship 2. Transition angles not to exceed 2. 5 to 1

Welding Process Related Discontinuities resulting from welding process include: ü Undercut: A groove melted into the base metal adjacent to the toe or root of a weld and left unfilled by weld metal. ü Slag inclusion: Non metallic solid material entrapped in weld or between weld metal and base metal. ü Porosity: Cavity-type discontinuities formed by gas entrapment during solidification. ü Tungsten inclusions: Particles from Tungsten electrodes. Which results from improper gas Tungsten arc welding procedures. ü Backing piece left on: Failure to remove material placed at the root of a weld joint to support molten weld metal. ü Shrinkage voids: Cavity type discontinuities normally formed by shrinkage during solidification. ü Oxide inclusions: Particles of surface oxides which have not melted and are mixed into the weld metal.

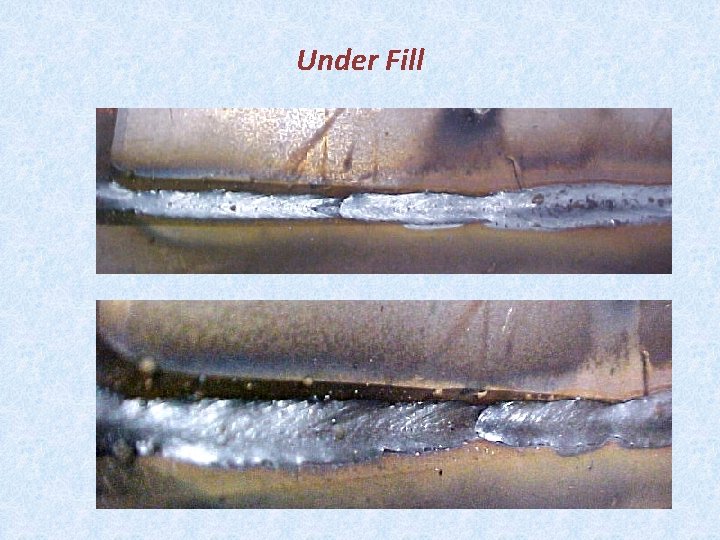
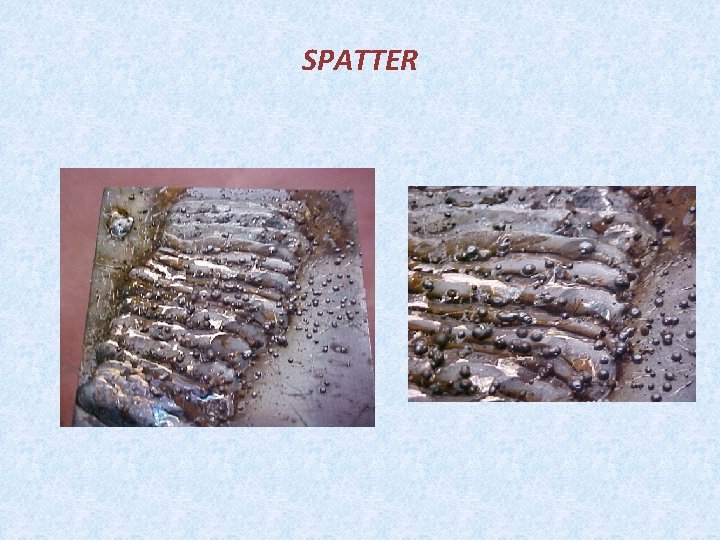
Welding Process Related Discontinuities Contd…. ü Lack of Fusion: A condition in which fusion is less than complete. ü Lack of Penetration: A condition in which joint penetration is less than that specified. ü Craters: Depression at the termination of a weld head or in the molten weld pool ü Melt-through: A condition resulting when the arc melts through the bottom of a joint welded from one side. ü Spatter: Metal particles expelled during welding which do not form a part of the weld. ü Arc strikes (arc burns): Discontinuities consisting of any localized remelted metal, or change in the surface profile of any part of a weld or base metal resulting from an arc. ü Underfill: A depression on the face of the weld or root surface of the adjacent base metal.

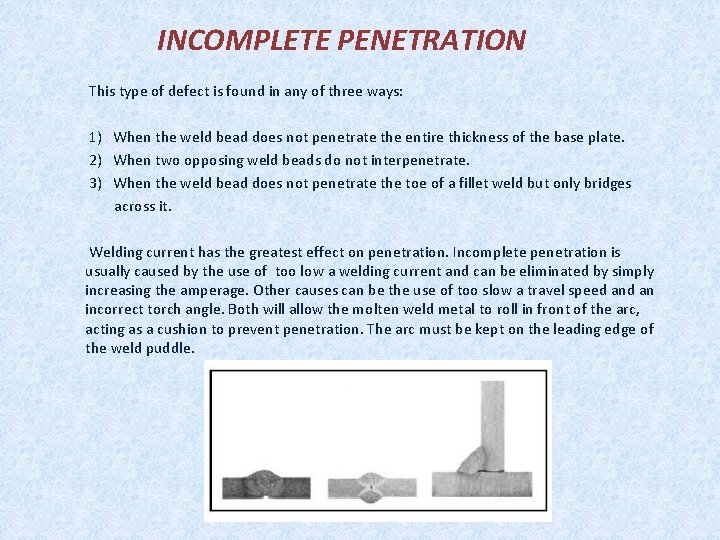
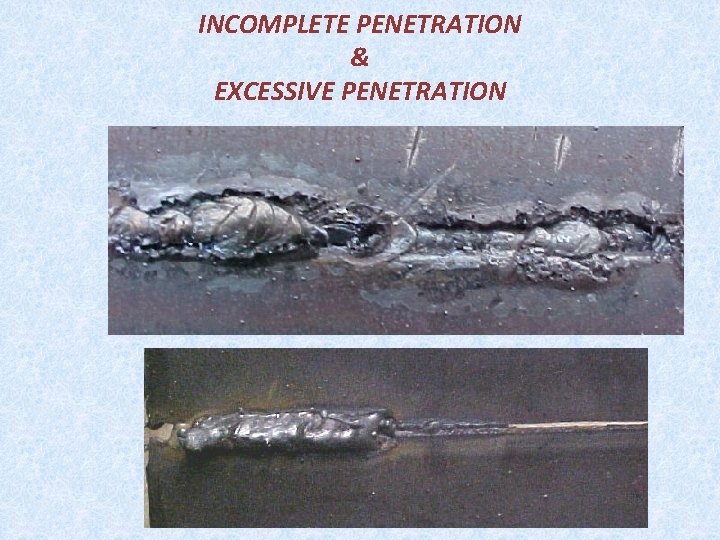
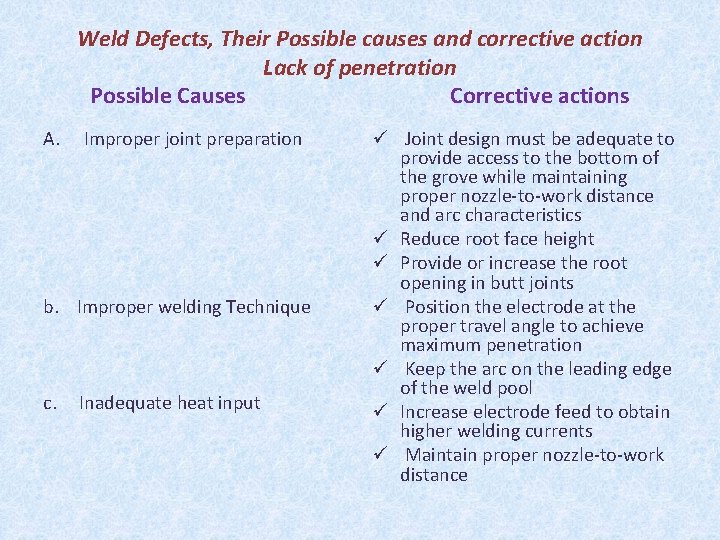
INCOMPLETE PENETRATION This type of defect is found in any of three ways: 1) When the weld bead does not penetrate the entire thickness of the base plate. 2) When two opposing weld beads do not interpenetrate. 3) When the weld bead does not penetrate the toe of a fillet weld but only bridges across it. Welding current has the greatest effect on penetration. Incomplete penetration is usually caused by the use of too low a welding current and can be eliminated by simply increasing the amperage. Other causes can be the use of too slow a travel speed an incorrect torch angle. Both will allow the molten weld metal to roll in front of the arc, acting as a cushion to prevent penetration. The arc must be kept on the leading edge of the weld puddle.

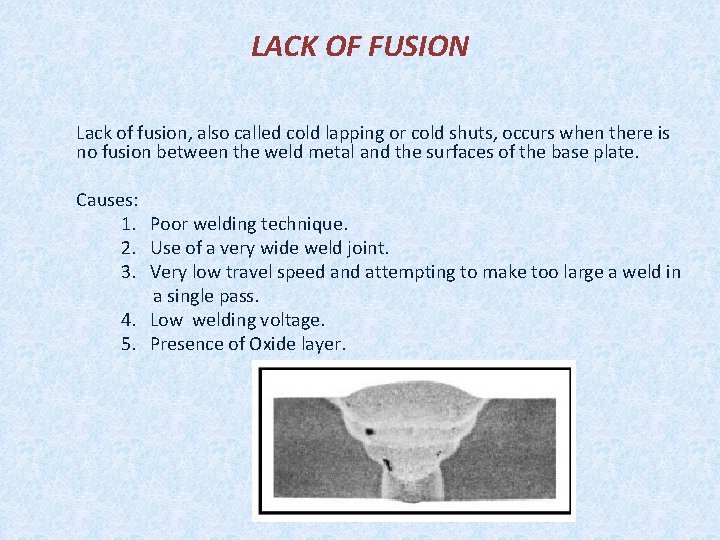
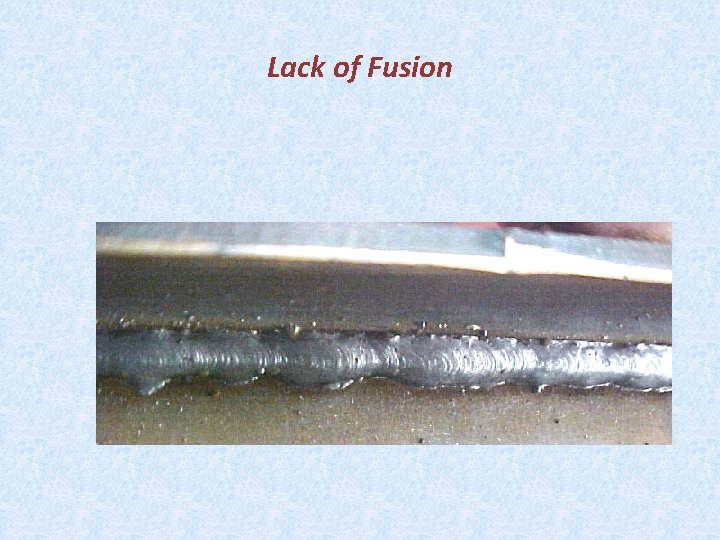
LACK OF FUSION Lack of fusion, also called cold lapping or cold shuts, occurs when there is no fusion between the weld metal and the surfaces of the base plate. Causes: 1. Poor welding technique. 2. Use of a very wide weld joint. 3. Very low travel speed and attempting to make too large a weld in a single pass. 4. Low welding voltage. 5. Presence of Oxide layer.

INCOMPLETE PENETRATION & EXCESSIVE PENETRATION

Lack of Fusion

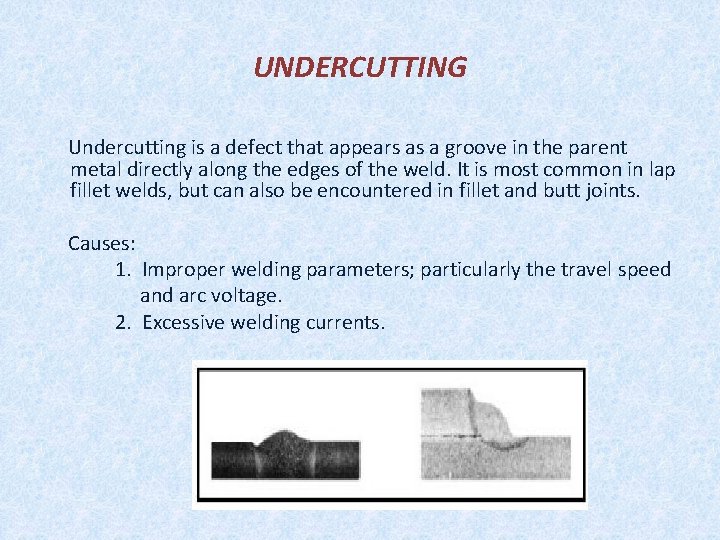
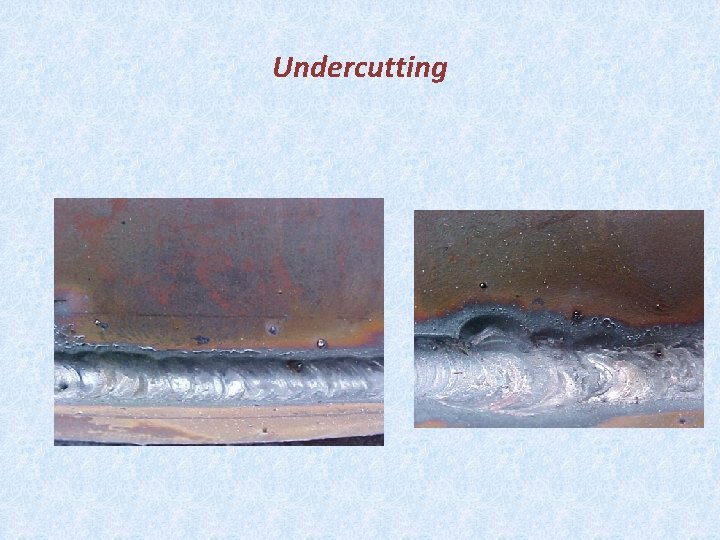
UNDERCUTTING Undercutting is a defect that appears as a groove in the parent metal directly along the edges of the weld. It is most common in lap fillet welds, but can also be encountered in fillet and butt joints. Causes: 1. Improper welding parameters; particularly the travel speed and arc voltage. 2. Excessive welding currents.

Undercutting

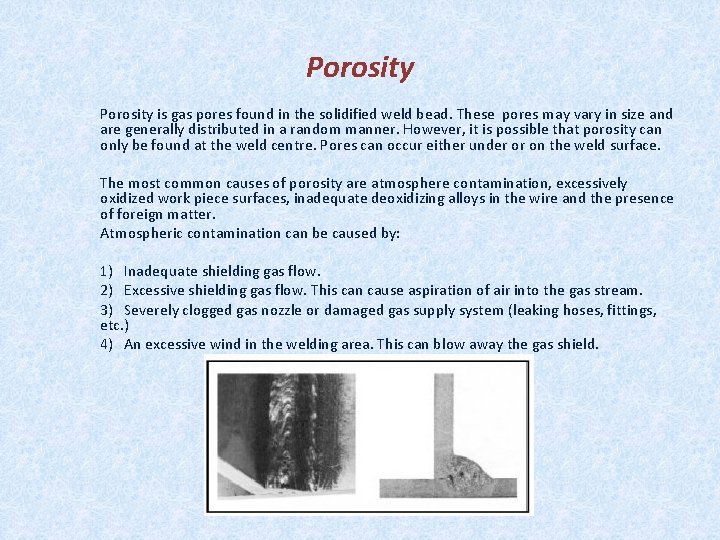
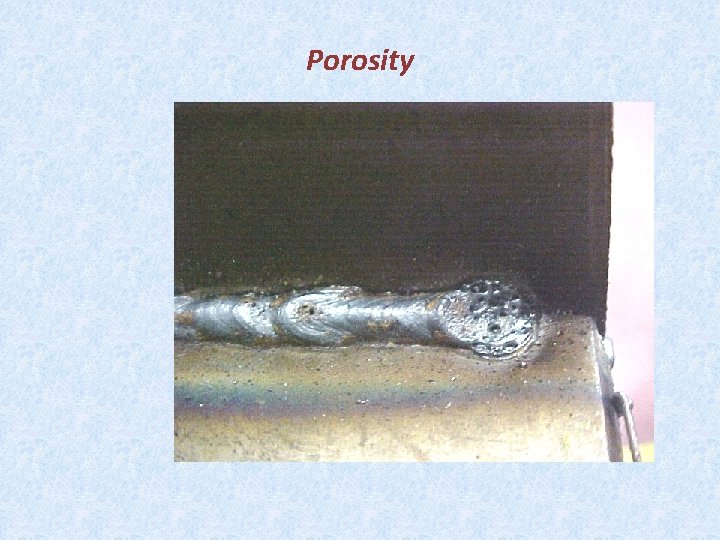
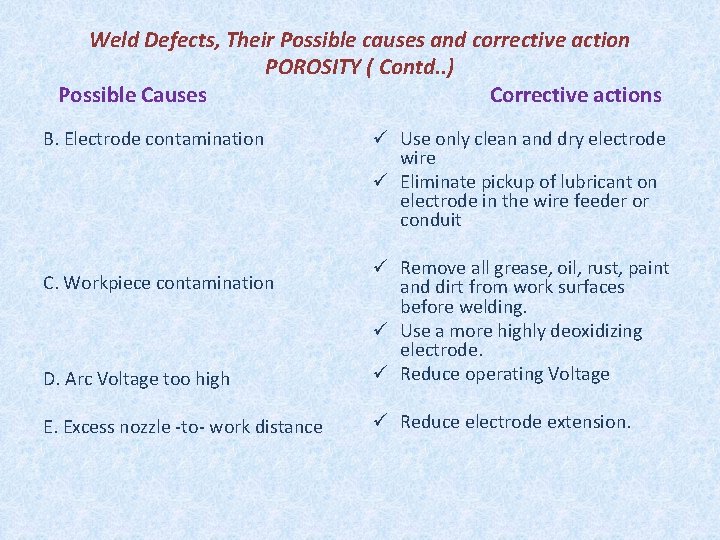
Porosity is gas pores found in the solidified weld bead. These pores may vary in size and are generally distributed in a random manner. However, it is possible that porosity can only be found at the weld centre. Pores can occur either under or on the weld surface. The most common causes of porosity are atmosphere contamination, excessively oxidized work piece surfaces, inadequate deoxidizing alloys in the wire and the presence of foreign matter. Atmospheric contamination can be caused by: 1) Inadequate shielding gas flow. 2) Excessive shielding gas flow. This can cause aspiration of air into the gas stream. 3) Severely clogged gas nozzle or damaged gas supply system (leaking hoses, fittings, etc. ) 4) An excessive wind in the welding area. This can blow away the gas shield.

Porosity

Weld Defects, Their Possible causes and corrective action POROSITY Possible Causes A. Inadequate shielding gas coverage Corrective Actions ü Increase the shielding gas flow to displace all air from the weld area ü Decrease the shielding gas flow to avoid turbulence and entrapment of air in the gas ü Remove Spatter from the interior of the gas nozzle. ü Eliminate drafts (from fans, open doors, etc. ) blowing into the welding arc. ü Use a slower travel speed. ü Reduce the nozzle-to-work distance. ü Hold the gun at the end of the weld until the molten crater solidifiers

Weld Defects, Their Possible causes and corrective action POROSITY ( Contd. . ) Possible Causes Corrective actions B. Electrode contamination ü Use only clean and dry electrode wire ü Eliminate pickup of lubricant on electrode in the wire feeder or conduit D. Arc Voltage too high ü Remove all grease, oil, rust, paint and dirt from work surfaces before welding. ü Use a more highly deoxidizing electrode. ü Reduce operating Voltage E. Excess nozzle -to- work distance ü Reduce electrode extension. C. Workpiece contamination

Weld Defects, Their Possible causes and corrective action Lack of penetration Possible Causes Corrective actions A. Improper joint preparation b. Improper welding Technique c. Inadequate heat input ü Joint design must be adequate to provide access to the bottom of the grove while maintaining proper nozzle-to-work distance and arc characteristics ü Reduce root face height ü Provide or increase the root opening in butt joints ü Position the electrode at the proper travel angle to achieve maximum penetration ü Keep the arc on the leading edge of the weld pool ü Increase electrode feed to obtain higher welding currents ü Maintain proper nozzle-to-work distance

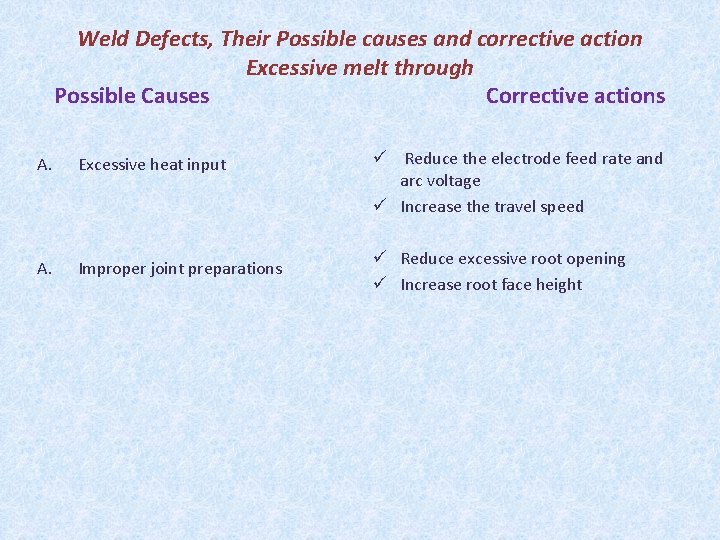
Weld Defects, Their Possible causes and corrective action Excessive melt through Possible Causes Corrective actions A. Excessive heat input A. Improper joint preparations ü Reduce the electrode feed rate and arc voltage ü Increase the travel speed ü Reduce excessive root opening ü Increase root face height

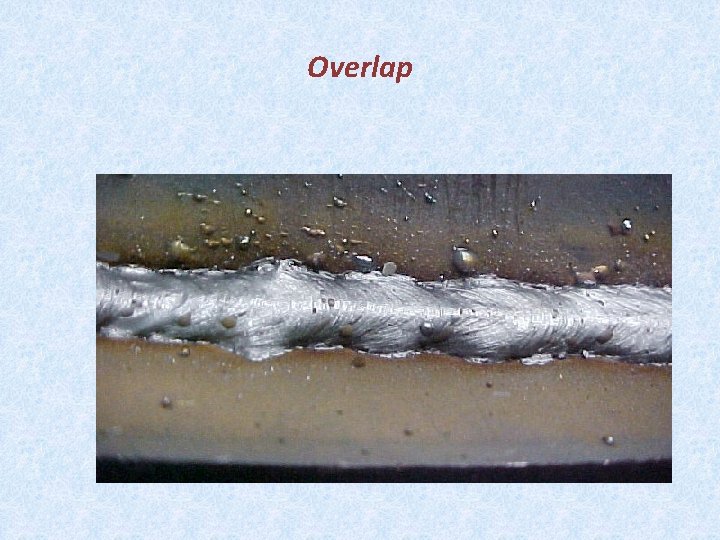
Overlap

Under Fill

SPATTER

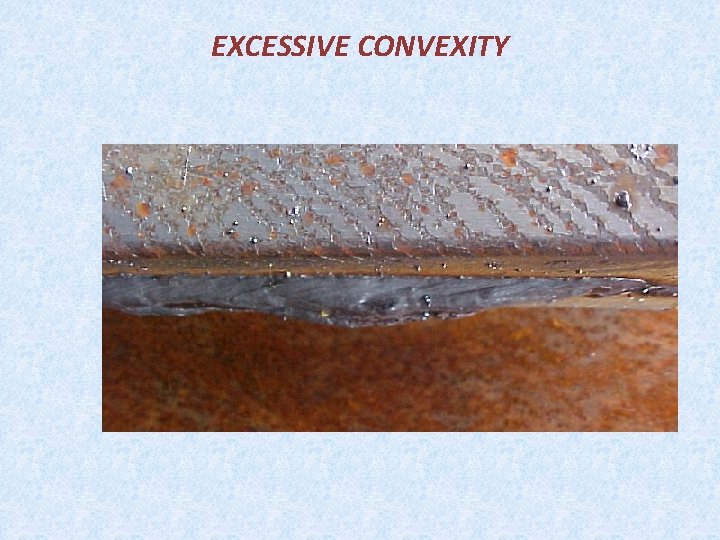
EXCESSIVE CONVEXITY

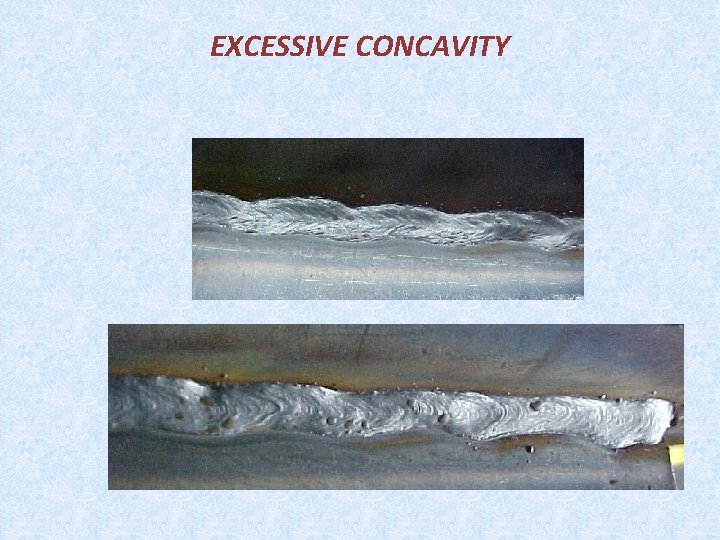
EXCESSIVE CONCAVITY

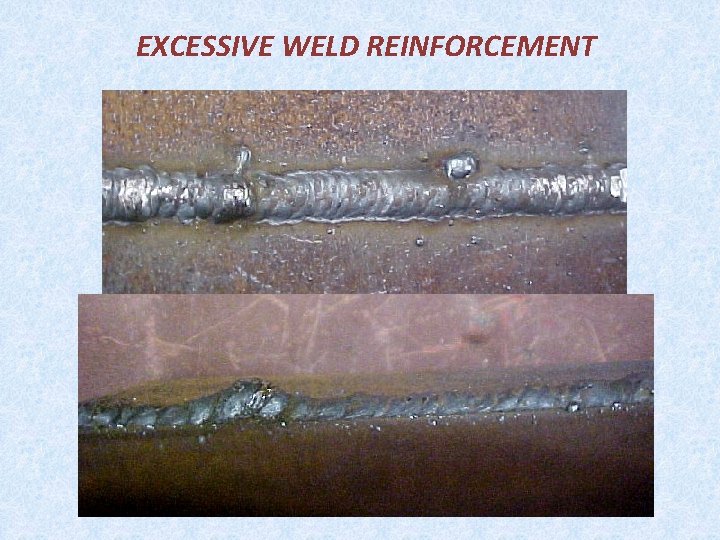
EXCESSIVE WELD REINFORCEMENT

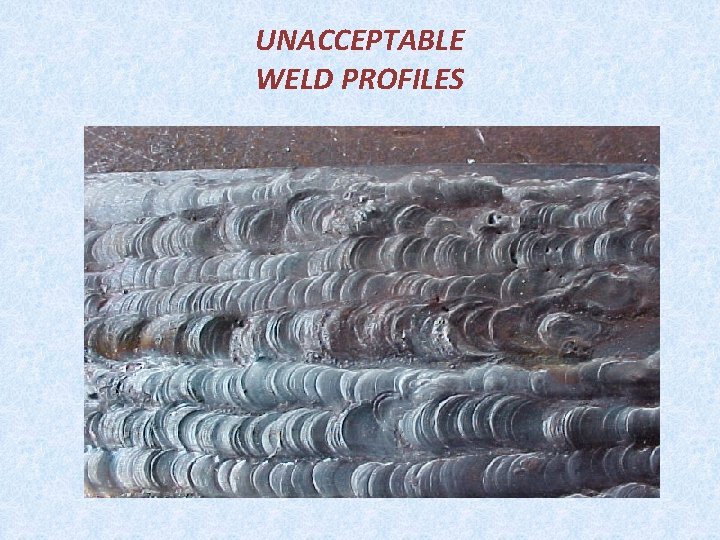
UNACCEPTABLE WELD PROFILES

Metallurgical Discontinuities ü Cracks: Fracture type discontinuities characterized by a sharp tip and high ratio of length and width to opening displacement. ü Fissures: Small crack-like discontinuities with only a slight separation (opening displacement) of the fracture surfaces. ü Fisheye: A discontinuity found on the fracture surface of a weld in steel that consists of a small pore or inclusion surrounded by a bright, round area. ü Segregation: A non-uniform distribution or concentration of impurities or alloying elements which arises during the solidification of the weld. ü Lamellar tearing: A type of cracking that occurs in the base metal or heat affected zone (HAZ) of restrained weld joints that is the result of inadequate ductility in through-thickness direction of steel plate.

Cracking This can occur due just to thermal shrinkage or due to a combination of strain accompanying phase change and thermal shrinkage. In the case of welded stiff frames, a combination of poor design and inappropriate procedure may result in high residual stresses and cracking. Where alloy steels or steels with a carbon content greater than about 0. 2% are being welded, self cooling may be rapid enough to cause some (brittle) martensite to form. This will easily develop cracks. To prevent these problems a process of pre-heating in stages may be needed and after welding a slow controlled post cooling in stages will be required. This can greatly increase the cost of welded joins, but for high strength steels, such as those used in petrochemical plant and piping, there may well be no alternative.

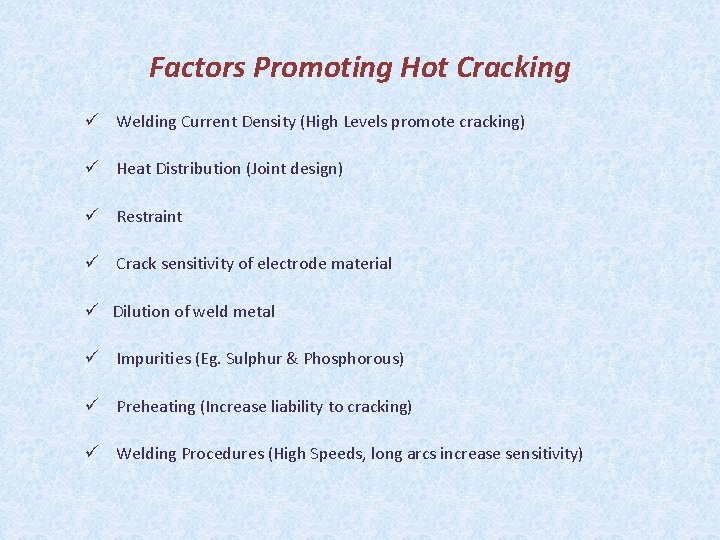
Factors Promoting Hot Cracking ü Welding Current Density (High Levels promote cracking) ü Heat Distribution (Joint design) ü Restraint ü Crack sensitivity of electrode material ü Dilution of weld metal ü Impurities (Eg. Sulphur & Phosphorous) ü Preheating (Increase liability to cracking) ü Welding Procedures (High Speeds, long arcs increase sensitivity)

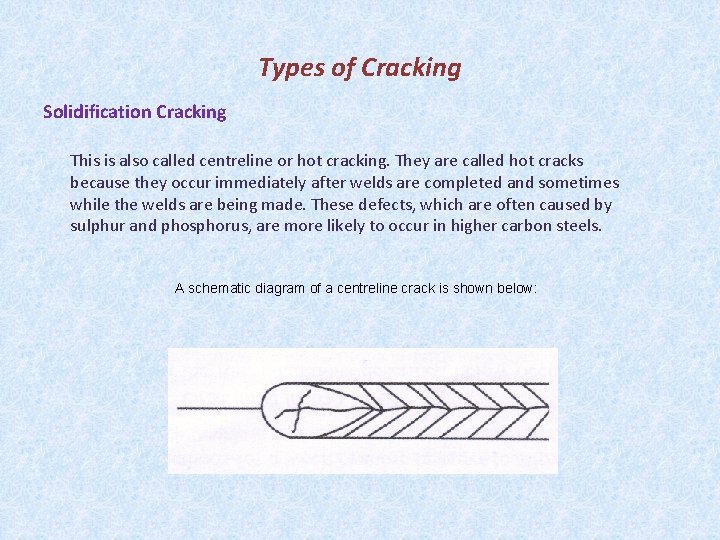
Types of Cracking Solidification Cracking This is also called centreline or hot cracking. They are called hot cracks because they occur immediately after welds are completed and sometimes while the welds are being made. These defects, which are often caused by sulphur and phosphorus, are more likely to occur in higher carbon steels. A schematic diagram of a centreline crack is shown below:

Types of cracking (Contd. . ) Hydrogen induced cracking (HIC) It is also referred to as hydrogen cracking or hydrogen assisted cracking, can occur in steels during manufacture, during fabrication or during service. When HIC occurs as a result of welding, the cracks are in the heat affected zone (HAZ) or in the weld metal itself. Four requirements for HIC to occur are: a) Hydrogen be present, this may come from moisture in any flux or from other sources. It is absorbed by the weld pool and diffuses into the HAZ. b) A HAZ microstructure susceptible to hydrogen cracking. c) Tensile stresses act on the weld d) The assembly has cooled to close to ambient - less than 150 o. C HIC in the HAZ is often at the weld toe, but can be under the weld bead or at the weld root. In fillet welds cracks are normally parallel to the weld run but in butt welds cracks can be transverse to the welding direction.

Reheat Cracking ü Mo-V and Mo-B steels susceptible ü Due to high temperature embrittlement of the heat-affected zone and the presence of residual stress ü Coarse-grained region near fusion line most susceptible ü Prevention by Ø Low heat input welding Ø Intermediate stress relief of partially completed welds Ø Design to avoid high restraint Ø Restrict vanadium additions to 0. 1% in steels Ø Dress the weld toe region to remove possible areas of stress concentration

Lamellar Tearing ü Occurs in thick plate subjected to high transverse welding stress ü Related to elongated non-metallic inclusions, sulfides and silicates, lying parallel to plate surface and producing regions of reduced ductility ü Prevention by Ø Low sulfur steel Ø Specify minimum ductility levels in transverse direction Ø Avoid designs with heavy through-thickness direction stress

Residual Stress & Distortion Residual Stresses also referred to as internal stresses , initial stresses , inherent stresses reaction stresses and locked in stresses, arc stresses that continue to exist in a body even after the removal of all the external loads. Thermal stresses occur in parts during welding due to the localized application of heat. Residual stresses and distortion remain after the welding process is completed. Thermal stresses, residual stresses and distortion sometimes cause cracking and mismatching of joints. Correcting unacceptable distortion is costly and in some cases impossible. Distortion in a weld results from the expansion and contraction of the weld metal and adjacent base metal during the heating and cooling cycle of the welding process.

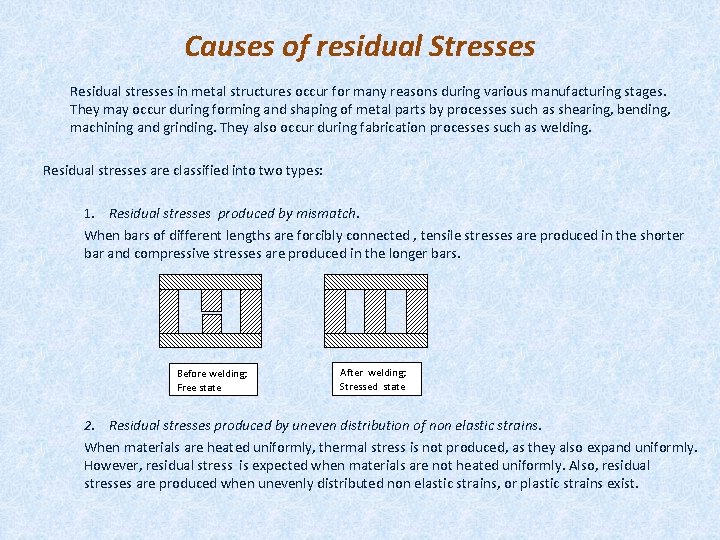
Causes of residual Stresses Residual stresses in metal structures occur for many reasons during various manufacturing stages. They may occur during forming and shaping of metal parts by processes such as shearing, bending, machining and grinding. They also occur during fabrication processes such as welding. Residual stresses are classified into two types: 1. Residual stresses produced by mismatch. When bars of different lengths are forcibly connected , tensile stresses are produced in the shorter bar and compressive stresses are produced in the longer bars. Before welding; Free state After welding; Stressed state 2. Residual stresses produced by uneven distribution of non elastic strains. When materials are heated uniformly, thermal stress is not produced, as they also expand uniformly. However, residual stress is expected when materials are not heated uniformly. Also, residual stresses are produced when unevenly distributed non elastic strains, or plastic strains exist.

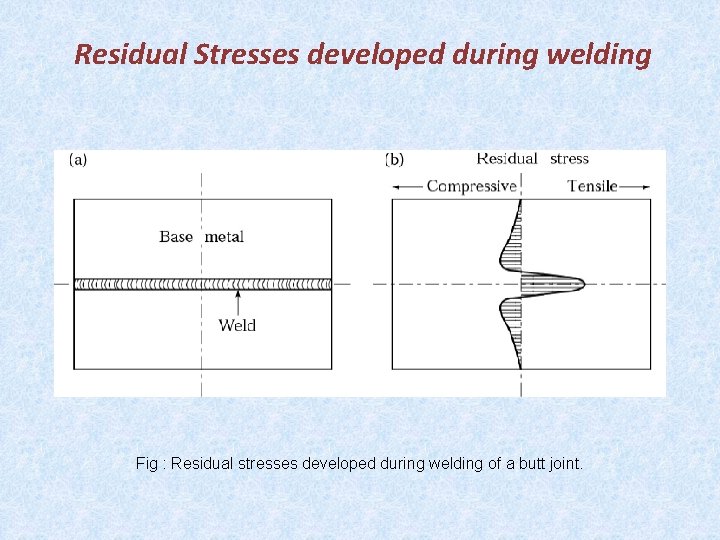
Residual Stresses developed during welding Fig : Residual stresses developed during welding of a butt joint.

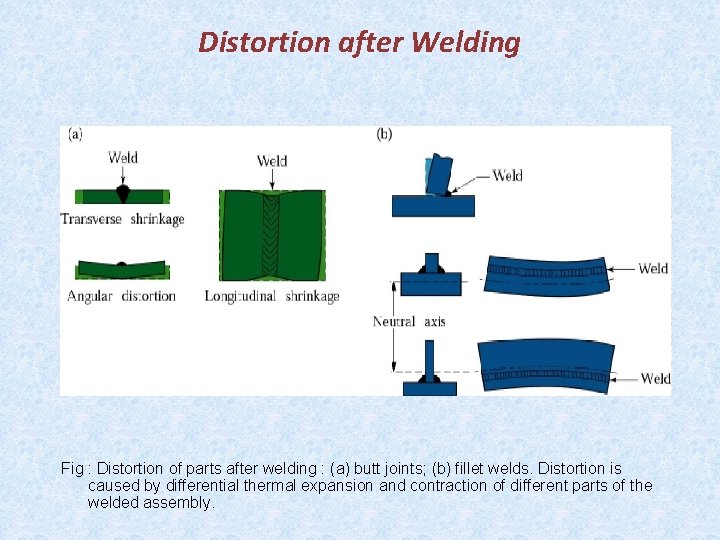
Distortion after Welding Fig : Distortion of parts after welding : (a) butt joints; (b) fillet welds. Distortion is caused by differential thermal expansion and contraction of different parts of the welded assembly.

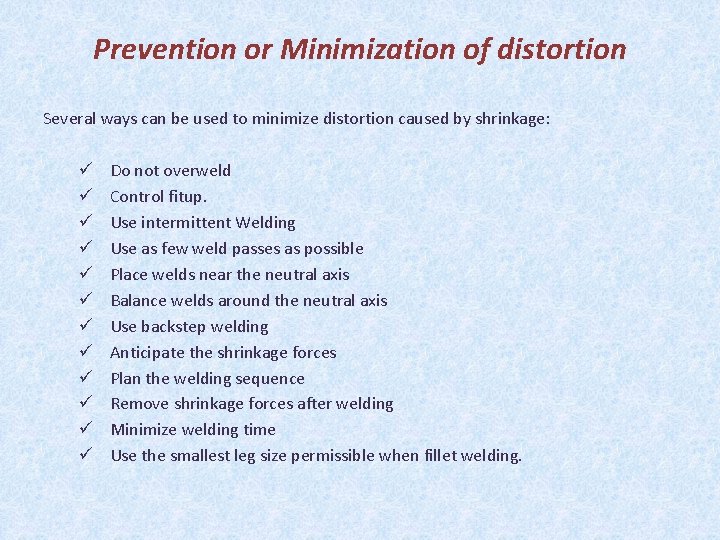
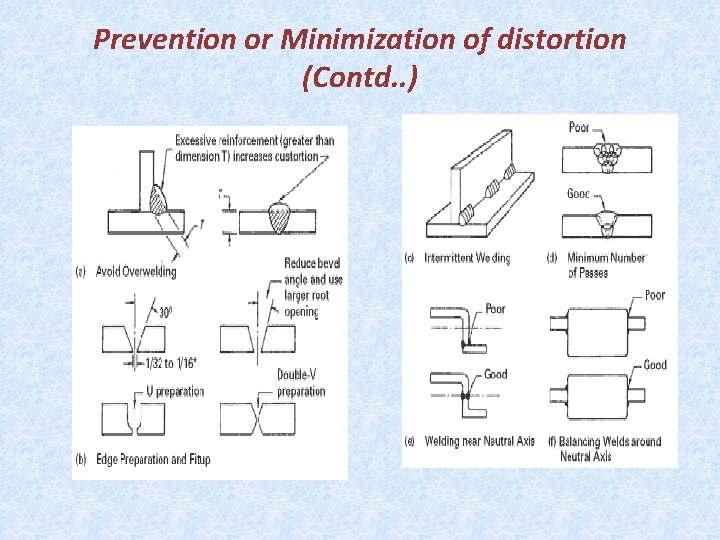
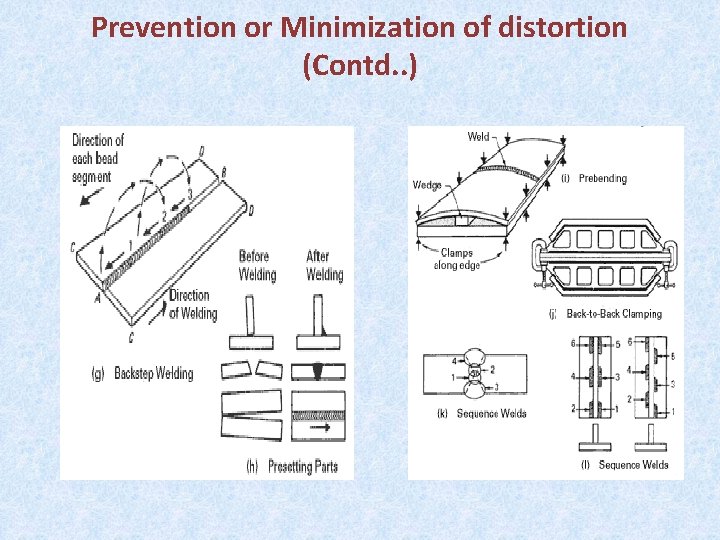
Prevention or Minimization of distortion Several ways can be used to minimize distortion caused by shrinkage: ü ü ü Do not overweld Control fitup. Use intermittent Welding Use as few weld passes as possible Place welds near the neutral axis Balance welds around the neutral axis Use backstep welding Anticipate the shrinkage forces Plan the welding sequence Remove shrinkage forces after welding Minimize welding time Use the smallest leg size permissible when fillet welding.

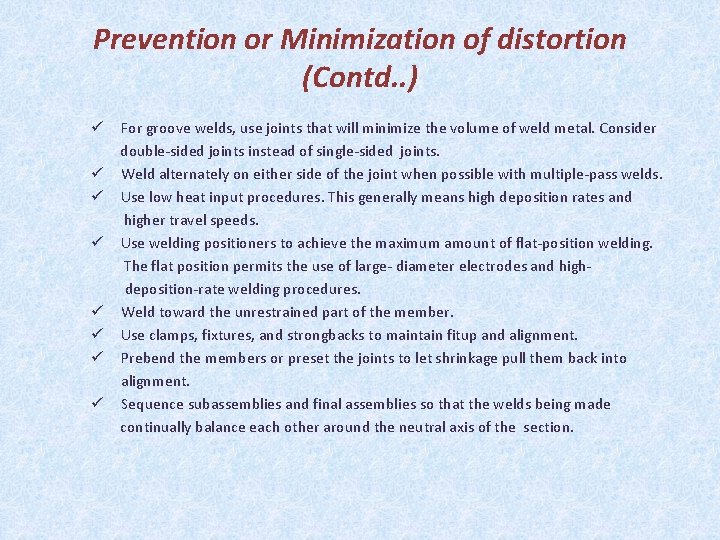
Prevention or Minimization of distortion (Contd. . ) ü For groove welds, use joints that will minimize the volume of weld metal. Consider double-sided joints instead of single-sided joints. ü Weld alternately on either side of the joint when possible with multiple-pass welds. ü Use low heat input procedures. This generally means high deposition rates and higher travel speeds. ü Use welding positioners to achieve the maximum amount of flat-position welding. The flat position permits the use of large- diameter electrodes and high deposition-rate welding procedures. ü Weld toward the unrestrained part of the member. ü Use clamps, fixtures, and strongbacks to maintain fitup and alignment. ü Prebend the members or preset the joints to let shrinkage pull them back into alignment. ü Sequence subassemblies and final assemblies so that the welds being made continually balance each other around the neutral axis of the section.

Prevention or Minimization of distortion (Contd. . )

Prevention or Minimization of distortion (Contd. . )

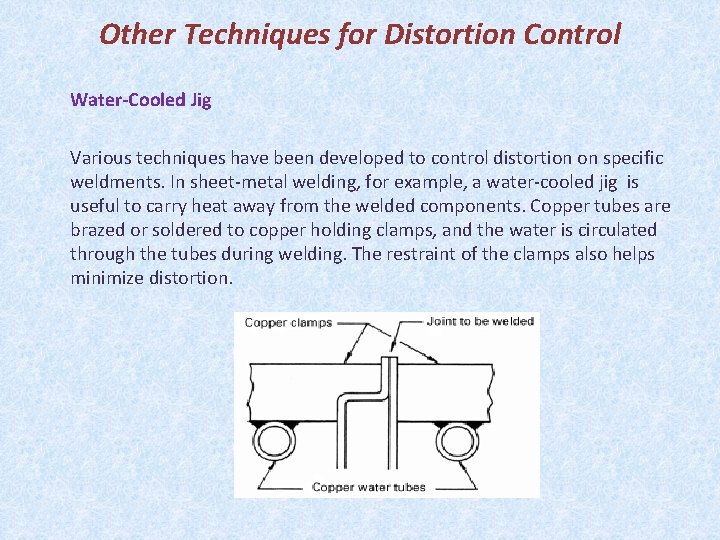
Other Techniques for Distortion Control Water-Cooled Jig Various techniques have been developed to control distortion on specific weldments. In sheet-metal welding, for example, a water-cooled jig is useful to carry heat away from the welded components. Copper tubes are brazed or soldered to copper holding clamps, and the water is circulated through the tubes during welding. The restraint of the clamps also helps minimize distortion.

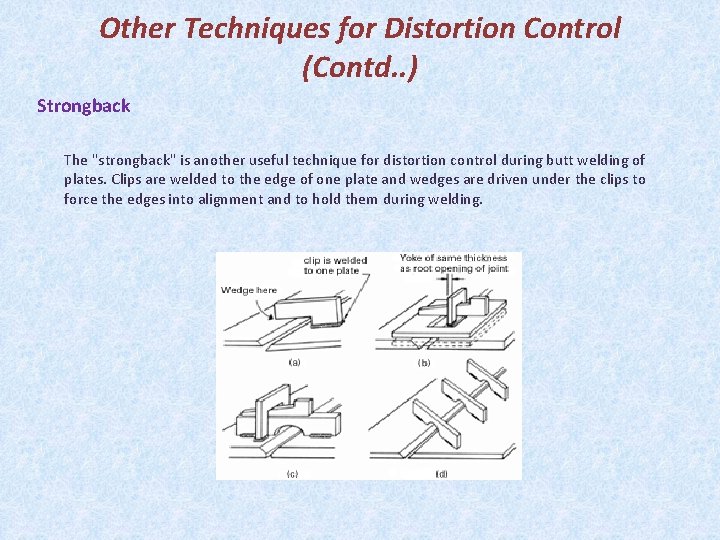
Other Techniques for Distortion Control (Contd. . ) Strongback The "strongback" is another useful technique for distortion control during butt welding of plates. Clips are welded to the edge of one plate and wedges are driven under the clips to force the edges into alignment and to hold them during welding.

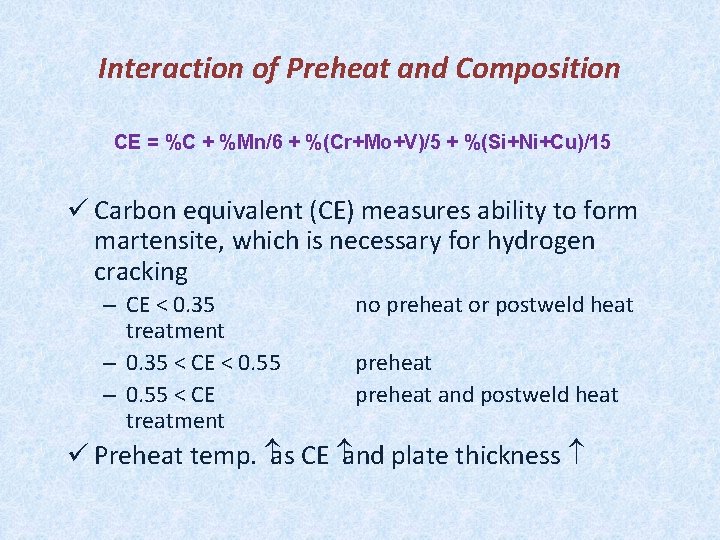
Other Techniques for Distortion Control (Contd. . ) Thermal Stress Relieving (Heat Treatment) Except in special situations, stress relief by heating is not used for correcting distortion. There are occasions, however, when stress relief is necessary to prevent further distortion from occurring before the weldment is finished. Preheat reduces the temperature differential between the weld region and the base metal ü Reduces the cooling rate, which reduces the chance of forming martensite in steels ü Reduces distortion and shrinkage stress ü Reduces the danger of weld cracking ü Allows hydrogen to escape

Interaction of Preheat and Composition CE = %C + %Mn/6 + %(Cr+Mo+V)/5 + %(Si+Ni+Cu)/15 ü Carbon equivalent (CE) measures ability to form martensite, which is necessary for hydrogen cracking – CE < 0. 35 treatment – 0. 35 < CE < 0. 55 – 0. 55 < CE treatment no preheat or postweld heat preheat and postweld heat ü Preheat temp. as CE and plate thickness

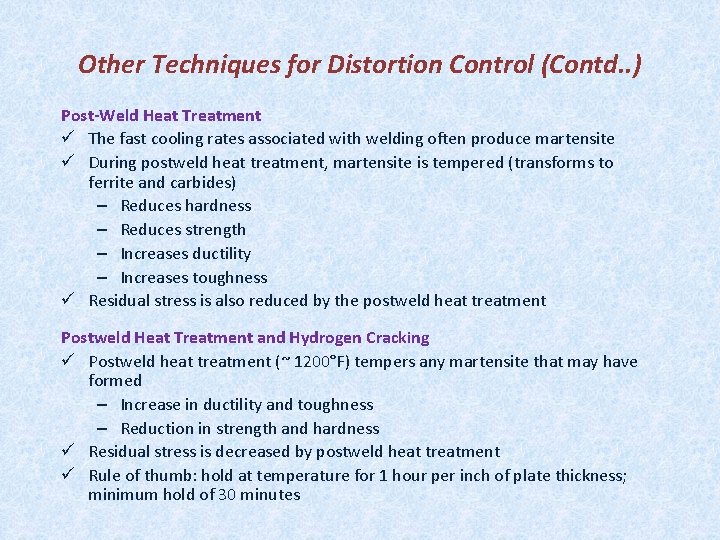
Other Techniques for Distortion Control (Contd. . ) Post-Weld Heat Treatment ü The fast cooling rates associated with welding often produce martensite ü During postweld heat treatment, martensite is tempered (transforms to ferrite and carbides) – Reduces hardness – Reduces strength – Increases ductility – Increases toughness ü Residual stress is also reduced by the postweld heat treatment Postweld Heat Treatment and Hydrogen Cracking ü Postweld heat treatment (~ 1200°F) tempers any martensite that may have formed – Increase in ductility and toughness – Reduction in strength and hardness ü Residual stress is decreased by postweld heat treatment ü Rule of thumb: hold at temperature for 1 hour per inch of plate thickness; minimum hold of 30 minutes

Thank You