Walk Through Share Point Web Part blog joycode
![Walk. Through Share. Point Web. Part 入门指南 blog. joycode. com Kaneboy [MS MVP]](https://slidetodoc.com/presentation_image_h2/b5bafbcf5134008f5238843b1195ff77/image-1.jpg "Walk. Through Share. Point Web. Part 入门指南 blog. joycode. com Kaneboy [MS MVP]")
Walk. Through Share. Point Web. Part 入门指南 blog. joycode. com Kaneboy [MS MVP]
和Web.")
背景知识 • 什么是 Web. Part ? * 构成SPS站点Web. Part Page的基本构建块 * 由Web. Part说明文件(. dwp)和Web. Part程序集(. dll)组成 * 也是ASP. NET Custom Control
,")
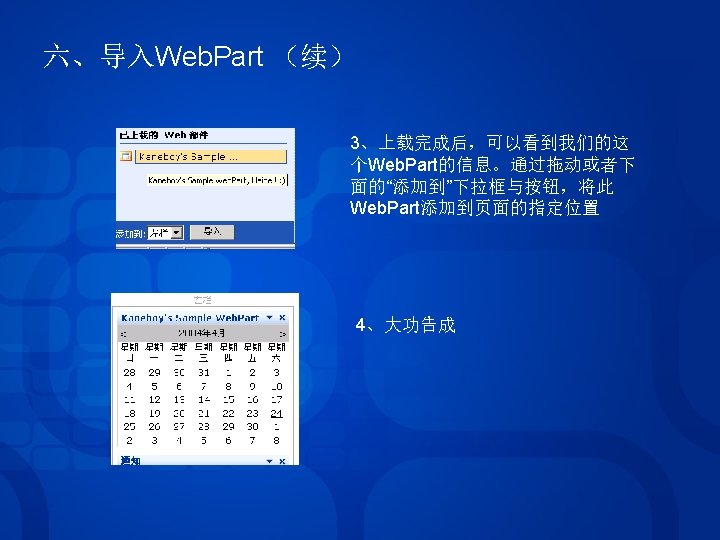
二、创建一个Web. Part 1、从微软网站下载Web. Part Templates for VS. NET,并安装。 2、在VS. NET中创建一个“Web Part Library”项目(比如项目名为“Sample. Web. Part”), VS. NET会帮我们自动创建一个继承自Microsoft. Share. Point. Web. Part. Pages. Web. Part 的Web. Part(通常名称为“Web. Part 1”),并自动重载Render. Web. Part()方法。 3、在Web. Part 1类中定义一个用来保存第一步中创建的User. Control的对象: private System. Web. UI. Control _inner. User. Control; 4、重载Web. Part 1的父类的Create. Child. Controls()方法,在其中载入第一步创建的 User. Control: protected override void Create. Child. Controls() { _inner. User. Control = this. Page. Load. Control("/bin/Web. User. Control 1. ascx"); this. Controls. Add(_inner. User. Control); } 5、在Render. Web. Part()方法中输出载入的User. Control: protected override void Render. Web. Part(Html. Text. Writer output) { this. Ensure. Child. Controls(); _inner. User. Control. Render. Control(output); }

三、配置Web. Part 打开Web. Part 1. dwp,这是一个XML格式的配置文件。 <? xml version="1. 0" encoding="utf-8"? > <Web. Part xmlns="http: //schemas. microsoft. com/Web. Part/v 2" > <Title>Kaneboy's Sample Web. Part</Title> <Description>Kaneboy's SampleĹWeb. Part, Heihei! : )</Description> <Assembly>Sample. Web. Part</Assembly> <Type. Name>Sample. Web. Part 1</Type. Name> <!-- Specify initial values for any additional base class or custom properties here. --> </Web. Part> Title : 显示在SPS页面上的标题 Description : 显示在SPS页面上的提示文字 Assembly : 编译出来的dll文件的文件名(勿加“. dll”) Type. Name : 完整的Web. Part的类名称(包含Namespace)

- Slides: 11