Valve train inspection Inspect Cylinder head castings Valves
- Slides: 22

Valve train inspection Inspect. . . • Cylinder head castings • Valves • Guides • Springs • Cam and lifters • Rocker arms and push rods • Timing chains and gears Copyright 2003 Gary Lewis – Dave Capitolo

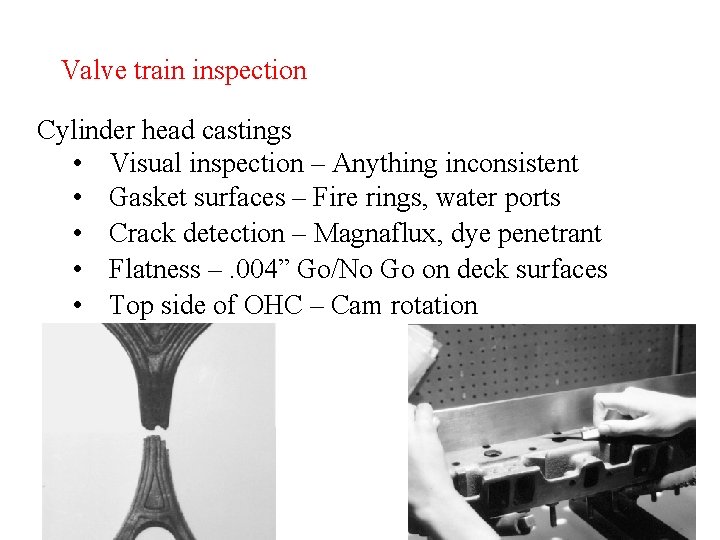
Valve train inspection Cylinder head castings • Visual inspection – Anything inconsistent • Gasket surfaces – Fire rings, water ports • Crack detection – Magnaflux, dye penetrant • Flatness –. 004” Go/No Go on deck surfaces • Top side of OHC – Cam rotation

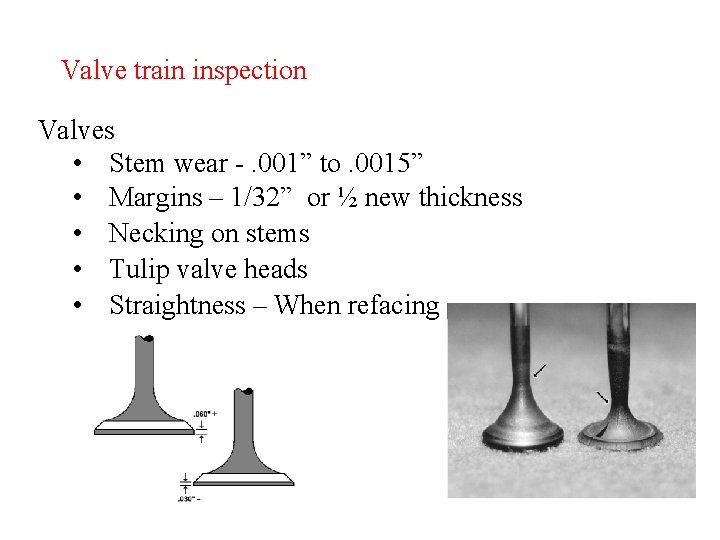
Valve train inspection Valves • Stem wear -. 001” to. 0015” • Margins – 1/32” or ½ new thickness • Necking on stems • Tulip valve heads • Straightness – When refacing

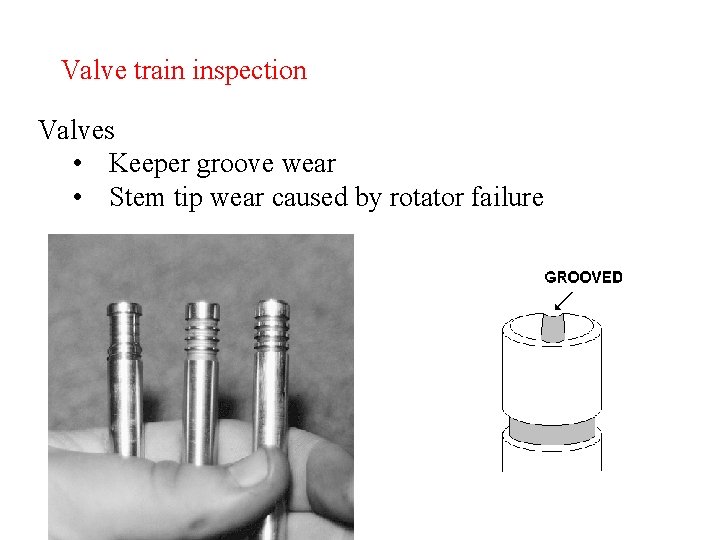
Valve train inspection Valves • Keeper groove wear • Stem tip wear caused by rotator failure

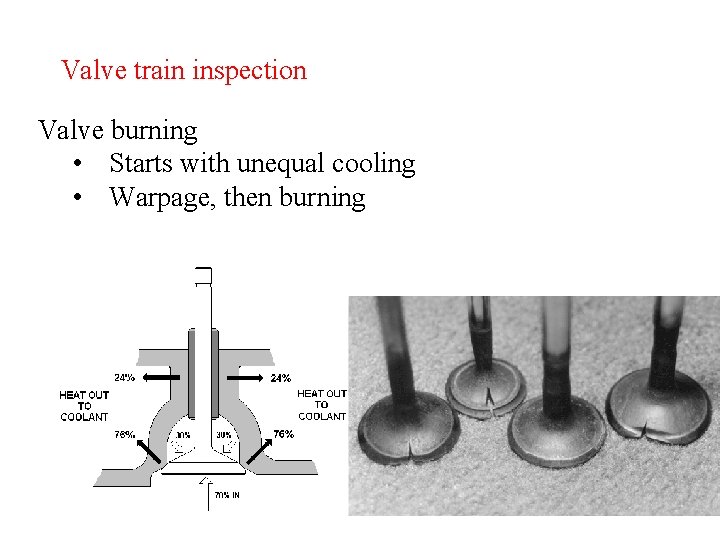
Valve train inspection Valve burning • Starts with unequal cooling • Warpage, then burning

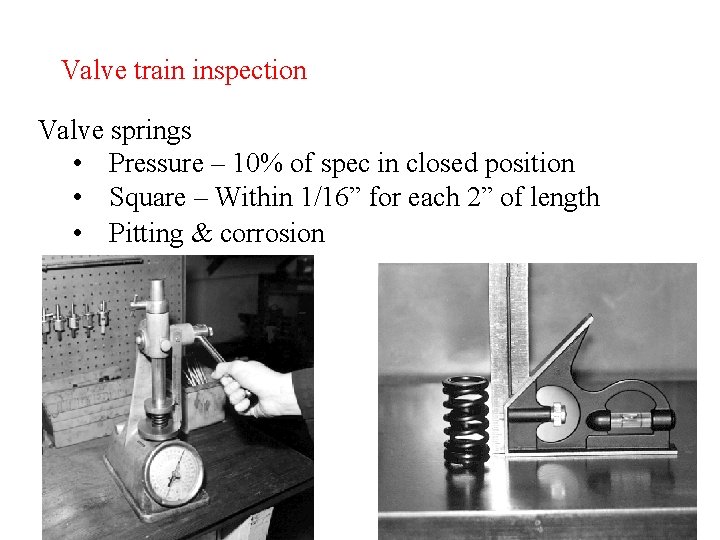
Valve train inspection Valve springs • Pressure – 10% of spec in closed position • Square – Within 1/16” for each 2” of length • Pitting & corrosion

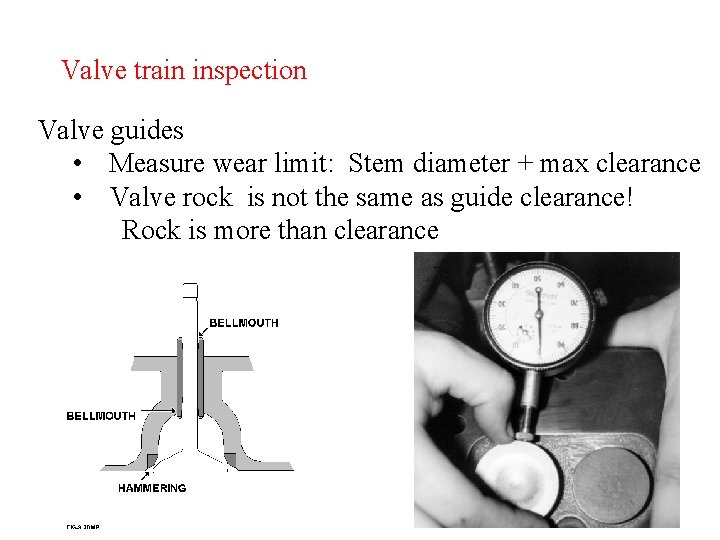
Valve train inspection Valve guides • Measure wear limit: Stem diameter + max clearance • Valve rock is not the same as guide clearance! Rock is more than clearance

Valve train inspection Valve guide knurling limits • Measure stem diameter. Is it within limits? • Set telescoping gauge: stem dia. +. 002” +. 004” • Use as “Go/No Go” • If wear is excessive, replace guide or use OS stem

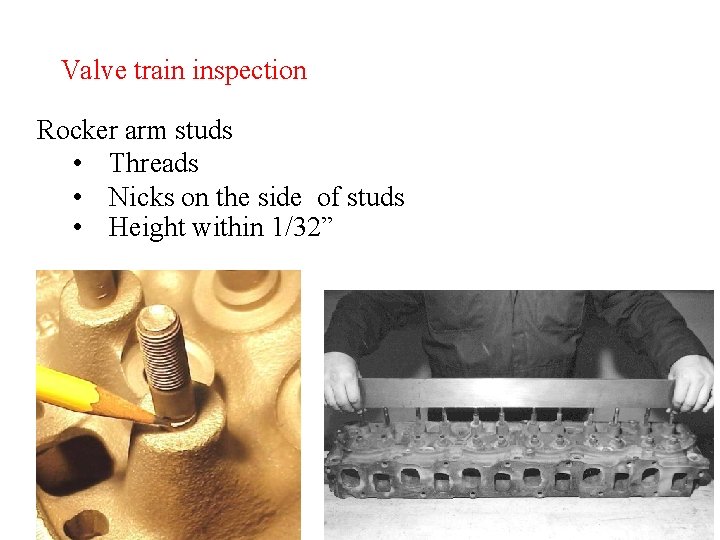
Valve train inspection Rocker arm studs • Threads • Nicks on the side of studs • Height within 1/32”

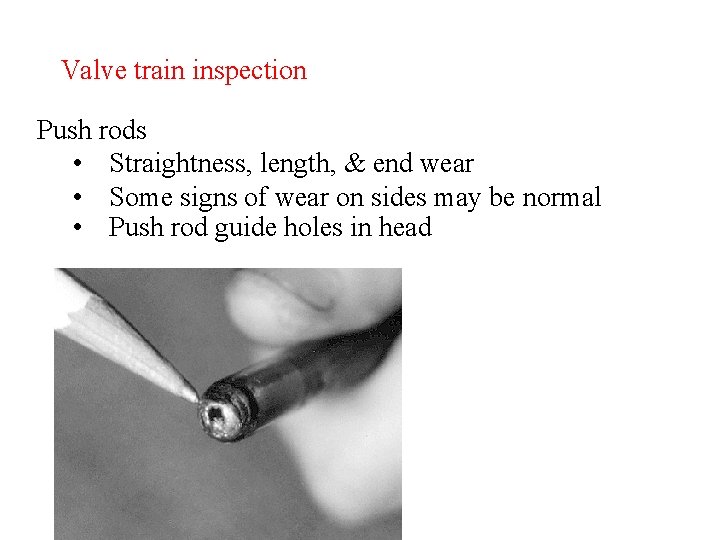
Valve train inspection Push rods • Straightness, length, & end wear • Some signs of wear on sides may be normal • Push rod guide holes in head

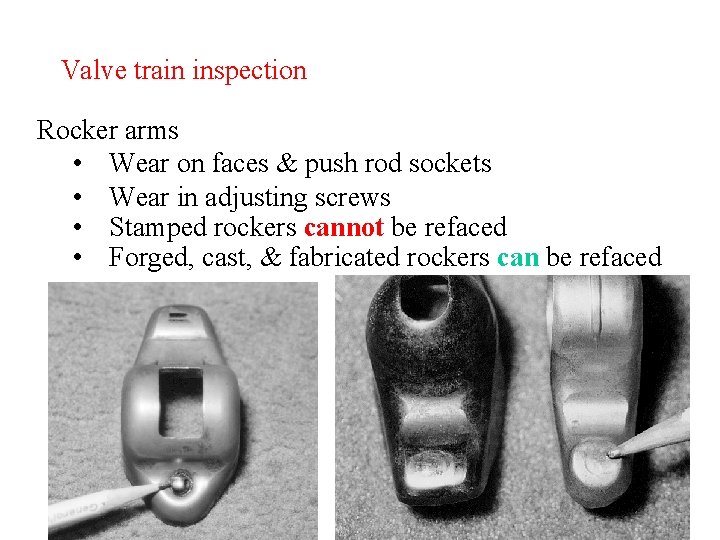
Valve train inspection Rocker arms • Wear on faces & push rod sockets • Wear in adjusting screws • Stamped rockers cannot be refaced • Forged, cast, & fabricated rockers can be refaced

Valve train inspection Rocker shafts • Cleaning is critical for normal oiling • Check direction of oil holes

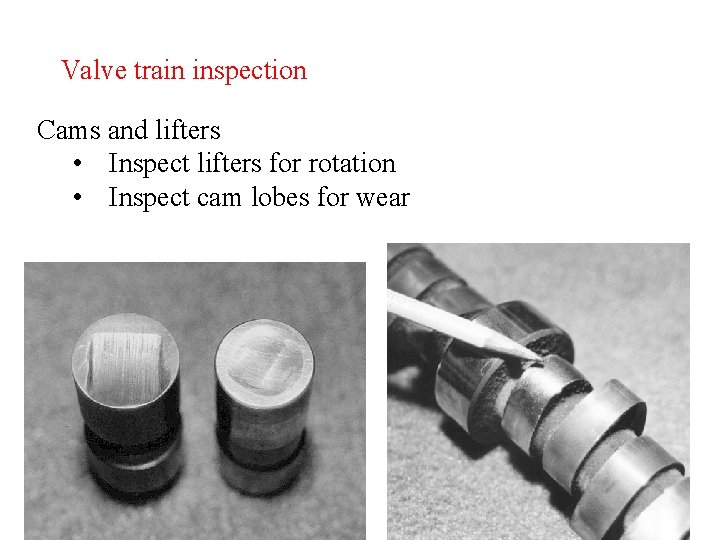
Valve train inspection Cams and lifters • Inspect lifters for rotation • Inspect cam lobes for wear

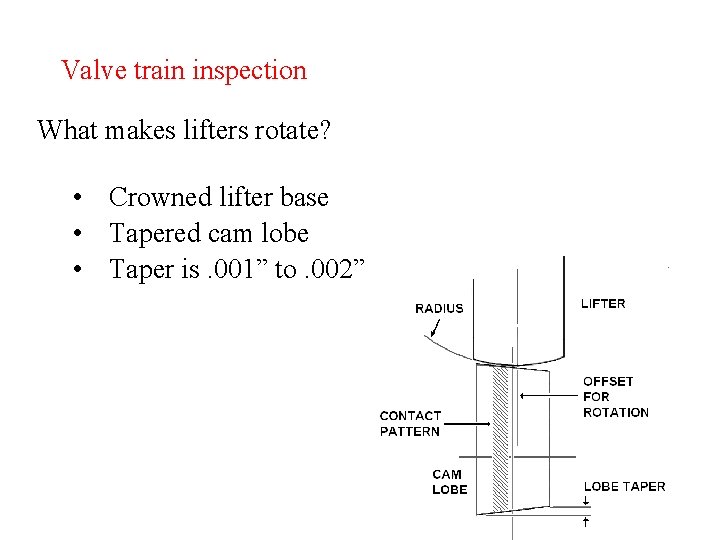
Valve train inspection What makes lifters rotate? • Crowned lifter base • Tapered cam lobe • Taper is. 001” to. 002”

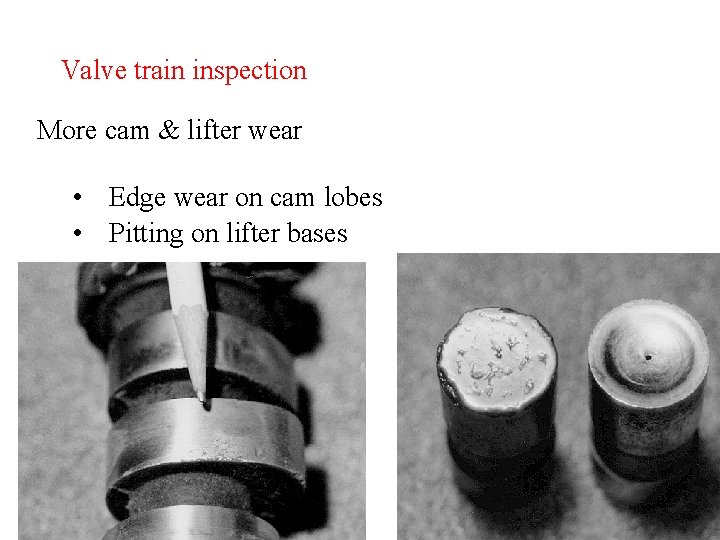
Valve train inspection More cam & lifter wear • Edge wear on cam lobes • Pitting on lifter bases

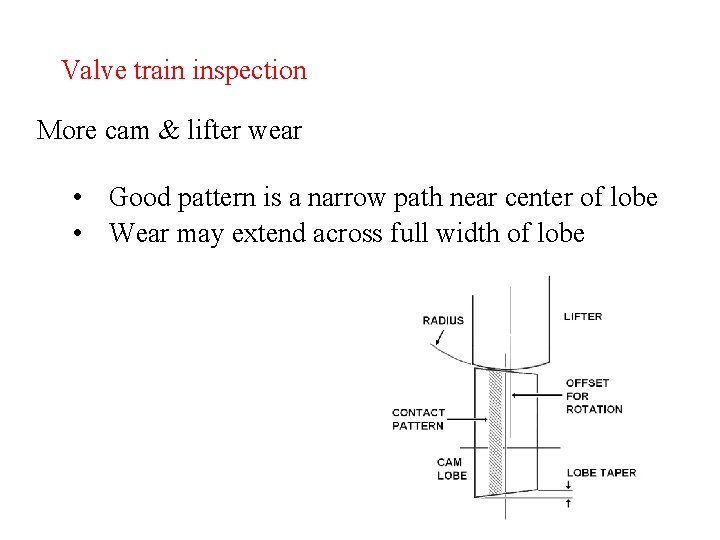
Valve train inspection More cam & lifter wear • Good pattern is a narrow path near center of lobe • Wear may extend across full width of lobe

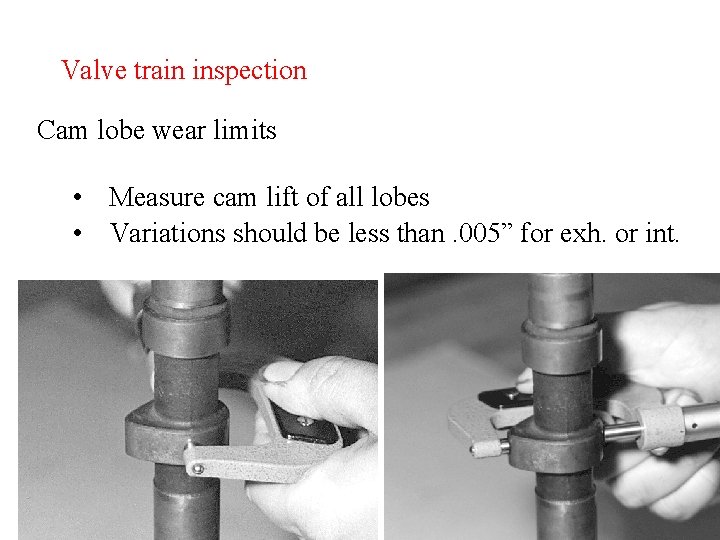
Valve train inspection Cam lobe wear limits • Measure cam lift of all lobes • Variations should be less than. 005” for exh. or int.

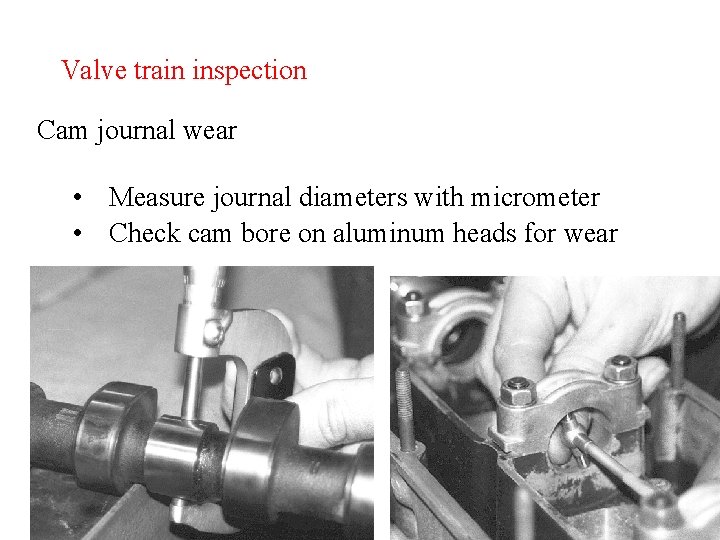
Valve train inspection Cam journal wear • Measure journal diameters with micrometer • Check cam bore on aluminum heads for wear

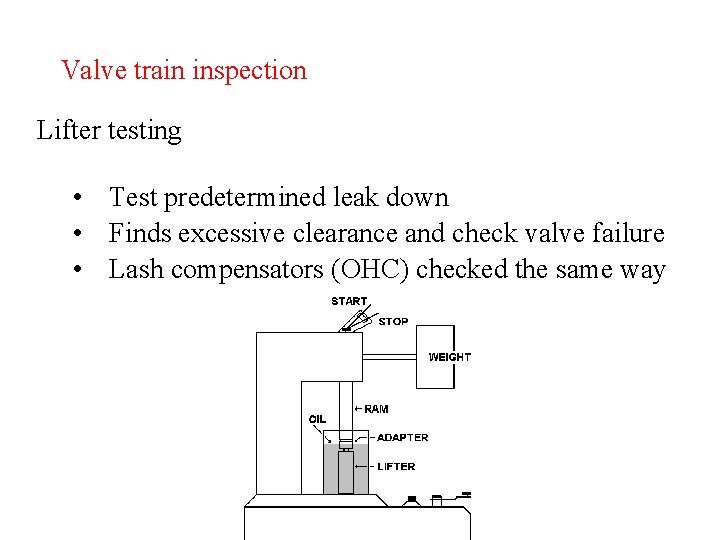
Valve train inspection Lifter testing • Test predetermined leak down • Finds excessive clearance and check valve failure • Lash compensators (OHC) checked the same way

Valve train inspection Natural gas valve trains • • • No lubrication in fuel Valve rotators should be removed Recommended valve material - Inconel alloy Recommended seat material – cobalt, non-magnetic Recommended seal material - Viton umbrella seals

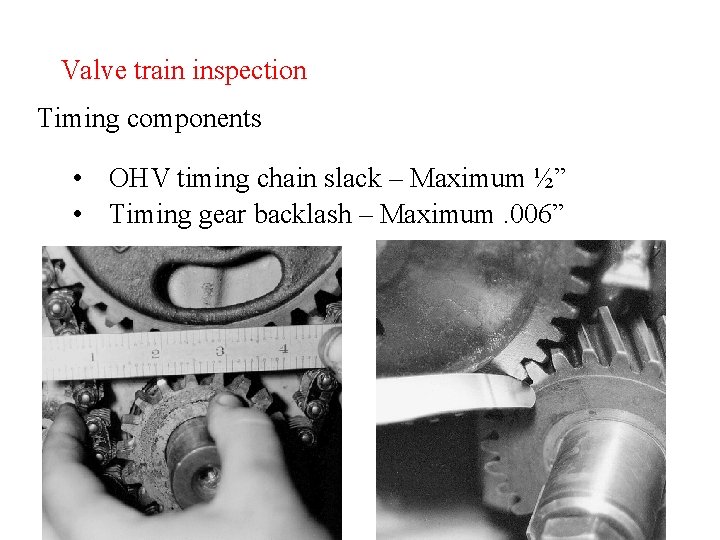
Valve train inspection Timing components • OHV timing chain slack – Maximum ½” • Timing gear backlash – Maximum. 006”

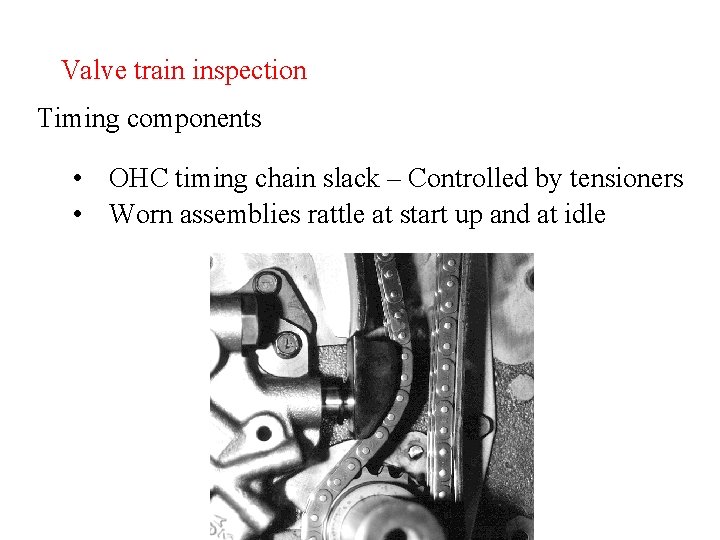
Valve train inspection Timing components • OHC timing chain slack – Controlled by tensioners • Worn assemblies rattle at start up and at idle