
Using SCOUT Thin Film Analysis Ryan Lance Oregon
![5) Change Measurement Information Click the plus [+] Views to show the drop down](https://slidetodoc.com/presentation_image_h2/4afc2230a904384316caffde7ca56f31/image-21.jpg "5) Change Measurement Information Click the plus [+] Views to show the drop down")
- Slides: 32
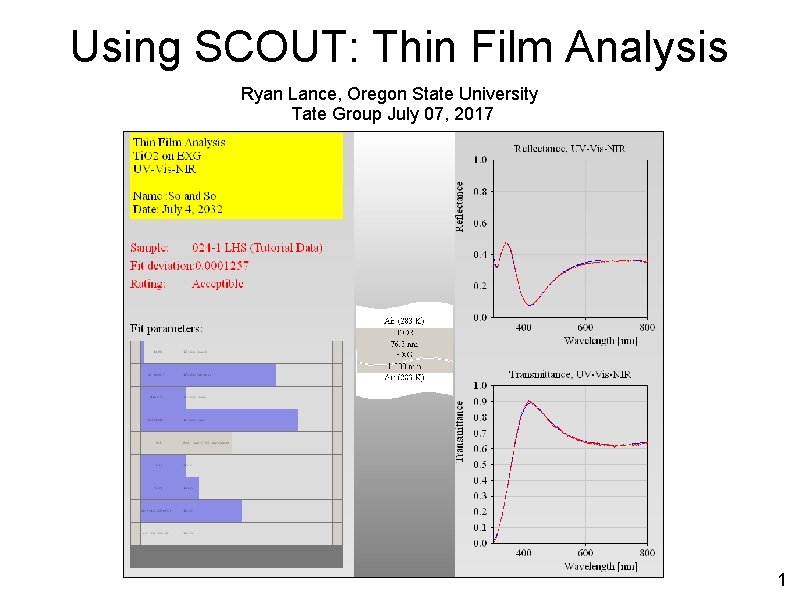
Using SCOUT: Thin Film Analysis Ryan Lance, Oregon State University Tate Group July 07, 2017 1
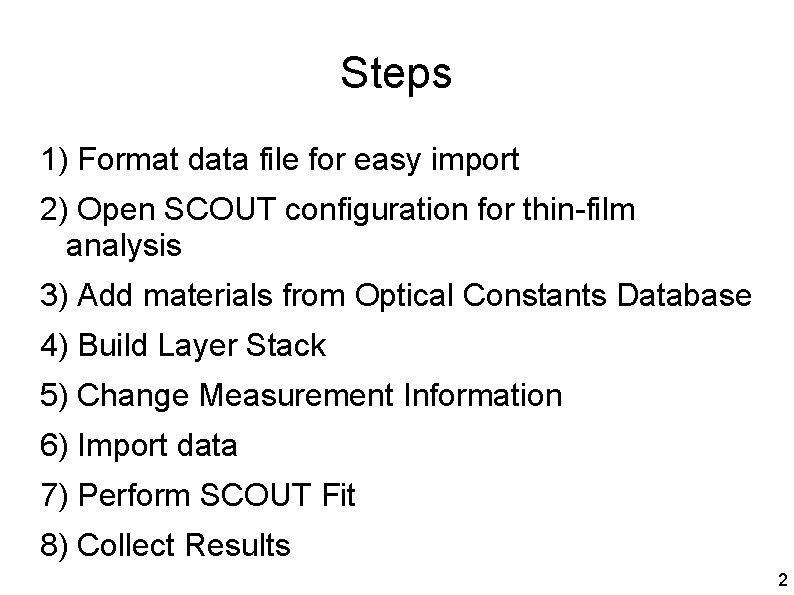
Steps 1) Format data file for easy import 2) Open SCOUT configuration for thin-film analysis 3) Add materials from Optical Constants Database 4) Build Layer Stack 5) Change Measurement Information 6) Import data 7) Perform SCOUT Fit 8) Collect Results 2
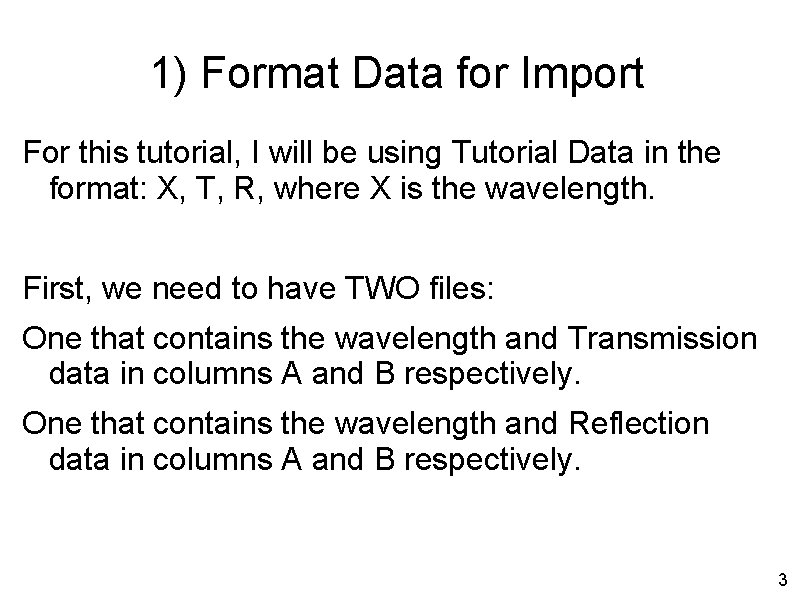
1) Format Data for Import For this tutorial, I will be using Tutorial Data in the format: X, T, R, where X is the wavelength. First, we need to have TWO files: One that contains the wavelength and Transmission data in columns A and B respectively. One that contains the wavelength and Reflection data in columns A and B respectively. 3
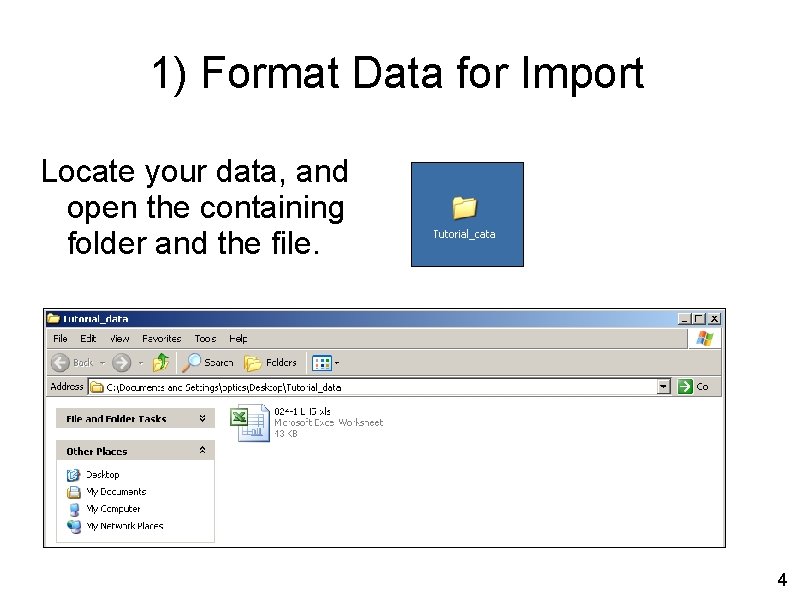
1) Format Data for Import Locate your data, and open the containing folder and the file. 4
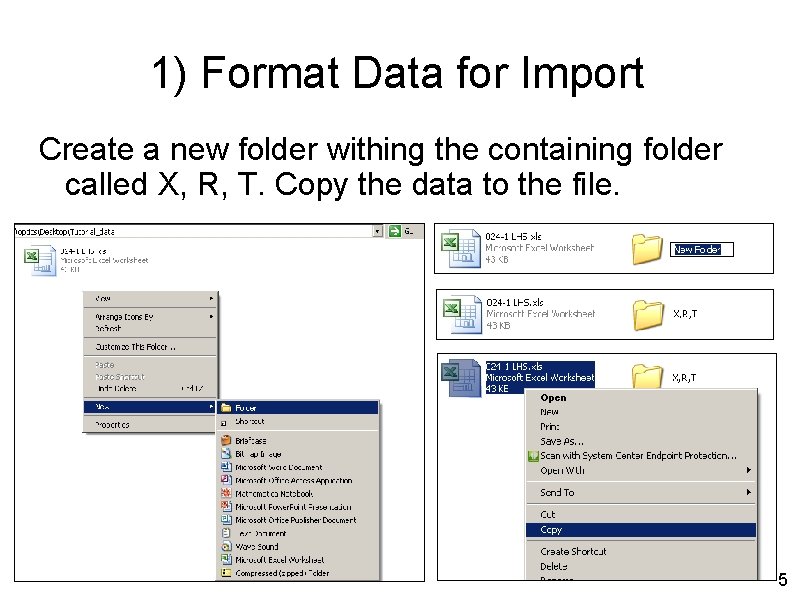
1) Format Data for Import Create a new folder withing the containing folder called X, R, T. Copy the data to the file. 5
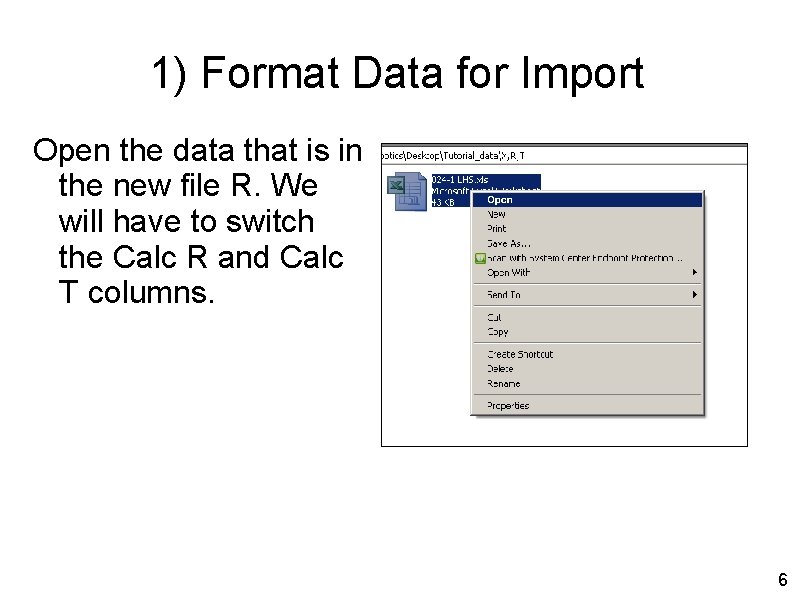
1) Format Data for Import Open the data that is in the new file R. We will have to switch the Calc R and Calc T columns. 6
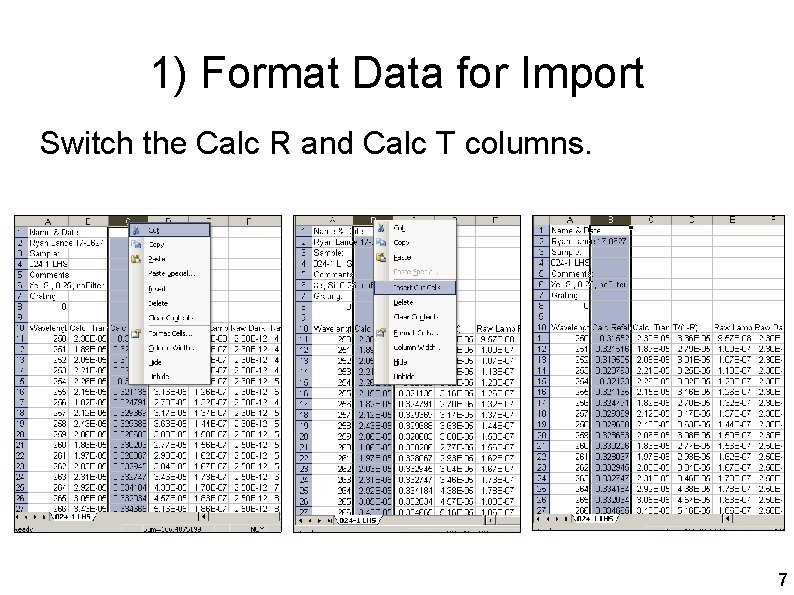
1) Format Data for Import Switch the Calc R and Calc T columns. 7
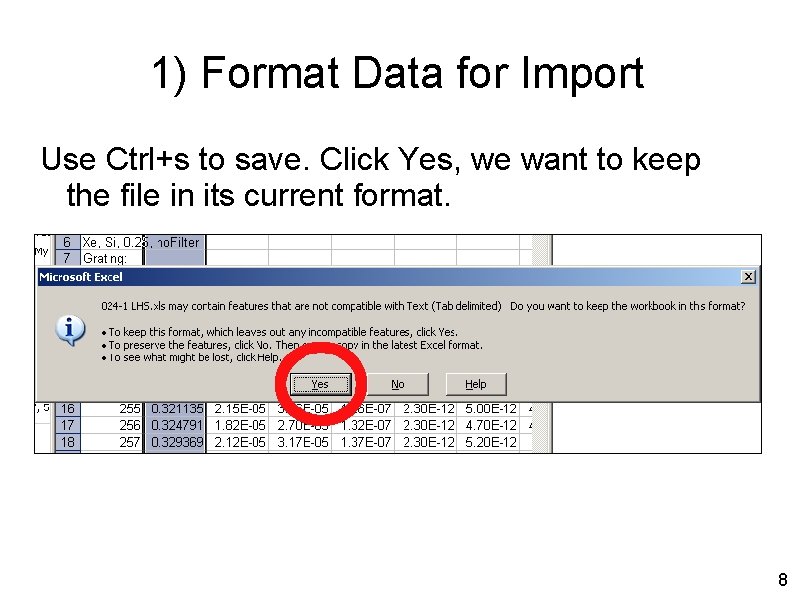
1) Format Data for Import Use Ctrl+s to save. Click Yes, we want to keep the file in its current format. 8
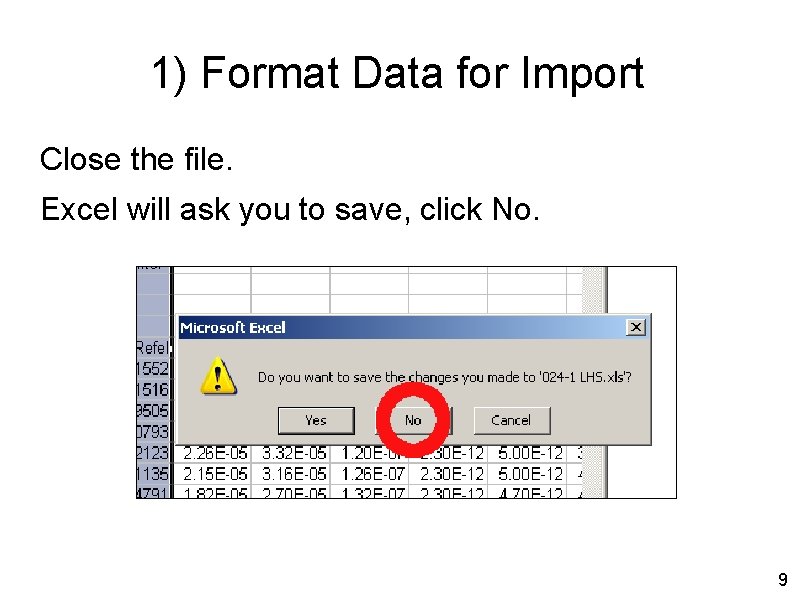
1) Format Data for Import Close the file. Excel will ask you to save, click No. 9
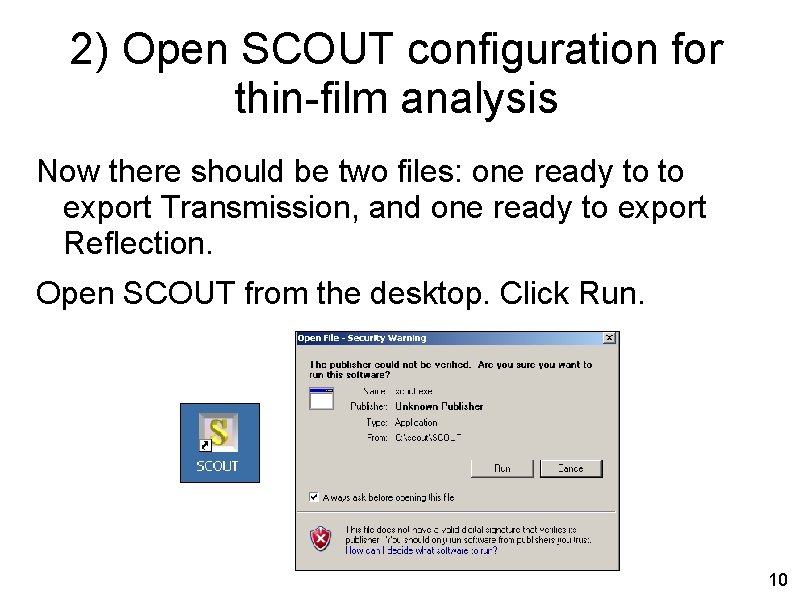
2) Open SCOUT configuration for thin-film analysis Now there should be two files: one ready to to export Transmission, and one ready to export Reflection. Open SCOUT from the desktop. Click Run. 10
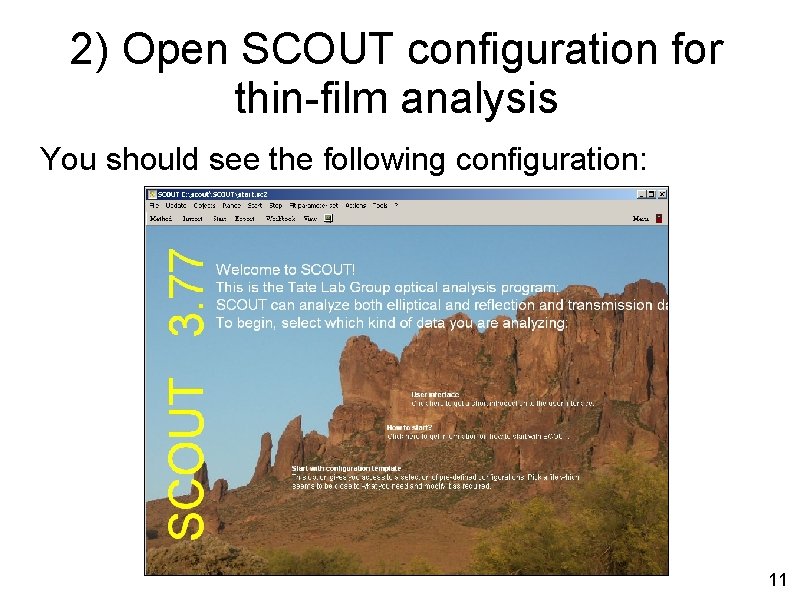
2) Open SCOUT configuration for thin-film analysis You should see the following configuration: 11
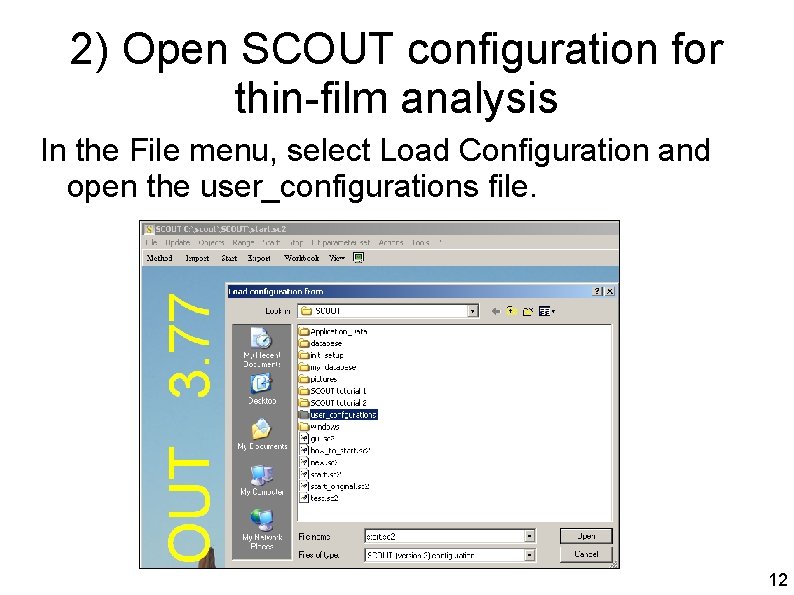
2) Open SCOUT configuration for thin-film analysis In the File menu, select Load Configuration and open the user_configurations file. 12
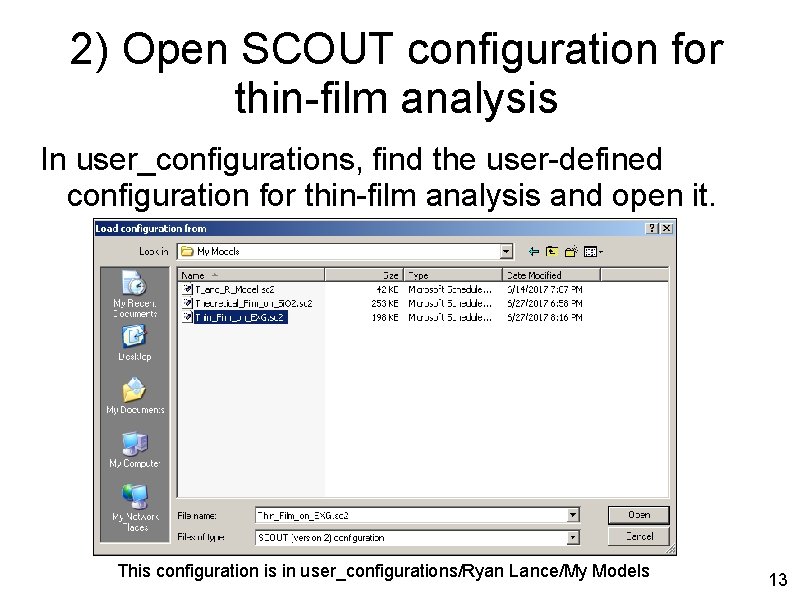
2) Open SCOUT configuration for thin-film analysis In user_configurations, find the user-defined configuration for thin-film analysis and open it. This configuration is in user_configurations/Ryan Lance/My Models 13
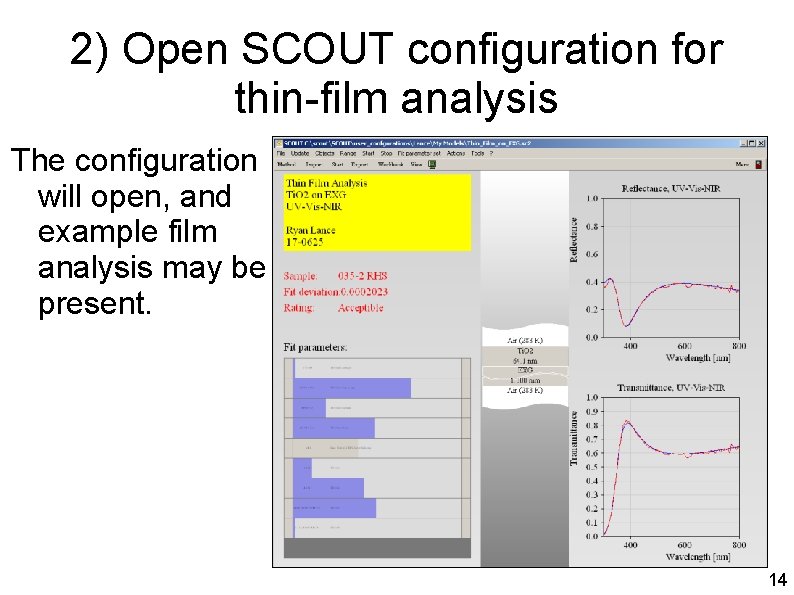
2) Open SCOUT configuration for thin-film analysis The configuration will open, and example film analysis may be present. 14
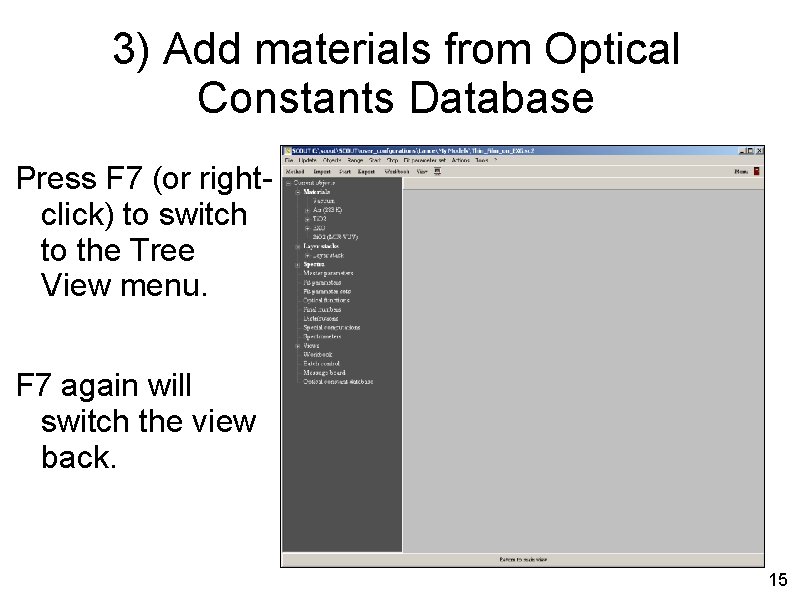
3) Add materials from Optical Constants Database Press F 7 (or rightclick) to switch to the Tree View menu. F 7 again will switch the view back. 15
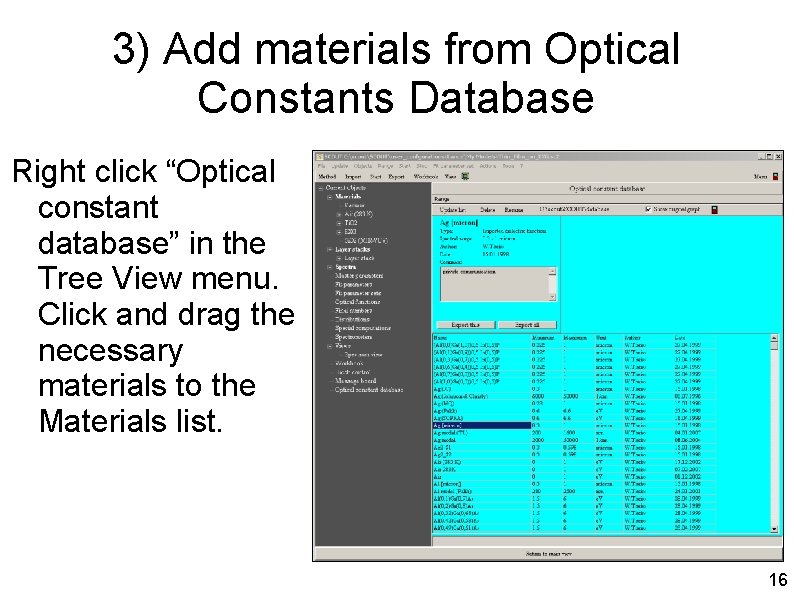
3) Add materials from Optical Constants Database Right click “Optical constant database” in the Tree View menu. Click and drag the necessary materials to the Materials list. 16
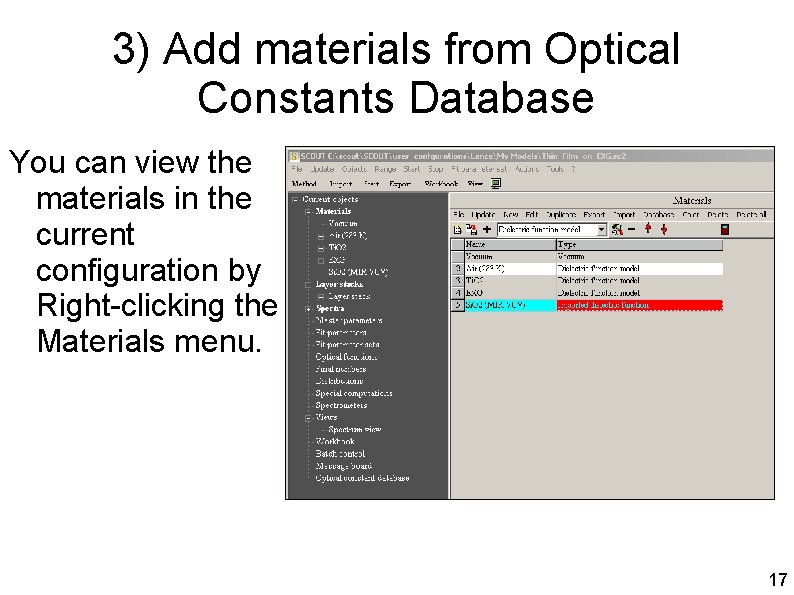
3) Add materials from Optical Constants Database You can view the materials in the current configuration by Right-clicking the Materials menu. 17
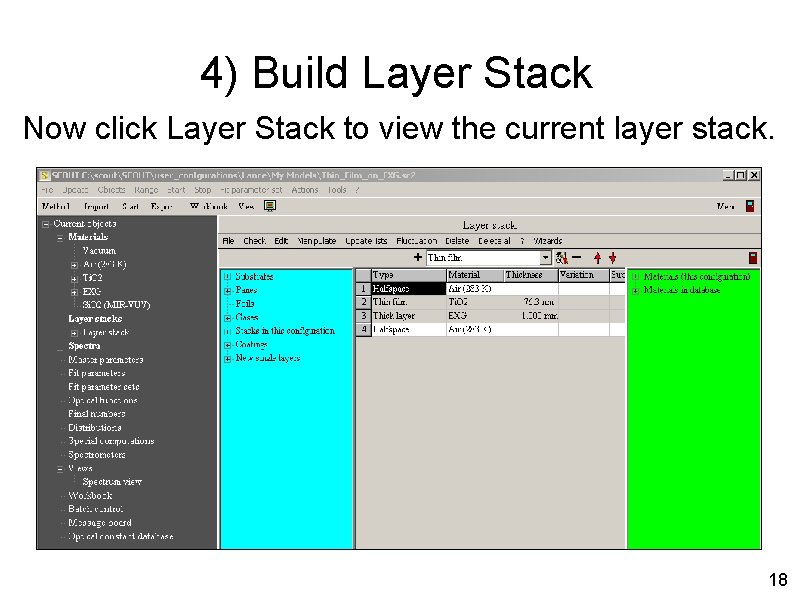
4) Build Layer Stack Now click Layer Stack to view the current layer stack. 18
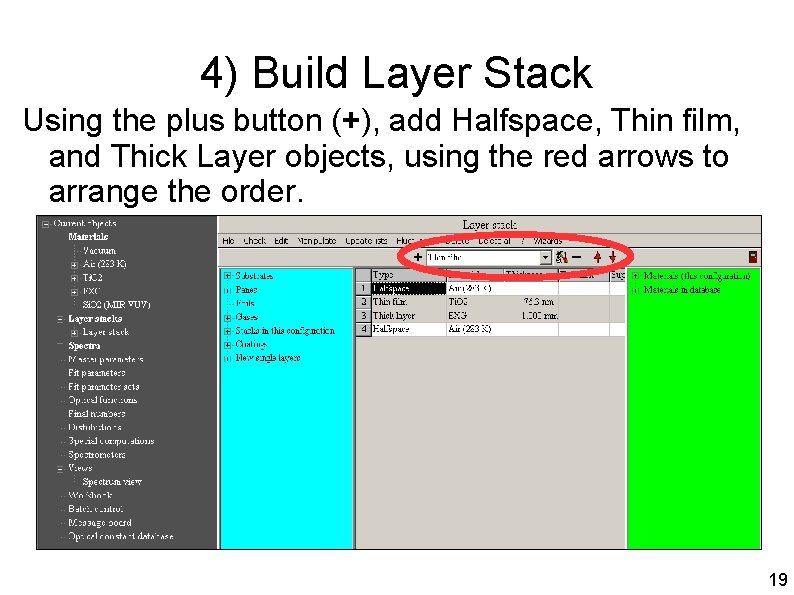
4) Build Layer Stack Using the plus button (+), add Halfspace, Thin film, and Thick Layer objects, using the red arrows to arrange the order. 19
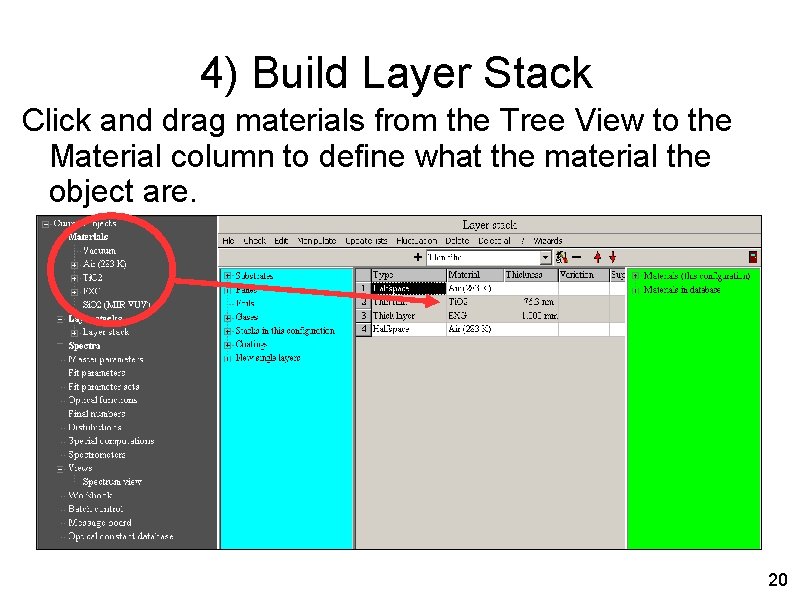
4) Build Layer Stack Click and drag materials from the Tree View to the Material column to define what the material the object are. 20
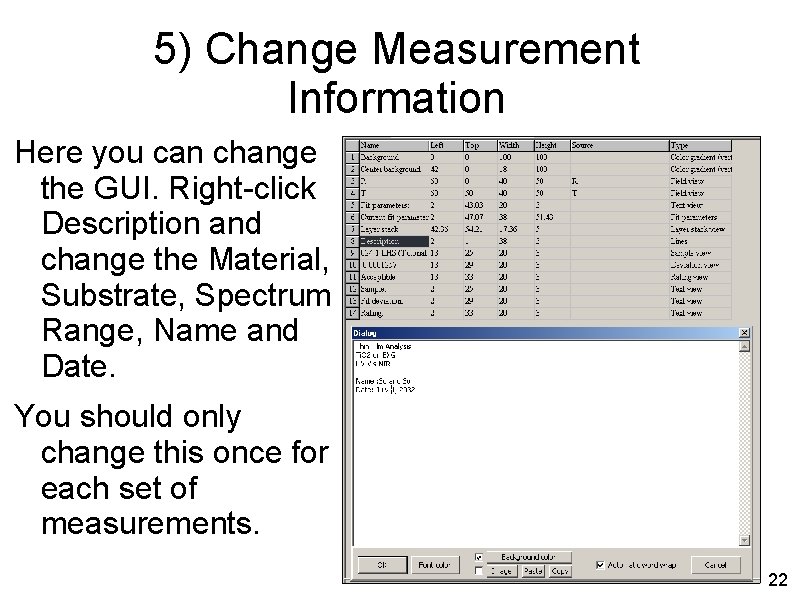
5) Change Measurement Information Click the plus [+] Views to show the drop down menu. Right-click Spectrum View to see the view options. 21
5) Change Measurement Information Here you can change the GUI. Right-click Description and change the Material, Substrate, Spectrum Range, Name and Date. You should only change this once for each set of measurements. 22
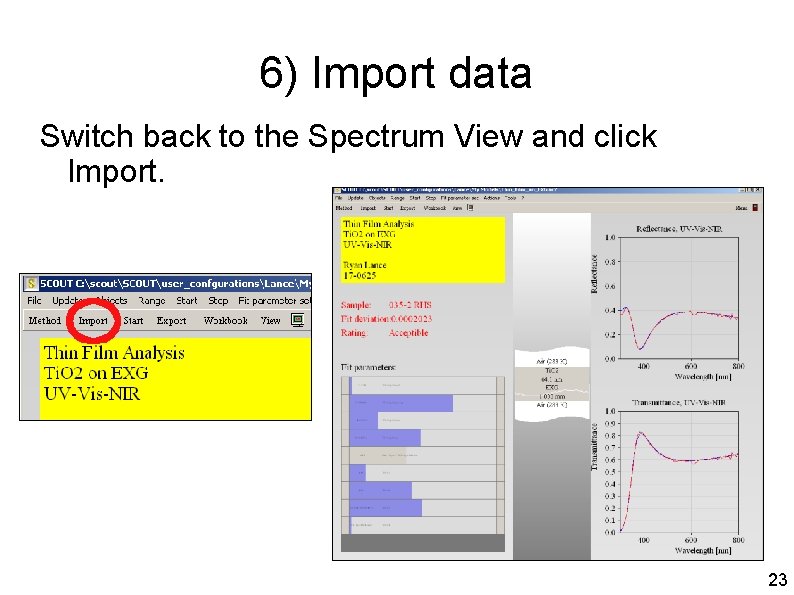
6) Import data Switch back to the Spectrum View and click Import. 23
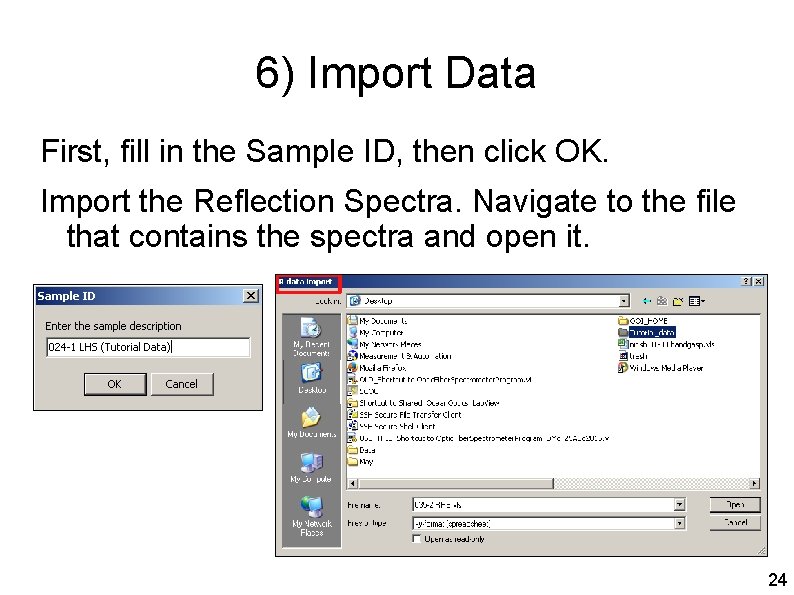
6) Import Data First, fill in the Sample ID, then click OK. Import the Reflection Spectra. Navigate to the file that contains the spectra and open it. 24
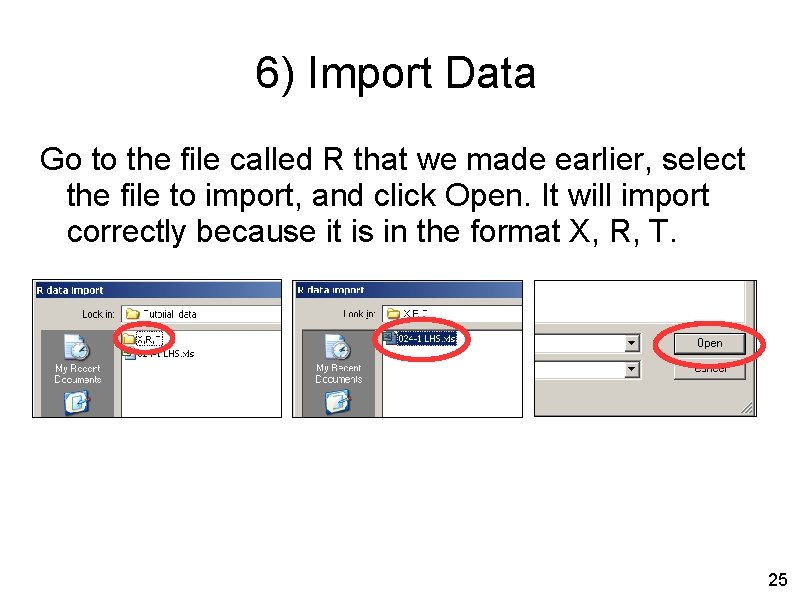
6) Import Data Go to the file called R that we made earlier, select the file to import, and click Open. It will import correctly because it is in the format X, R, T. 25
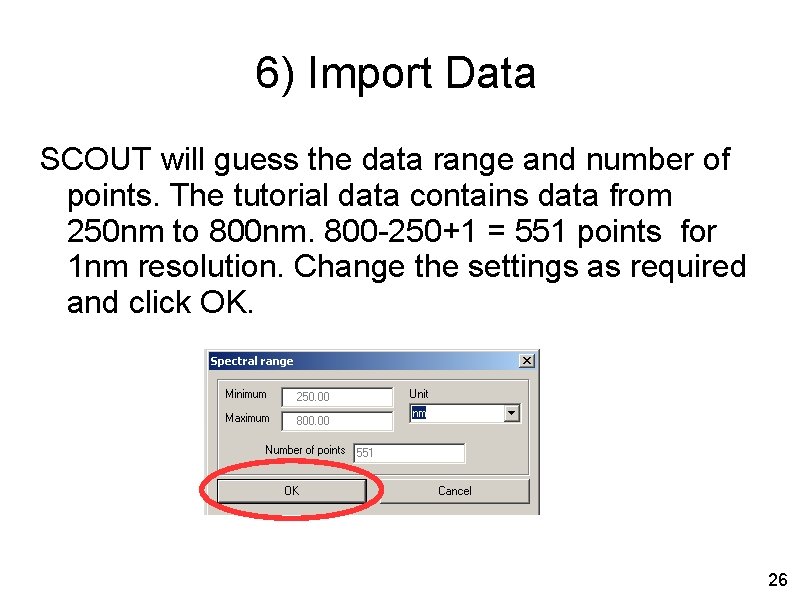
6) Import Data SCOUT will guess the data range and number of points. The tutorial data contains data from 250 nm to 800 nm. 800 -250+1 = 551 points for 1 nm resolution. Change the settings as required and click OK. 26
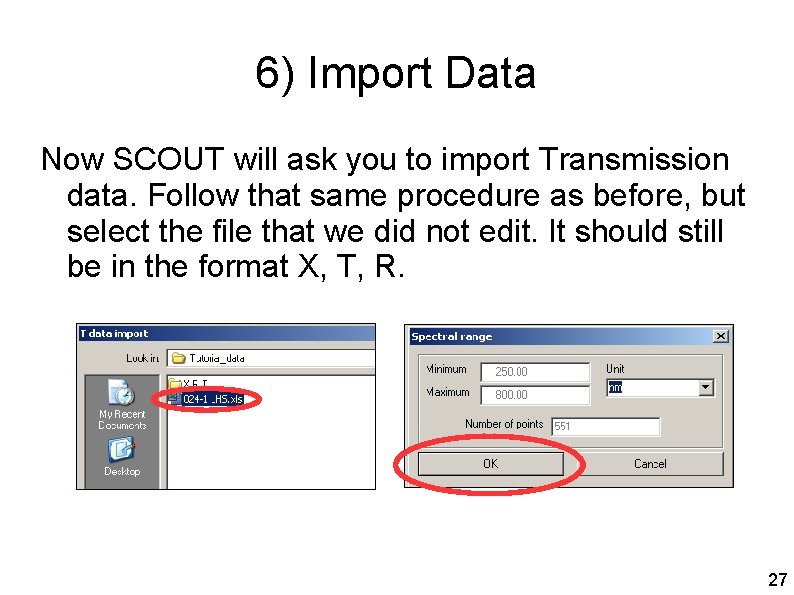
6) Import Data Now SCOUT will ask you to import Transmission data. Follow that same procedure as before, but select the file that we did not edit. It should still be in the format X, T, R. 27
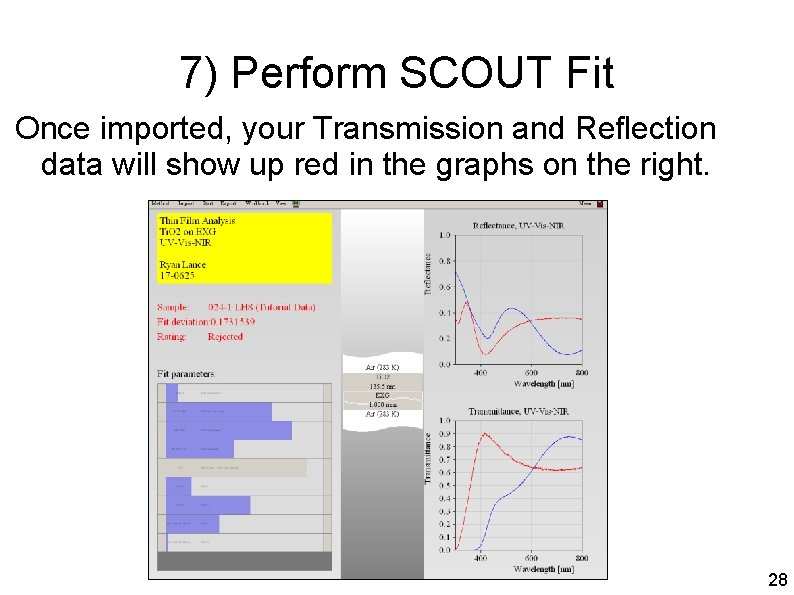
7) Perform SCOUT Fit Once imported, your Transmission and Reflection data will show up red in the graphs on the right. 28
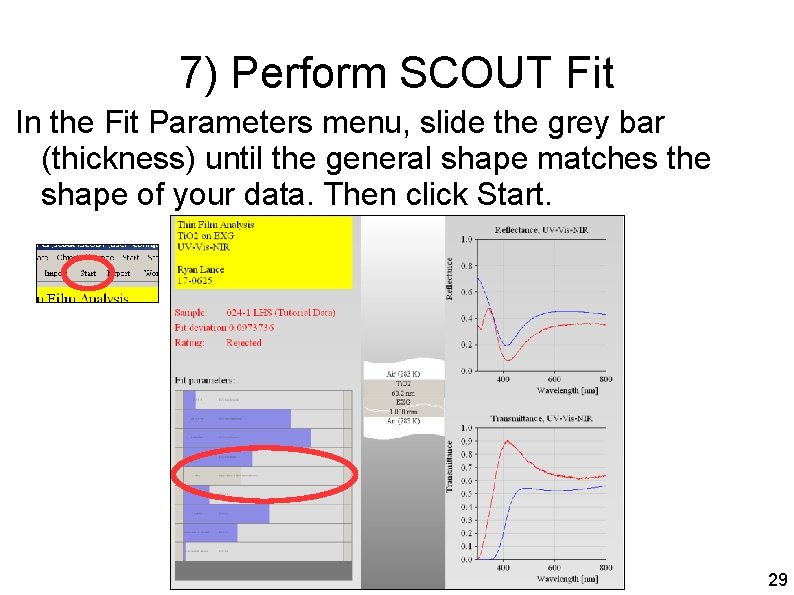
7) Perform SCOUT Fit In the Fit Parameters menu, slide the grey bar (thickness) until the general shape matches the shape of your data. Then click Start. 29
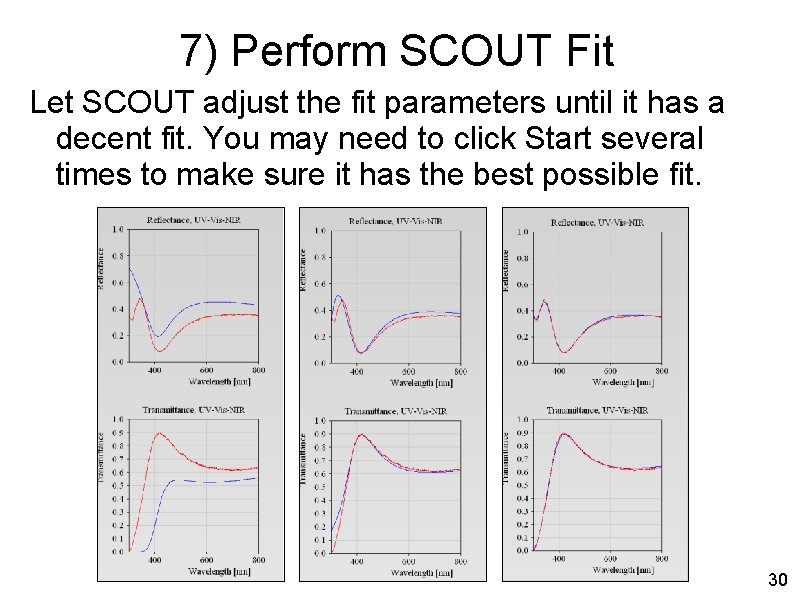
7) Perform SCOUT Fit Let SCOUT adjust the fit parameters until it has a decent fit. You may need to click Start several times to make sure it has the best possible fit. 30
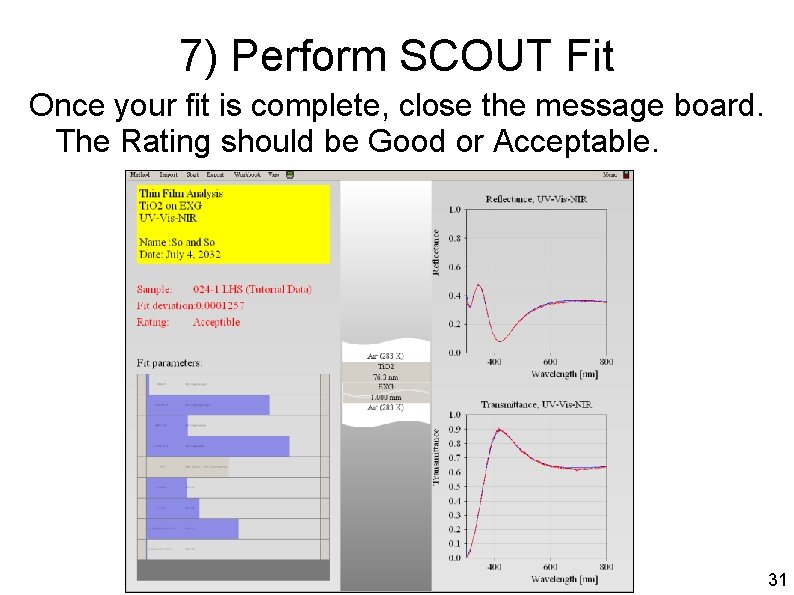
7) Perform SCOUT Fit Once your fit is complete, close the message board. The Rating should be Good or Acceptable. 31
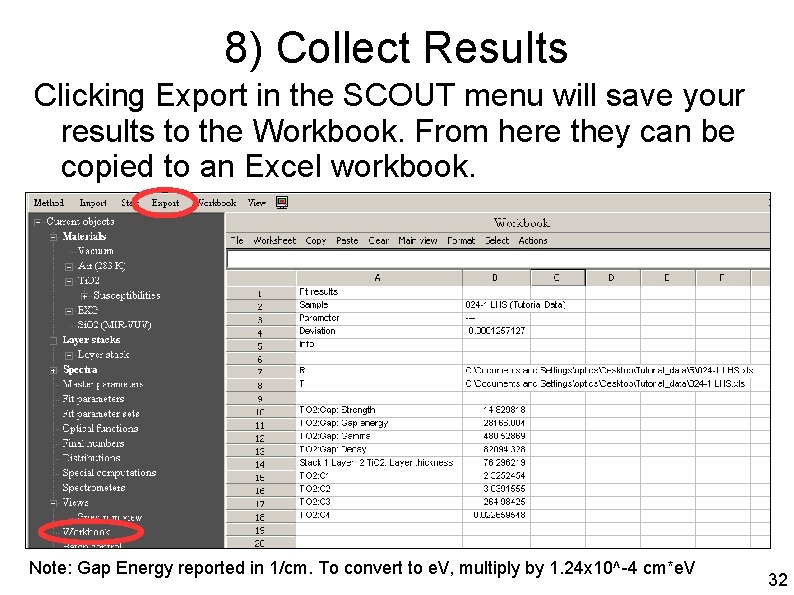
8) Collect Results Clicking Export in the SCOUT menu will save your results to the Workbook. From here they can be copied to an Excel workbook. Note: Gap Energy reported in 1/cm. To convert to e. V, multiply by 1. 24 x 10^-4 cm*e. V 32