Use of Social Media in Organization Walkthrough on


 Create Your First Nonprofit Facebook Page Before you begin, there a few resources")


 Upload a Display Image (A) • Dimensions: 170 x 170 pixels • If")
 Upload a Cover Image (B) • Dimensions: 820 x 312 pixels • The")
 Update Your About Us Page (C) To do this, click “About” on the")
 Get Your First Followers (D) Now it’s time to start getting followers who")


- Slides: 32
Use of Social Media in Organization
Walk-through on GEFONT's website www. gefont. org and GEFONT's mail server
What is Social Networking? Social Networking is defined as: u A phenomena defined by linking people to each other in some way by topicguru. com u u A social network service focuses on building online communities of people who share interests and/or activities, or who are interested in exploring the interests and activities of others by wikipedia. com This is where people develop networks of friends and associates. It forges and creates links between different people. A social network can form a key element of collaborating and networking by edublog. org
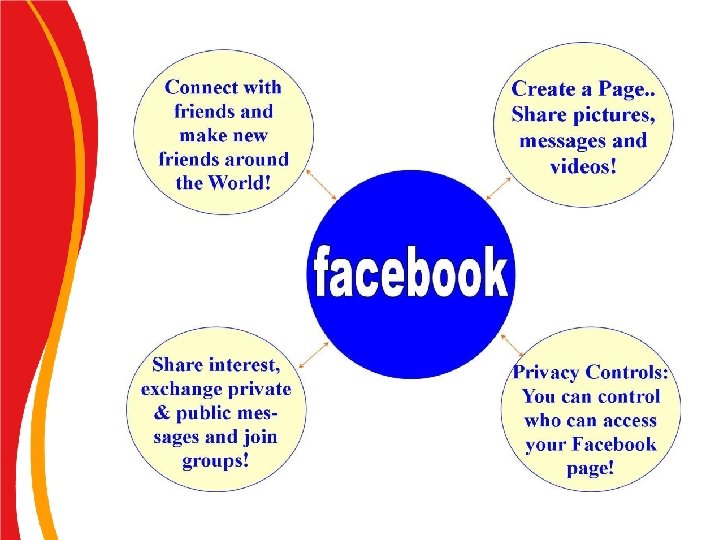
So what's all the Hype? What exactly is Facebook®? u u u Facebook® is a “social networking website” Facebook® is a free service that allows you to create an online page to connect with friends, family, or make new friends with anyone anywhere. On your Facebook® page you can share pictures, personal information , messages, videos , join groups and add applications.
History u u u Facebook® was founded in 2004 by Harvard student Mark E. Zuckerberg with help from his roommates Dustin Moskovitz and Chris Hughes. Facebook® was originally for Harvard students then expanded to other colleges then to anyone over the age of 18, and now currently to anyone 13 years of age or older. Company Overview: “Facebook's mission is to give people the power to share and make the world more open and connected. ”
Privacy Policy Major points available on facebook. com: 1. You should have control over your personal information. Facebook® helps you share information with your friends and people around you. You choose what information you put in your profile, including contact and personal information, pictures, interests and groups you join. And you control the users with whom you share that information through the privacy settings on the Privacy page. 1. Children between 13 -18 Facebook® recommends that minors 13 years of age or older ask their parents for permission before sending any information about themselves to anyone over the Internet. 3. Sharing Your Information with Third Parties Facebook® share your information with third parties under the following circumstances: 1) reasonably necessary to offer the service, 2) legally required or, 3) permitted by you.
Staying safe on Facebook®/ Internet Available on www. facebook. com/safety/ : u u u Some important safety tips when using Facebook®: Keep the amount of private information you post to a minimum. Never post information like your address, birthday, telephone number, class schedule, or anything else that you would not want a stranger to know. Keep your password a secret Make sure to adjust your privacy setting so only people you want to review you page can Be cautious about posting and sharing personal information, especially information that could be used to identify you or locate you offline, such as your address or telephone number Block and report anyone that sends you unwanted or inappropriate communications
Advantages and Disadvantages of Facebook®: Advantages: u u u It’s a social network- It’s a great way to keep in touch with friends and also make new friends. You can meet people with your same interest or hobbies, and even connect with people in your same field of study or job. Facebook® allows you to share information and photos, you can blog about a topic of interest, and you can also connect to other applications like, Twitter or Flickr. Facebook® allows people to connect, to learn from each other, to discuss issues, viewpoints and share advice. You can also join groups having similar likes and dislikes. Disadvantages: u Sharing too much private information could become a problem so share only what you are comfortable with sharing. Through your privacy settings you can control what you share. Discussion Are their anymore advantages and disadvantages you can think of?
Fun Facts u u Facebook has over 2 billion 234 million users Over 80% of Facebook users are outside the United States The average person has 120 friends on Facebook More than 6. 5 billion minutes are
How to Create a Nonprofit Facebook Page and Get Followers
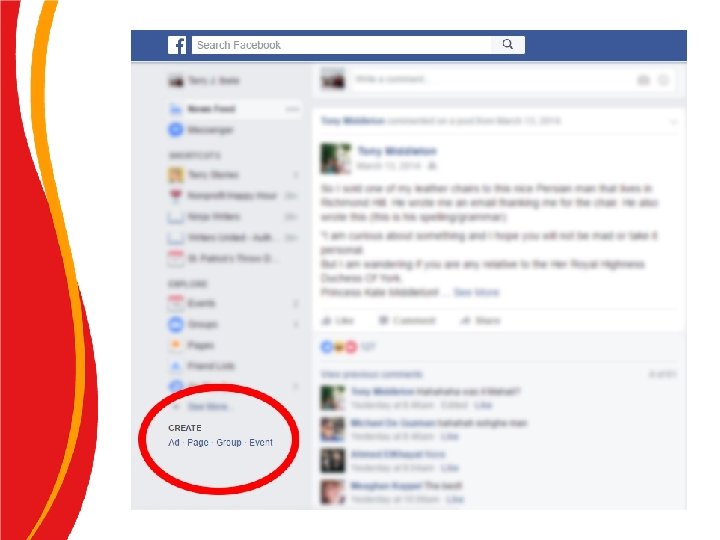
1) Create Your First Nonprofit Facebook Page Before you begin, there a few resources you will need to gather: • Your organization’s logo in digital format (try to find the largest size you have) • A large image you can use as a cover photo (more details later) • Your organization’s contact information, mission, and a short description of what your organization does • Once you have all these things, it’s time to create your Facebook Page. Login to your Facebook account and click “Page” located in the lower left of the screen.
This will take you to the next screen, which will show six quadrants. Each indicates a different type of Page you can create. Select “Company, Organization or Institution” to create a nonprofit Page.
Once you click the quadrant, you’ll be asked to choose a category. Scroll down until you find, “Non. Profit Organization” and select it. After that, enter your organization’s name and click “Get Started”.
Congratulations, you’ve just created a Facebook Page for your nonprofit. There are just four more steps to make your new Page complete. I’ve highlighted each step in the image below:
2) Upload a Display Image (A) • Dimensions: 170 x 170 pixels • If the image you upload isn’t a perfect square, it’s okay, Facebook will help you crop it. Your display image is the best place to use your organization’s logo, because this is the image that will appear in people’s Facebook feeds whenever you post something. To upload your image, simply click the box in the upper left hand corner.
3) Upload a Cover Image (B) • Dimensions: 820 x 312 pixels • The higher quality and size of the picture you upload here, the better. This image is only seen if someone comes to your Facebook Page. Use this image to help give your Page some extra branding and display the culture of your organization. Here are three great ways you can create/use a Facebook banner to help grow your organization: 1. Event Promotion 2. Membership or Cause Promotion 3. Member Engagement
4) Update Your About Us Page (C) To do this, click “About” on the left hand side of the screen. You’ll be taken to a Page where you can enter all the information you like about your organization. While there are many fields in this area, here are the most important ones to add: • Address: this is your nonprofit’s mailing • Mission • address Short & Long Description: here you can write more information about your nonprofit, board, members, and goals • • • Phone Email Website
5) Get Your First Followers (D) Now it’s time to start getting followers who will like your Page (don’t forget to like the Page yourself). Followers who like your Facebook Page will see your photos and posts in their Facebook feed whenever you have a new update. Here are four simple things you can do to get more followers: 1. Use Facebook search to invite your Facebook friends to like the Page. 2. Email your friends and members with a link to your Facebook Page and ask them to like it. 3. Add a Facebook link to your website. 4. Include a Facebook feed on your website’s homepage
Lets make it! Facebook Page
What are the different Page roles and what can There are 6 different types of roles for people who manage Pages.
Facebook Groups
Quick Facts About Facebook Group • Any Facebook user can make a Group • Some Groups let anyone join but others might be private • When joining a Group, whether private or public, your Facebook friends might see that you've joined it • Some Groups are secret and can't be searched for, in which case a qualifying Group member has to invite you • Leaving a Group will notify the other members • Only the creator of the group and anyone they make an admin has the power to invite someone to a Group • You can create events, upload pictures/video and share files within a Group • Groups can be deleted by removing all the members
How to create a Facebook group The actual process of creating a Facebook group takes just a few clicks. The harder work is making decisions about the purpose of your group and how best to support it through the various options available. 1. Open the Create a group window Log into your brand’s Facebook Page and click the more icon (…) at the far right of the menu bar under your cover photo, then choose Create group.
2. Choose a name for your group You’ll want this to be something that’s easily recognizable as connected to your business and conveys what group members will get from the group that they can’t get by following your Facebook Page. 3. Invite some members Just like no one wants to be first to arrive at a party, no one want to be the first person to join a Facebook group. Invite some colleagues, employees, or friends to get the ball rolling. You can choose to customize your invitation with a note— this is a good way to let people know why you are inviting them to the group, and how they can expect to benefit from participating.
4. Select the privacy level for your group You have three privacy options: public, closed, or secret.
4. Select the privacy level for your group A public group is exactly what it sounds like. It’s fully visible to everyone, and anyone can join without being approved. All members’ posts are fully visible to all other Facebook users, so this type of group does not offer the sense of privacy and security that comes with the more restricted group types. In a closed group, posts are only visible to members, so there’s a sense of being involved in an exclusive community. The group itself appears in Facebook searches, and the description and member list are visible to anyone on Facebook. It doesn’t offer complete privacy, but members can feel comfortable knowing that the posts they share visible only to members of the group. A secret group offers the same post privacy as a closed group, with an added level of stealth: the group does not show up in Facebook searches. The only way to find and
Facebook Pages vs Groups
w. Gojfb