Update on structure CAD model H Felice P
- Slides: 12

Update on structure CAD model H. Felice - P. Ferracin – D. Cheng 09/19/2013

COLLAR (I) • IR of the collar has been fixed to 115 mm which accounts for • Nominal coil OR after impregnation is 113. 376 mm (baseline) • Wide coil (18. 636 mm) OR after impregnation is 113. 886 mm • Trace + insulation 0. 1 + 0. 15 mm • Decision on the length of the structure to 1. 550 m (CAD) • Coil length (endshoe to extension): 1. 51 m • + 0. 02 m of coil length variability (not in CAD) • + 0. 02 m of G 10 pushers (0. 01 per side in CAD) => included • + 0. 02 m of SS pusher (0. 01 m per side in CAD) => included • will be inside structure in CAD model (no variability accounted for) • Might be flush with structure or sticking out depending on coil length variability. • Lamination thickness: 50 mm => 31 collar laminations • Comment from Mike: structure on the long side, we might remove one lamination • Alignment feature at the midplane will be female on the collar side 09/19/2013 2

COLLAR (II) • Bolting of the collar: • M 6 bolts • Slotted hole will be open to avoid thin wall thickness • Decision: not a through thread: Standard thread + 10 mm longer • Tie rod holes will be moved (same center radius, few degrees down) to ensure enough wall thickness between tie rod hole and the bolt hole (at least 3 mm) • M 6 tie rods tolerance H 9 • 9 mm holes with bushings 1 mm wall thickness • A profile tolerance will be given for the collars laminations (tolerance de forme) as all the surfaces are important surfaces 09/19/2013 3

Pole key • Pole groove is 14 mm • Collar distance 15 mm • 0. 5 mm per side to include ground plane insulation and key shimming • Key nominal width is 14 -2 x 0. 625 = 12. 75 mm • Ground plane insulation should be discussed between coil WG and structure WG • Coil ground plane insulation could be simplified as long as the collar have also Kapton wrap 09/19/2013 4

PAD and MASTERS (I) • Pad and pad master might be merged in a unique component • Done in CERN CAD model • To be discussed • Yoke master will remain a separate component from the yoke • Making it part of the yoke would prevent loading by quadrant and prevent aligning coil pack to yoke during loading • The alignment key will be a separate component • Making it part of the pad could make the assembly more difficult • the alignment key will be made wider • Will be brass • Load keys • will be stainless steel • Slot and spacing to be defined 09/19/2013 5

PAD and MASTERS (II) • Tie rod • M 10 • 15 mm holes and bushings wall thickness 2 mm • Pad bolts • M 8 • Through thread • Distance between the pads = 40 mm 09/19/2013 6

Alignment key and yoke master • Master to master distance: 3 mm • Bladder slot: 3 mm deep => we keep it • Dan suggested to go to 5 mm • 0. 5 mm bladder thickness + 9 mm pull shim at LBNL • When collapsed => 6 mm so thinner pull shim should be used • Fresca used 6 mm – Juan Carlos comfortable with that • Key groove depth: 5 mm per side • Load Key pad to master direction : 10 mm • Alignment key pad to master direction: 10 • Key size might be increased to 11 mm • Yoke master thickness : 10 mm (junction block) + 2 mm (wall thickness) • Need to confirm junction block dimension • LBNL is using 9. 5 mm • Alignment key slot • 5 mm deep on each side (yoke master and pad) • Key is 10 mm (pad to master dimension) • Width to be defined 09/19/2013 7

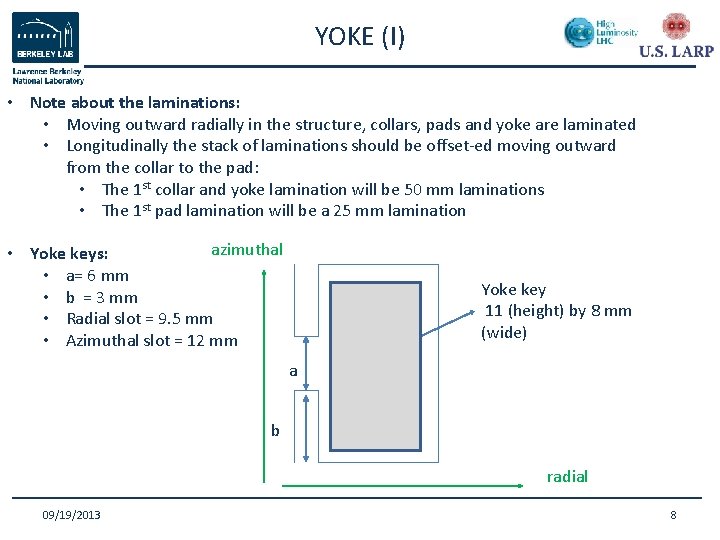
YOKE (I) • Note about the laminations: • Moving outward radially in the structure, collars, pads and yoke are laminated • Longitudinally the stack of laminations should be offset-ed moving outward from the collar to the pad: • The 1 st collar and yoke lamination will be 50 mm laminations • The 1 st pad lamination will be a 25 mm lamination azimuthal • Yoke keys: • a= 6 mm • b = 3 mm • Radial slot = 9. 5 mm • Azimuthal slot = 12 mm Yoke key 11 (height) by 8 mm (wide) a b radial 09/19/2013 8

YOKE (II) • Yoke alignment/integration features • When present, should be present in all 4 quadrants • Need only to be present in extremities laminations • In between could be plain laminations • Geometry of the features to be discussed with Herve Prin Þ Magnetic and mechanical impact on the design has to be checked • Lamination assembly: • M 20 tie rods and 24 mm holes with 2 mm wall thickness bushings • Cooling hole and pipes • 1. 5 mm clearance between tube and hole (radius) • 2 mm wall thickness • 77 mm diameter hole 09/19/2013 9

SHELL • Shell of SQXF is made of 2 segments • Shell alignment/integration features • When present, should be present in all 4 quadrants • Geometry of the features to be discussed with Herve Prin Þ Mechanical impact on the design has to be checked: 3 D 09/19/2013 10

END PLATE and RODS • Baseline plate is 75 mm thick • Scaled up from HQ (60 % more axial forces in QXF) • Aperture is 150 mm in diameter • M 16 “real” bullets (spherical end) will be used instead of set screws (HQ) • Distance between endplate and face of the yoke is set to 25 mm • 35 mm because of the pad tie rods could change if one lamination is removed • Rods • M 36 axial rods • Spherical washer NOT interfering with cooling holes => OK • have to be elongated in present CERN CAD model to allow for spherical washer and 2 nuts • Thread on rods will be asymmetric for lead and return ends (to allow for axial load rig (endplate, piston…) mounting) • Axial load rig will be assembled on return end (non connection) side => Should be added to the CAD model 09/19/2013 11

Analysis to be performed/performed • ANSYS 2 D model ü Incorporate pad master in pad => no change in the optimization ü Change alignment feature between pad and collar (female) • Modify yoke master thickness to accommodate junction blocks • Master=15 mm wide • 3 mm deep bladder slot • 12 mm bladder wall • Accommodates 9. 5 mm junction block allowing 2 mm wall thickness • Set pad to ymaster minimum distance = 3 mm • Impact of yoke features on magnetic and mechanical analysis • Opera 2 D / Roxie to be defined 09/19/2013 12