Update on Armor Simulation Experiments At Dragonfire Facility
- Slides: 13

Update on Armor Simulation Experiments At Dragonfire Facility Farrokh Najmabadi and John Pulsifer HAPL Meeting June 20 -21, 2005 Lawrence Livermore National Laboratory Electronic copy: http: //aries. ucsd. edu/najmabadi/TALKS UCSD IFE Web Site: http: //aries. ucsd. edu/IFE

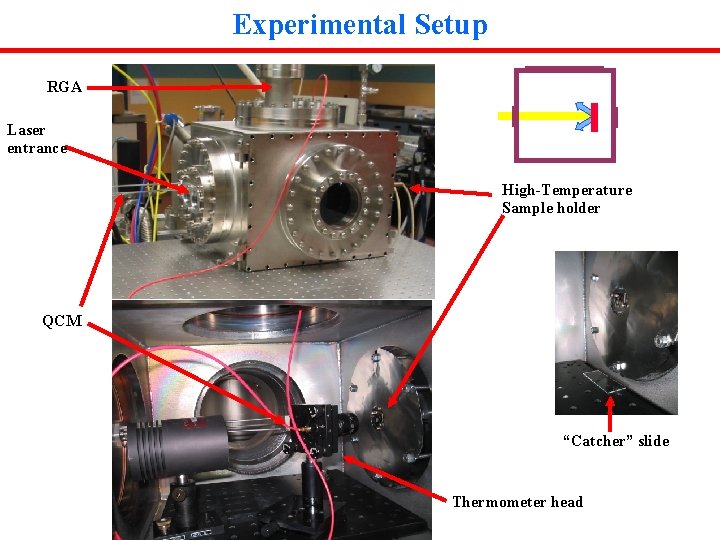
Experimental Setup RGA Laser entrance High-Temperature Sample holder QCM “Catcher” slide Thermometer head

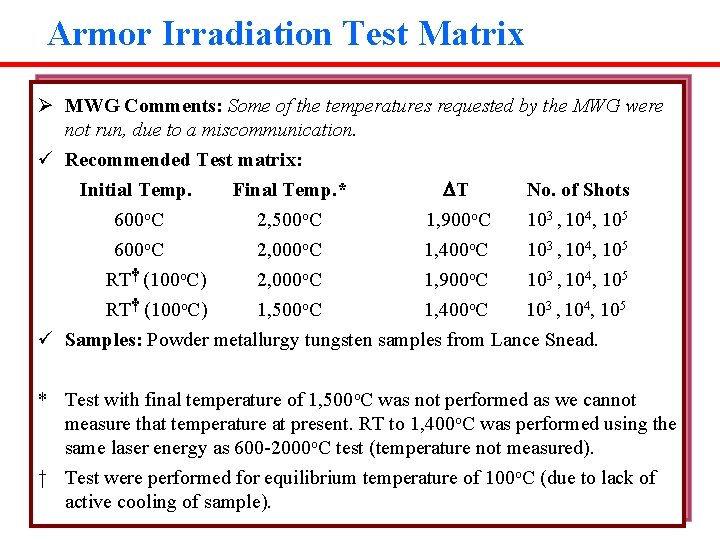
Armor Irradiation Test Matrix Ø MWG Comments: Some of the temperatures requested by the MWG were not run, due to a miscommunication. ü Recommended Test matrix: Initial Temp. Final Temp. * DT No. of Shots 600 o. C 2, 500 o. C 1, 900 o. C 103 , 104, 105 600 o. C 2, 000 o. C 1, 400 o. C 103 , 104, 105 RT† (100 o. C) 2, 000 o. C 1, 900 o. C 103 , 104, 105 RT† (100 o. C) 1, 500 o. C 1, 400 o. C 103 , 104, 105 ü Samples: Powder metallurgy tungsten samples from Lance Snead. * Test with final temperature of 1, 500 o. C was not performed as we cannot measure that temperature at present. RT to 1, 400 o. C was performed using the same laser energy as 600 -2000 o. C test (temperature not measured). † Test were performed for equilibrium temperature of 100 o. C (due to lack of active cooling of sample).

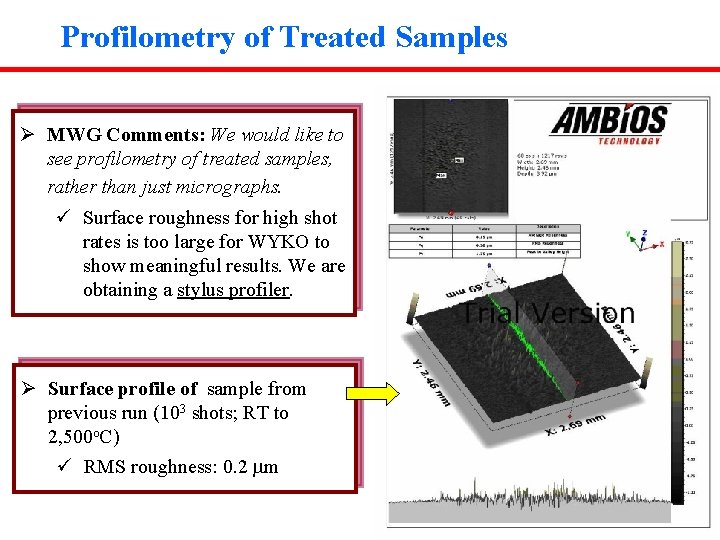
Profilometry of Treated Samples Ø MWG Comments: We would like to see profilometry of treated samples, rather than just micrographs. ü Surface roughness for high shot rates is too large for WYKO to show meaningful results. We are obtaining a stylus profiler. Ø Surface profile of sample from previous run (103 shots; RT to 2, 500 o. C) ü RMS roughness: 0. 2 mm

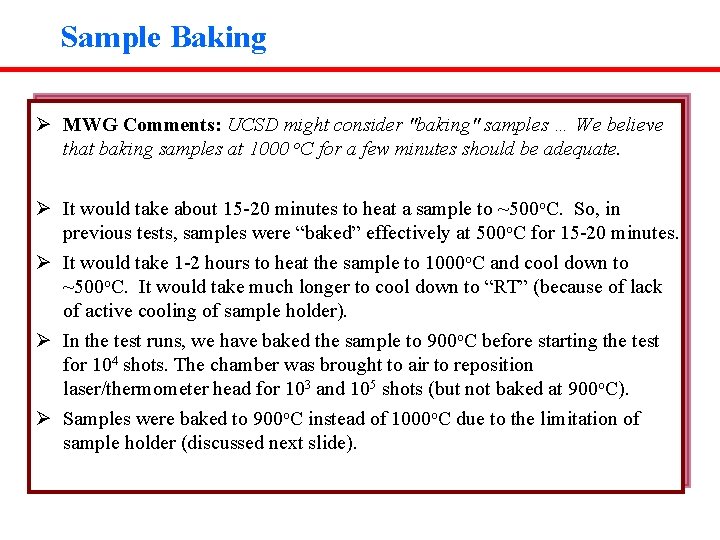
Sample Baking Ø MWG Comments: UCSD might consider "baking" samples … We believe that baking samples at 1000 o. C for a few minutes should be adequate. Ø It would take about 15 -20 minutes to heat a sample to ~500 o. C. So, in previous tests, samples were “baked” effectively at 500 o. C for 15 -20 minutes. Ø It would take 1 -2 hours to heat the sample to 1000 o. C and cool down to ~500 o. C. It would take much longer to cool down to “RT” (because of lack of active cooling of sample holder). Ø In the test runs, we have baked the sample to 900 o. C before starting the test for 104 shots. The chamber was brought to air to reposition laser/thermometer head for 103 and 105 shots (but not baked at 900 o. C). Ø Samples were baked to 900 o. C instead of 1000 o. C due to the limitation of sample holder (discussed next slide).

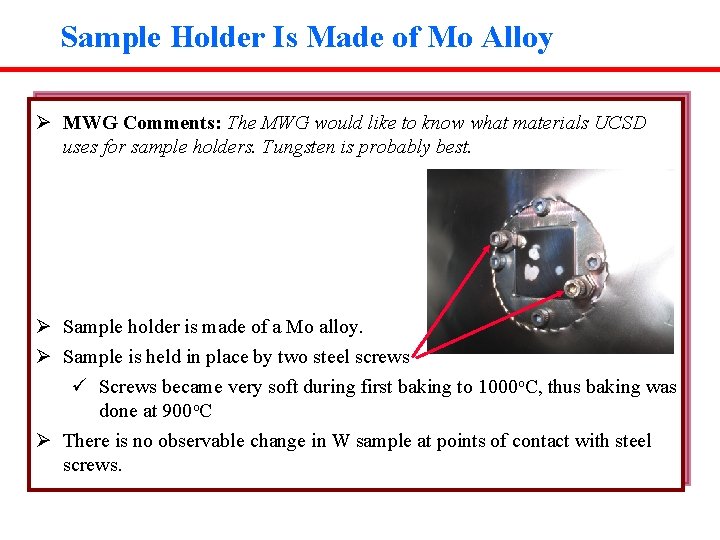
Sample Holder Is Made of Mo Alloy Ø MWG Comments: The MWG would like to know what materials UCSD uses for sample holders. Tungsten is probably best. Ø Sample holder is made of a Mo alloy. Ø Sample is held in place by two steel screws ü Screws became very soft during first baking to 1000 o. C, thus baking was done at 900 o. C Ø There is no observable change in W sample at points of contact with steel screws.

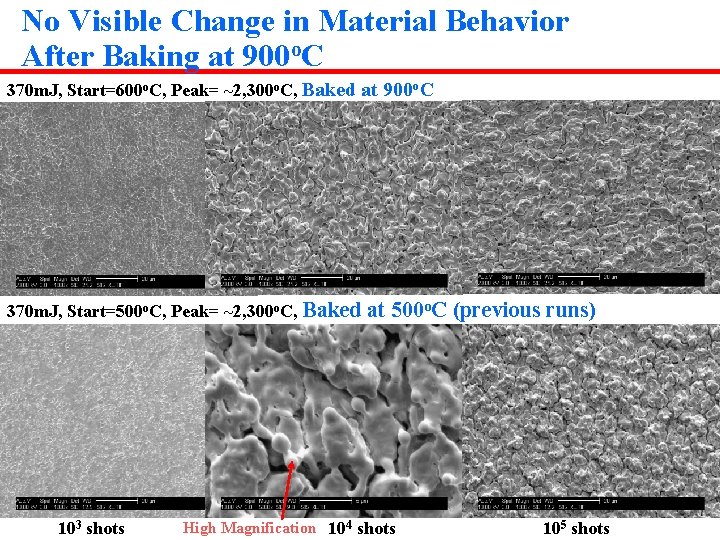
No Visible Change in Material Behavior After Baking at 900 o. C 370 m. J, Start=600 o. C, Peak= ~2, 300 o. C, Baked at 900 o. C 370 m. J, Start=500 o. C, Peak= ~2, 300 o. C, Baked 103 shots at 500 o. C (previous runs) High Magnification 104 shots 105 shots

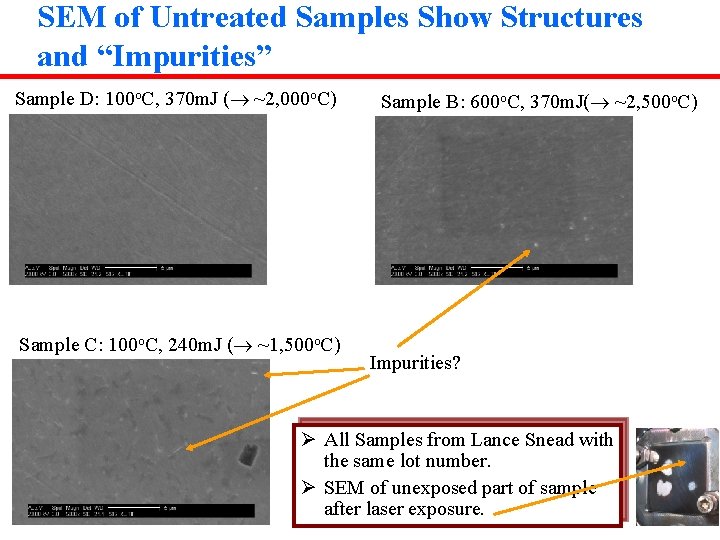
SEM of Untreated Samples Show Structures and “Impurities” Sample D: 100 o. C, 370 m. J ( ~2, 000 o. C) Sample C: 100 o. C, 240 m. J ( ~1, 500 o. C) Sample B: 600 o. C, 370 m. J( ~2, 500 o. C) Impurities? Ø All Samples from Lance Snead with the same lot number. Ø SEM of unexposed part of sample after laser exposure.

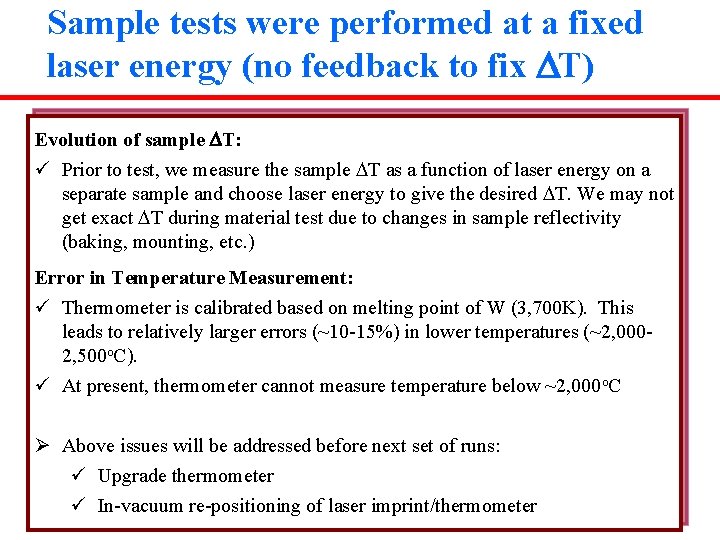
Sample tests were performed at a fixed laser energy (no feedback to fix DT) Evolution of sample DT: ü Prior to test, we measure the sample DT as a function of laser energy on a separate sample and choose laser energy to give the desired DT. We may not get exact DT during material test due to changes in sample reflectivity (baking, mounting, etc. ) Error in Temperature Measurement: ü Thermometer is calibrated based on melting point of W (3, 700 K). This leads to relatively larger errors (~10 -15%) in lower temperatures (~2, 0002, 500 o. C). ü At present, thermometer cannot measure temperature below ~2, 000 o. C Ø Above issues will be addressed before next set of runs: ü Upgrade thermometer ü In-vacuum re-positioning of laser imprint/thermometer

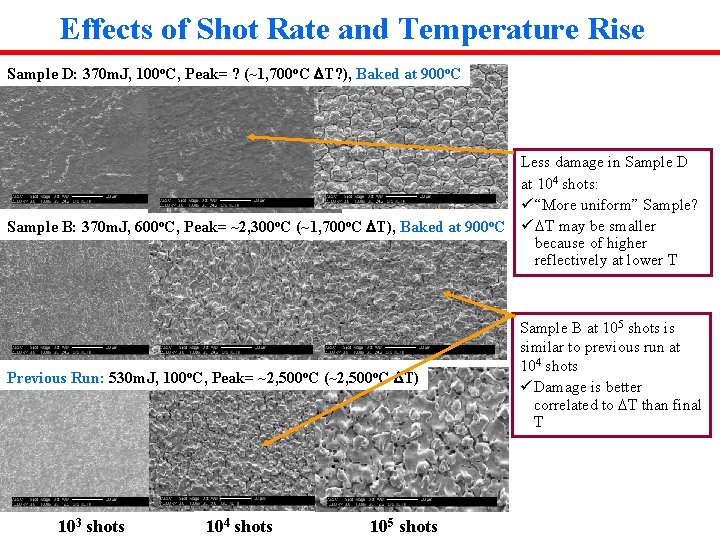
Effects of Shot Rate and Temperature Rise Sample D: 370 m. J, 100 o. C, Peak= ? (~1, 700 o. C DT? ), Baked at 900 o. C Less damage in Sample D at 104 shots: ü “More uniform” Sample? Sample B: 370 m. J, 600 o. C, Peak= ~2, 300 o. C (~1, 700 o. C DT), Baked at 900 o. C ü DT may be smaller because of higher reflectively at lower T Previous Run: 530 m. J, 100 o. C, Peak= ~2, 500 o. C (~2, 500 o. C DT) 103 shots 104 shots 105 shots Sample B at 105 shots is similar to previous run at 104 shots ü Damage is better correlated to DT than final T

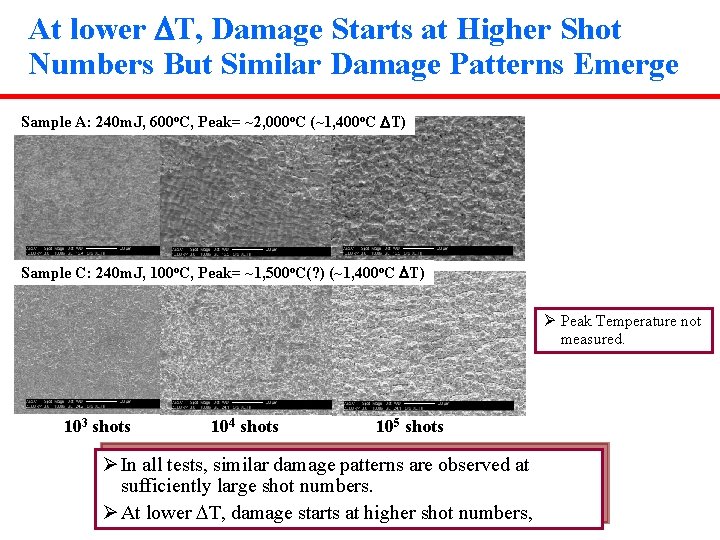
At lower DT, Damage Starts at Higher Shot Numbers But Similar Damage Patterns Emerge Sample A: 240 m. J, 600 o. C, Peak= ~2, 000 o. C (~1, 400 o. C DT) Sample C: 240 m. J, 100 o. C, Peak= ~1, 500 o. C(? ) (~1, 400 o. C DT) Ø Peak Temperature not measured. 103 shots 104 shots 105 shots Ø In all tests, similar damage patterns are observed at sufficiently large shot numbers. Ø At lower DT, damage starts at higher shot numbers,

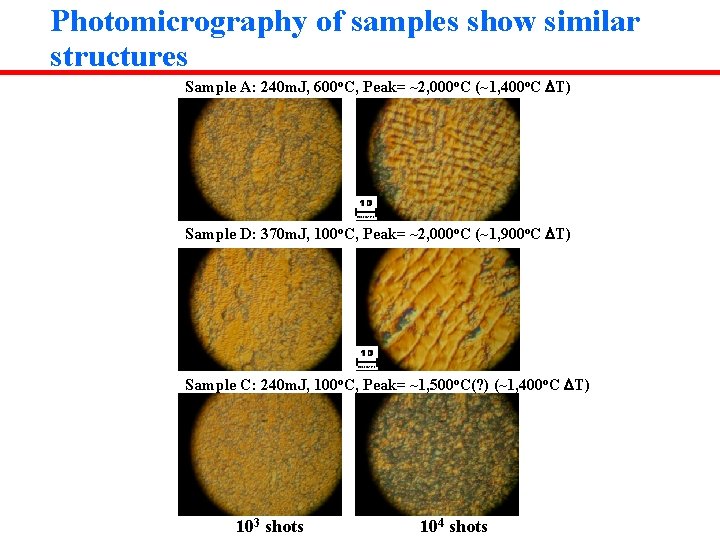
Photomicrography of samples show similar structures Sample A: 240 m. J, 600 o. C, Peak= ~2, 000 o. C (~1, 400 o. C DT) Sample D: 370 m. J, 100 o. C, Peak= ~2, 000 o. C (~1, 900 o. C DT) Sample C: 240 m. J, 100 o. C, Peak= ~1, 500 o. C(? ) (~1, 400 o. C DT) 103 shots 104 shots

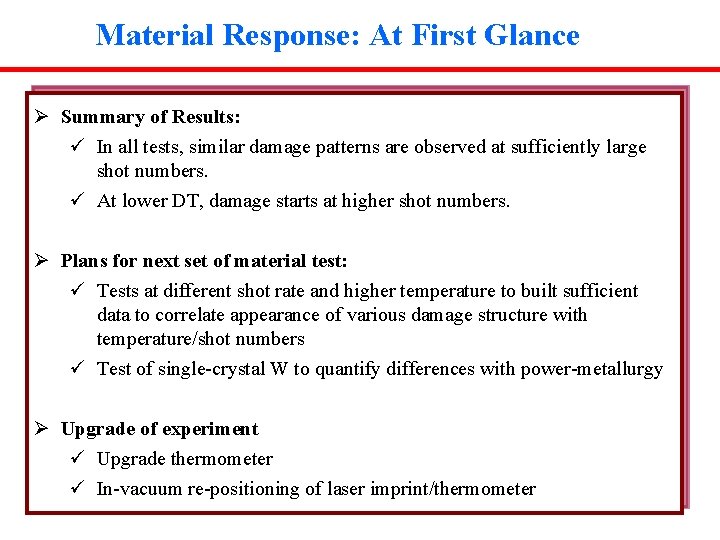
Material Response: At First Glance Ø Summary of Results: ü In all tests, similar damage patterns are observed at sufficiently large shot numbers. ü At lower DT, damage starts at higher shot numbers. Ø Plans for next set of material test: ü Tests at different shot rate and higher temperature to built sufficient data to correlate appearance of various damage structure with temperature/shot numbers ü Test of single-crystal W to quantify differences with power-metallurgy Ø Upgrade of experiment ü Upgrade thermometer ü In-vacuum re-positioning of laser imprint/thermometer