UNITIV 8255 PPI Various Modes Of Operation Interfacing

 For most of the applications 8086 needs parallel input ,")


 convert binary numbers into their")


- Slides: 41
UNIT-IV 8255 PPI Various Modes Of Operation Interfacing To 8086. Interfacing Keyboard, Displays Stepper Motor D/A And A/D Converter Interfacing.
8255 Programmable Peripheral Interface(PPI) For most of the applications 8086 needs parallel input , output data to/from the peripherals. 8255 is a device used to interface different real time peripherals to the microprocessors which can be initialized for different modes operations like simple I/O, Strobed I/O and handshaking I/O. It has three 8 -bit parallel ports : port A, port B, port C
Fig 4. 2 8255 pin diagram
q 8255 has three operation modes: mode 0, mode 1, and mode 2 Fig 4. 3 Control Word Register Bit Format of 8255 for I/O mode and BSR mode
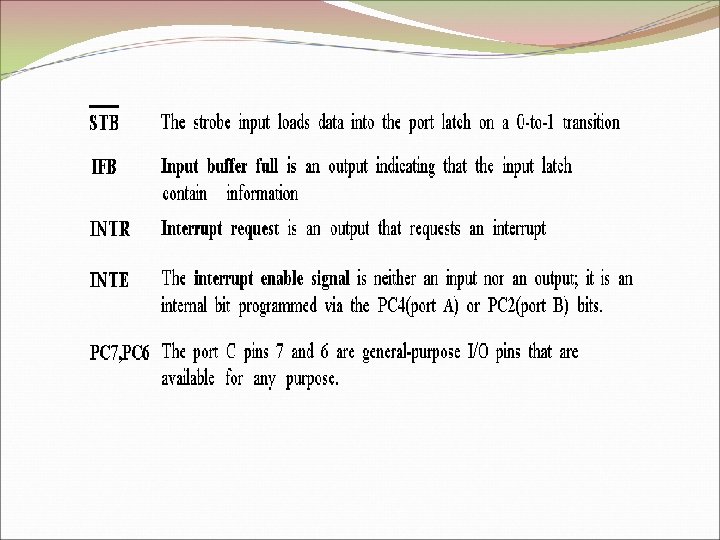
Programming 8255 q Mode 0: — Ports A, B, and C can be individually programmed as input or output ports — Port C is divided into two 4 -bit ports which are independent from each other q Mode 1: — Ports A and B are programmed as input or output ports — Port C is used for handshaking PC 4 PC 5 PC 3 8255 PC 2 PC 1 PC 0 PC 6, 7 PA[7: 0] STBA IBFA INTRA PB[7: 0] STBB IBFB INTRB PC 7 PC 6 PC 3 8255 PC 2 PC 1 PC 0 PC 4, 5 PA[7: 0] OBFA ACKA INTRA PB[7: 0] OBFB ACKB INTRB Fig 4. 4 Input and Output control signals of 8255 in mode 1
Fig 4. 5 Input and Output control signals of 8255 in mode 1
Programming 8255 q Mode 2: — Port A is programmed to be bi-directional — Port C is for handshaking — Port B can be either input or output in mode 0 or mode 1 PC 7 PC 6 PC 4 8255 PC 3 PC 0 PA[7: 0] OBFA ACKA STBA IBFA INTRA PB[7: 0] In In In Out STBB Out IBFB Out INTRB Mode 0 OBFB ACKB INTRB Mode 1 Fig 4. 6 Input and Output control signals of 8255 in mode 2
Fig 4. 7 Input and Output control signals of 8255 in mode 2
Example: Mode 1 Input BIT 5 EQU PORTC PORTA 20 H EQU READ Read: PROC NEAR IN AL, PORTC TEST AL, BIT 5 JZ Read IN AL, PORTA READ ENDP keyboard 8255 22 H 20 H ; read portc ; test IBF ; if IBF=0 ; Read Data PA 0 PA 7 PC 4 STB DAV Fig 4. 8 Interfacing of 8255 to Keyboard for input in mode 1
Example: Mode 1 output Printer 8255 PB 0 PB 7 PC 2 PC 4 ACK DS Fig 4. 9 Interfacing of 8255 to Printer for output in mode 1
Example: Mode 1 output BIT 1 EQU PORTC PORTB CMD EQU PRINTPROC 2 EQU 62 H EQU 61 H 63 H NEAR ; check printer ready? IN AL, PORTC ; get OBF TEST AL, BIT 1 ; test OBF JZ PRINT ; if OBF=0 buffer is full ; send character to printer MOV AL, AH ; get data OUT PORTB, AL ; print data ; send data strobe to printer MOV AL, 8 ; clear DS OUT CMD, AL MOV AL, 9 ; clear DS OUT CMD, AL ; rising the data at the positive edge of DS RET PRINT ENDP
Data bus A 0 A 1 RD WR RESET 8086 A 7 A 6 A 5 A 4 A 3 A 2 IO/M D[7: 0] PA[7: 0] PB[7: 0] Control port PC[7: 0] CS A 1 A 0 0 0 1 1 0 1 Fig 4. 1 Interfacing of 8255 PPI to 8086 Port PA PB PC Control
Keyboard example Fig 4. 10 Interfacing of 8255 to 4 x 4 matrix Keyboard in mode 1
Keyboard example Fig 4. 11 Flow chart of a keyboard scanning procedure
Bouncing Problem Fig 4. 12 Key bouncing problem
Fig 4. 13 Key bouncing problem
Software Solution Fig 4. 14 Software Key debouncing solution
ADC Interfacing The time taken by the ADC from the active edge of SOC pulse till the active edge of EOC signal is called as the conversion delay of the ADC. General algorithm for ADC interfacing contains the following steps 1. Ensure the stability of analog input, applied to the ADC 2. Issue start of conversion SOC pulse to ADC 3. Read end of conversion EOC signal to mark the end of conversion process 4. Read digital data output of the ADC as equivalent digital output.
ADC 0808/0809 The analog to digital converter chips 0808 and 0809 are 8 -bit CMOS, successive approximation converters. It is fastest technique. The conversion delay is 100 µs at a clock frequency of 640 k. Hz, which is quite low as compared to other converters. Block Diagram of ADC 0808/0809 This converter internally has a 3: 8 analog multiplexer, so that at a time 8 different analog inputs can be connected to the chips. Out of these 8 inputs only one can be selected for conversion by using 3 address lines A, B, C. The CPU may drive these lines using output port lines in case of multichannel applications.
Fig 4. 15 Pin diagram of ADC 0808/0809
Table 4. 1 analog input selection • These are unipolar Analog to Digital (A to D) converters, they are able to convert only positive analog input voltages to their digital equivalents. This chips do not contain any internal sample & hold circuit.
Interfacing between ADC to Microprocessor Problem: Interface ADC 0808 with 8086 using 8255 ports. Use Port A of 8255 for transferring digital data output of ADC to the CPU & Port C for control signals. Assume that an analog input is present at I/P 2 of the ADC and a clock input of suitable frequency is available for ADC. Draw the schematic & timing diagram of different signals of ADC 0808.
Solution: - • The analog input I/P 2 is used & therefore address pins A, B, C should be 0, 1, 0 respectively to select I/P 2. • The OE (Out put latch Enable) & ALE pins are already kept at +5 v to select the ADC and enable the outputs. • Port C upper acts as the input port to receive the EOC signal while Port C lower acts as the output port to send SOC to ADC. • Port A acts as a 8 -bit input data port to receive the digital data output from the ADC.
8255 Control Word: D 7 D 6 1 0 0 Program: MOV AL, 98 H OUT CWR, AL MOV AL, 02 H OUT Port B, AL MOV AL, 00 H OUT Port C, AL MOV AL, 01 H OUT Port C, AL MOV AL, 00 H OUT Port C, AL WAIT: IN AL, Port C RCL JNC WAIT IN AL, Port A HLT D 5 1 D 4 1 D 3 0 D 2 0 D 1 D 0 0 = 98 H ; Initialize 8255, send AL to control word (CWR) ; Select I/P 2 as analog I/P ; Port B as output ; Give start of conversion pulse to the ADC ; check for EOC by reading Port C upper & rotating ; through carry. ; if EOC, read digital equivalent in AC ; stop.
Fig 4. 16 Interfacing of ADC 0808 to 8086 through 8255
Interfacing D/A Converters The Digital to Analog Converters (DAC) convert binary numbers into their analog equivalent voltages. The DAC find applications in areas like Digitally controlled gains Motor speed controls Programmable gain amplifiers etc. AD 7523 8 -Bit Multiplying DAC: - • Intersil’s AD 7523 is a 16 pin DIP, multiplying digital to analog converter, containing R-2 R ladder (R=10 K) for digital to analog conversion.
Power supply +5 v to +15 v ü Vref -> -10 v to +10 v ü The maximum analog output voltage will be +10 v ü A Zener is connected between OUT 1 & OUT 2 to save the DAC from negative transients. ü An operational amplifier is used as a current – to – voltage converter at the output of AD 7523. ü An external feedback resister acts to control the gain. ü
Interfacing of AD 7523 with 8086 Problem: -Interface DAC AD 7523 with the 8086 running at 8 MHz & write ALP to generate a saw tooth waveform of period 1 ms with Vmax 5 v. Solution: -Code segment Assume cs: code Start: MOV AL, 80 H OUT CWR, AL AGAIN: MOV AL, 00 H BACK: OUT Port A, AL INC AL CMP AL, 0 F 2 H JB BACK JMP AGAIN Code ends End Start
Fig 4. 17 Pin diagram of AD 7523
Fig 4. 18 Interfacing of AD 7523 to 8086 through 8255
Display interface Interface an 8255 with 8086 at 80 h as an I/O address of port-A. interface five 7 segment displays with the 8255. write a sequence of instructions to display 1, 2, 3, 4 and 5 over the five displays continuously as per their positions starting with 1 at the least significant position. CWR address is 86 h. Number to be displayed PA 7 dp PA 6 a PA 5 b PA 4 c PA 3 d PA 2 e PA 1 f PA 0 g Code 1 1 1 0 0 1 1 CF 2 1 0 0 1 0 92 3 1 0 0 1 1 0 86 4 1 1 0 0 CC 5 1 0 0 A 4 All these codes are stored in a look up table starting at 2000: 0001.
Fig 4. 19 Interfacing multiplexed 7 -segment display to 8086 through 8255
ALP for display interface again: mov cl, 05 h mov bx, 2000 h mov ds, bx mov ch, 01 h mov al, 80 h out 86 h, al mov dl, 01 h display nxtdgt: mov bx, 0000 h mov al, ch xlat ; count for displays ; initialize the data segment for ; look-up table ; 1 st no. to be displayed ; load control word in the CWR ; enable code for least significant 7 -seg ; set pointer to look-up table ; store number to be display ; find code from table
out 80 h, al mov al, dl out 82 h, al rol dl inc ch dec cl jnz nxtdgt jmp again ; enable the display ; go for next digit display ; decrement counter ; go for next digit display
Stepper Motor Interfacing A stepper motor is a device used to obtain an accurate position control of rotating shafts. It employs rotation of its shaft in terms of steps, rather than continuous rotation as in case of AC or DC motors. In dot-matrix printer one small stepper motor which is used to advance the paper to the next line position & another small stepper motor which is used to move the print head to the next character position. In floppy disk stepper motor is used to position the read/write head over the desired track. To rotate the shaft of the stepper motor, a sequence of pulses is needed to be applied to the windings of the stepper motor, in a proper sequence. The no. of pulses required for one complete rotation of the shaft of the stepper motor are equal to its number of internal teeth on its rotor.
The stator teeth the rotor teeth lock with each other to fix a position of the shaft. With a pulse applied to the winding input, the rotor rotates by one teeth position or an angle x. The angle x may be calculated as: x = 3600 / no. of rotor teeth The stepper motors have been designed to work with digital circuits. Binary level pulses of 0 -5 v are required at its winding inputs to obtain the rotation of shafts. The sequence of pulses can be decided, depending upon the required motion of the shaft. The count for rotating the shaft of the stepper motor through a specified angle may be calculated from the no. of rotor teeth C = no. of rotor teeth / 3600 * θ 0
Motion Clockwise Anticlockwise Step A B C D 1 1 0 0 0 2 0 1 0 0 3 0 0 1 0 4 0 0 0 1 5 1 0 0 0 1 1 0 0 0 2 0 0 0 1 3 0 0 1 0 4 0 1 0 0 5 1 0 0 0 Table 4. 2 Excitation sequence for clockwise and anticlockwise rotation of a stepper motor
Problem Design a stepper motor controller and write an ALP to rotate shaft of a 4 -phase stepper motor: i. In clockwise 5 rotations ii. In anticlockwise 5 rotations. The 8255 port A address is 0740 h. The stepper motor has 200 rotor teeth. The port A bit PA 0 drives winding Wa, PA 1 drives winding Wb and so on. The stepper motor has an internal delay of 10 msec. Assume that the routine for this delay is already available.
Solution: ALP: Assume cs: Code segment Start: MOV AL, 80 H 1000 Again 1: OUT CWR, AL MOV AL, 88 H; Bit pattern MOV CX, 1000 OUT Port A, AL CALL DELAY ROL AL, 01 DEC CX JNZ Again 1 MOV AL, 88 H MOV CX, 1000
Again 2: OUT Port A, AL CALL DELAY ROR AL, 01 DEC CX JNZ Again 2 MOV AH, 4 CH INT 21 H Code ends End start