Unit 16 Engineering Drawing 1 Engineering Drawing Aims
- Slides: 16

Unit 16 Engineering Drawing 1

Engineering Drawing Aims: 1. Introduce Oblique Projection. 2. Identify dimensioning techniques Objectives: 1. Identify the cavalier and cabinet oblique drawing projection. 2. Recognise the BS standard dimensioning. 2

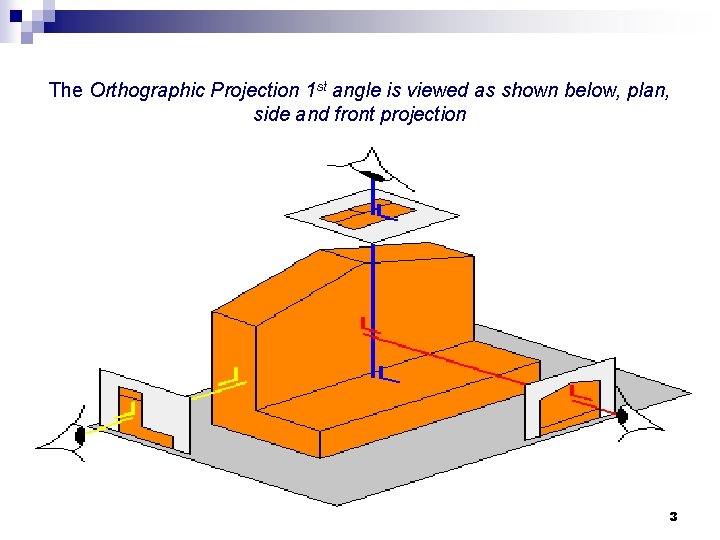
The Orthographic Projection 1 st angle is viewed as shown below, plan, side and front projection 3

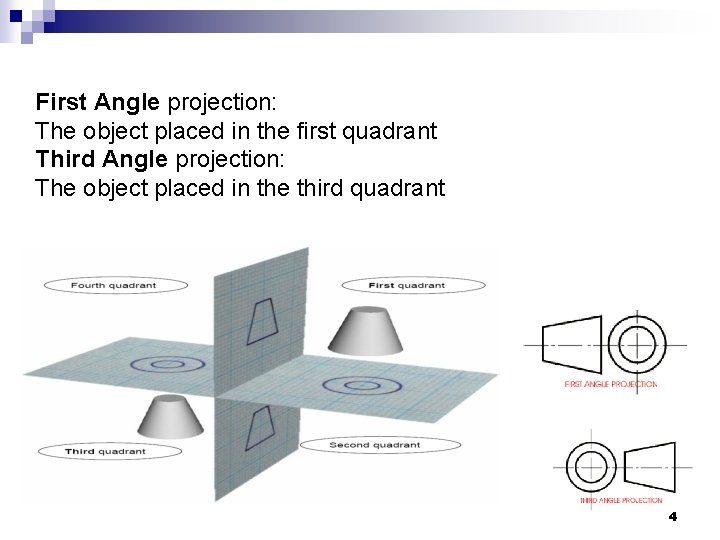
First Angle projection: The object placed in the first quadrant Third Angle projection: The object placed in the third quadrant 4

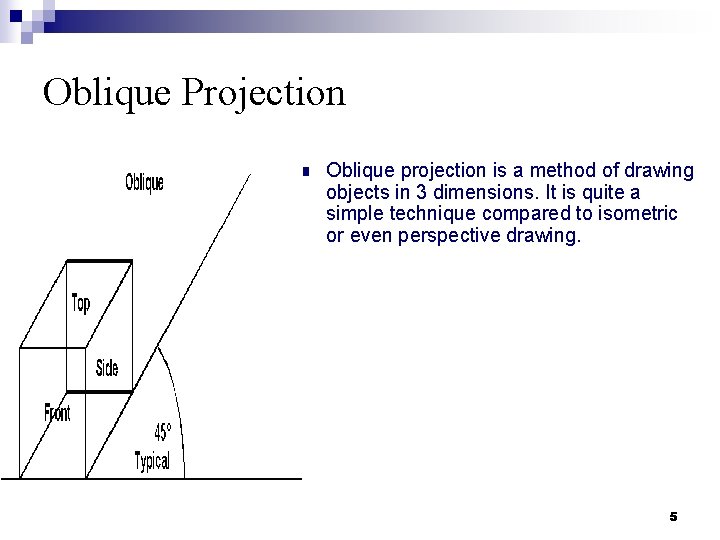
Oblique Projection n Oblique projection is a method of drawing objects in 3 dimensions. It is quite a simple technique compared to isometric or even perspective drawing. 5

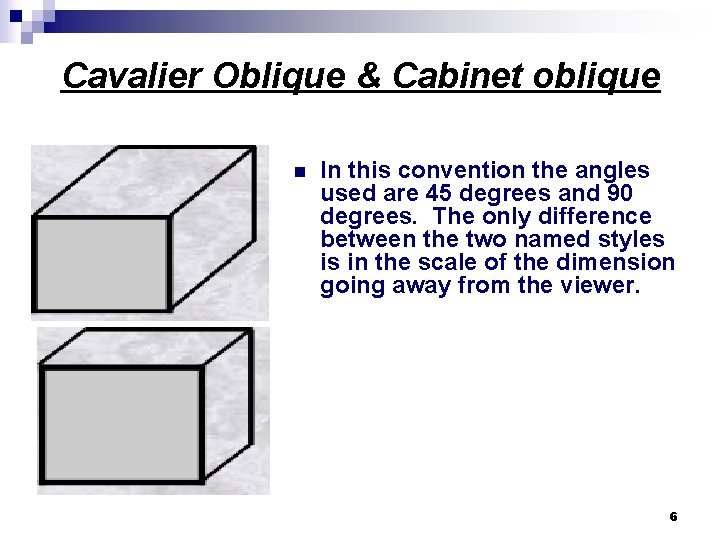
Cavalier Oblique & Cabinet oblique n In this convention the angles used are 45 degrees and 90 degrees. The only difference between the two named styles is in the scale of the dimension going away from the viewer. 6

Dimensioning n n The purpose of dimensioning is to provide a clear and complete description of an object. Accuracy: correct values must be given. Clearness: dimensions must be placed in appropriate positions. Completeness: nothing must be left out, and nothing duplicated. 7

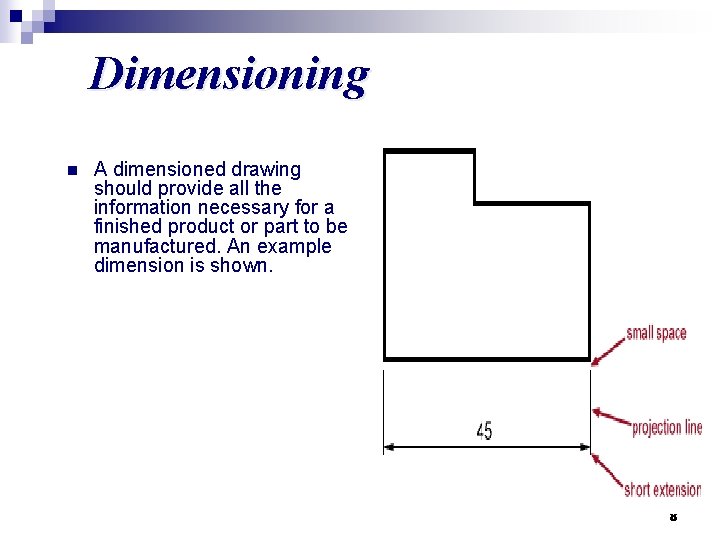
Dimensioning n A dimensioned drawing should provide all the information necessary for a finished product or part to be manufactured. An example dimension is shown. 8

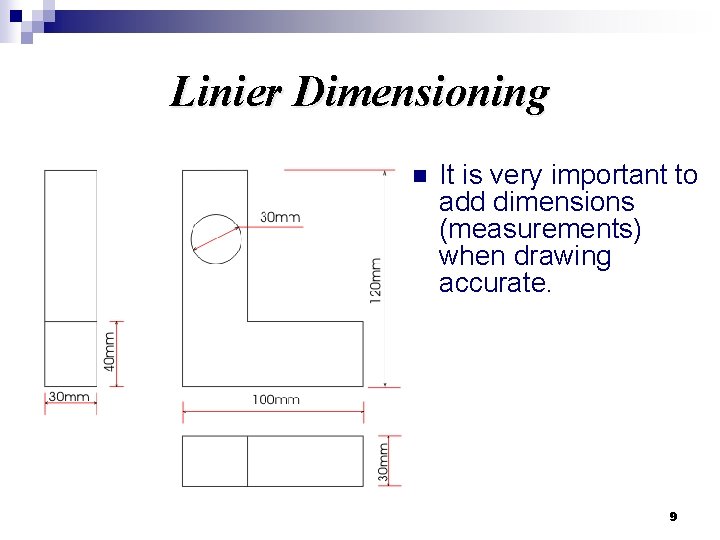
Linier Dimensioning n It is very important to add dimensions (measurements) when drawing accurate. 9

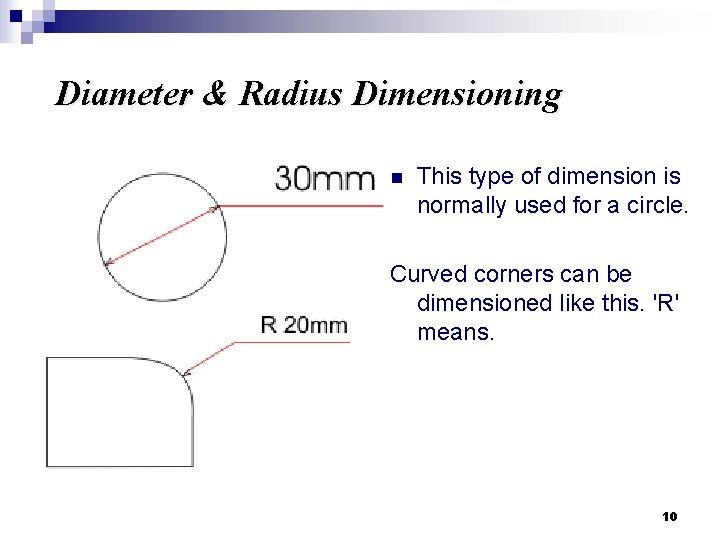
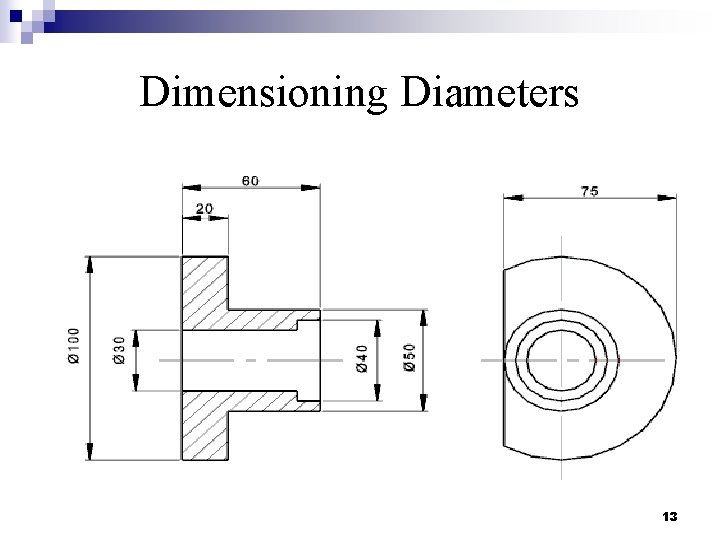
Diameter & Radius Dimensioning n This type of dimension is normally used for a circle. Curved corners can be dimensioned like this. 'R' means. 10

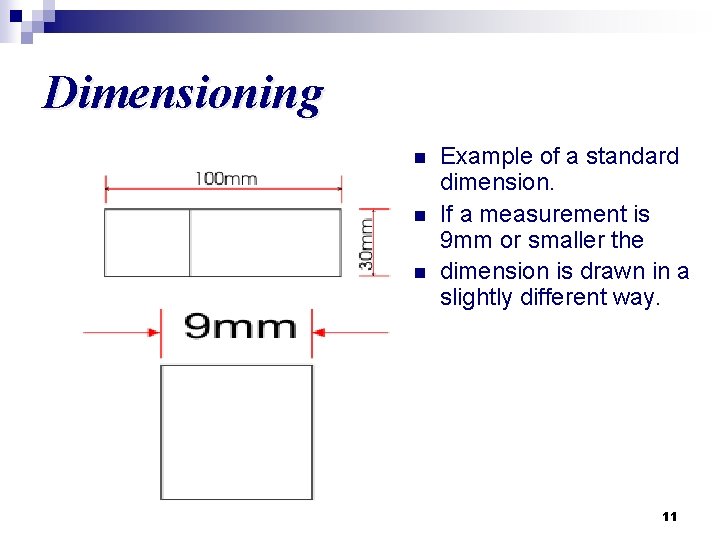
Dimensioning n n n Example of a standard dimension. If a measurement is 9 mm or smaller the dimension is drawn in a slightly different way. 11

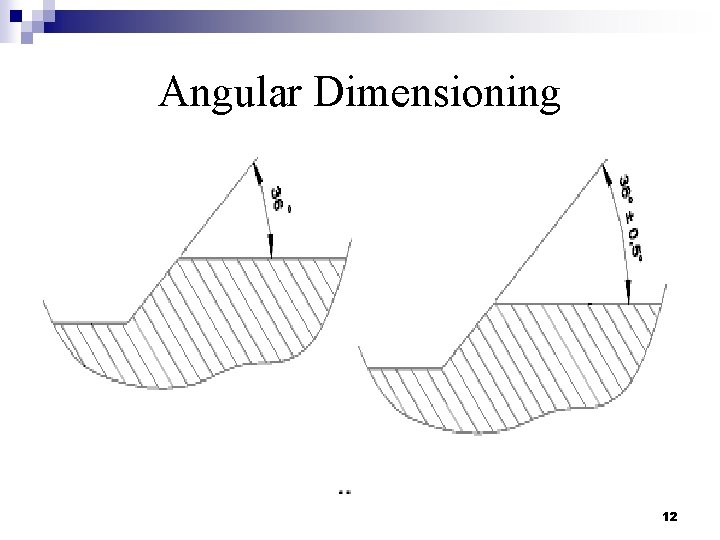
Angular Dimensioning 12

Dimensioning Diameters 13

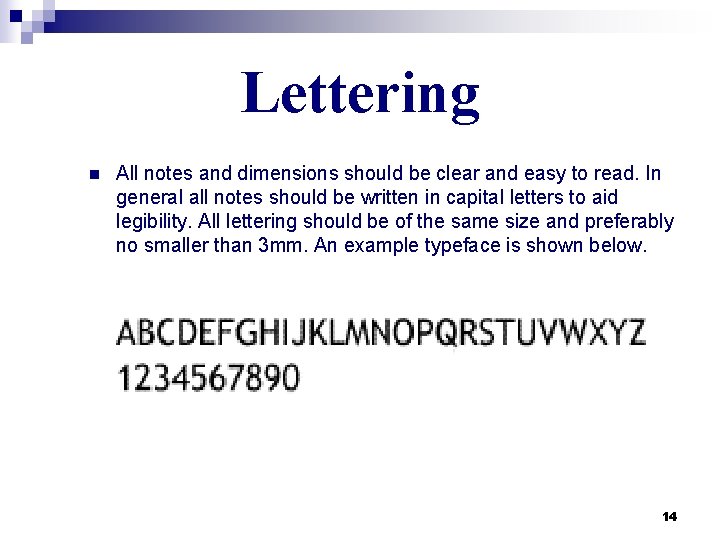
Lettering n All notes and dimensions should be clear and easy to read. In general all notes should be written in capital letters to aid legibility. All lettering should be of the same size and preferably no smaller than 3 mm. An example typeface is shown below. 14

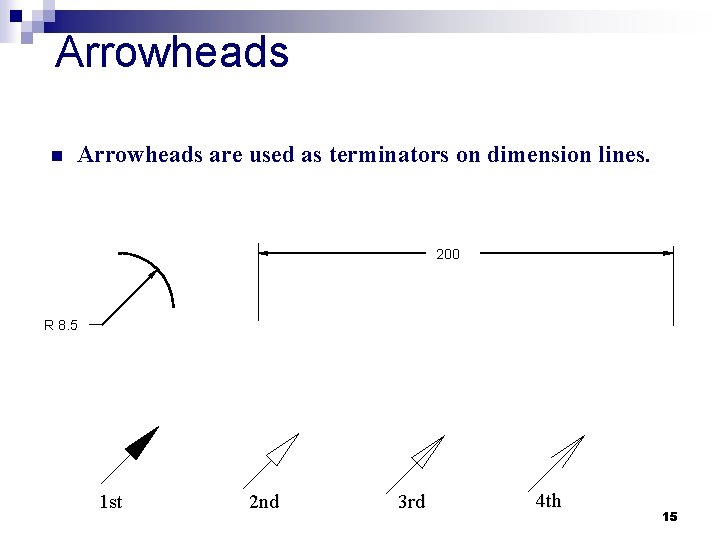
Arrowheads n Arrowheads are used as terminators on dimension lines. 200 R 8. 5 1 st 2 nd 3 rd 4 th 15

16