Unit 16 Engineering Drawing 1 Engineering Drawing Aims

- Slides: 13

Unit 16 Engineering Drawing 1

Engineering Drawing Aims: 1. Introduce cross hatching Objectives: 1. Apply hatching techniques where appropriate 2

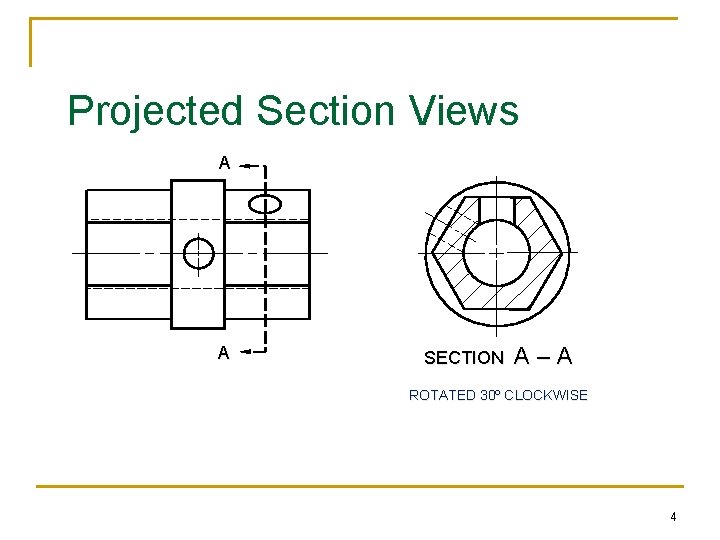
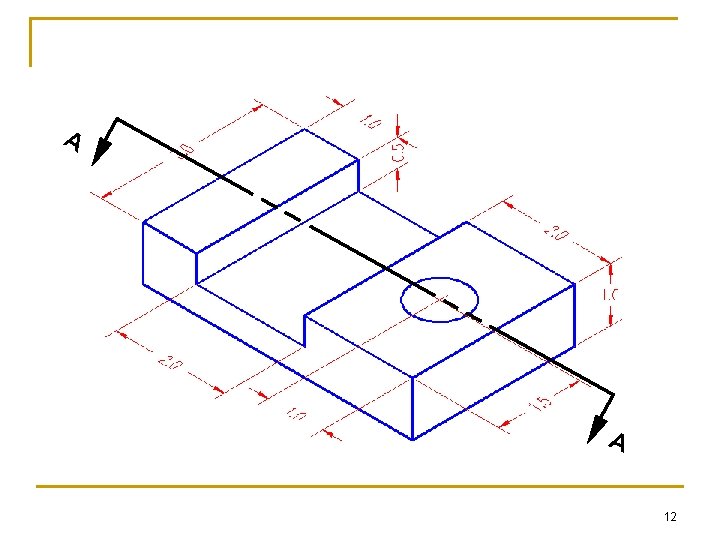
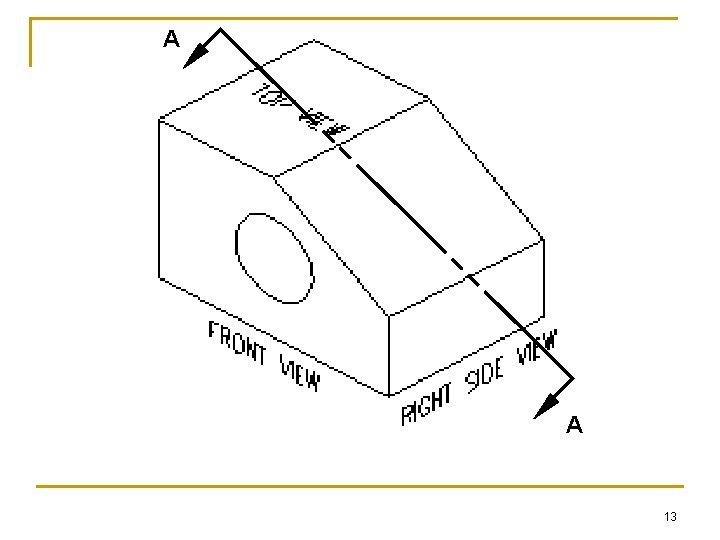
Section Views A A n n SECTION Section views are used to clarify internal detail and to avoid dimensioning to hidden lines. Cutting planes are constructed as an integral feature of the parent view, and cutting plane arrowheads always indicate the direction for the observer’s line of sight. A-A 3

Projected Section Views A A SECTION A–A ROTATED 30º CLOCKWISE 4

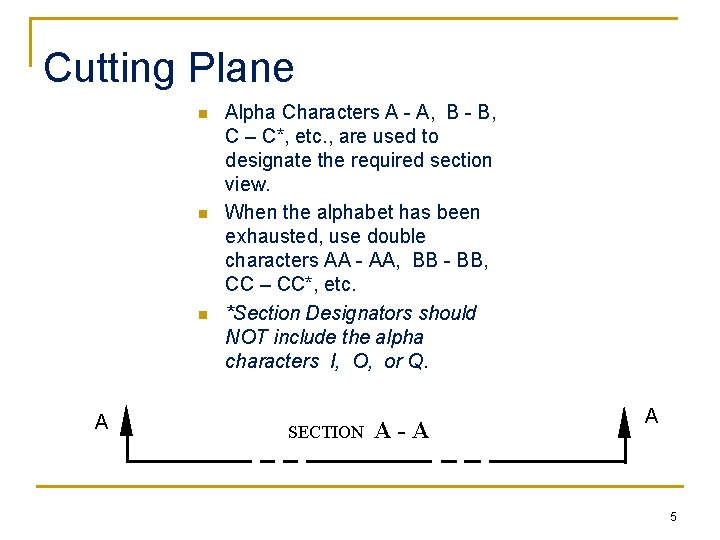
Cutting Plane n n n A Alpha Characters A - A, B - B, C – C*, etc. , are used to designate the required section view. When the alphabet has been exhausted, use double characters AA - AA, BB - BB, CC – CC*, etc. *Section Designators should NOT include the alpha characters I, O, or Q. SECTION A-A A 5

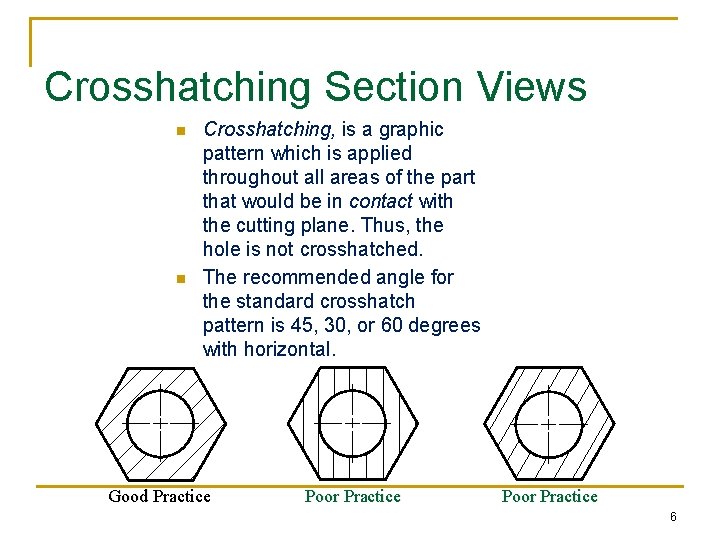
Crosshatching Section Views n n Crosshatching, is a graphic pattern which is applied throughout all areas of the part that would be in contact with the cutting plane. Thus, the hole is not crosshatched. The recommended angle for the standard crosshatch pattern is 45, 30, or 60 degrees with horizontal. Good Practice Poor Practice 6

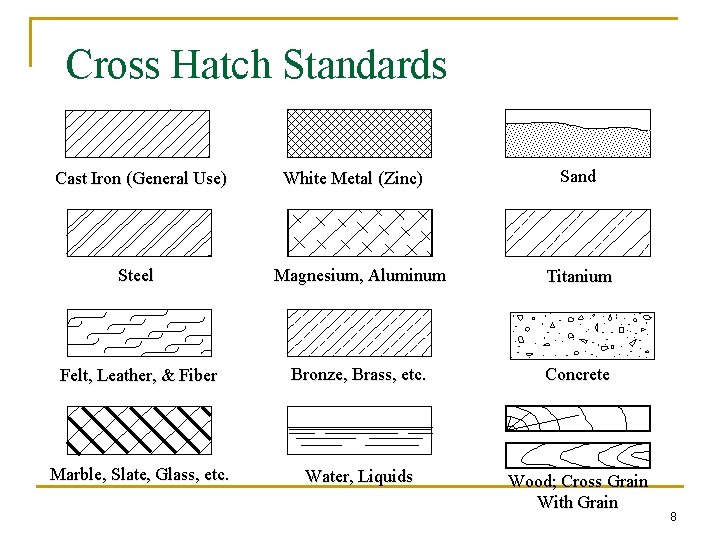
Cross Hatch Standards • The general purpose cross hatch is used in most individual detail component drawings and in assembly applications where no confusion will result. • Each of the assembled components are depicted with a different crosshatch angle to assist in part differentiation. • Specific crosshatch symbols are sometimes used to represent each different material type. 7

Cross Hatch Standards Cast Iron (General Use) White Metal (Zinc) Sand Steel Magnesium, Aluminum Titanium Felt, Leather, & Fiber Bronze, Brass, etc. Concrete Marble, Slate, Glass, etc. Water, Liquids Wood; Cross Grain With Grain 8

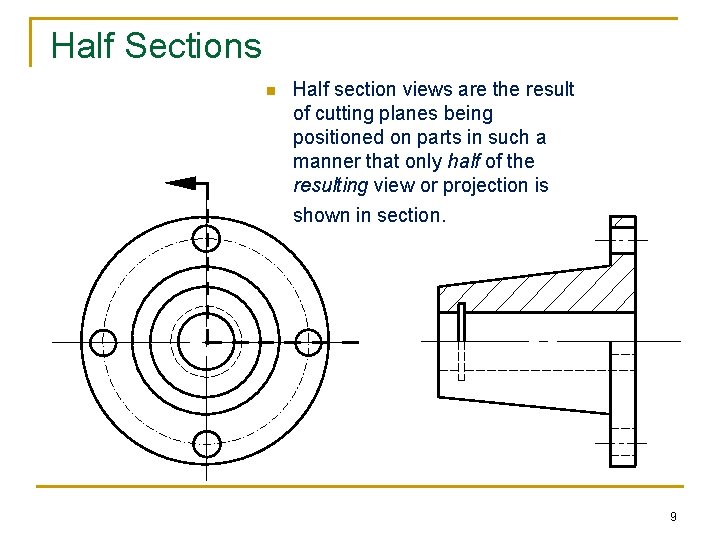
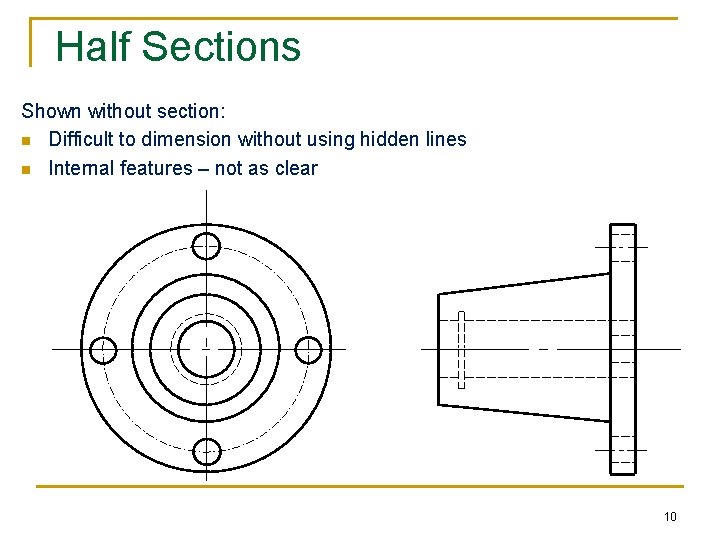
Half Sections n Half section views are the result of cutting planes being positioned on parts in such a manner that only half of the resulting view or projection is shown in section. 9

Half Sections Shown without section: n Difficult to dimension without using hidden lines n Internal features – not as clear 10

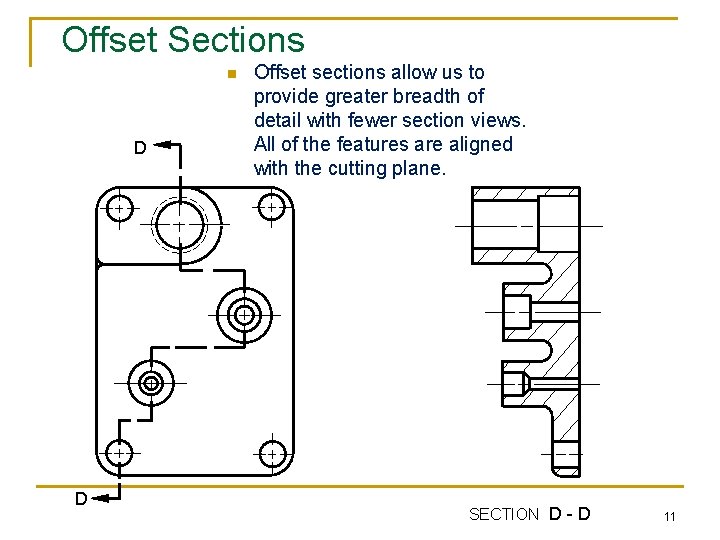
Offset Sections n D D Offset sections allow us to provide greater breadth of detail with fewer section views. All of the features are aligned with the cutting plane. SECTION D - D 11

A A 12

A A 13