UNIT 10 PRINT READING LESSON 3 DIMENSIONS TOLERANCES


- Slides: 47

UNIT 10: PRINT READING

LESSON 3: DIMENSIONS, TOLERANCES AND CLASSES OF FITS 2

COURSE INFORMATION Unit 10: Print Reading • Lesson 1: Fundamentals of Print Reading • Lesson 2: Views and Drawing Symbols • Lesson 3: Dimensions, Tolerances and Classes of Fits Course Description: Dimensioning and Tolerancing ensure a part is made accurately. Applying them correctly is a fundamental step in the production of parts in any industry. In this lesson, students will learn why Dimensioning and Tolerancing is important and then they will learn to interpret and calculate dimensions and tolerances found in basic blueprints. In addition, students will learn how to interpret classes of fits. This is the last lesson in the Print Reading unit and there is a Unit Project and Unit Tests for the instructor to use.

LESSON OBJECTIVES At the completion of this lesson, you will be able to • Identify types of dimensioning: linear, progressive, typical, equally spaced, angles, arcs, cylinders, holes, size, location, baseline and tabular. • Explain the purpose of tolerances. • Calculate decimal and fraction tolerances. • Identify classes of fits.

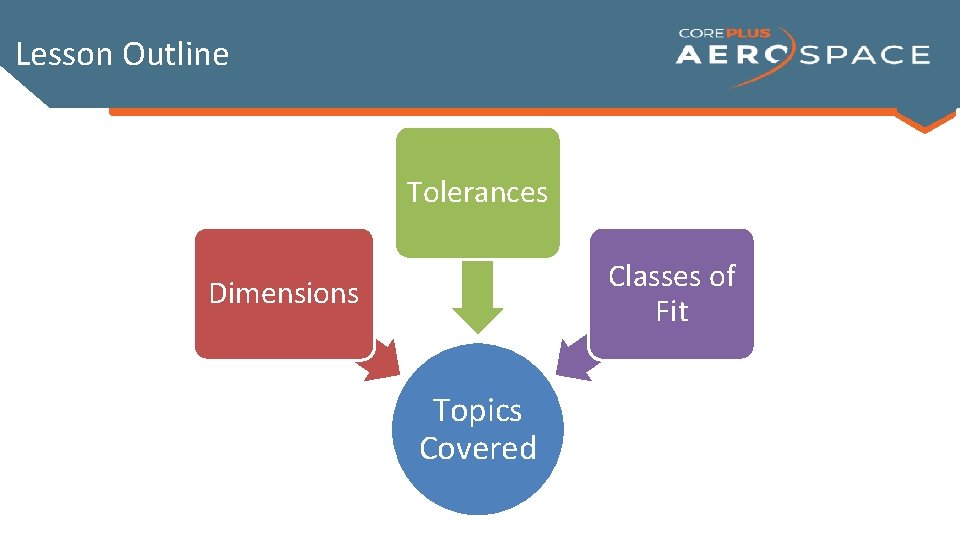
Lesson Outline Tolerances Classes of Fit Dimensions Topics Covered

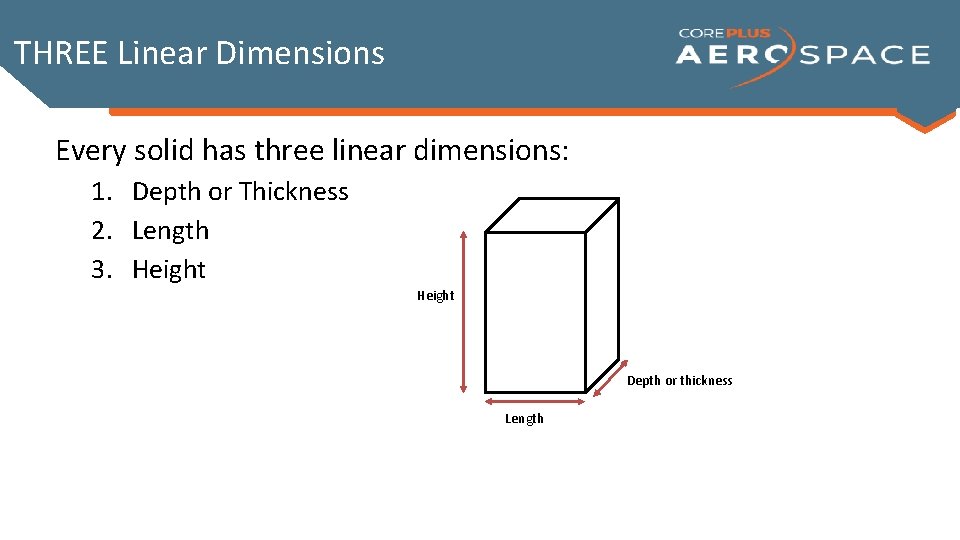
THREE Linear Dimensions Every solid has three linear dimensions: 1. Depth or Thickness 2. Length 3. Height Depth or thickness Length

LINEAR DIMENSIONS • Dimensions are the labels holding the measurement information. • Dimensions tell us the sizes of items for manufacture and how the items relate to each other for assembly and installation.

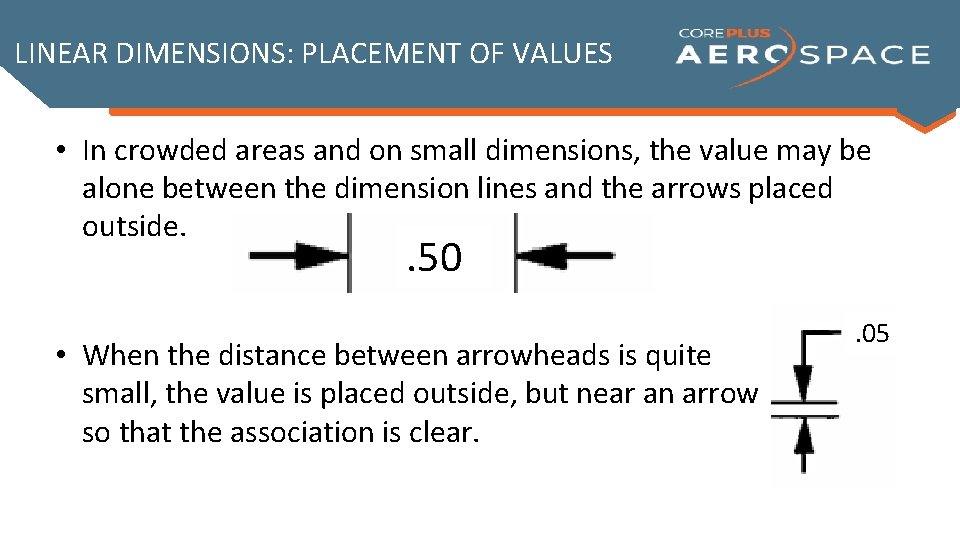
LINEAR DIMENSIONS: PLACEMENT OF VALUES • In crowded areas and on small dimensions, the value may be alone between the dimension lines and the arrows placed outside. . 50 • When the distance between arrowheads is quite small, the value is placed outside, but near an arrow so that the association is clear. . 05

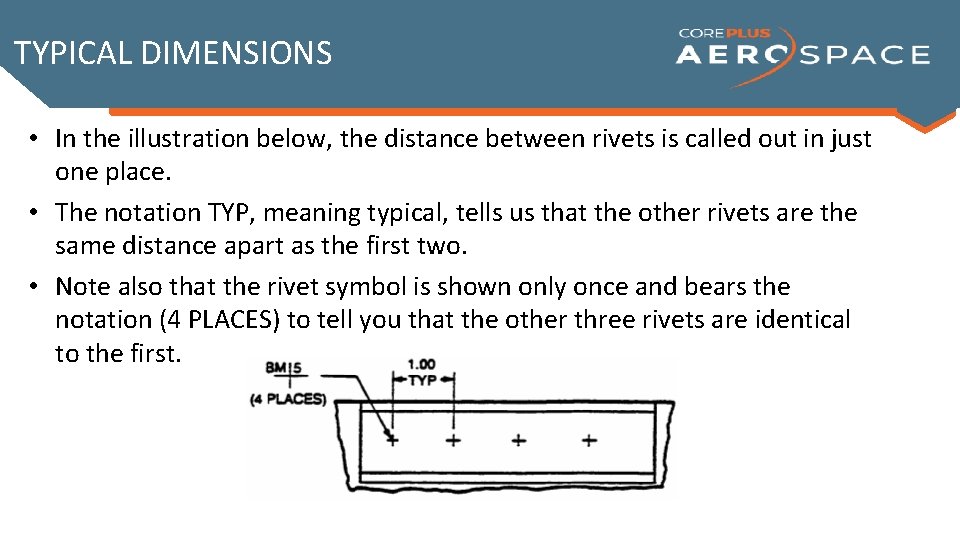
TYPICAL DIMENSIONS When several location dimensions are identical, as in a rivet pattern, you may find that the dimension is written in only one place along with a note that the other locations are identical.

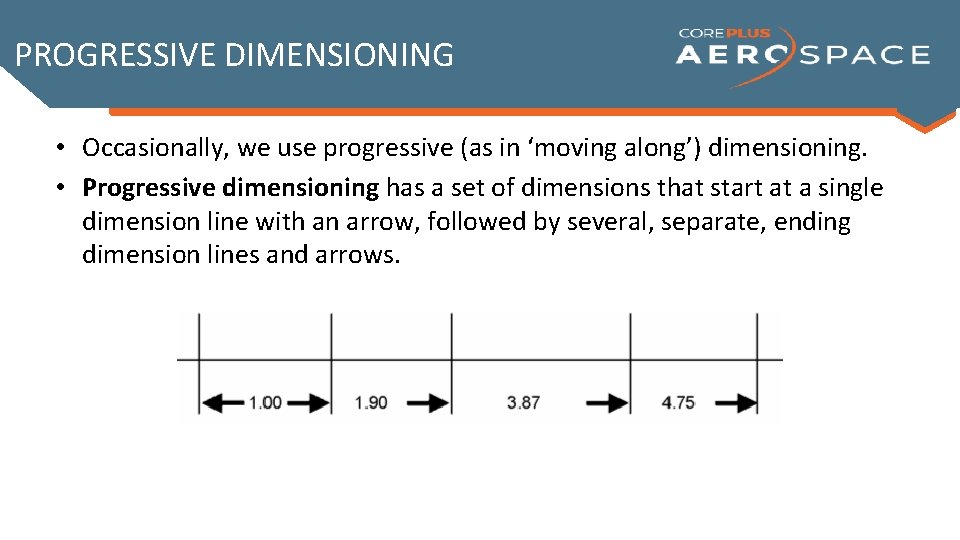
PROGRESSIVE DIMENSIONING • Occasionally, we use progressive (as in ‘moving along’) dimensioning. • Progressive dimensioning has a set of dimensions that start at a single dimension line with an arrow, followed by several, separate, ending dimension lines and arrows.

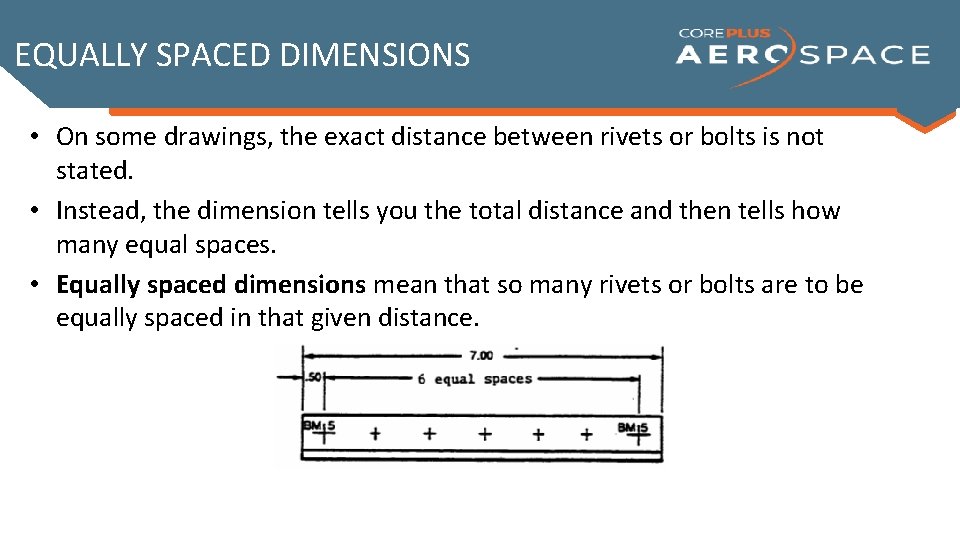
EQUALLY SPACED DIMENSIONS • On some drawings, the exact distance between rivets or bolts is not stated. • Instead, the dimension tells you the total distance and then tells how many equal spaces. • Equally spaced dimensions mean that so many rivets or bolts are to be equally spaced in that given distance.

TYPICAL DIMENSIONS • In the illustration below, the distance between rivets is called out in just one place. • The notation TYP, meaning typical, tells us that the other rivets are the same distance apart as the first two. • Note also that the rivet symbol is shown only once and bears the notation (4 PLACES) to tell you that the other three rivets are identical to the first.

DECIMALS AND DIMENSIONS • If you look back through the examples on the previous pages, you will see that the values given with the dimension lines and arrows are all in one format: decimal. • Decimal means the number is written with a decimal point. • A whole inch is written as 1. 00. One-half of an inch is written as: 0. 5

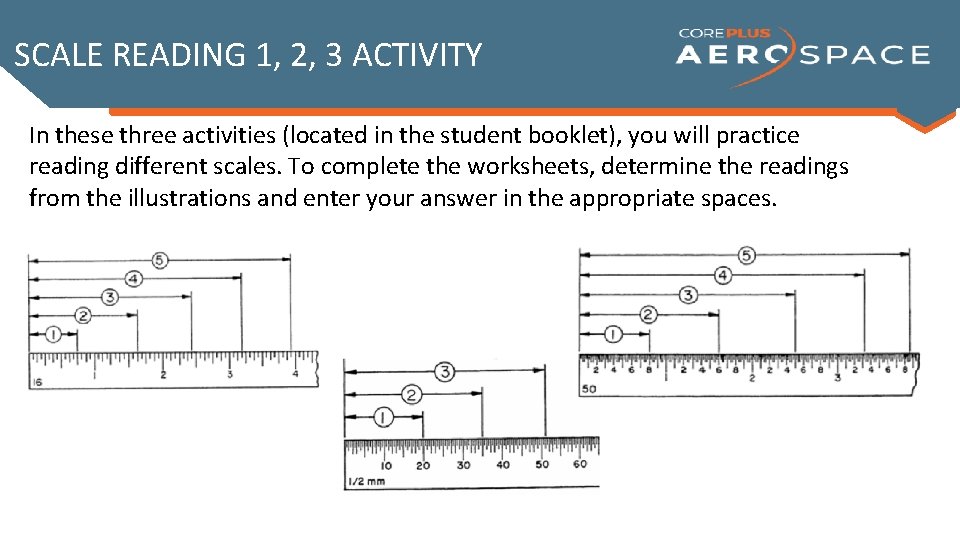
SCALE READING 1, 2, 3 ACTIVITY In these three activities (located in the student booklet), you will practice reading different scales. To complete the worksheets, determine the readings from the illustrations and enter your answer in the appropriate spaces.

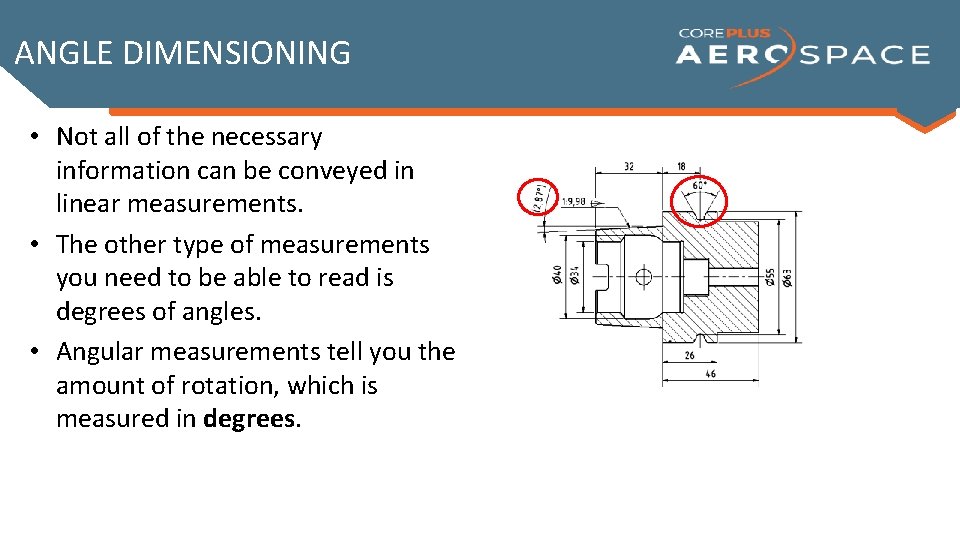
ANGLE DIMENSIONING • Not all of the necessary information can be conveyed in linear measurements. • The other type of measurements you need to be able to read is degrees of angles. • Angular measurements tell you the amount of rotation, which is measured in degrees.

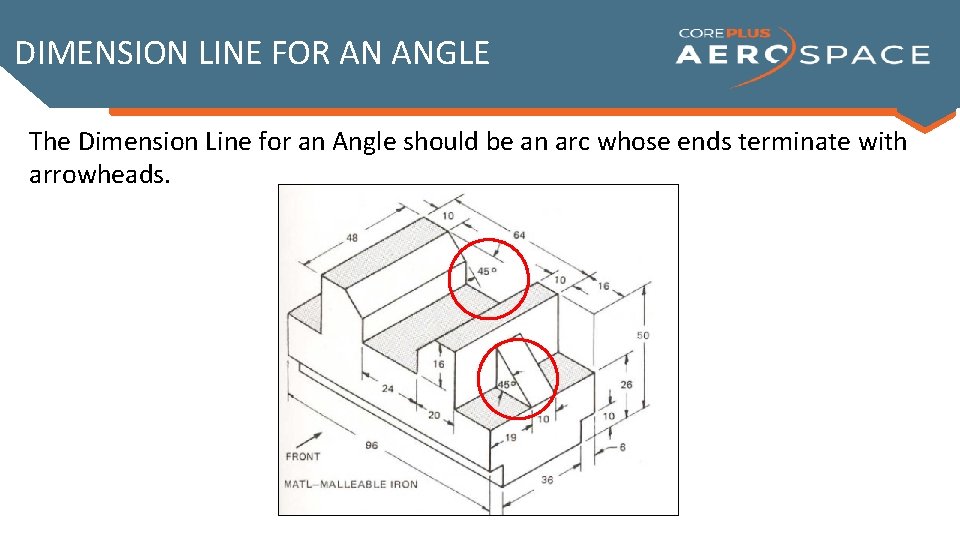
DIMENSION LINE FOR AN ANGLE The Dimension Line for an Angle should be an arc whose ends terminate with arrowheads.

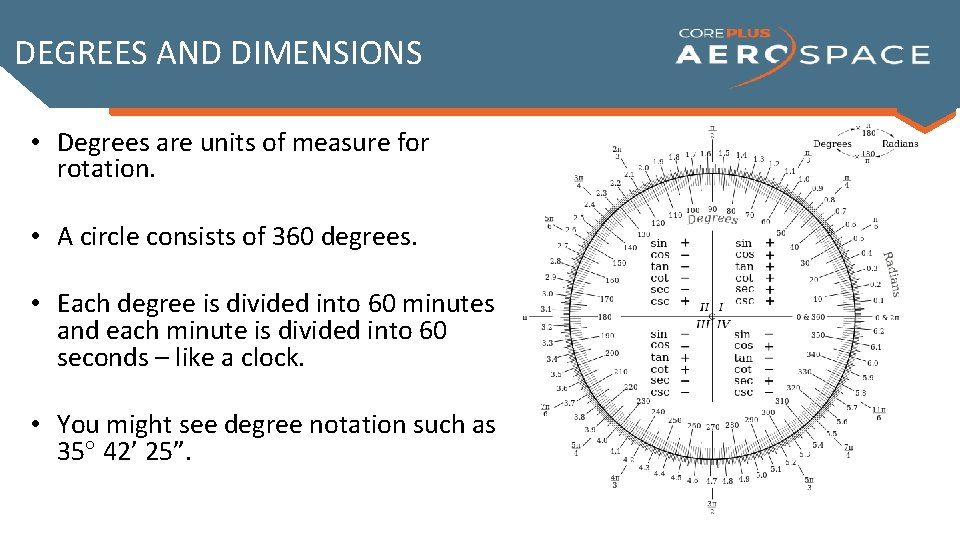
DEGREES AND DIMENSIONS • Degrees are units of measure for rotation. • A circle consists of 360 degrees. • Each degree is divided into 60 minutes and each minute is divided into 60 seconds – like a clock. • You might see degree notation such as 35 42’ 25”.

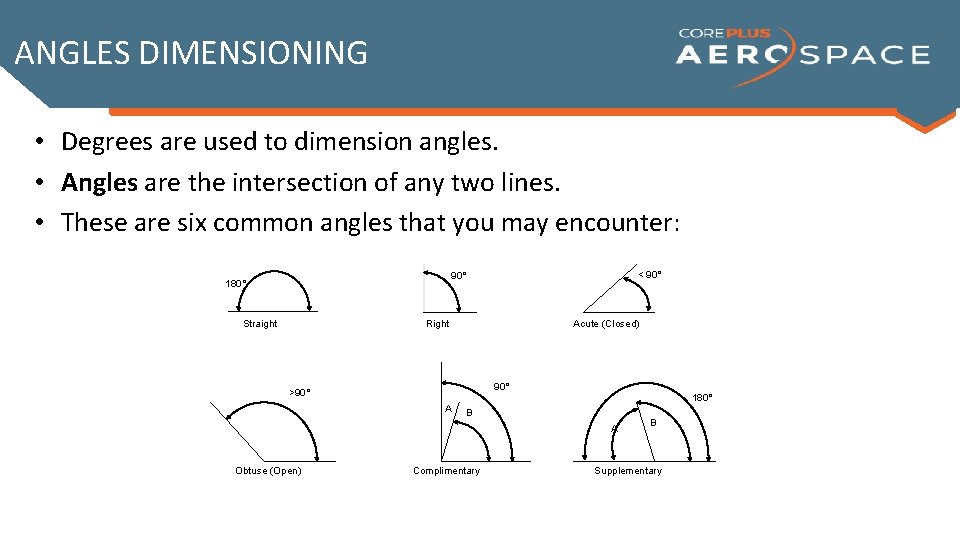
ANGLES DIMENSIONING • Degrees are used to dimension angles. • Angles are the intersection of any two lines. • These are six common angles that you may encounter: < 90° 180° Right Straight Acute (Closed) 90° >90° A 180° B A Obtuse (Open) Complimentary B Supplementary

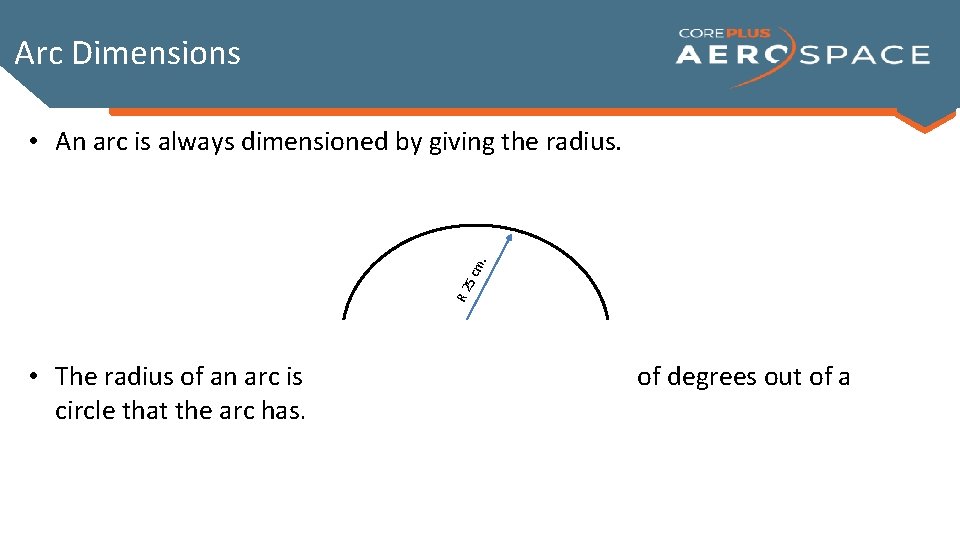
Arc Dimensions R 2 5 c m. • An arc is always dimensioned by giving the radius. • The radius of an arc is expressed using the number of degrees out of a circle that the arc has.

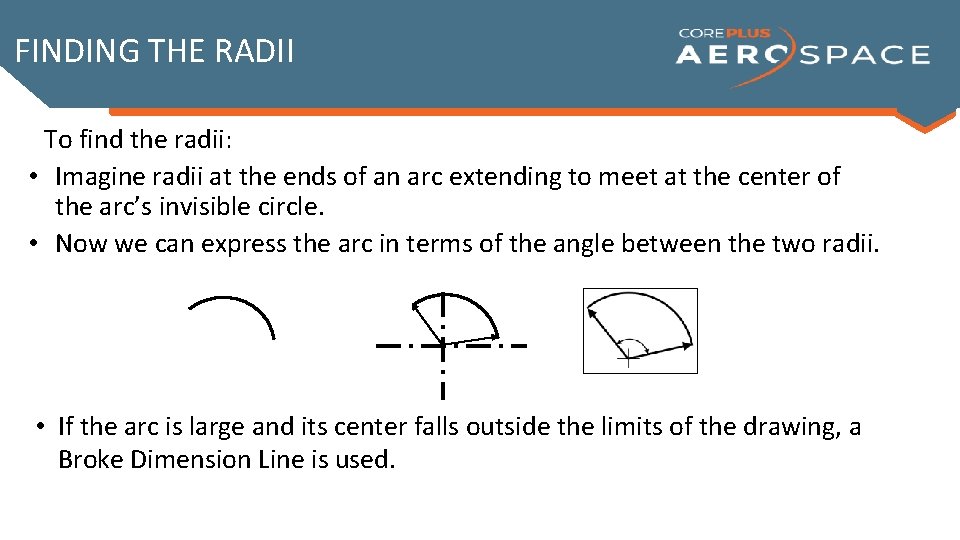
FINDING THE RADII To find the radii: • Imagine radii at the ends of an arc extending to meet at the center of the arc’s invisible circle. • Now we can express the arc in terms of the angle between the two radii. • If the arc is large and its center falls outside the limits of the drawing, a Broke Dimension Line is used.

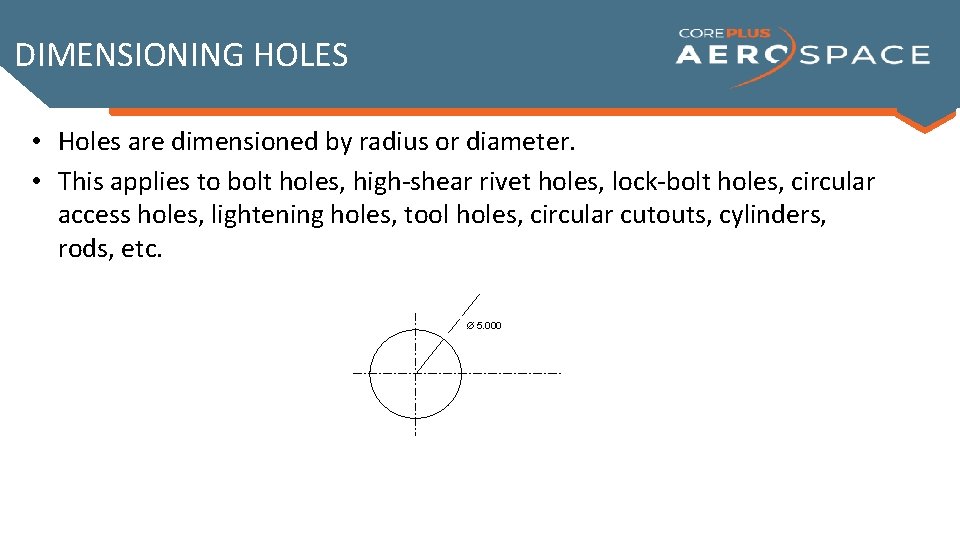
DIMENSIONING HOLES • Holes are dimensioned by radius or diameter. • This applies to bolt holes, high-shear rivet holes, lock-bolt holes, circular access holes, lightening holes, tool holes, circular cutouts, cylinders, rods, etc. 5. 000

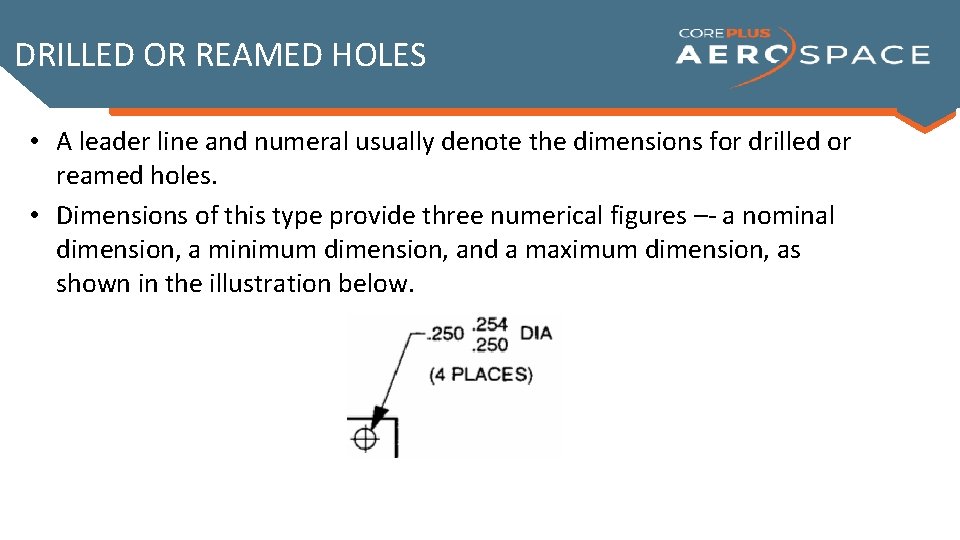
DRILLED OR REAMED HOLES • A leader line and numeral usually denote the dimensions for drilled or reamed holes. • Dimensions of this type provide three numerical figures –- a nominal dimension, a minimum dimension, and a maximum dimension, as shown in the illustration below.

Size Dimensions for Holes Hole Dimension Call-outs are commonly in this order: 1. Information on the diameter of the hole being machined 2. Type of machining operation performed 3. Number of holes to be produced

Dimensioning Equally Spaced Holes on a Circle CALL-OUT: 1. Diameter of the holes 2. The number of holes 3. The notation “Equally Spaced”

Dimensioning Counter Bored Holes are dimensioned in this order: 1. Diameter of the drill 2. The diameter of the counter bore 3. The depth of the counter bore 4. The number holes

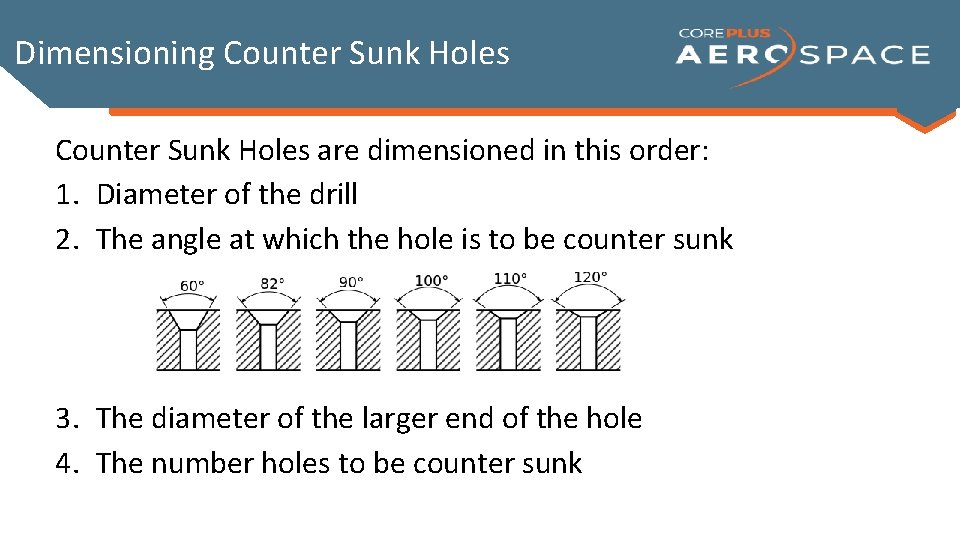
Dimensioning Counter Sunk Holes are dimensioned in this order: 1. Diameter of the drill 2. The angle at which the hole is to be counter sunk 3. The diameter of the larger end of the hole 4. The number holes to be counter sunk

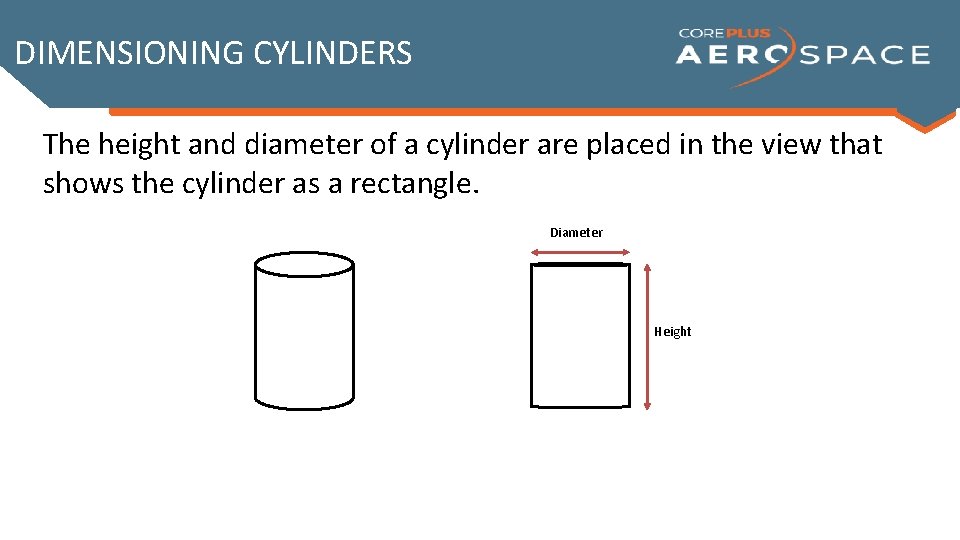
DIMENSIONING CYLINDERS The height and diameter of a cylinder are placed in the view that shows the cylinder as a rectangle. Diameter Height

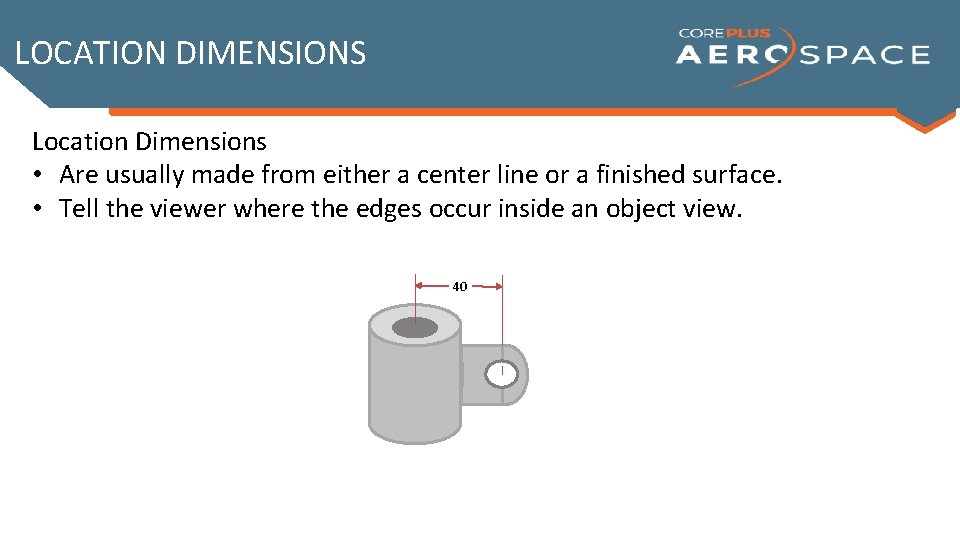
LOCATION DIMENSIONS Location Dimensions • Are usually made from either a center line or a finished surface. • Tell the viewer where the edges occur inside an object view. 40

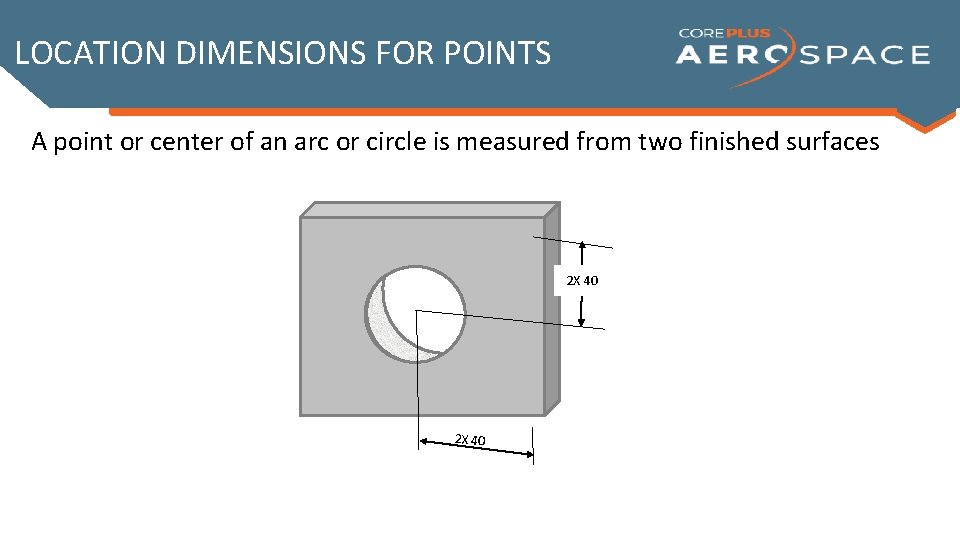
LOCATION DIMENSIONS FOR POINTS A point or center of an arc or circle is measured from two finished surfaces 2 X 40

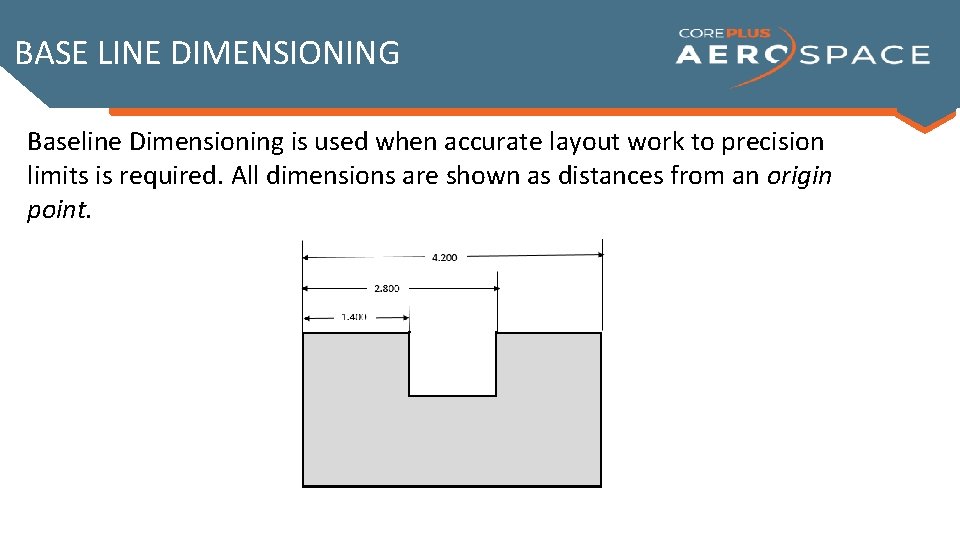
BASE LINE DIMENSIONING Baseline Dimensioning is used when accurate layout work to precision limits is required. All dimensions are shown as distances from an origin point.

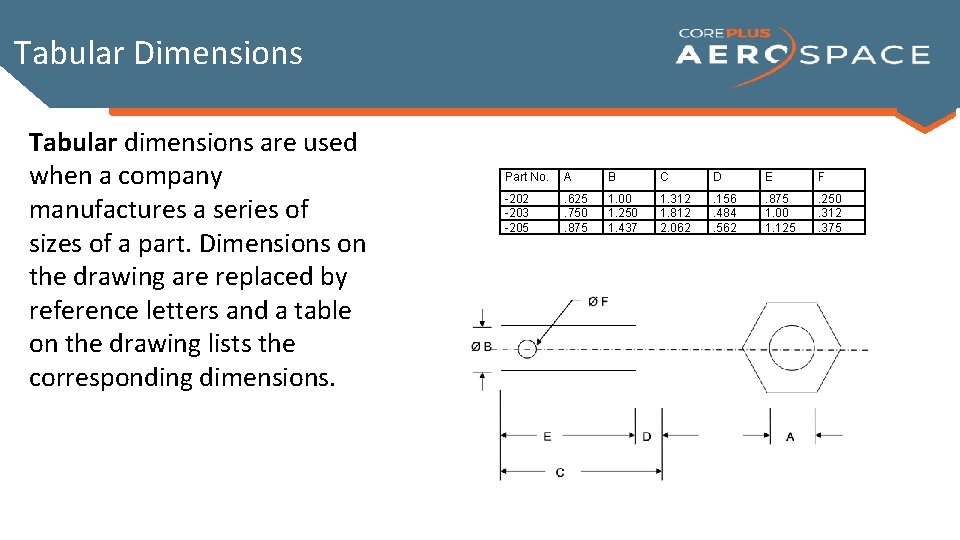
Tabular Dimensions Tabular dimensions are used when a company manufactures a series of sizes of a part. Dimensions on the drawing are replaced by reference letters and a table on the drawing lists the corresponding dimensions. Part No. A B C D E F -202 -203 -205 . 625. 750. 875 1. 00 1. 250 1. 437 1. 312 1. 812 2. 062 . 156. 484. 562 . 875 1. 00 1. 125 . 250. 312. 375

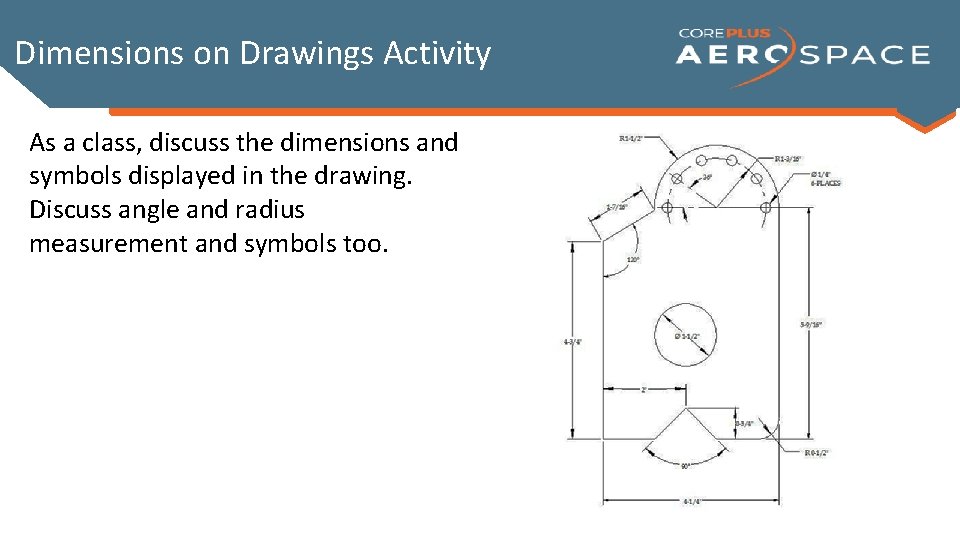
Dimensions on Drawings Activity As a class, discuss the dimensions and symbols displayed in the drawing. Discuss angle and radius measurement and symbols too.

Topics Covered Tolerances Classes of Fit Dimensions Topics Covered

TOLERANCES • Machinists and technicians cannot be expected to build every part to a precise size. • Allowances must be made for small errors, so that unimportant variations in size or shape will not cause parts to be scrapped. • These allowances are called tolerances. • The limits of acceptable variation for an item are specified by the drafter on the drawing.

Tolerances on a Drawing • Tolerances on a drawing are an indication of what the limits of accuracy are. • Parts may have a tolerance given in fractions and decimals. à In many industries, such as aviation, health (medical devices) and machining, the tolerances are often within the thousandth of an inch. THERE’S NOT A LOT OF ROOM FOR ERROR!

TOLERANCE TERMS • Nominal Size: – The dimension used to describe the general size. • Basic Size: – The theoretical size used when determining tolerance levels. • Actual Size: – After the part is machined, the actual size.

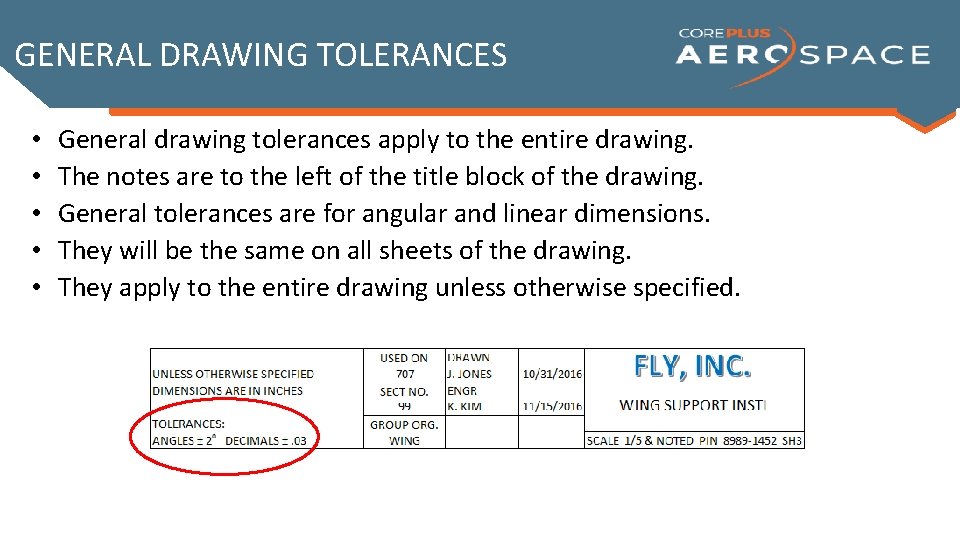
GENERAL DRAWING TOLERANCES • • • General drawing tolerances apply to the entire drawing. The notes are to the left of the title block of the drawing. General tolerances are for angular and linear dimensions. They will be the same on all sheets of the drawing. They apply to the entire drawing unless otherwise specified.

SPECIFIC TOLERANCES • Specific tolerances are given on the picture of the part in those places where general tolerances do not apply. • Some examples of specific tolerances are bolt and rivet hole sizes, where exact dimensions are required.

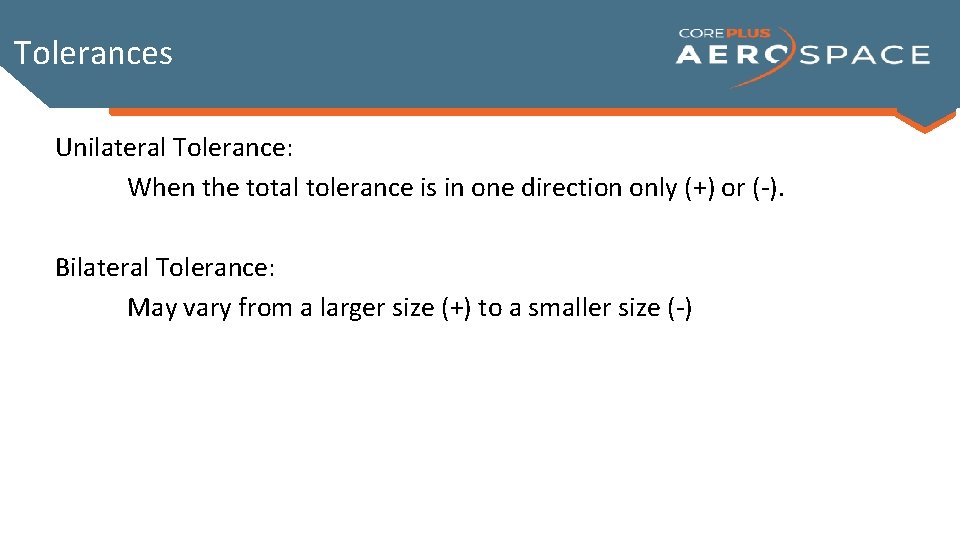
Tolerances Unilateral Tolerance: When the total tolerance is in one direction only (+) or (-). Bilateral Tolerance: May vary from a larger size (+) to a smaller size (-)

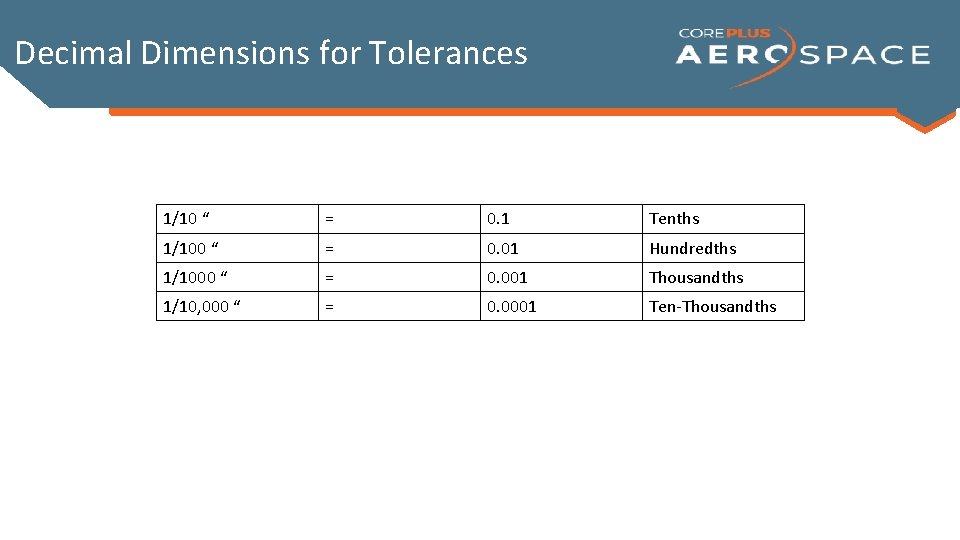
Decimal Dimensions for Tolerances 1/10 “ = 0. 1 Tenths 1/100 “ = 0. 01 Hundredths 1/1000 “ = 0. 001 Thousandths 1/10, 000 “ = 0. 0001 Ten-Thousandths

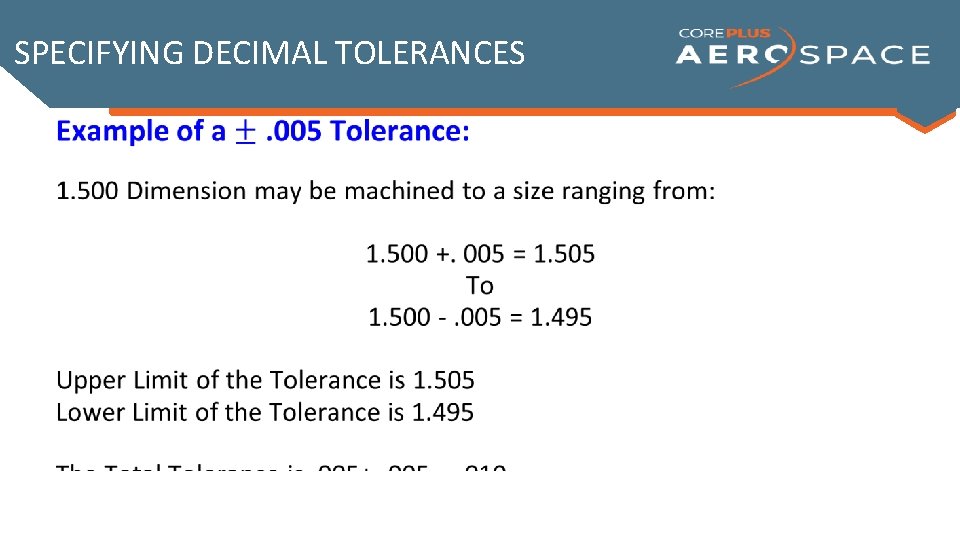
SPECIFYING DECIMAL TOLERANCES •

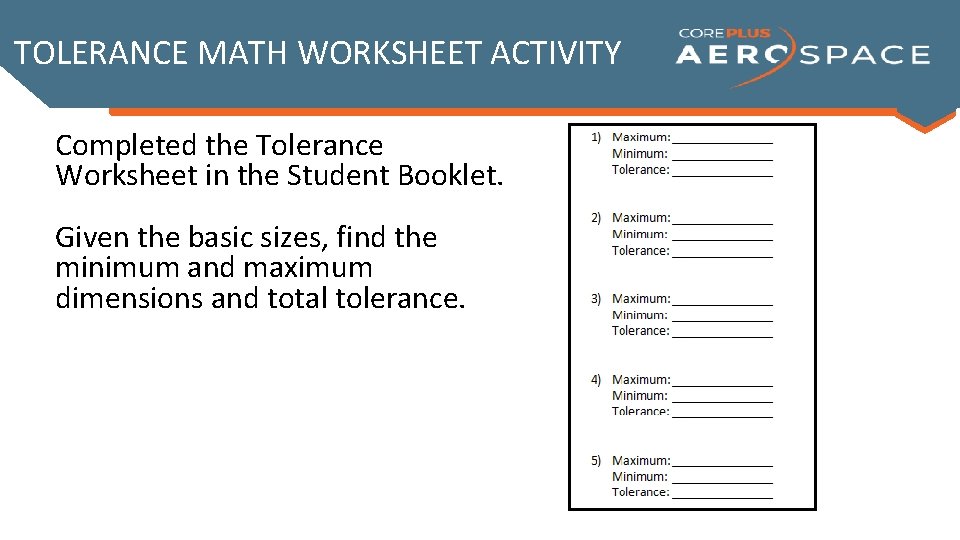
TOLERANCE MATH WORKSHEET ACTIVITY Completed the Tolerance Worksheet in the Student Booklet. Given the basic sizes, find the minimum and maximum dimensions and total tolerance.

Topics Covered Tolerances Classes of Fit Dimensions Topics Covered

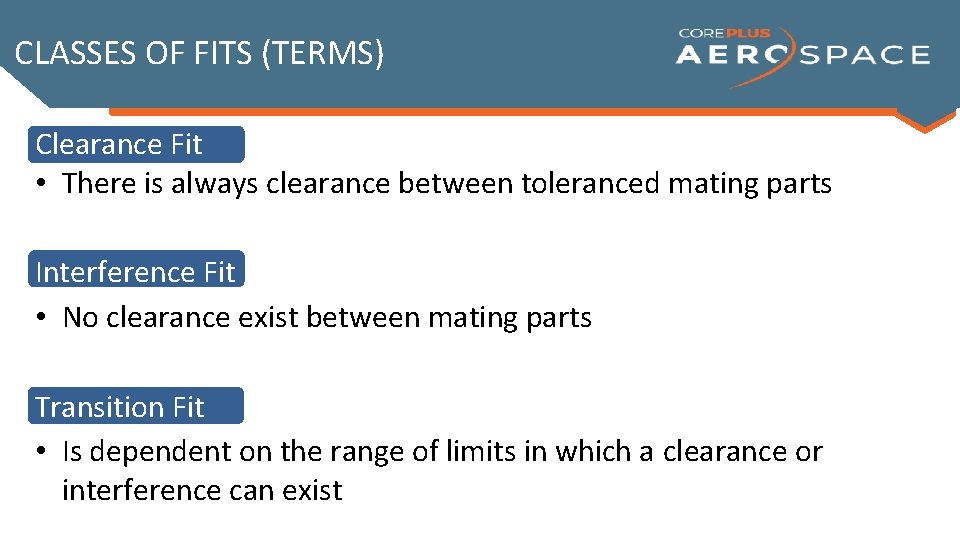
CLASSES OF FITS (TERMS) Clearance Fit • There is always clearance between toleranced mating parts Interference Fit • No clearance exist between mating parts Transition Fit • Is dependent on the range of limits in which a clearance or interference can exist

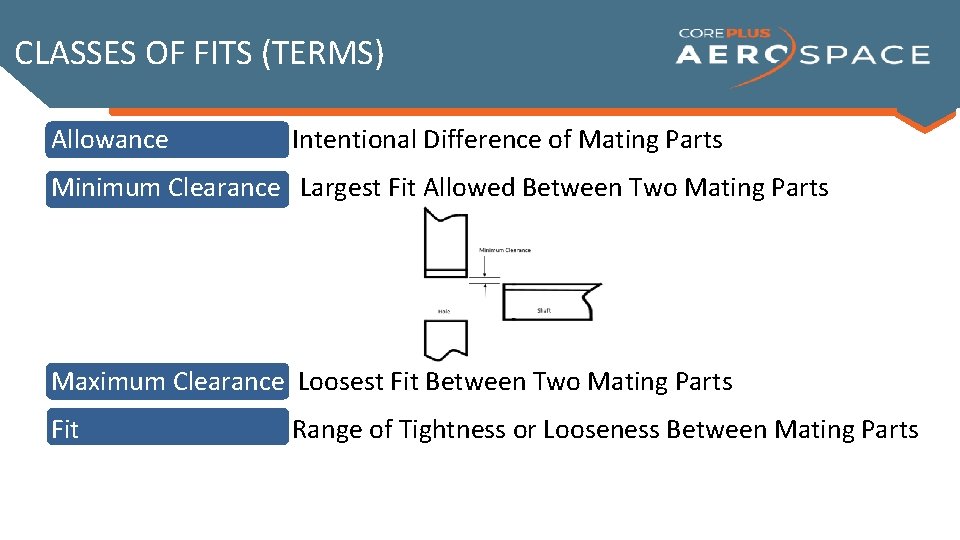
CLASSES OF FITS (TERMS) Allowance Intentional Difference of Mating Parts Minimum Clearance Largest Fit Allowed Between Two Mating Parts Maximum Clearance Loosest Fit Between Two Mating Parts Fit Range of Tightness or Looseness Between Mating Parts

LESSON OBJECTIVES Now that you have completed this lesson, you are able to • Identify types of dimensioning: linear, progressive, typical, equally spaced, angles, arcs, cylinders, holes, size, location, baseline and tabular. • Explain the purpose of tolerances. • Calculate decimal and fraction tolerances. • Identify classes of fits.

Acknowledgements Aerospace Joint Apprenticeship Committee (AJAC), American Society of Metals (ASM), The Boeing Company, National STEM Consortium (NSC), Skills, Inc. , WMATI About These Materials Copyright © 2015 by Washington Manufacturing Advanced Training Institute (WMATI) The Core. Plus: Manufacturing Skills Curriculum is a collaboration among Boeing, and WMATI. License Unless otherwise specified, this work is licensed under a Creative Commons Attribution-Share. Alike 4. 0 International License. Attribution and Citation To attribute this course please reference WMATI. To cite this course please use the following citation example: WMATI. Core. Plus Manufacturing Skills Curriculum: Precision Measurement course. [URL if applicable. ] Core. Plus, 2015. Disclaimer This workforce solution was built from open license materials from many sources. There are no guarantees, warrantees, or assurances of any kind, express or implied, with respect to such information, including any information on linked sites and including, but not limited to, accuracy of the information or its completeness, timeliness, usefulness, adequacy, continued availability, or ownership.