UNIT 10 PRINT READING 1 FUNDAMENTALS OF PRINT
- Slides: 67

UNIT 10: PRINT READING

1: FUNDAMENTALS OF PRINT READING

COURSE INFORMATION Unit 10: Print Reading • Lesson 1: Fundamentals of Print Reading • Lesson 2: Views and Drawing Symbols • Lesson 3: Dimensions, Tolerances and Classes of Fits Course Description: In this lesson, you will be introduced to print reading. This includes basic terminology, drawing categories and authorities, all about the picture sheet, including the title block, the geometric elements found in a drawing and the Alphabet of Lines. You will have activities associated with the material found in this lesson.

LESSON OBJECTIVES At the completion of this lesson, you will be able to: • Understand fundamental terminology related to prints and drawings. • Recognize drawing categories. • Apply drawing authorities. • Recognize and interpret the elements found on a picture sheet. • Locate the Title Block on a drawing and identify the name, purpose of a drawing, and other fields depicted. • Interpret geometric elements in a drawing. • Identify the Alphabet of Lines.

LESSON OUTLINE Drawing Categories Drawing Authorities Definition Print Reading Picture Sheet

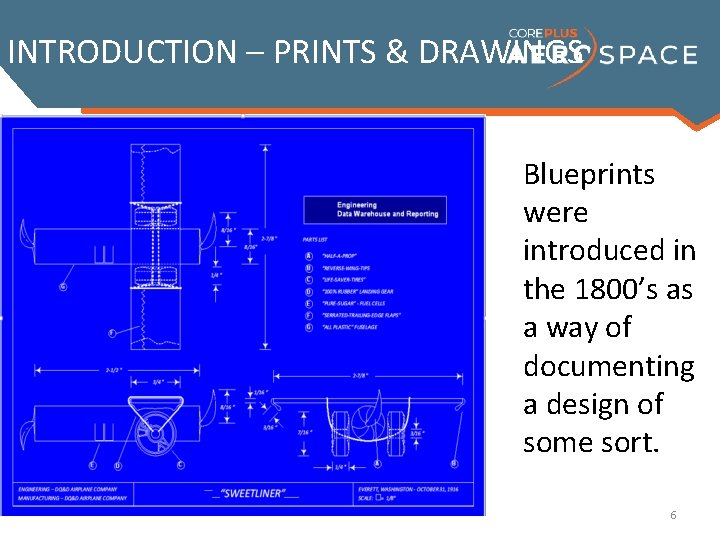
INTRODUCTION – PRINTS & DRAWINGS Blueprints were introduced in the 1800’s as a way of documenting a design of some sort. 6

HISTORY OF BLUEPRINTS ‘Blueprint’ is still a term used today even though the technology for all sorts of drawing have been largely supplanted by Computer. Aided Design (CAD). The term ‘drawing’ is frequently interchanged with blueprint or prints. In many cases a drawing is never printed. Rather it is accessed on a computer. Drawings that used to take hundreds of hours to make, now take minutes. It is not just CAD, there also related sophisticated computeraided programs which help with engineering, product analysis, assembly, simulations and maintenance information. 7

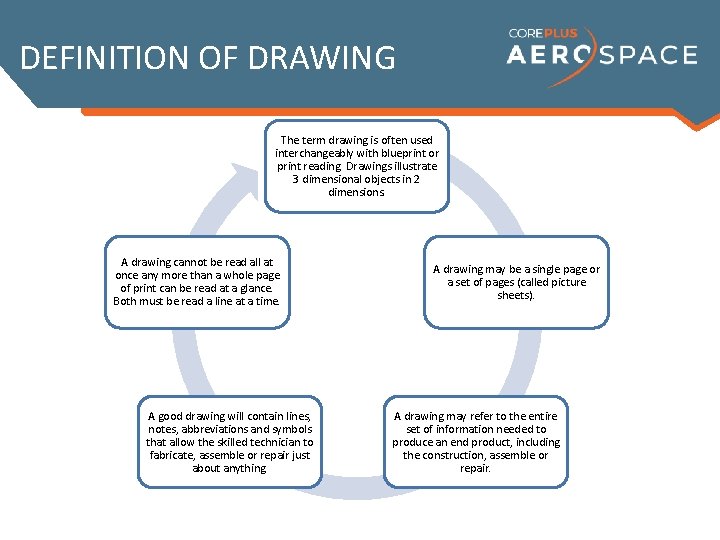
DEFINITION OF DRAWING The term drawing is often used interchangeably with blueprint or print reading. Drawings illustrate 3 dimensional objects in 2 dimensions. A drawing cannot be read all at once any more than a whole page of print can be read at a glance. Both must be read a line at a time. A good drawing will contain lines, notes, abbreviations and symbols that allow the skilled technician to fabricate, assemble or repair just about anything. A drawing may be a single page or a set of pages (called picture sheets). A drawing may refer to the entire set of information needed to produce an end product, including the construction, assemble or repair.

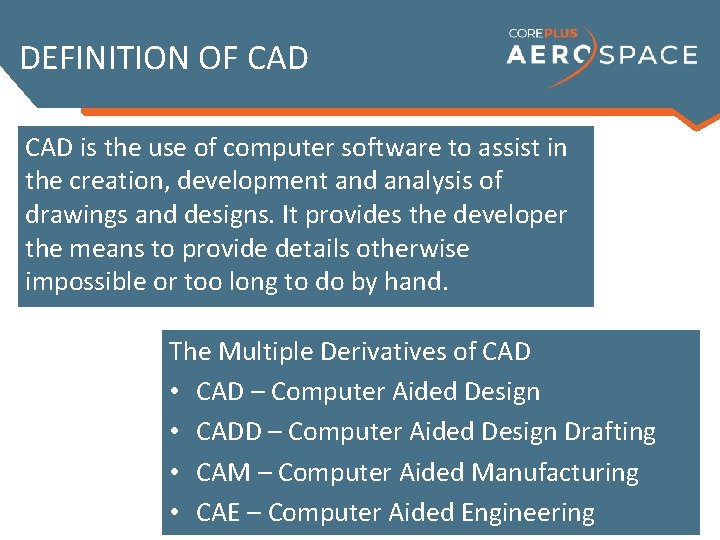
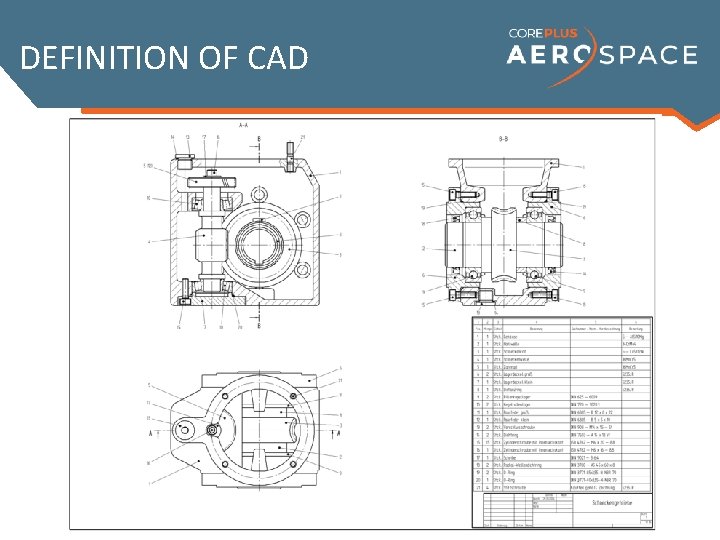
DEFINITION OF CAD is the use of computer software to assist in the creation, development and analysis of drawings and designs. It provides the developer the means to provide details otherwise impossible or too long to do by hand. The Multiple Derivatives of CAD • CAD – Computer Aided Design • CADD – Computer Aided Design Drafting • CAM – Computer Aided Manufacturing • CAE – Computer Aided Engineering

DEFINITION OF CAD

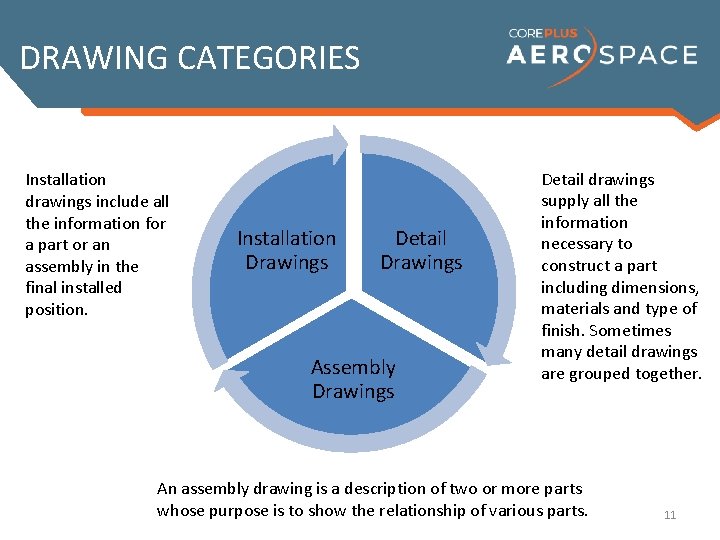
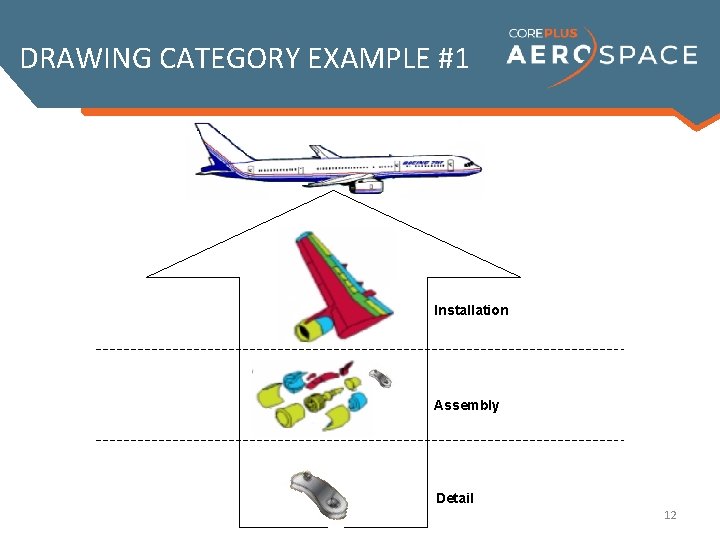
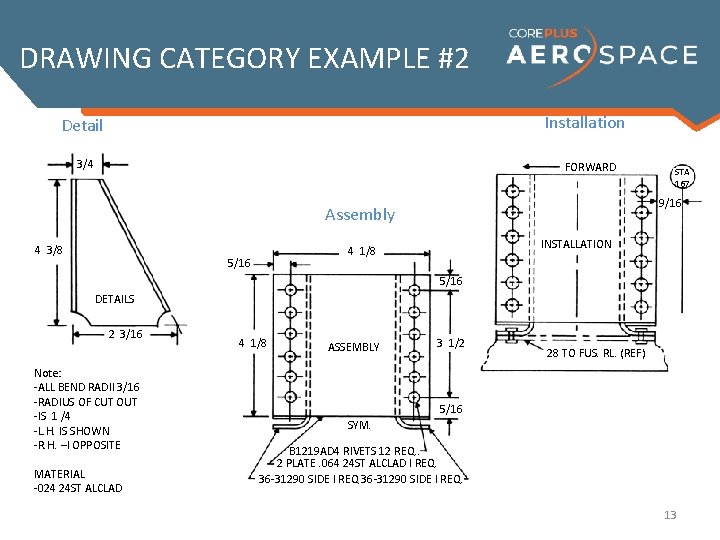
DRAWING CATEGORIES Installation drawings include all the information for a part or an assembly in the final installed position. Installation Drawings Detail Drawings Assembly Drawings Detail drawings supply all the information necessary to construct a part including dimensions, materials and type of finish. Sometimes many detail drawings are grouped together. An assembly drawing is a description of two or more parts whose purpose is to show the relationship of various parts. 11

DRAWING CATEGORY EXAMPLE #1 Installation Assembly Detail 12

DRAWING CATEGORY EXAMPLE #2 Installation Detail 3/4 FORWARD 9/16 Assembly 4 3/8 INSTALLATION 4 1/8 5/16 STA 167 5/16 DETAILS 2 3/16 Note: -ALL BEND RADII 3/16 -RADIUS OF CUT OUT -IS 1 /4 -L. H. IS SHOWN -R. H. –I OPPOSITE MATERIAL -024 24 ST ALCLAD 4 1/8 ASSEMBLY 3 1/2 28 TO FUS. RL. (REF) 5/16 SYM. B 1219 AD 4 RIVETS 12 REQ. . 2 PLATE. 064 24 ST ALCLAD I REQ. 36 -31290 SIDE I REQ. 13

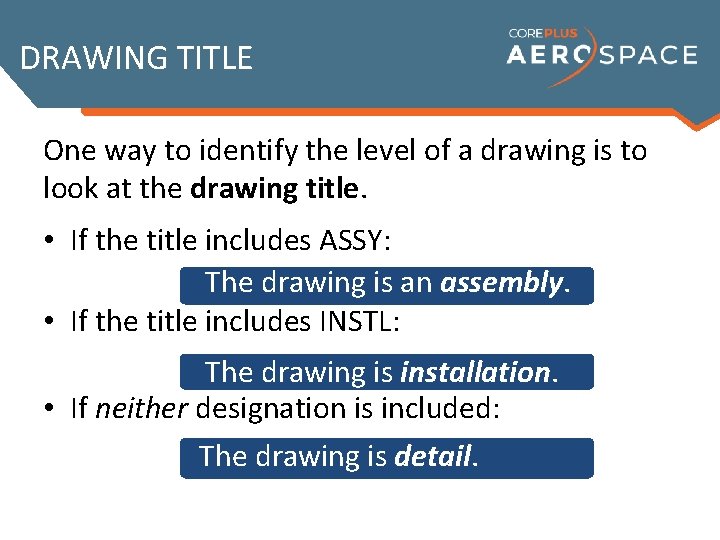
DRAWING TITLE One way to identify the level of a drawing is to look at the drawing title. • If the title includes ASSY: The drawing is an assembly. • If the title includes INSTL: The drawing is installation. • If neither designation is included: The drawing is detail.

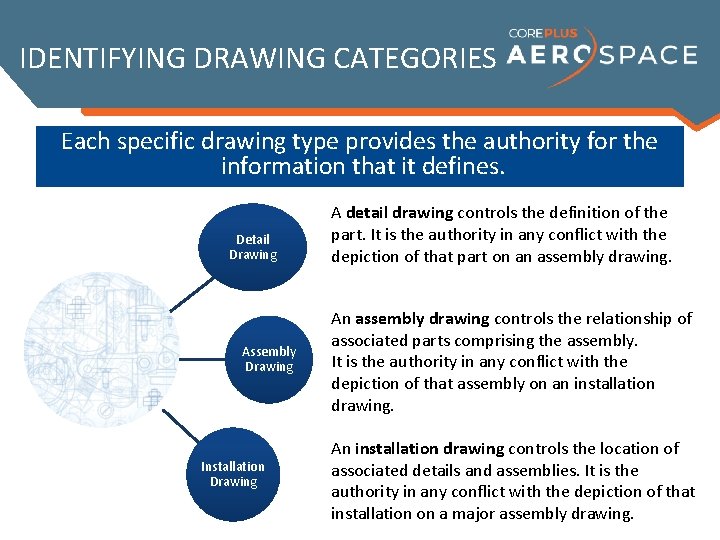
IDENTIFYING DRAWING CATEGORIES Each specific drawing type provides the authority for the information that it defines. Detail Drawing Assembly Drawing Installation Drawing A detail drawing controls the definition of the part. It is the authority in any conflict with the depiction of that part on an assembly drawing. An assembly drawing controls the relationship of associated parts comprising the assembly. It is the authority in any conflict with the depiction of that assembly on an installation drawing. An installation drawing controls the location of associated details and assemblies. It is the authority in any conflict with the depiction of that installation on a major assembly drawing.

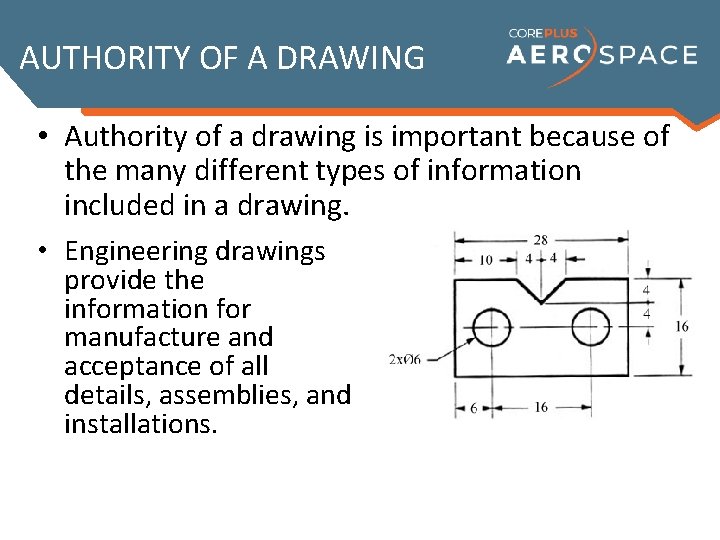
AUTHORITY OF A DRAWING • Authority of a drawing is important because of the many different types of information included in a drawing. • Engineering drawings provide the information for manufacture and acceptance of all details, assemblies, and installations.

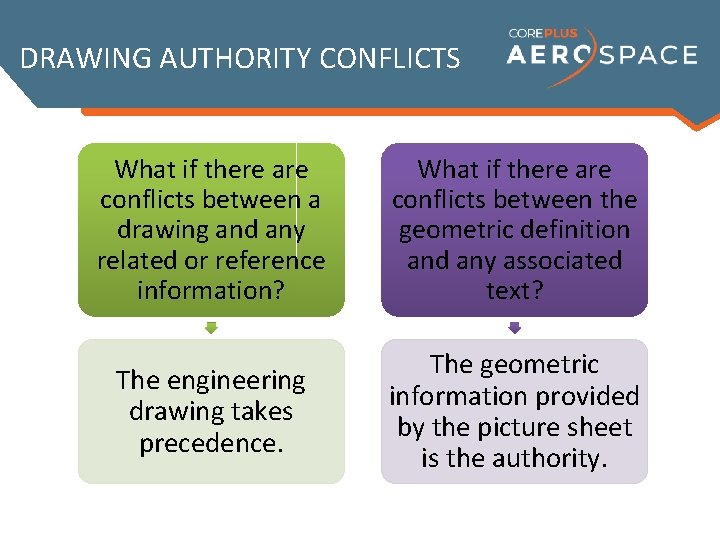
DRAWING AUTHORITY CONFLICTS What if there are conflicts between a drawing and any related or reference information? What if there are conflicts between the geometric definition and any associated text? The engineering drawing takes precedence. The geometric information provided by the picture sheet is the authority.

DRAWING AUTHORITY EXCEPTIONS Here are two exceptions: • Dimensions associated with geometry on the picture sheet are the authority over the geometric definition. • If there is a conflict between general notes within a drawing and information provided within a flagnote or local note, the flagnote or local note is the authority.

THE PICTURE SHEET The picture sheet is what most people have in mind when they think about drawings. The picture sheet contains • Diagrams of parts • Assemblies • Installations The picture sheet shows • Size and shape of parts • How parts fit together • Where parts are located

THE PICTURE SHEET What the picture sheet shows is different in each category. • Installation picture sheets show parts and assemblies joined and installed on various sections of the finished product. They may also include detail fabrication of specific parts used on that drawing. • Assembly picture sheets show two or more parts joined together and may include fabrication information and detail views for each part. • Detail picture sheets show separate single or multiple single parts used in the fabrication of a finished product.

THE PICTURE SHEET A multi-sheet drawing has more than one picture sheet. Multi-sheets are used when: • A part is too large. • A part is too complex. • There are many variations.

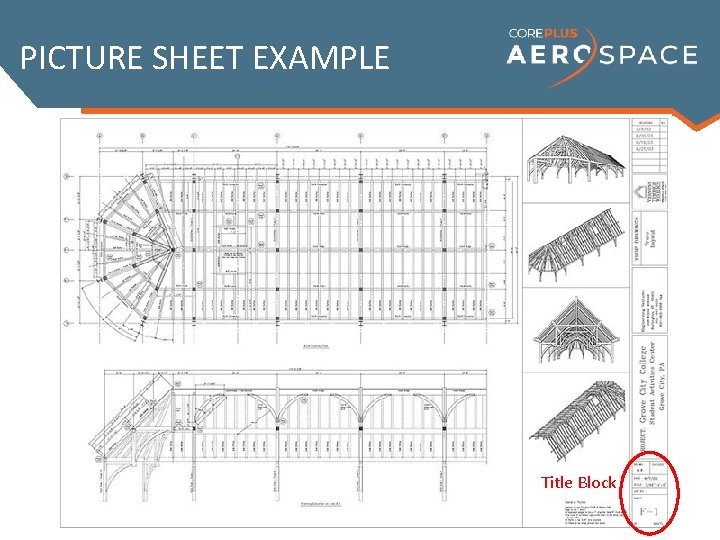
PICTURE SHEET EXAMPLE Title Block

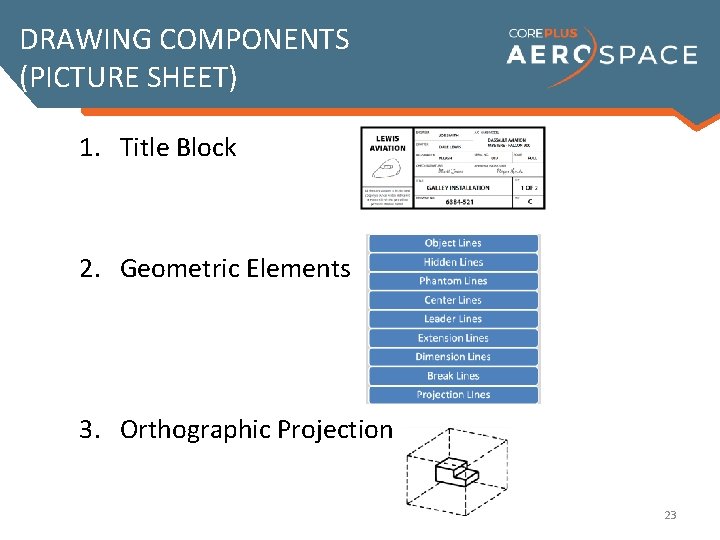
DRAWING COMPONENTS (PICTURE SHEET) 1. Title Block 2. Geometric Elements 3. Orthographic Projection 23

TITLE BLOCK • The title block is always located in the lower righthand corner of the picture sheet. • The title block provides the basic identification information for the drawing.

THE TITLE BLOCK The first place to look when reading a drawing is the Title Block. 25

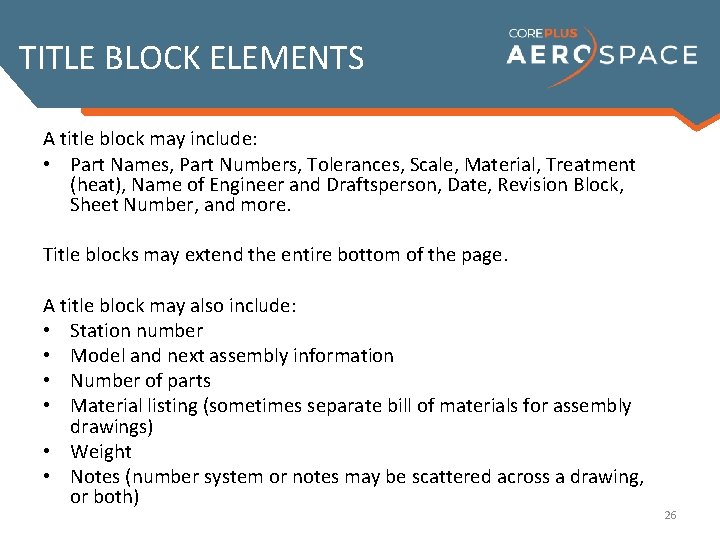
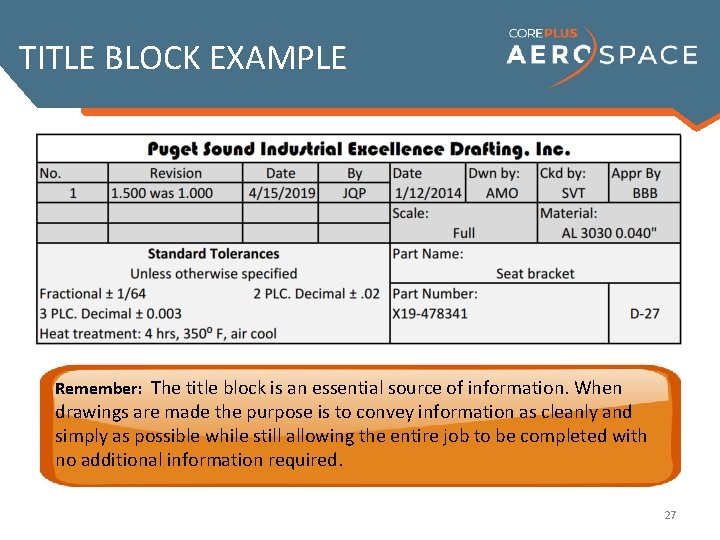
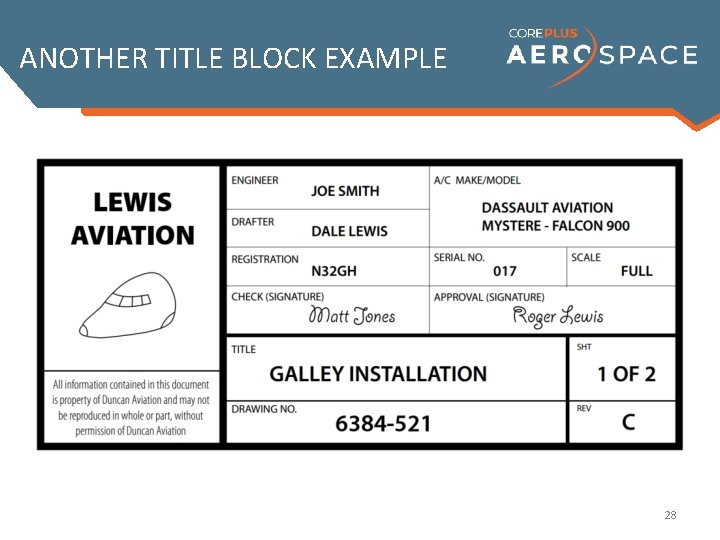
TITLE BLOCK ELEMENTS A title block may include: • Part Names, Part Numbers, Tolerances, Scale, Material, Treatment (heat), Name of Engineer and Draftsperson, Date, Revision Block, Sheet Number, and more. Title blocks may extend the entire bottom of the page. A title block may also include: • Station number • Model and next assembly information • Number of parts • Material listing (sometimes separate bill of materials for assembly drawings) • Weight • Notes (number system or notes may be scattered across a drawing, or both) 26

TITLE BLOCK EXAMPLE Remember: The title block is an essential source of information. When drawings are made the purpose is to convey information as cleanly and simply as possible while still allowing the entire job to be completed with no additional information required. 27

ANOTHER TITLE BLOCK EXAMPLE 28

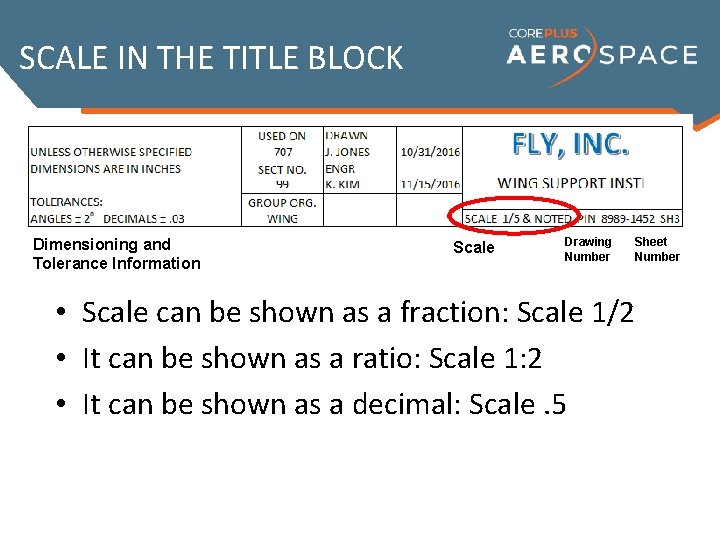
SCALE IN THE TITLE BLOCK Dimensioning and Tolerance Information Scale Drawing Number Sheet Number • Scale can be shown as a fraction: Scale 1/2 • It can be shown as a ratio: Scale 1: 2 • It can be shown as a decimal: Scale. 5

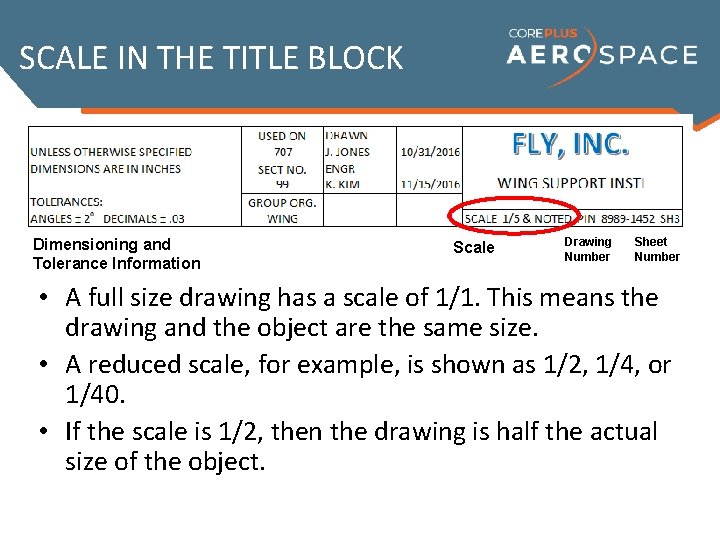
SCALE IN THE TITLE BLOCK Dimensioning and Tolerance Information Scale Drawing Number Sheet Number • A full size drawing has a scale of 1/1. This means the drawing and the object are the same size. • A reduced scale, for example, is shown as 1/2, 1/4, or 1/40. • If the scale is 1/2, then the drawing is half the actual size of the object.

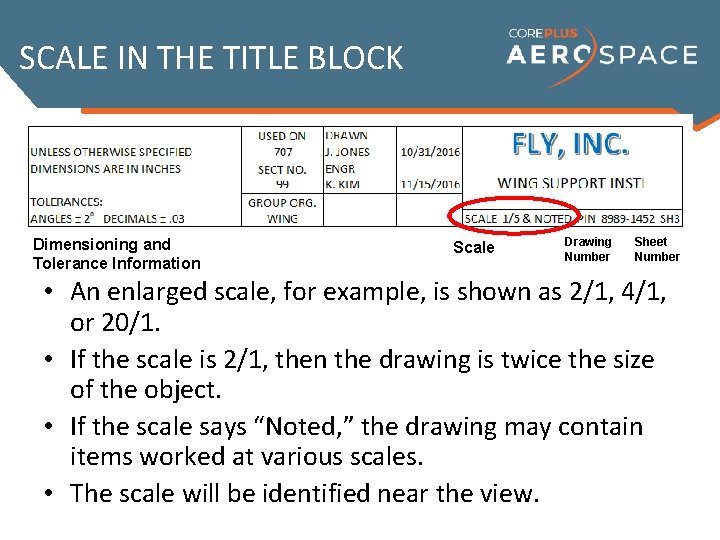
SCALE IN THE TITLE BLOCK Dimensioning and Tolerance Information Scale Drawing Number Sheet Number • An enlarged scale, for example, is shown as 2/1, 4/1, or 20/1. • If the scale is 2/1, then the drawing is twice the size of the object. • If the scale says “Noted, ” the drawing may contain items worked at various scales. • The scale will be identified near the view.

TITLE BLOCK Q&A The title block should be the first thing to look when reading a drawing. 32

TITLE BLOCK Q&A The title block should be the first thing to look when reading a drawing. 33

GEOMETRIC ELEMENTS • A picture sheet shows a three dimensional object in two dimensions using geometric elements. • Views use geometric elements to show an object as it appears from different directions in order to describe the part to the mechanic. • In each view, geometry, dimensioning, and tolerance are used to convey drawing information.

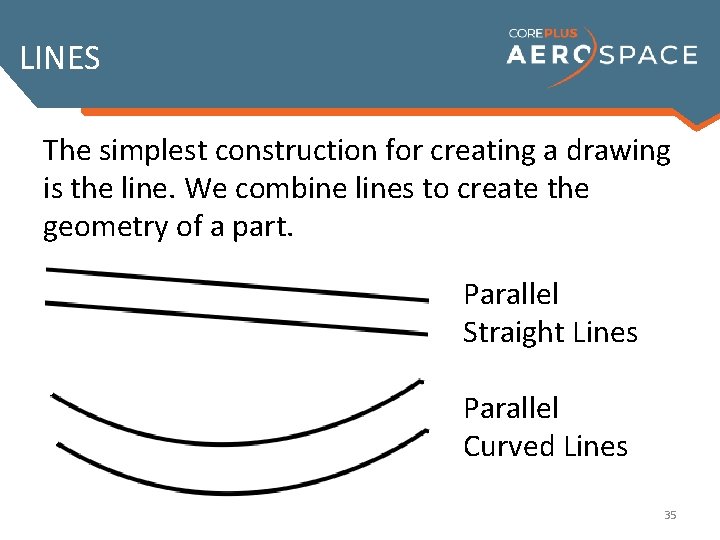
LINES The simplest construction for creating a drawing is the line. We combine lines to create the geometry of a part. Parallel Straight Lines Parallel Curved Lines 35

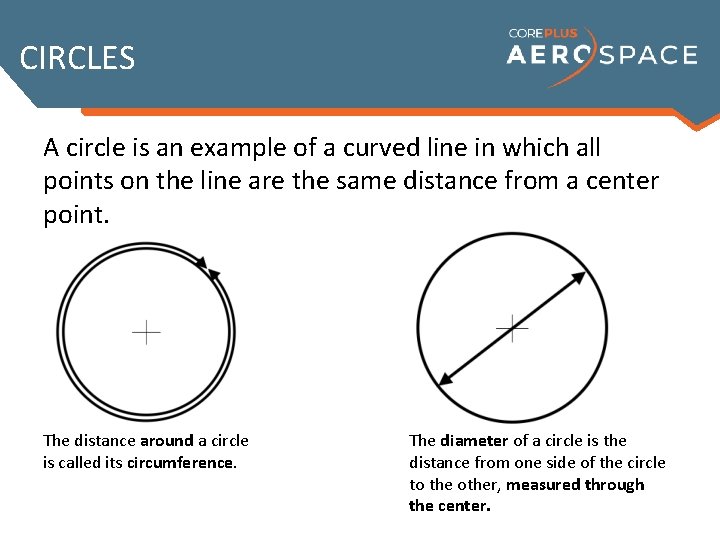
CIRCLES A circle is an example of a curved line in which all points on the line are the same distance from a center point. The distance around a circle is called its circumference. The diameter of a circle is the distance from one side of the circle to the other, measured through the center.

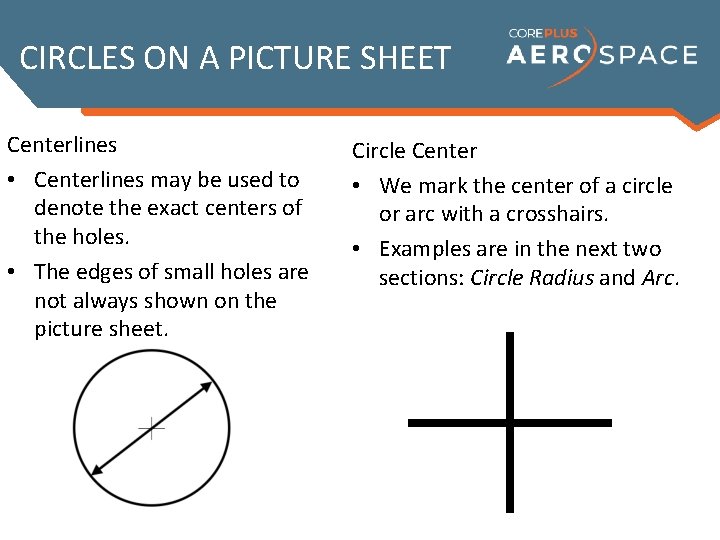
CIRCLES ON A PICTURE SHEET Centerlines • Centerlines may be used to denote the exact centers of the holes. • The edges of small holes are not always shown on the picture sheet. Circle Center • We mark the center of a circle or arc with a crosshairs. • Examples are in the next two sections: Circle Radius and Arc.

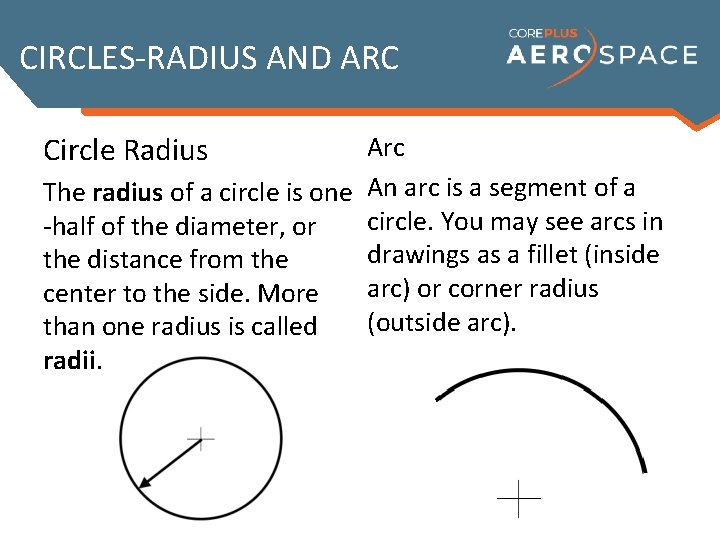
CIRCLES-RADIUS AND ARC Circle Radius Arc The radius of a circle is one An arc is a segment of a circle. You may see arcs in -half of the diameter, or drawings as a fillet (inside the distance from the center to the side. More arc) or corner radius (outside arc). than one radius is called radii.

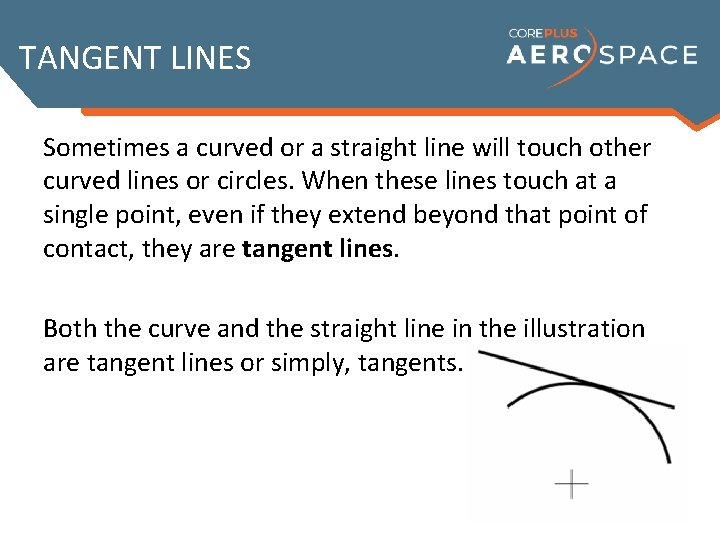
TANGENT LINES Sometimes a curved or a straight line will touch other curved lines or circles. When these lines touch at a single point, even if they extend beyond that point of contact, they are tangent lines. Both the curve and the straight line in the illustration are tangent lines or simply, tangents.

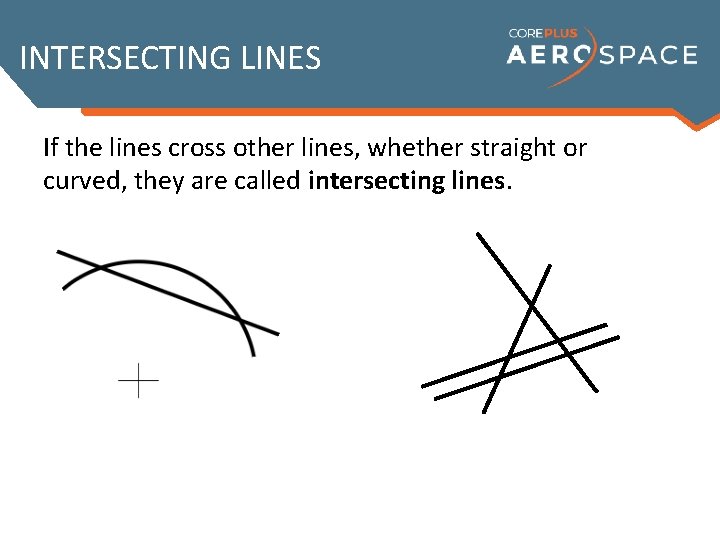
INTERSECTING LINES If the lines cross other lines, whether straight or curved, they are called intersecting lines.

LINES STANDARDS Remember that the picture sheet of a drawing is made up of only three basic lines: • Straight • Curves • Broken How they are used and the form that they depict is the key.

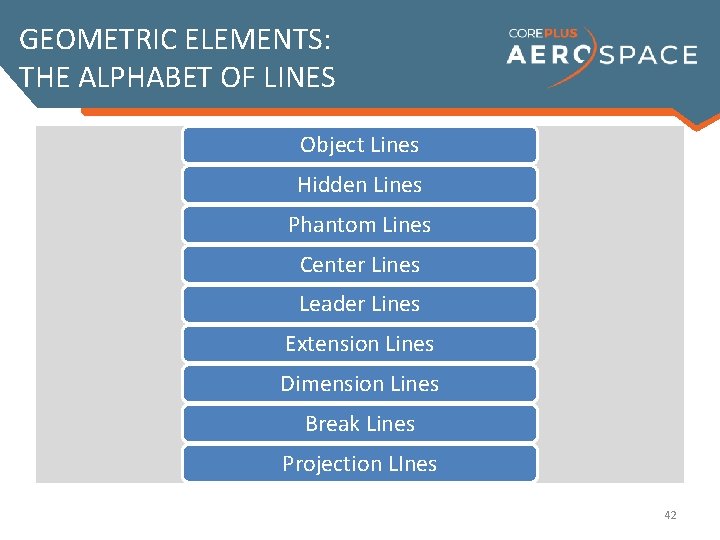
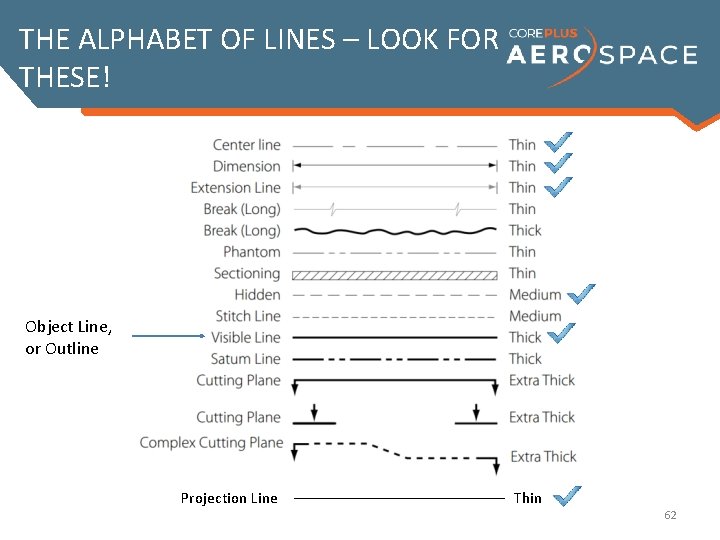
GEOMETRIC ELEMENTS: THE ALPHABET OF LINES Object Lines Hidden Lines Phantom Lines Center Lines Leader Lines Extension Lines Dimension Lines Break Lines Projection LInes 42

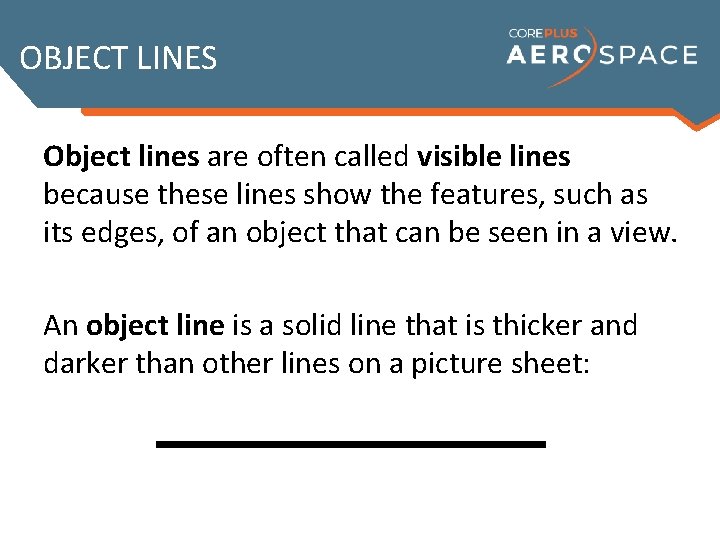
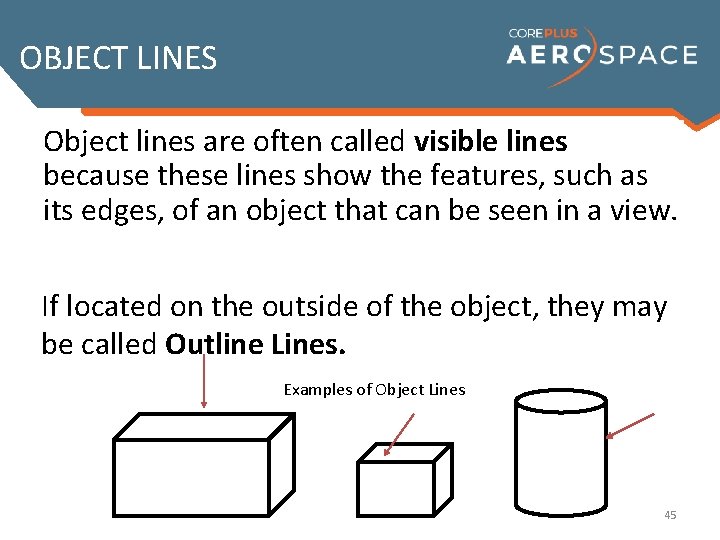
OBJECT LINES Object lines are often called visible lines because these lines show the features, such as its edges, of an object that can be seen in a view. An object line is a solid line that is thicker and darker than other lines on a picture sheet:

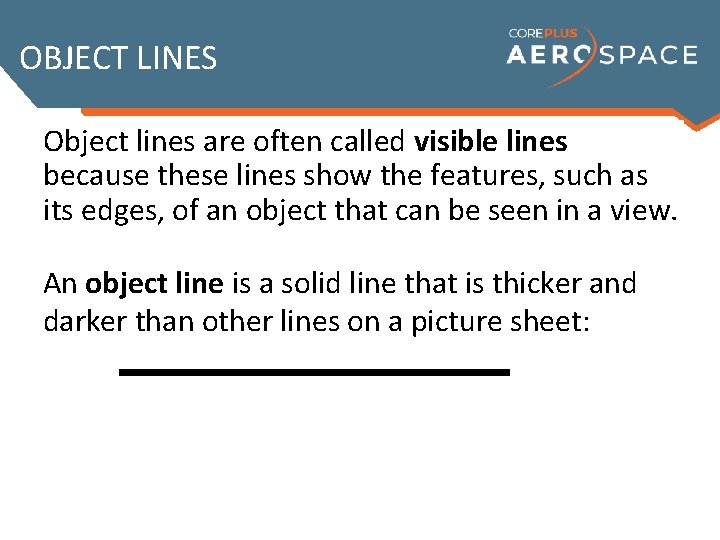
OBJECT LINES Object lines are often called visible lines because these lines show the features, such as its edges, of an object that can be seen in a view. An object line is a solid line that is thicker and darker than other lines on a picture sheet: 44

OBJECT LINES Object lines are often called visible lines because these lines show the features, such as its edges, of an object that can be seen in a view. If located on the outside of the object, they may be called Outline Lines. Examples of Object Lines 45

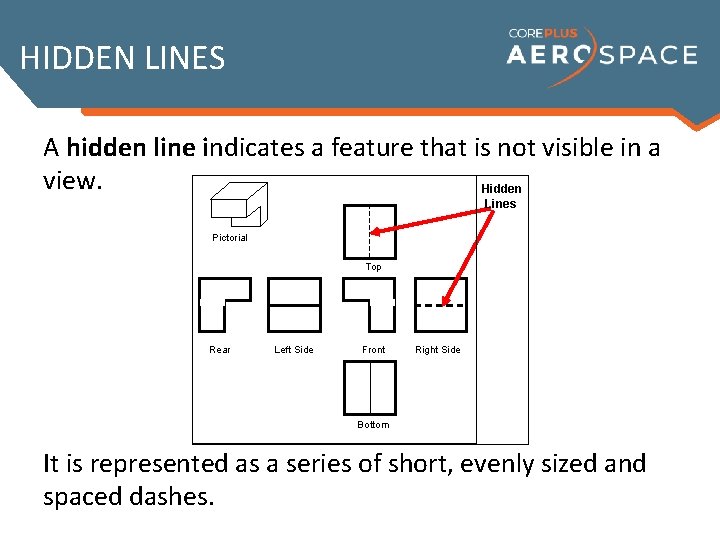
HIDDEN LINES A hidden line indicates a feature that is not visible in a view. Hidden Lines Pictorial Top Rear Left Side Front Right Side Bottom It is represented as a series of short, evenly sized and spaced dashes.

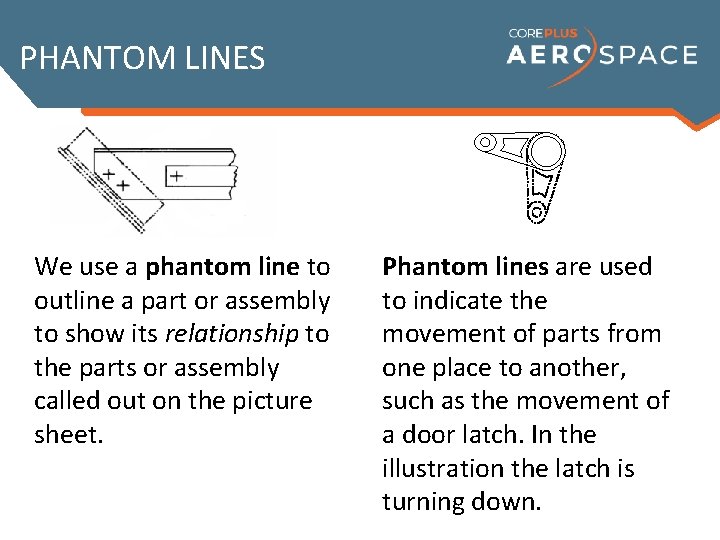
PHANTOM LINES We use a phantom line to outline a part or assembly to show its relationship to the parts or assembly called out on the picture sheet. Phantom lines are used to indicate the movement of parts from one place to another, such as the movement of a door latch. In the illustration the latch is turning down.

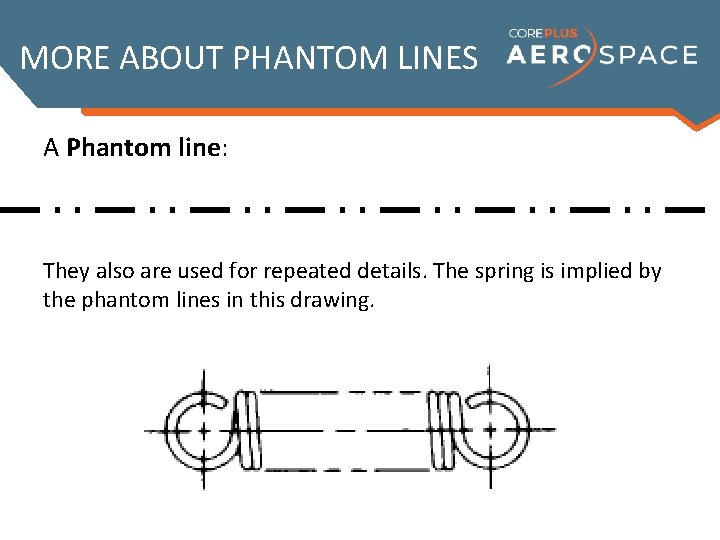
MORE ABOUT PHANTOM LINES A Phantom line: They also are used for repeated details. The spring is implied by the phantom lines in this drawing.

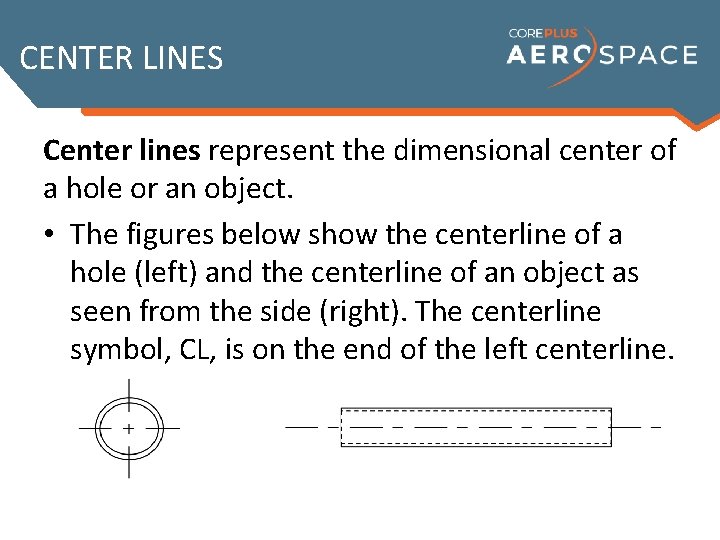
CENTER LINES Center lines represent the dimensional center of a hole or an object. • The figures below show the centerline of a hole (left) and the centerline of an object as seen from the side (right). The centerline symbol, CL, is on the end of the left centerline.

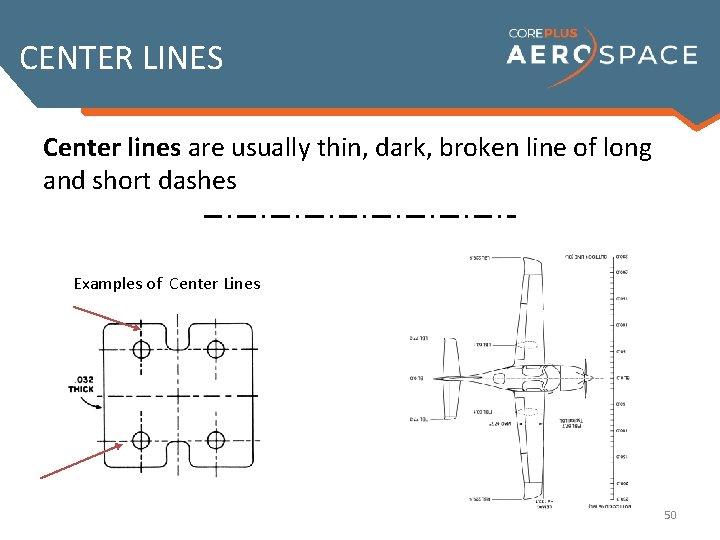
CENTER LINES Center lines are usually thin, dark, broken line of long and short dashes Examples of Center Lines 50

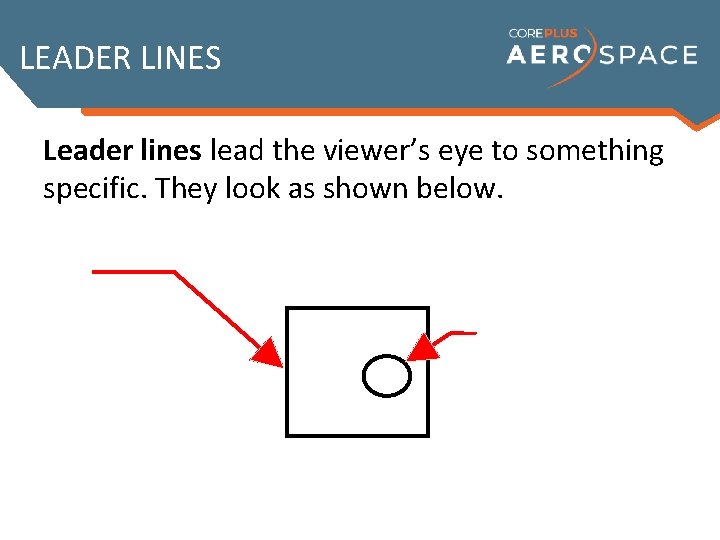
LEADER LINES Leader lines lead the viewer’s eye to something specific. They look as shown below.

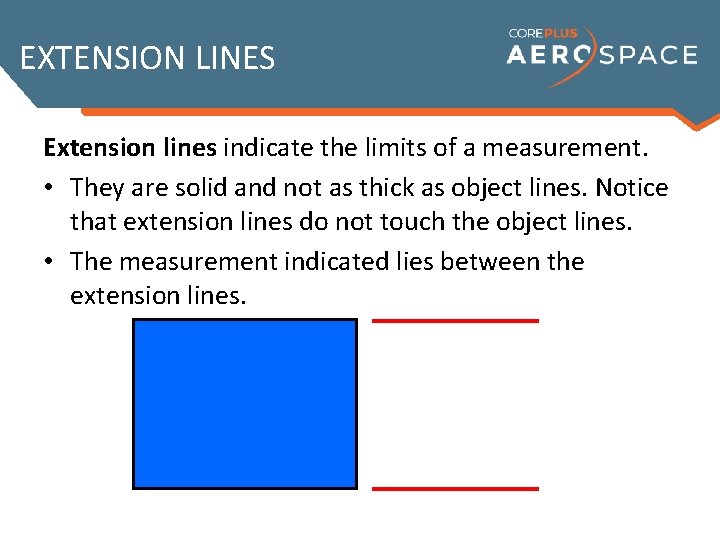
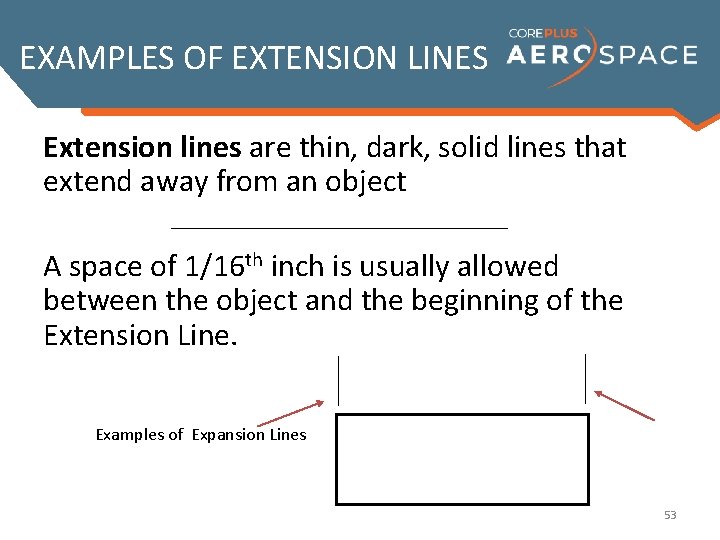
EXTENSION LINES Extension lines indicate the limits of a measurement. • They are solid and not as thick as object lines. Notice that extension lines do not touch the object lines. • The measurement indicated lies between the extension lines.

EXAMPLES OF EXTENSION LINES Extension lines are thin, dark, solid lines that extend away from an object A space of 1/16 th inch is usually allowed between the object and the beginning of the Extension Line. Examples of Expansion Lines 53

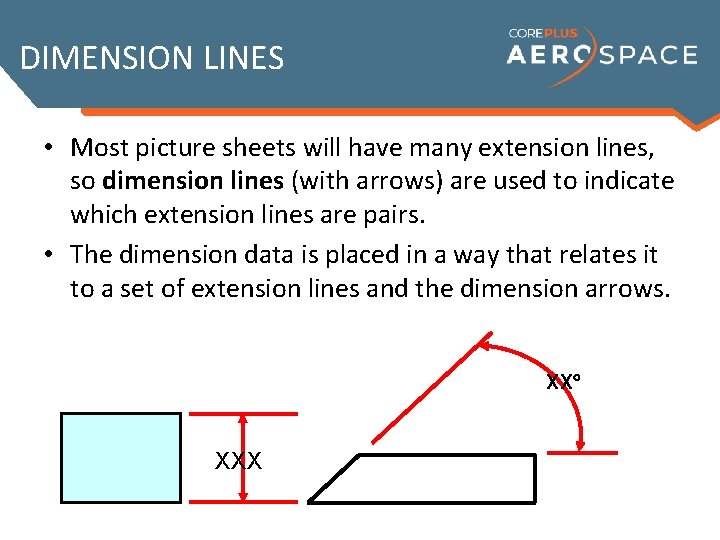
DIMENSION LINES • Most picture sheets will have many extension lines, so dimension lines (with arrows) are used to indicate which extension lines are pairs. • The dimension data is placed in a way that relates it to a set of extension lines and the dimension arrows. XXX

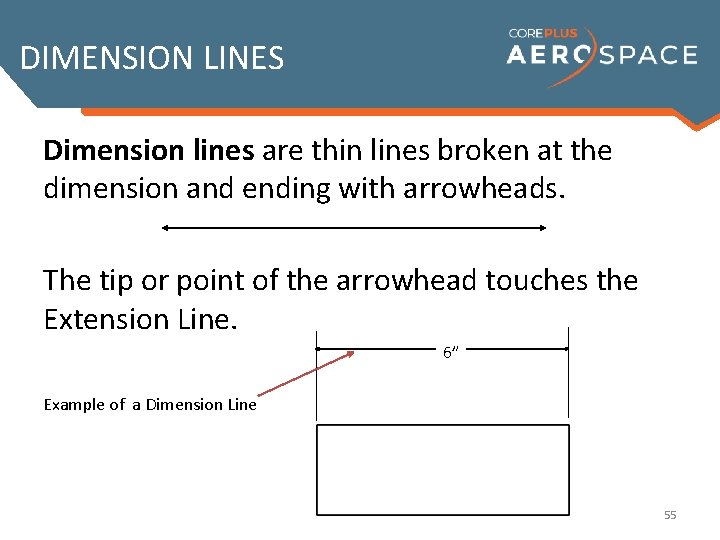
DIMENSION LINES Dimension lines are thin lines broken at the dimension and ending with arrowheads. The tip or point of the arrowhead touches the Extension Line. 6” Example of a Dimension Line 55

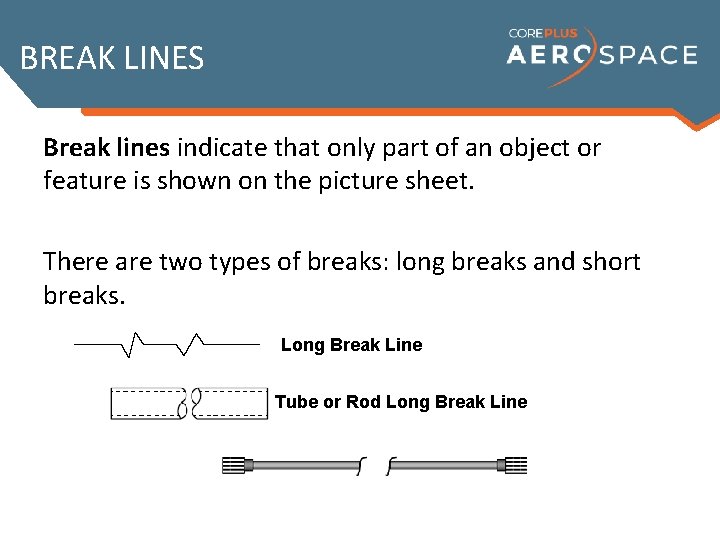
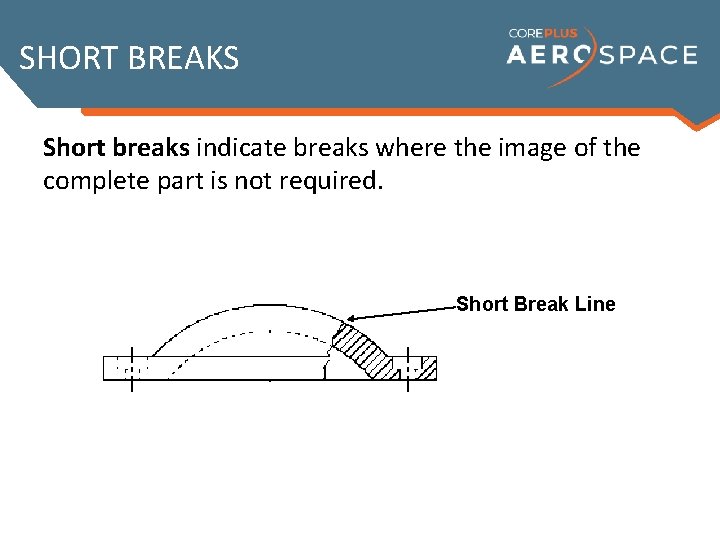
BREAK LINES Break lines indicate that only part of an object or feature is shown on the picture sheet. There are two types of breaks: long breaks and short breaks. Long Break Line Tube or Rod Long Break Line

SHORT BREAKS Short breaks indicate breaks where the image of the complete part is not required. Short Break Line

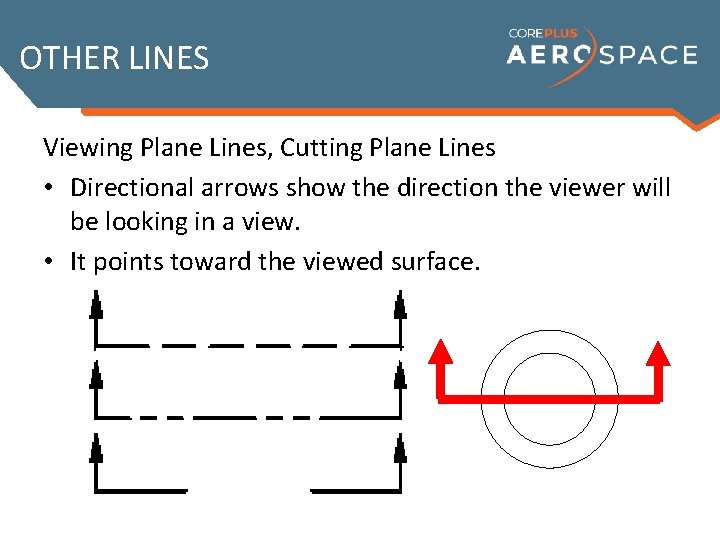
OTHER LINES Viewing Plane Lines, Cutting Plane Lines • Directional arrows show the direction the viewer will be looking in a view. • It points toward the viewed surface.

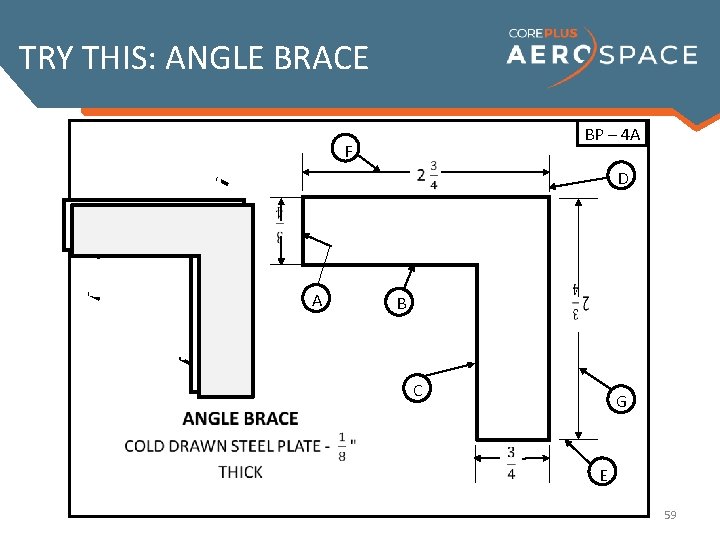
TRY THIS: ANGLE BRACE BP – 4 A F D B A C G E 59

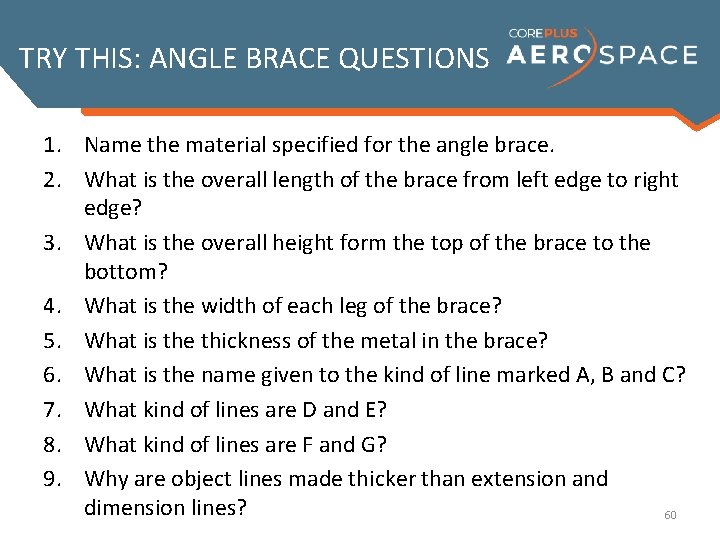
TRY THIS: ANGLE BRACE QUESTIONS 1. Name the material specified for the angle brace. 2. What is the overall length of the brace from left edge to right edge? 3. What is the overall height form the top of the brace to the bottom? 4. What is the width of each leg of the brace? 5. What is the thickness of the metal in the brace? 6. What is the name given to the kind of line marked A, B and C? 7. What kind of lines are D and E? 8. What kind of lines are F and G? 9. Why are object lines made thicker than extension and dimension lines? 60

PROJECTION LINES Projection lines are thin, unbroken lines projected from a point in one view to locate the same point in another view. They are often used to illustrate complex shapes and show the relationship on related detail drawings. 61

THE ALPHABET OF LINES – LOOK FOR THESE! Object Line, or Outline Projection Line Thin 62

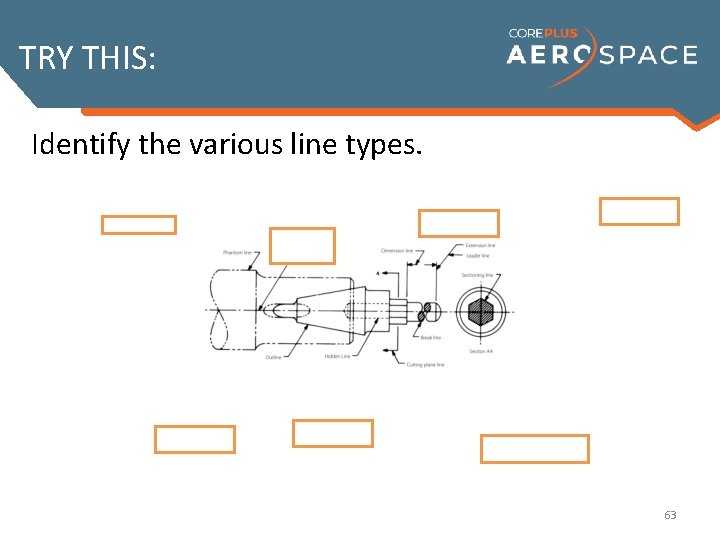
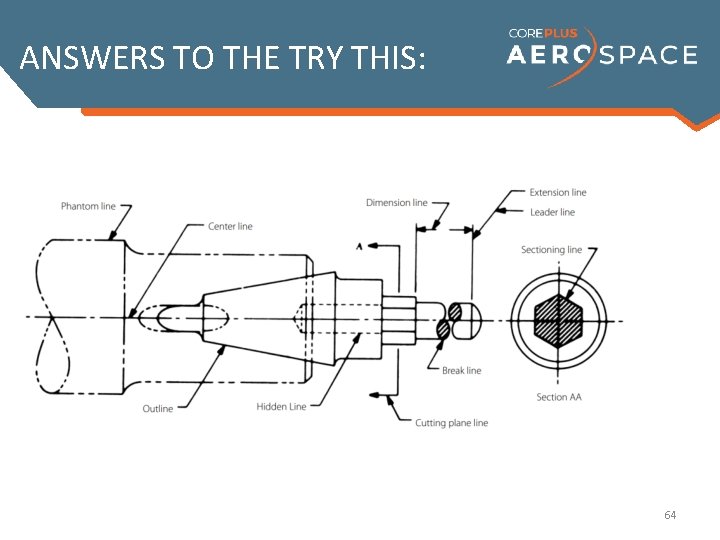
TRY THIS: Identify the various line types. 63

ANSWERS TO THE TRY THIS: 64

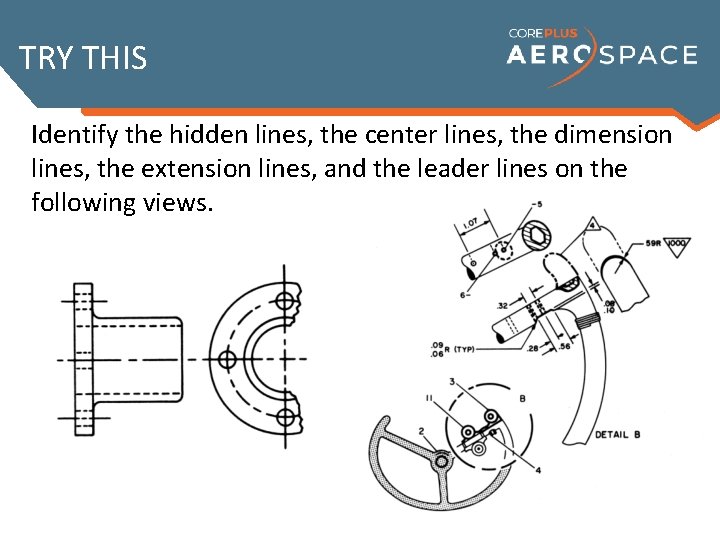
TRY THIS Identify the hidden lines, the center lines, the dimension lines, the extension lines, and the leader lines on the following views. 65

IN SUMMARY Now that you’ve finished this lesson, you can: • Understand fundamental terminology related to prints and drawings. • Recognize drawing categories. • Apply drawing authorities. • Recognize and interpret the elements found on a picture sheet. • Locate the Title Block on a drawing and identify the name, purpose of a drawing, and other fields depicted. • Interpret geometric elements in a drawing. • Identify the Alphabet of Lines.

Acknowledgements Aerospace Joint Apprenticeship Committee (AJAC), American Society of Metals (ASM), The Boeing Company, National STEM Consortium (NSC), Skills, Inc. , WMATI About These Materials Copyright © 2015 by Washington Manufacturing Advanced Training Institute (WMATI) The Core. Plus: Manufacturing Skills Curriculum is a collaboration among Boeing and WMATI. License Unless otherwise specified, this work is licensed under a Creative Commons Attribution. Share. Alike 4. 0 International License. Attribution and Citation To attribute this course please reference WMATI. To cite this course please use the following citation example: WMATI. Core. Plus Manufacturing Skills Curriculum: Precision Measurement course. [URL if applicable. ] Core. Plus, 2015. Disclaimer This workforce solution was built from open license materials from many sources. There are no guarantees, warrantees, or assurances of any kind, express or implied, with respect to such information, including any information on linked sites and including, but not limited to, accuracy of the information or its completeness, timeliness, usefulness, adequacy, continued availability, or ownership.