Tutorial on IC Engine Connecting Rod Hareesha N
- Slides: 15

Tutorial on IC Engine Connecting Rod Hareesha N G Dept of Aeronautical Engg Dayananda Sagar College of Engg Bangalore-78 9/11/2021 Hareesha N G, DSCE, Blore-78 1

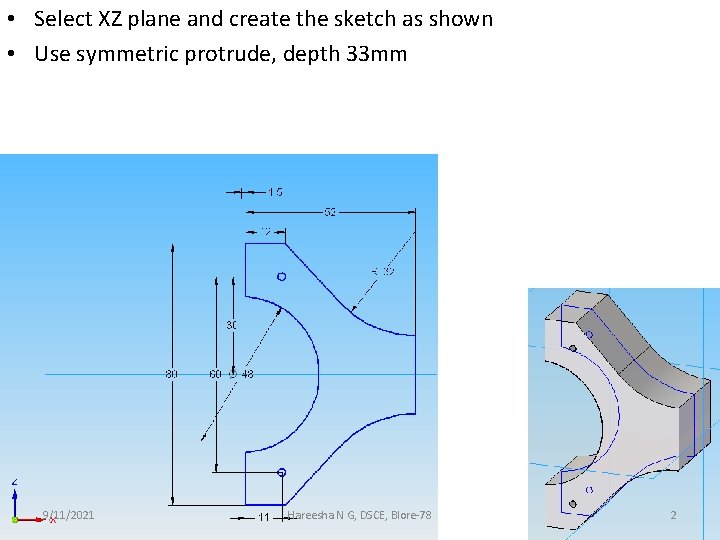
• Select XZ plane and create the sketch as shown • Use symmetric protrude, depth 33 mm 9/11/2021 Hareesha N G, DSCE, Blore-78 2

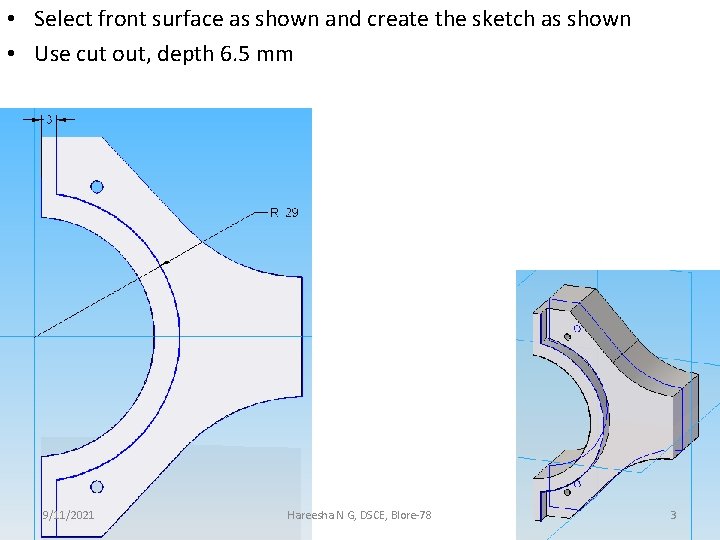
• Select front surface as shown and create the sketch as shown • Use cut out, depth 6. 5 mm 9/11/2021 Hareesha N G, DSCE, Blore-78 3

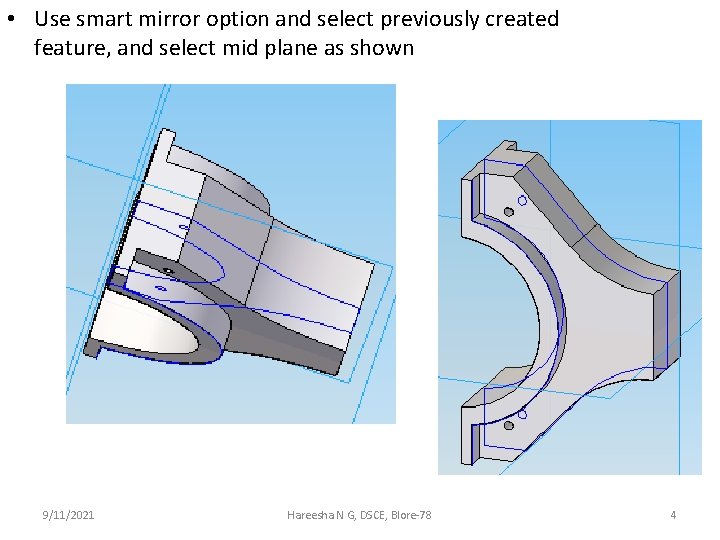
• Use smart mirror option and select previously created feature, and select mid plane as shown 9/11/2021 Hareesha N G, DSCE, Blore-78 4

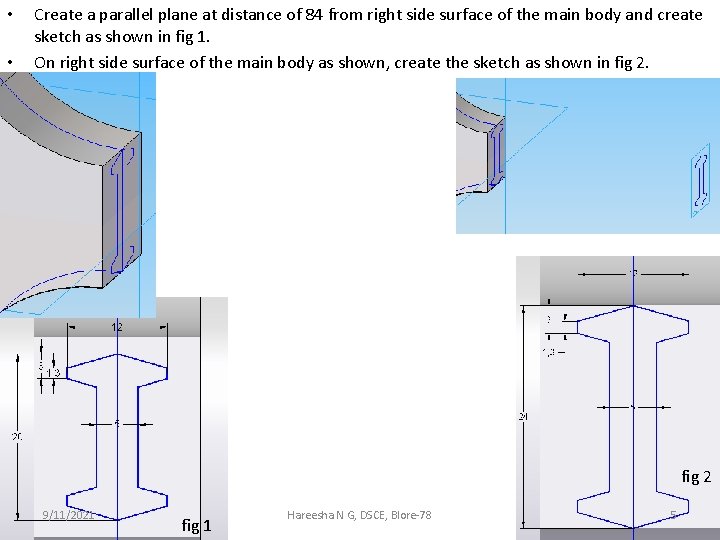
• • Create a parallel plane at distance of 84 from right side surface of the main body and create sketch as shown in fig 1. On right side surface of the main body as shown, create the sketch as shown in fig 2 9/11/2021 fig 1 Hareesha N G, DSCE, Blore-78 5

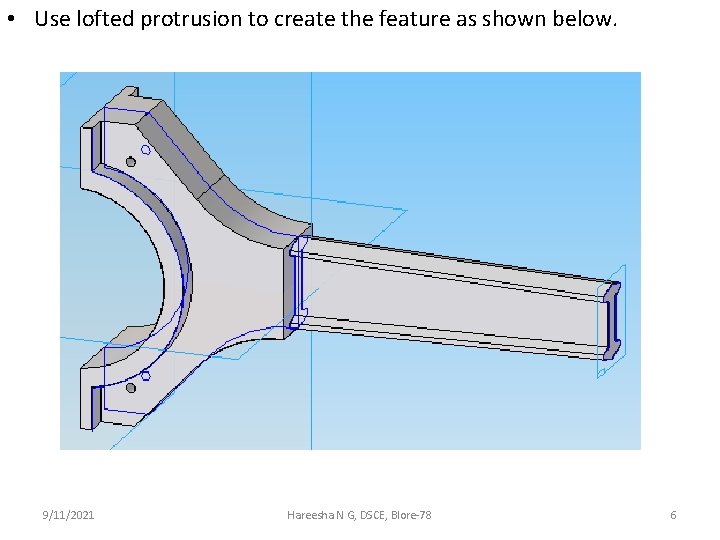
• Use lofted protrusion to create the feature as shown below. 9/11/2021 Hareesha N G, DSCE, Blore-78 6

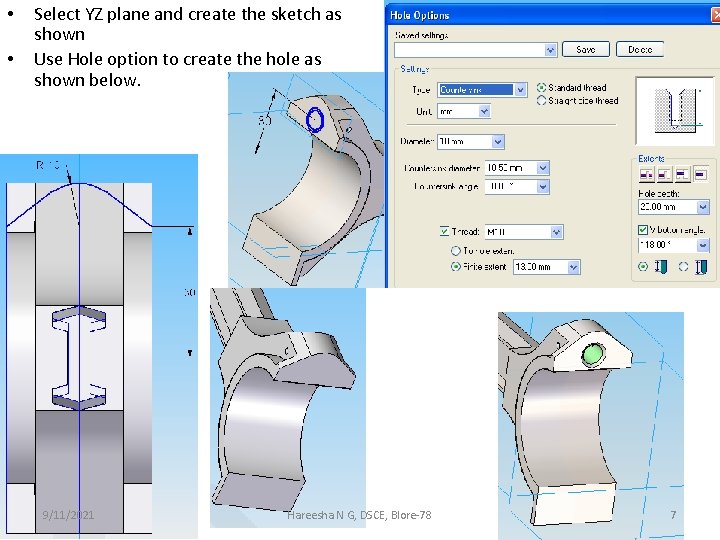
• • Select YZ plane and create the sketch as shown Use Hole option to create the hole as shown below. 9/11/2021 Hareesha N G, DSCE, Blore-78 7

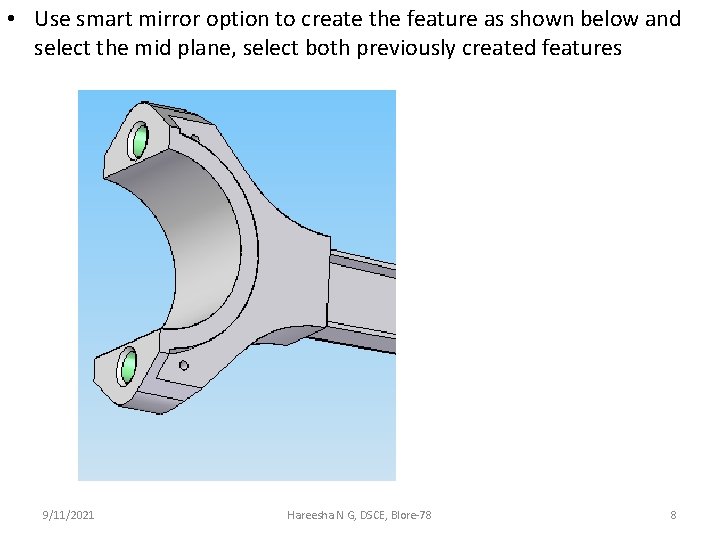
• Use smart mirror option to create the feature as shown below and select the mid plane, select both previously created features 9/11/2021 Hareesha N G, DSCE, Blore-78 8

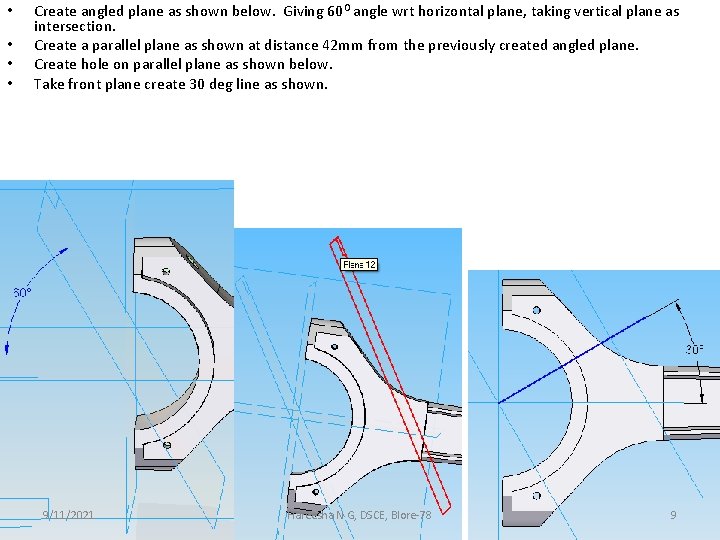
• • Create angled plane as shown below. Giving 60 O angle wrt horizontal plane, taking vertical plane as intersection. Create a parallel plane as shown at distance 42 mm from the previously created angled plane. Create hole on parallel plane as shown below. Take front plane create 30 deg line as shown. 9/11/2021 Hareesha N G, DSCE, Blore-78 9

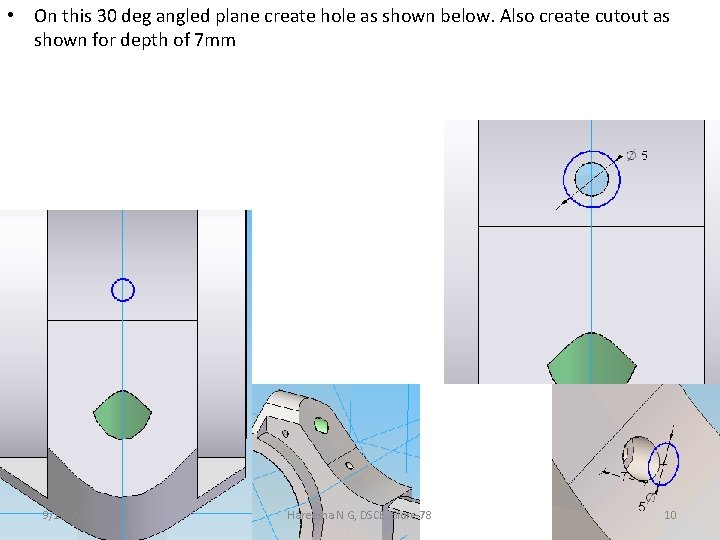
• On this 30 deg angled plane create hole as shown below. Also create cutout as shown for depth of 7 mm 9/11/2021 Hareesha N G, DSCE, Blore-78 10

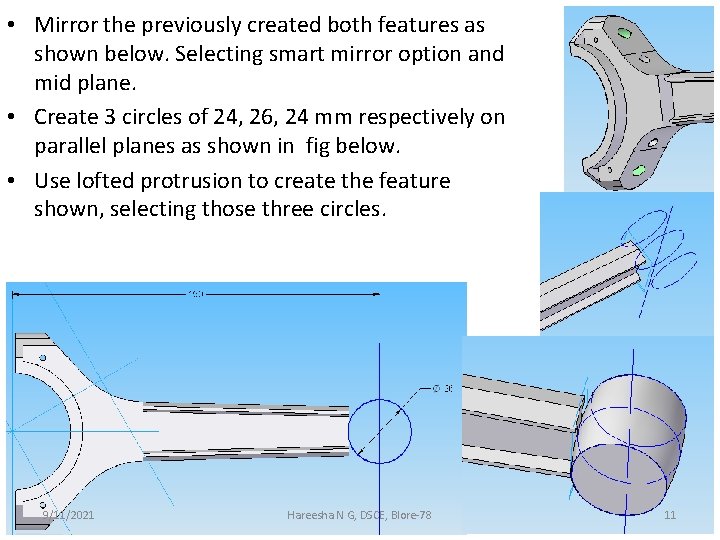
• Mirror the previously created both features as shown below. Selecting smart mirror option and mid plane. • Create 3 circles of 24, 26, 24 mm respectively on parallel planes as shown in fig below. • Use lofted protrusion to create the feature shown, selecting those three circles. 9/11/2021 Hareesha N G, DSCE, Blore-78 11

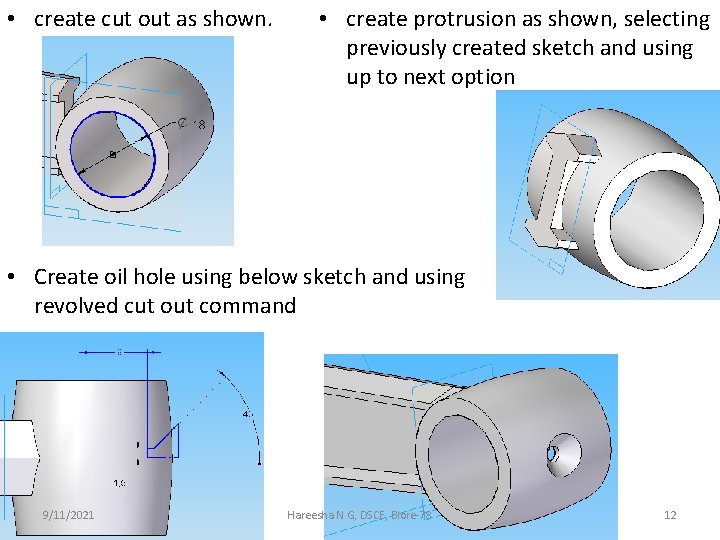
• create cut out as shown. • create protrusion as shown, selecting previously created sketch and using up to next option • Create oil hole using below sketch and using revolved cut out command 9/11/2021 Hareesha N G, DSCE, Blore-78 12

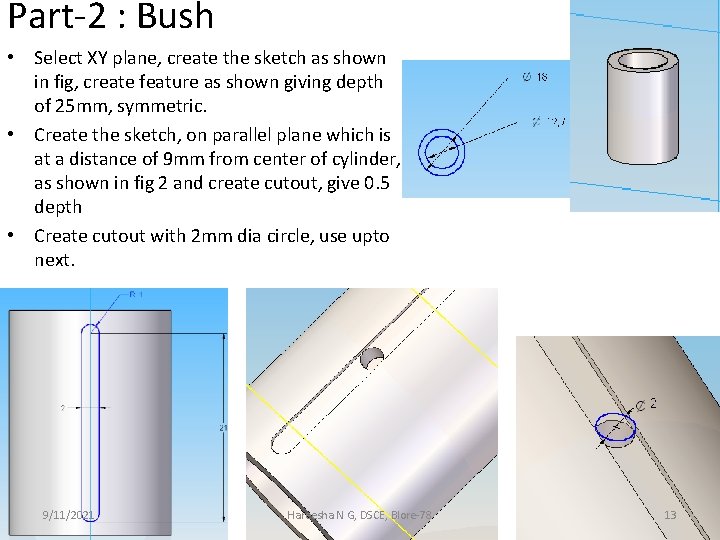
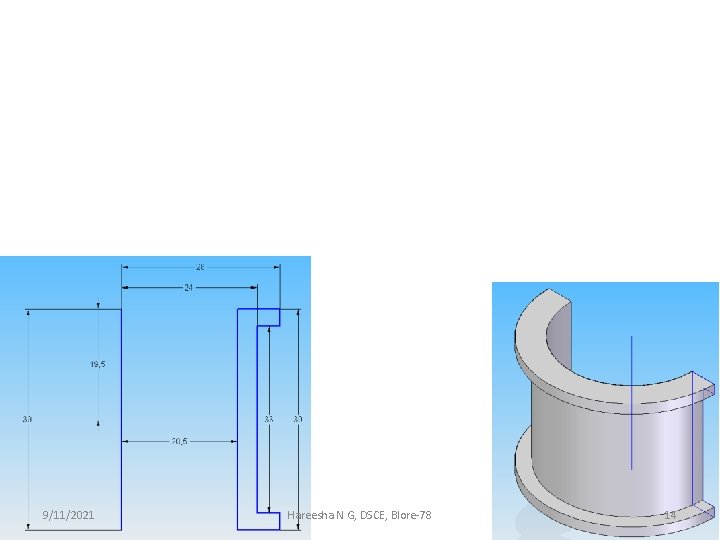
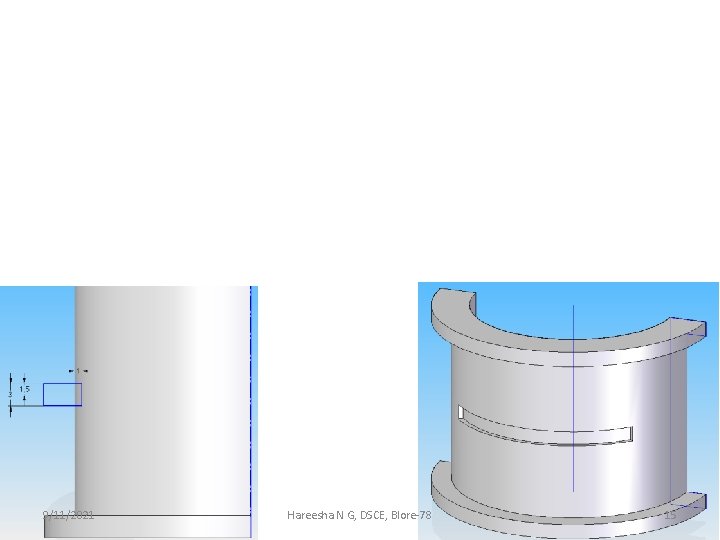
Part-2 : Bush • Select XY plane, create the sketch as shown in fig, create feature as shown giving depth of 25 mm, symmetric. • Create the sketch, on parallel plane which is at a distance of 9 mm from center of cylinder, as shown in fig 2 and create cutout, give 0. 5 depth • Create cutout with 2 mm dia circle, use upto next. 9/11/2021 Hareesha N G, DSCE, Blore-78 13

9/11/2021 Hareesha N G, DSCE, Blore-78 14

9/11/2021 Hareesha N G, DSCE, Blore-78 15