Transpiration 012 10977 r 1 04 Transpiration Introduction


- Slides: 37

Transpiration 012 -10977 r 1. 04

Transpiration Introduction Journals and Snapshots The Snapshot button is used to capture the screen. The Journal is where snapshots are stored and viewed. The Share button is used to export or print your journal to turn in your work. Each page of this lab that contains the symbol Should be inserted into your journal. After completing a lab page with the snapshot symbol, tap (in the upper right hand corner) to insert the page into your journal. Note: You may want to take a snapshot of the first page of this lab as a cover page for your journal.

Transpiration Lab Challenges • What is transpiration? • Do environmental factors, such as wind, have an effect on transpiration?

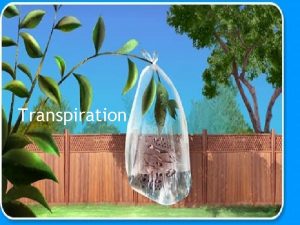
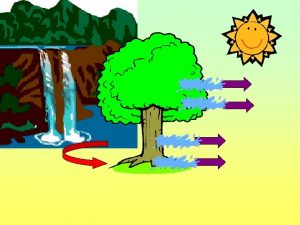
Transpiration Background • Transpiration is the evaporation of water from the surface of a plant. This occurs through the stomata on the underside of the leaves. • Stomates open and close to regulate the amount of water lost through transpiratio • Plants have adaptations, such as waxy cuticles, or modified leaf shapes, that help prevent water loss.

Transpiration Self Check 1. Plants are able to prevent water lost through transpiration by doing the following: a) closing stomates b) having a waxy cuticle c) having a modified leaf shape d) just saying NO e) A, B and C are correct f) none of the above This image is a reminder to tap to take a snapshot of the page after you have entered your response.

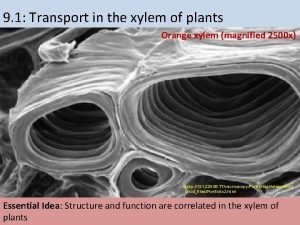
Transpiration . . . Background • Water moves through a plant in the xylem tissue. • The transport of water through the xylem tissue is controlled by differences in the concentration of water molecules (water potential). • Water evaporates from the open stomata of a leaf because the concentration of water molecules in the air is less than that inside the moist leaf. • There is a lower concentration of water in the leaf than in the xylem. So water moves from the xylem to the leaf. • This leaves a lower concentration of water in the xylem, so water moves from the roots to the xylem. • The low concentration of water in the roots draws water from the soil, into the roots.

Transpiration Self Check 2. Water moves through which of the following tissues in a plant? a) xylem b) phloem c) cuticle d) ground e) parenchyma

Transpiration Safety • Follow all common lab safety procedures. • Be careful as you use the knife or razor blade to trim the plant stem. • Do not let the barometer get wet.

Transpiration Materials and Equipment Collect all of these materials before beginning the lab. • • Barometer Sensor Extension Cable Large Base and Support Rod Utility Clamp 3 -Finger Clamp Pipette Plastic tubing, ~50 cm • • Knife or Razor Blade Fan Bowl Glycerin, 1 m. L Petroleum Jelly, 2 -3 g Plant Seedling Water, 1 L

Transpiration Sequencing Challenge A. Record data in still air. B. Set up all of your equipment. C. Record data in moving air. D. Analyze the data and determine if wind causes changes in the rate of transpiration. The steps to the left are part of the procedure for this lab activity. They are not in the right order. Determine the correct sequence of the steps, then take a snapshot of this page.

Transpiration Setup: Still Air 1. Attach the barometer to a sensor extension cable and connect it to the SPARK Science Learning System. 2. Put a drop of glycerin on the barbed end of the quick-release connector and insert the barb into one end of the plastic tubing. 3. Use a knife or razor blade to cut the stem of a plant, 2 -3 cm above the soil. Immediately immerse the cut end into a bowl of water. 4. Trim the freshly cut end to a 45 degree angle, keeping it submerged under water the entire time. Q 1: Why do you think it is important to keep the plant stem under water after you cut it?

Transpiration Setup: Still Air 5. Bend the piece of plastic tubing into a "U-shape" and use a pipette to fill the tubing with water. 6. Submerge the tubing in the bowl of water and insert the cut end of the plant stem into the open end of the tubing. Note: The plant stem should fit relatively snug in the tube. Avoid creating any air bubbles in the tubing. 5. Raise the tubing and plant out of the water keeping the -shape". Adjust the level of the tubing so there is a 2 -3 gap beneath the connector end. Water will spill out of open end of the tubing. Note: Make sure water always stays in contact with the plant. "U cm the

Transpiration . . . Setup: Still Air The sensor is mounted above the cut end of the stem. 8. Spread a thick amount of petroleum jelly around the base of the plant stem to create a seal between the edge of the tubing and the plant. Note: If water is able to leak out, it is not sealed. 9. Mount the barometer sensor and U-shaped tubing to the support rod as shown in the picture. Air bubble The cut end of the stem is mounted 1 to 2 inches below the sensor.

Transpiration . . . Setup: Still Air 10. Align the quick release connector in the tubing to the pressure port of the sensor. Push the connector into the port and twist until it "clicks". Make sure no water enters the sensor by maintaining a 2 -3 cm gap between the sensor and the water level. Answer the question and continue to the next page. Q 2: Why do you need to seal the tube with petroleum jelly? What would happen if the plant stem came in contact with the petroleum jelly?

Transpiration Q 3: What will happen to the pressure inside the tubing as transpiration occurs? Draw your prediction on the graph provided. * *To Draw a Prediction: 1. Tap to open the tool palette. 2. Tap then use your finger to draw your prediction. 3. Tap when finished. 4. If you make a mistake, tap to clear your prediction.

Transpiration Collect Data: Still Air 1. Tap to start collecting data. 2. Collect data for 600 seconds and tap to stop recording. 3. Restore pressure in the tubing to its original value by carefully removing and reattaching the quick release connector.

Transpiration Q 4: Why is it necessary to restore pressure in the tubing before starting the next trial? Q 5: What is the controlled variable in this experiment?

Transpiration Setup: Moving Air 1. Leave your transpiration apparatus set up as before. 2. Place a fan 1 m from the plant. 3. Turn the fan on low so a gentle breeze blows over the plant. Q 6: What environmental condition is the fan simulating?

Transpiration Q 7: What will happen to the pressure in the tubing when the fan blows on the plant? Draw your prediction in the graph. * *To Draw a Prediction: 1. Tap to open the tool palette. 2. Tap then use your finger to draw your prediction. 3. Tap when finished. 4. If you make a mistake, tap to clear your prediction.

Transpiration Collect Data: Moving Air 1. Tap to start collecting data. 2. Collect data for 600 seconds and tap to stop recording. 3. When you are finished with data collection, continue to the next page.

Transpiration Data Analysis 1. Scale your graph to optimize your display. * *To Scale a Graph: 1. Tap to open the tool palette. 2. Tap to scale the graph. 3. If you need to manually scale the graph, touch one of the numbers labeling an axis and drag it up or down.

Transpiration Data Analysis 2. Determine initial pressure, final pressure and change in pressure* for each run. Note: Enter these values on the next page. *To Find the Difference Between Two Data Points: 1. Tap to open the tools palette. 2. Tap and then tap two points on the data run. 3. Adjust using both buttons and then tap. 4. Tap to display the differences.

Transpiration Data Analysis 3. Record initial pressure and final pressure for each run in the table. *To Enter Data into a Table: 1. Tap to open the tool palette. 2. Tap then tap a cell in the data table to highlight it in yellow. 3. Tap to open the Keyboard screen.

Transpiration Data Analysis 4. Calculate the rate of transpiration for each run. Hint: Change in pressure/ change in time *To Enter Data into a Table: 1. Tap to open the tool palette. 2. Tap then tap a cell in the data table to highlight it in yellow. 3. Tap to open the Keyboard screen.

Transpiration Analysis 1. Does a decrease in pressure in the tubing correspond to more or less water being lost through the plant's stomata?

Transpiration Analysis 2. Explain how the fan affects the rate of transpiration. What natural phenomenon does this mimic?

Transpiration Synthesis 1. Describe some adaptations that enable plants to minimize water loss from their leaves.

Transpiration Synthesis 2. Would you expect all plant species to have the same rate of transpiration under similar environmental conditions? Explain your answer.

Transpiration Synthesis 3. Do you think that leaves or stems are more important in the process of evaporation through transpiration? Explain your answer.

Transpiration Synthesis 4. Would the transpiration rate in a conifer leaf (needle) be higher or lower than that of a deciduous (broad) leaf? Explain your answer.

Transpiration Synthesis 5. What do you think the data would look like if you removed the leaves from the plant prior to collecting the data? How does this relate to what you know about transpiration?

Transpiration Multiple Choice 1. Which of the following describes the fate of most of the water taken up by a plant? a) It is used as a solvent. b) It is used as a hydrogen source in photosynthesis. c) It is lost during transpiration. d) It makes cell elongation possible.

Transpiration Multiple Choice 2. In a plant, where does the majority of transpiration take place? a) roots b) leaves c) stems d) all parts of the plant equally

Transpiration Multiple Choice 3. Most transpiration occurs through the: a) stomata. b) epidermis. c) cuticle. d) phloem.

Transpiration Multiple Choice 4. All of the following can affect transpiration except: a) temperature b) humidity c) wind d) leaf color

Transpiration Congratulations! You have completed the lab. Please remember to follow your teacher's instructions for cleaning-up and submitting your lab.

Transpiration References Images are taken from PASCO documentation, public domain clip art, or Wikimedia Foundation Commons. http: //pdphoto. org/Picture. Detail. php? mat=pdef&pg=5528 http: //www. openstockphotography. org/image-licensing/wind/USDA_windmills. jpg http: //commons. wikimedia. org/wiki/File: A_CDP_4. JPG http: //commons. wikimedia. org/wiki/File: Stem-histology-cross-section-tag. svg http: //commons. wikimedia. org/wiki/File: Lamium_album_scan. jpg http: //commons. wikimedia. org/wiki/Image: Lassen_meadow_caldera. jpg http: //www. flickr. com/photos/jurvetson/1575475/
 Instalacja rozlewcza irs-2
 Abc pamec
 Nf p 01 012
 Auc rule 012
 Nit dicla 031
 Ioit-012
 Nom-012-scfi-1994
 Ap biology transpiration lab
 Transpiration
 Significance of transpiration
 Transpiration
 How does it move
 Adhesion cohesion
 Observation of plant growth day by day
 Transpiration practical grade 10
 Transpiration lab ap bio
 Water cycle transpiration
 Transpiration summary
 Stomatum
 Transpiration is the evaporation of water from
 Whats the definition of transpiration
 Transpiration
 Describe photosynthesis
 Assertion transpiration is a necessary evil
 Potometer
 David attenborough transpiration
 Significance of transpiration
 Stoma function
 Transpiration moves water from
 Potometer labelled
 Significance of transpiration
 Is photosynthesis endothermic
 Transpiration in plants
 What is transpiration
 Cohesion-tension theory
 Transpiration verb
 Introduction paragraph format
 Father of


