Training Program On Machine Alignment 71535 B Copyright

Training Program On Machine Alignment 71535 B © Copyright SPM Instrument AB 1997 1

What is Alignment? It is the correction of relative position of two machines so that Center lines of two rotating shafts form a straight line when the machines are working at normal operating temperature. 71535 B © Copyright SPM Instrument AB 1997 2
Causes Of Misalignment ØThermal expansion - Most machines align cold. ØMachine vibrations. ØForces transmitted to the machine by pipe or Ø support structure. ØSoft foot. ØDirect coupled machines are not properly aligned. ØPoor workmanship. 71535 B © Copyright SPM Instrument AB 1997 3

Effects Of Misalignment ØMore than 50% problems are due to misalignment. ØCauses vibration on the machine ØVibration destroys critical parts of machines like bearings, gears, seals, coupling etc. ØBreaks lubricant film inside the bearing and increase friction. ØIncreases load on the bearing. ØIncrease 2 - 17% power consumption. ØGenerates heat inside the coupling. 71535 B © Copyright SPM Instrument AB 1997 4
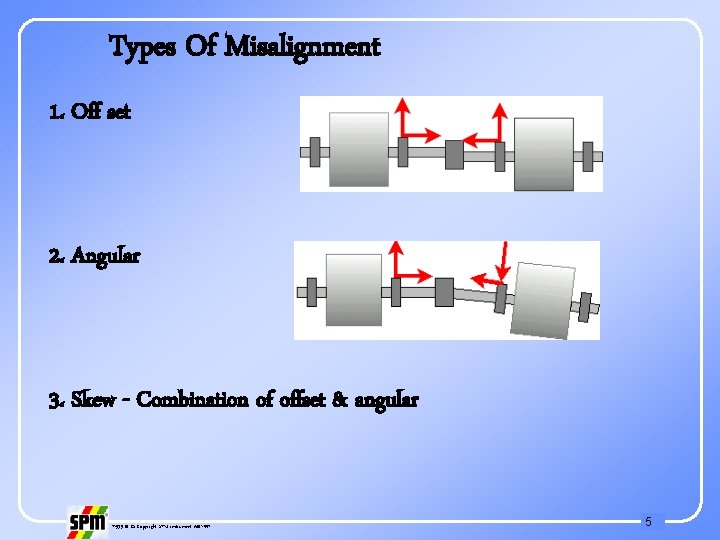
Types Of Misalignment 1. Off set 2. Angular 3. Skew - Combination of offset & angular 71535 B © Copyright SPM Instrument AB 1997 5
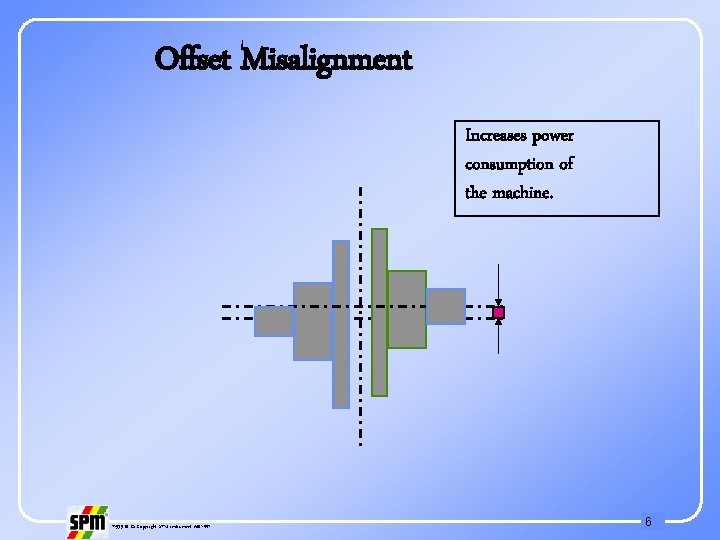
Offset Misalignment Increases power consumption of the machine. 71535 B © Copyright SPM Instrument AB 1997 6
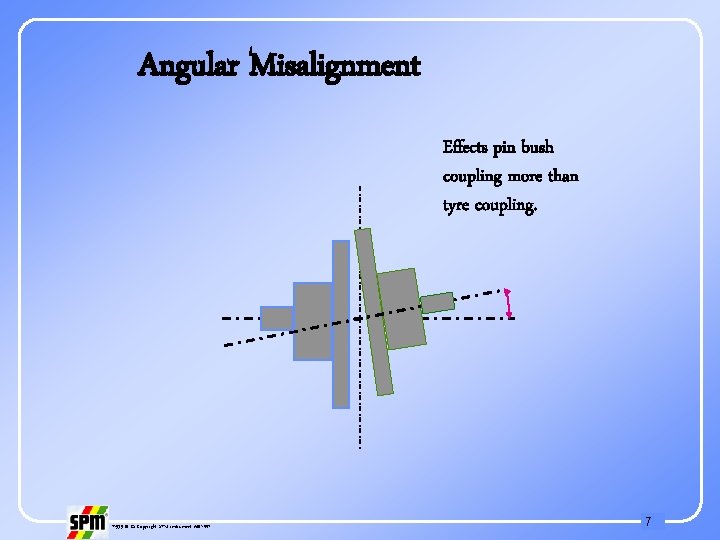
Angular Misalignment Effects pin bush coupling more than tyre coupling. 71535 B © Copyright SPM Instrument AB 1997 7
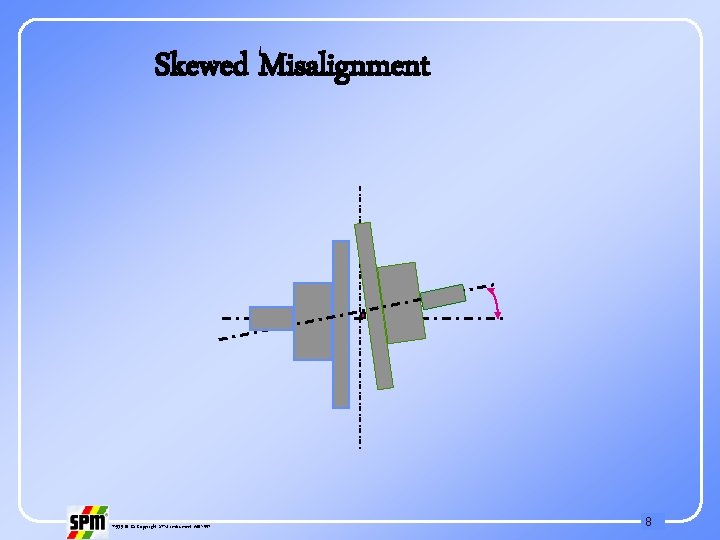
Skewed Misalignment 71535 B © Copyright SPM Instrument AB 1997 8

Recognition Of Misalignment 1. Excessive Radial & Axial vibration 2. Premature / repetitive failure of bearing, seal, coupling. 3. Loose coupling elements. 4. Leakage from the seal. 5. Loose base bolts. 6. Coupling become hot while running. 7. High casing temperature. 71535 B © Copyright SPM Instrument AB 1997 9
Scientific Diagnosis Of Misalignment 1. Vibration Spectrum Analysis 2. Vibration Phase Analysis 3. Wear Particle Analysis 71535 B © Copyright SPM Instrument AB 1997 10
1. Vibration Spectrum Analysis Angular - Axial vibration at Offset 1 X RPM - Radial vibration at 2 X or 3 X RPM Harmonics (3 X-10 X) generates as severity increases. • If the 2 X amplitude more than 50% of 1 X then coupling damage starts. • If the 2 X amplitude more than 150% of 1 X then machine should be stopped for correction. 71535 B © Copyright SPM Instrument AB 1997 11
2. Vibration Phase Analysis Angular - 1800 phase shift in the axial direction across the coupling. Offset - 1800 phase shift in the radial direction across the coupling. 00 to 1800 phase shift occur as the sensor moves from horizontal to the vertical direction of the same machine. Skew - 1800 phase shift in the axial or radial direction 71535 B © Copyright SPM Instrument AB 1997 across the coupling. 12

3. Wear Particle Analysis Curly cutting wear particle of 5: 1 to 50: 1 aspect ratio. 71535 B © Copyright SPM Instrument AB 1997 13
Types Of Couplings Flexible : Pin bush, Tyre, Love joy, ESBI Valkan tyre Semi Flexible : Fluid Rigid : Geared, Resilient 71535 B © Copyright SPM Instrument AB 1997 14

Flexible Coupling Can flexible coupling take misalignment? Flexible coupling can be used to take minor misalignment but it will generate heat and flexible members will fail prematurely. 71535 B © Copyright SPM Instrument AB 1997 15

Alignment Methods 1. Rough Alignment (a) Using straight edge (b) Twin wire method 2. Precision Alignment (a) Face & Rim (b) Reverse indicator 71535 B © Copyright SPM Instrument AB 1997 16
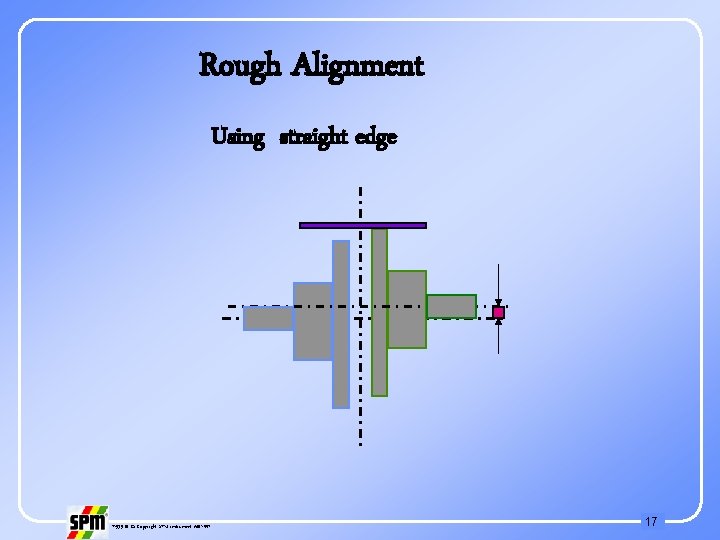
Rough Alignment Using straight edge 71535 B © Copyright SPM Instrument AB 1997 17
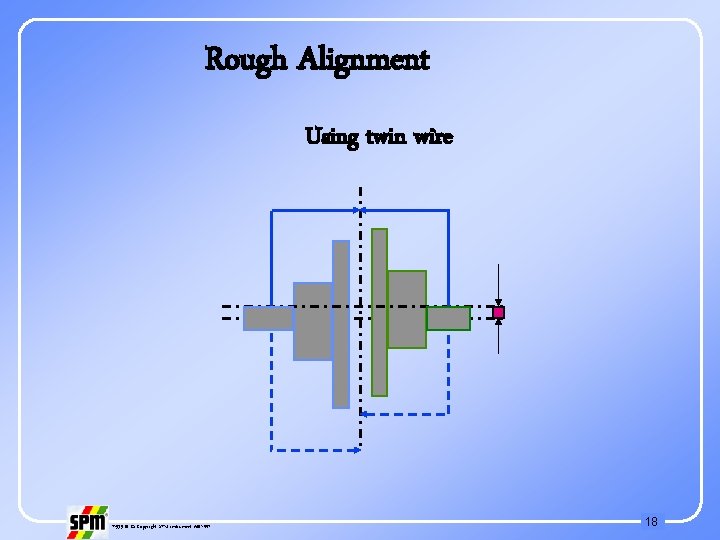
Rough Alignment Using twin wire 71535 B © Copyright SPM Instrument AB 1997 18
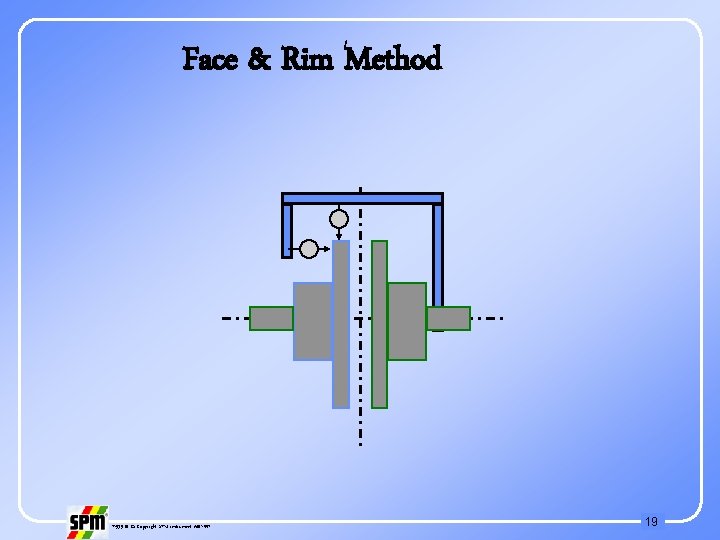
Face & Rim Method 71535 B © Copyright SPM Instrument AB 1997 19
Face & Rim Method Advantages: 1. Good for large dia. coupling hubs where the shafts are close together. 2. To be used where one of the shafts can not rotate during alignment. 3. Easy to use. Disadvantages: 1. Difficult to take face readings, if there is axial float in the shaft. 2. Requires removal of coupling spool. 3. More complex alignment calculation. 71535 B © Copyright SPM Instrument AB 1997 20
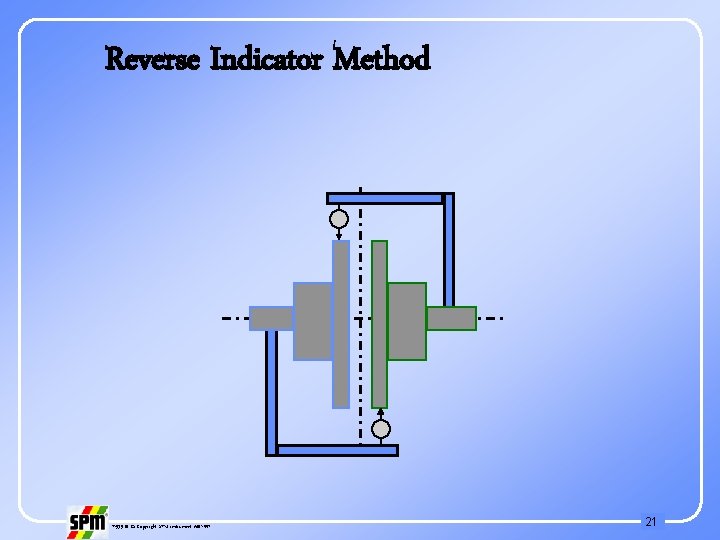
Reverse Indicator Method 71535 B © Copyright SPM Instrument AB 1997 21
Reverse Indicator Method Advantages: 1. More accurate than face & rim method. 2. Readings are not affected by axial float. 3. Possible to keep the coupling spool. Disadvantages: 1. Both shafts have to be rotated. 2. Should not be used on close coupled shafts. 3. Difficult to take readings on long shaft. 71535 B © Copyright SPM Instrument AB 1997 22
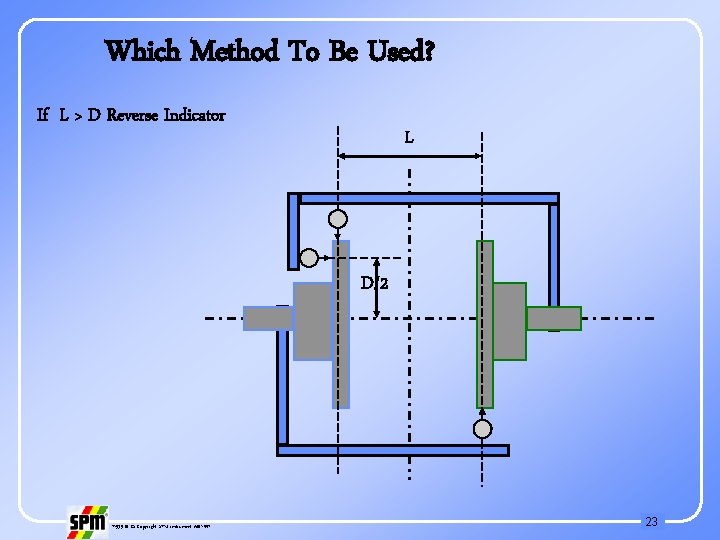
Which Method To Be Used? If L > D Reverse Indicator L D/2 71535 B © Copyright SPM Instrument AB 1997 23
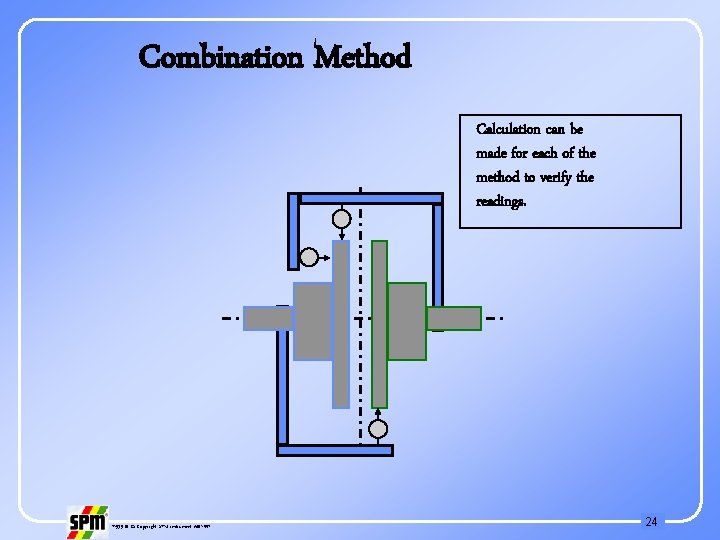
Combination Method Calculation can be made for each of the method to verify the readings. 71535 B © Copyright SPM Instrument AB 1997 24
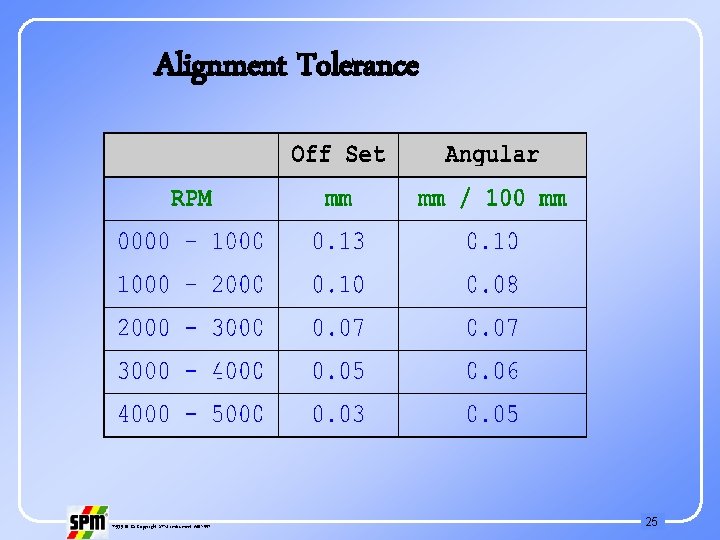
Alignment Tolerance 71535 B © Copyright SPM Instrument AB 1997 25
Disadvantages Of Dial Indicator Method ØMore time consuming. ØToo much manual work. ØIndicator sag. ØDifficult to perform on long shaft. ØDifficult to determine soft foot. ØDifficult to perform vertical shaft alignment. 71535 B © Copyright SPM Instrument AB 1997 26
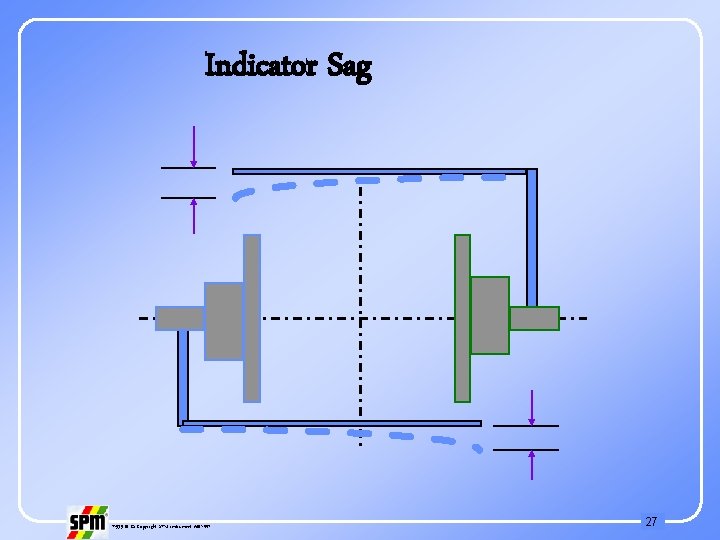
Indicator Sag 71535 B © Copyright SPM Instrument AB 1997 27
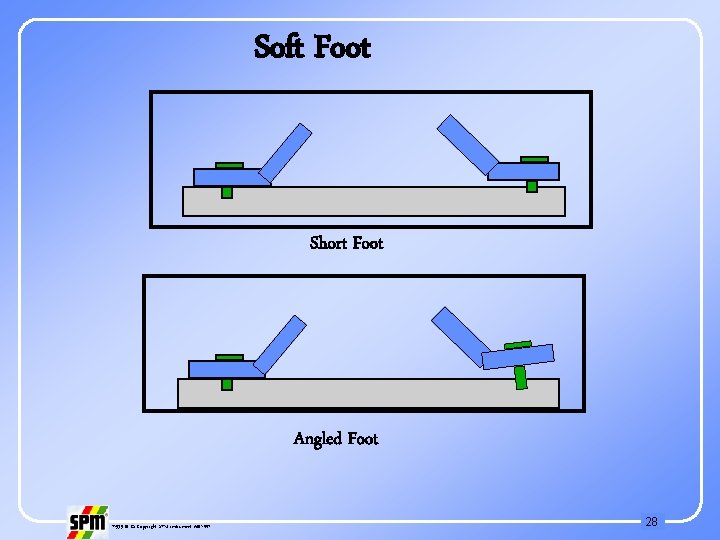
Soft Foot Short Foot Angled Foot 71535 B © Copyright SPM Instrument AB 1997 28
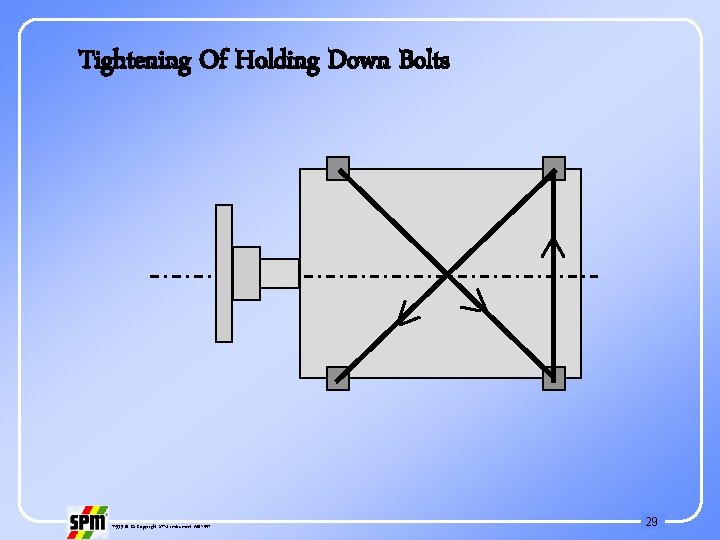
Tightening Of Holding Down Bolts 71535 B © Copyright SPM Instrument AB 1997 29
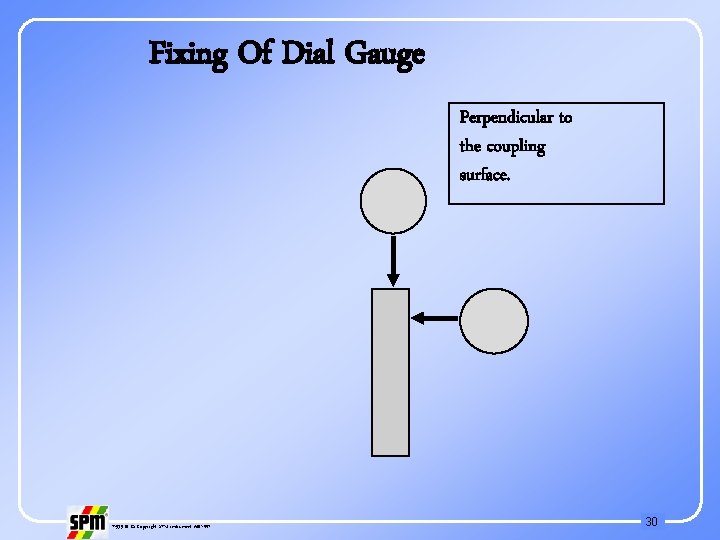
Fixing Of Dial Gauge Perpendicular to the coupling surface. 71535 B © Copyright SPM Instrument AB 1997 30
Rules For Good Alignment ØClean the machine base. Remove rust burrs etc. ØUse steel or brass shims. ØCheck indicator sag. ØCheck soft foot. ØCheck dial gauges before taking readings. ØUse correct bolt tightening procedure. ØDon’t lift the machine more than necessary. ØTry to put the stem of dial gauge perpendicular to the surface of coupling. ØUse jack bolts. 71535 B © Copyright SPM Instrument AB 1997 31
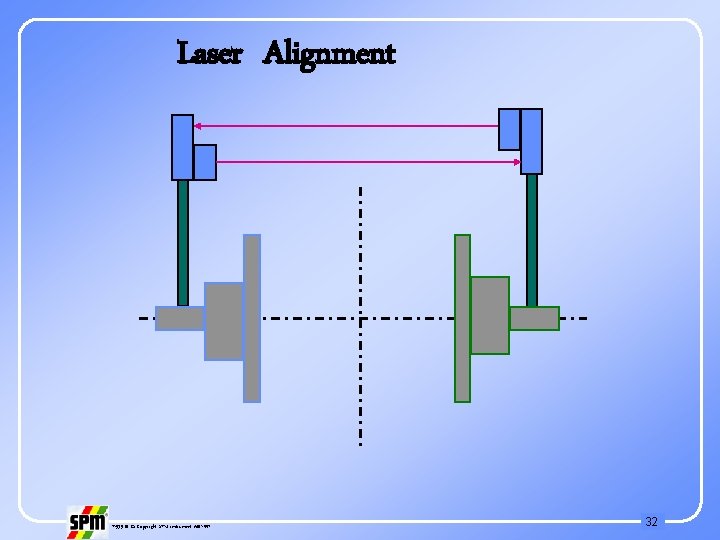
Laser Alignment 71535 B © Copyright SPM Instrument AB 1997 32
Laser Light Amplified By Stimulated Emission Of Radiation ØLaser was originally emitted by charge sent through a gas mixture of Helium & Neon. ØNow it emitted by a low power semi conductor diode with collimating lenses. ØModulated to avoid interference from other light source ØIt is collinear. ØSingle wave length of 670 nm. ØClass II Laser is used for Laser Alignment System. 71535 B © Copyright SPM Instrument AB 1997 33
Laser Alignment Advantages: 1. Easy to use. 2. Use Reverse Indicator Method. 3. Machine does the calculations. 4. 0 - 20 m max. working distance. 5. Selectable high resolution 0. 1, 0. 001 mm. 6. No indicator sag. 7. Soft foot measurement program. 8. Horizontal shaft alignment with mim 600 rotation. 9. Vertical shaft alignment program. 10. Thermal or offset compensation. 71535 B © Copyright SPM Instrument AB 1997 34

11. Machine train alignment program. 12. Cardon shaft alignment. 13. Straightness, Flatness, Perpendicularly, Parallelism measurement. 14. Spindle alignment. 15. Static feet correction. 16. Continuos monitoring. 71535 B © Copyright SPM Instrument AB 1997 35

Face Readings 71535 B © Copyright SPM Instrument AB 1997 36
71535 B © Copyright SPM Instrument AB 1997 37
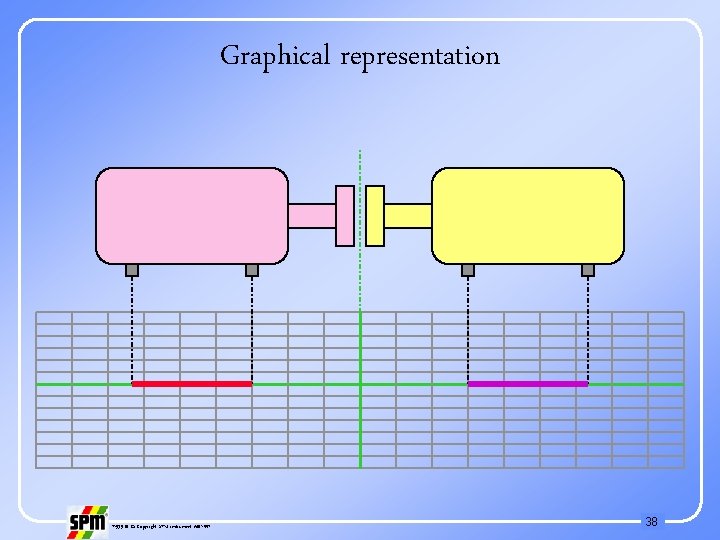
Graphical representation 71535 B © Copyright SPM Instrument AB 1997 38
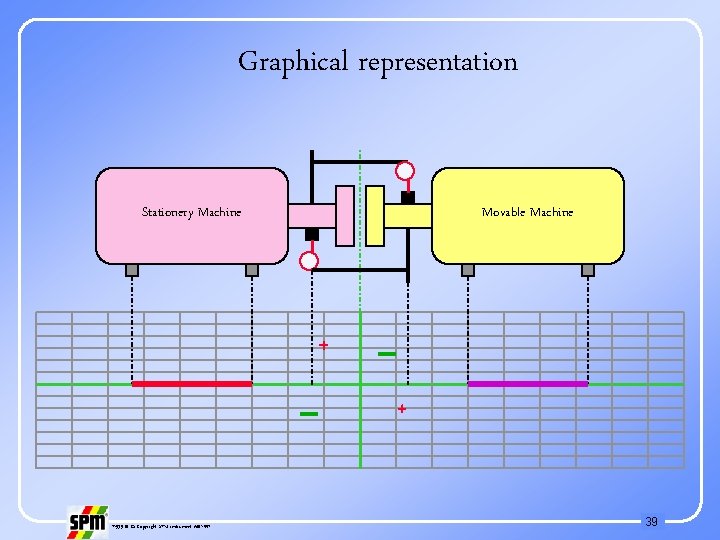
Graphical representation Stationery Machine Movable Machine + + 71535 B © Copyright SPM Instrument AB 1997 39
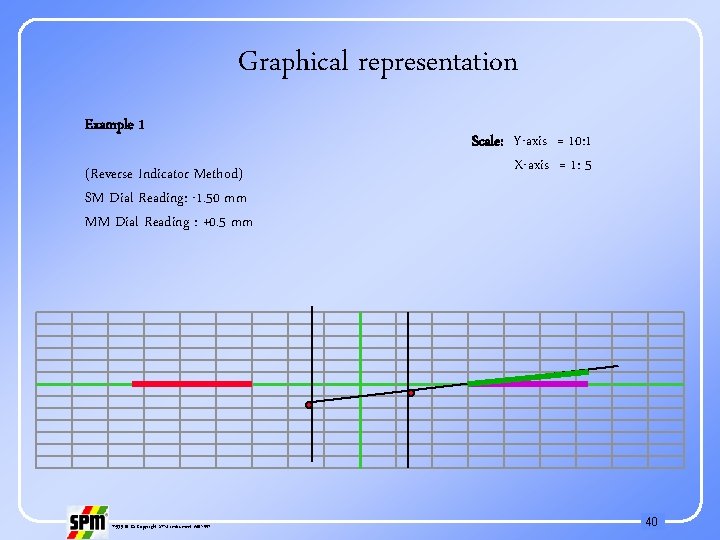
Graphical representation Example 1 (Reverse Indicator Method) SM Dial Reading: -1. 50 mm MM Dial Reading : +0. 5 mm 71535 B © Copyright SPM Instrument AB 1997 Scale: Y-axis = 10: 1 X-axis = 1: 5 40

Graphical representation + + 71535 B © Copyright SPM Instrument AB 1997 41
Graphical representation 71535 B © Copyright SPM Instrument AB 1997 42
- Slides: 42