Training Course Flex Sim Model 1 Sourcearrival rate


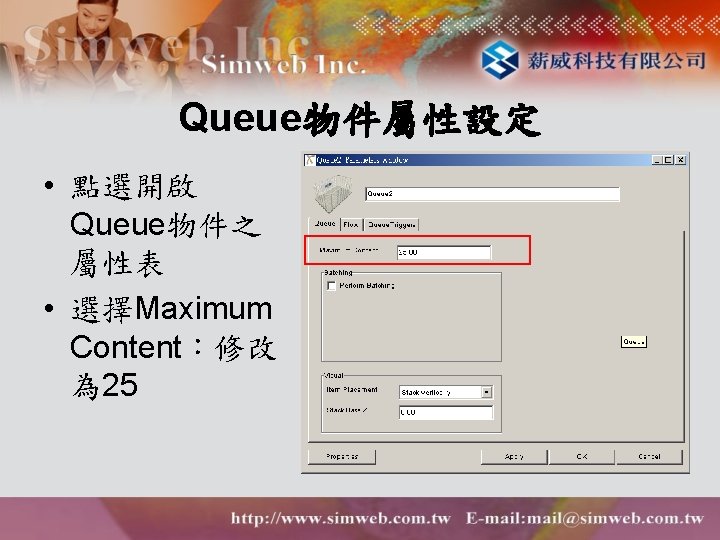
 – normal(20, 2) • 暫存區Queue物件之可容納之大小(size): 25 Flow. Items")
設定 • 選擇Source物件 之inter. Arrivaltime到達 率之下拉式選單 • 選擇Normal Distribution")
設定 • 選擇template button ,開啟選項設定對話框 • 將平均值mean 10變更為 20,符合normal(20, 2)")


 • • • 設定Global Table來指定物件從Queue送至Racks的路徑。 設定全部的Flowitem 1送至Rack 2。 設定全部的Flowitem 2送至Rack")
")
 • 設定Conveyor後 之Queue的Send To Port。 • 至Flow的頁面。 • 在Send")
 • 將 defaulttable 改為在 Tool. Box所設 定的表格名 稱rout。 •")


- Slides: 62
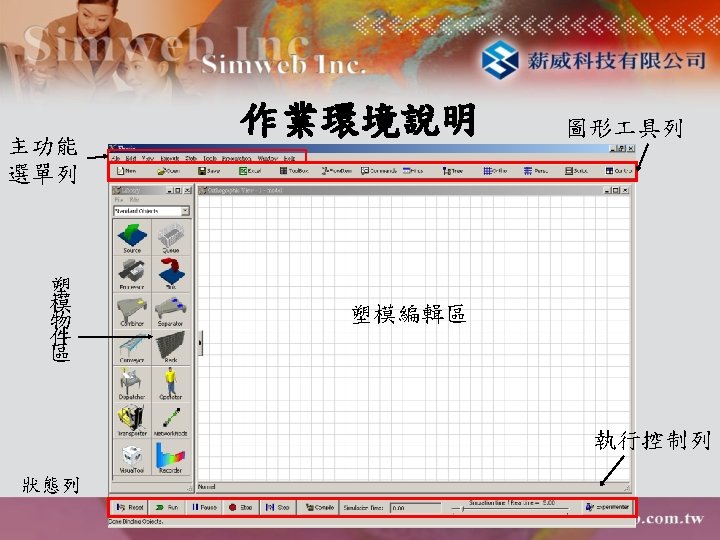
Training Course Flex. Sim上機課程
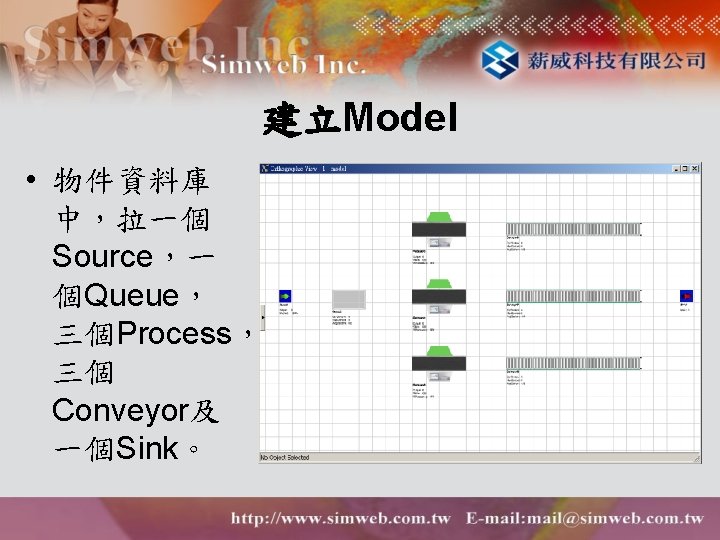
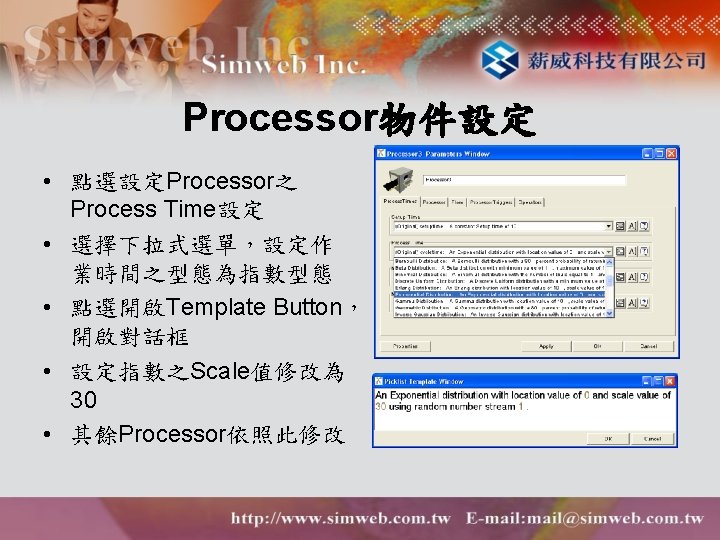
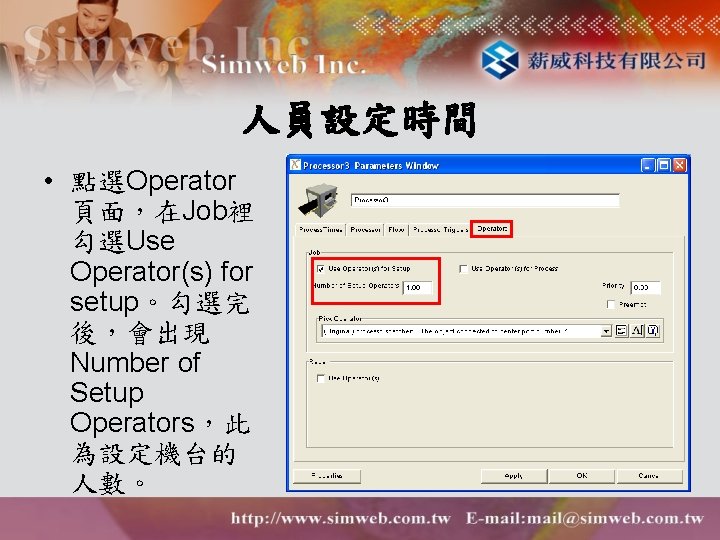
Model 1 之資料設定 • Source物件之到達率(arrival rate) – normal(20, 2) • 暫存區Queue物件之可容納之大小(size): 25 Flow. Items • Tester物件之處理時間 – processing time:exponential(30) • Conveyor速度 – speed: 1 meter per second • Flowitem 途程: – Itemtype 1 to Tester 1 – Itemtype 2 to Tester 2 – Itemtype 3 to Tester 3.
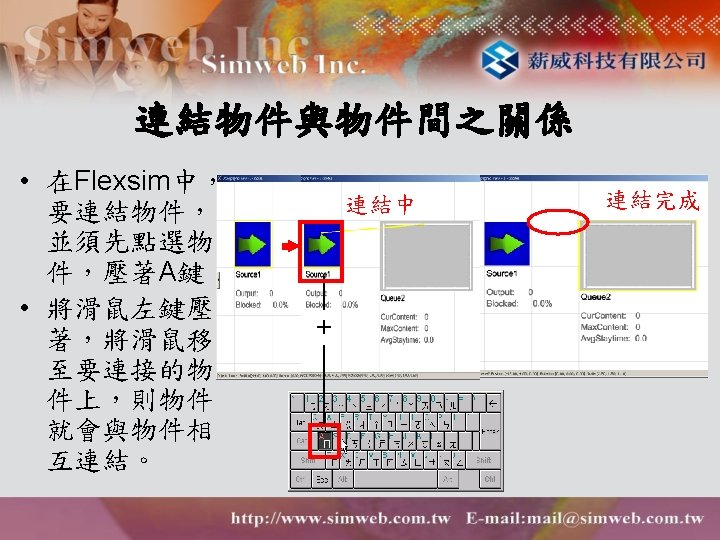
Source 之(arrival rate)設定 • 選擇Source物件 之inter. Arrivaltime到達 率之下拉式選單 • 選擇Normal Distribution
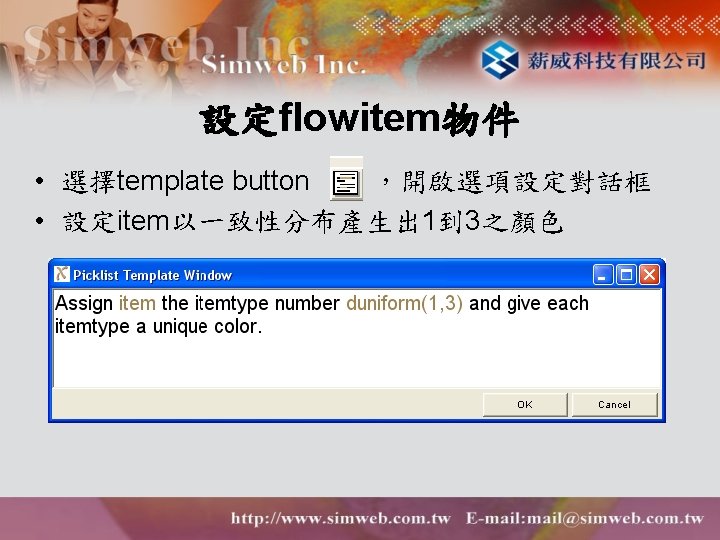
Source 之(arrival rate)設定 • 選擇template button ,開啟選項設定對話框 • 將平均值mean 10變更為 20,符合normal(20, 2)
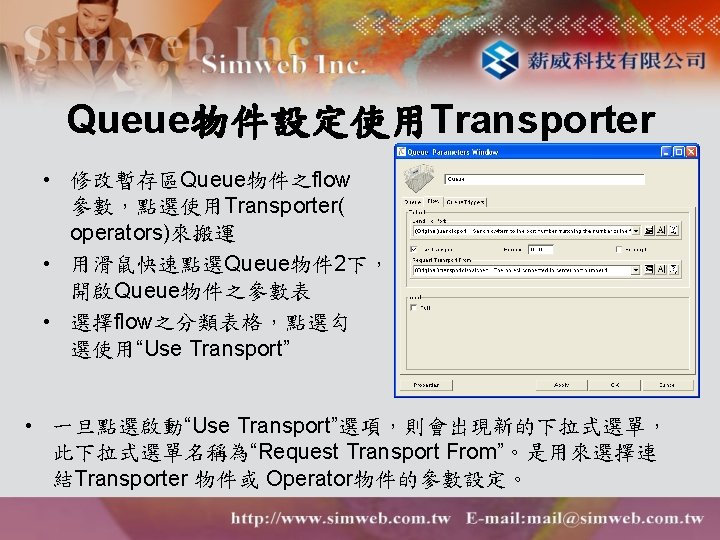
設定Queue物件之flow設定 • 點選Flow屬性頁 • 選擇設定Send to port – 選擇設定Port By Itemtype Direct
Model 2
Model 3
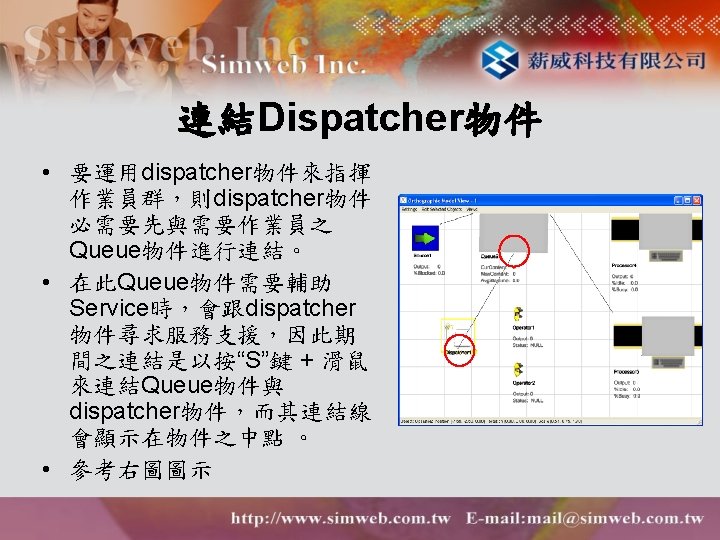
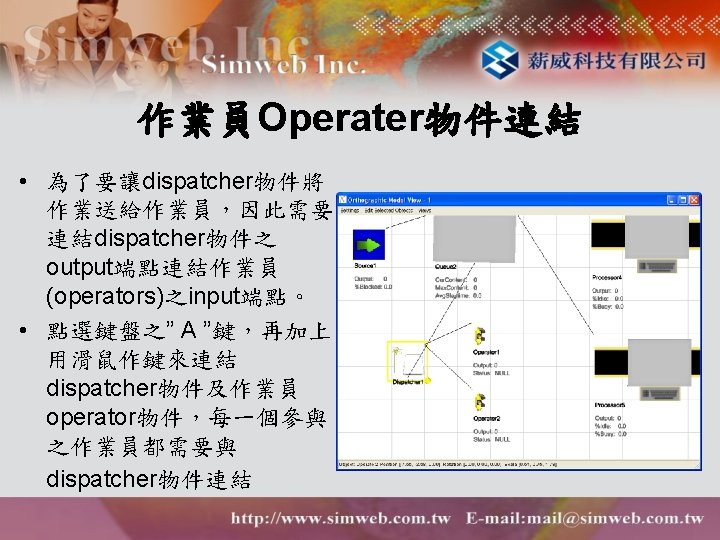
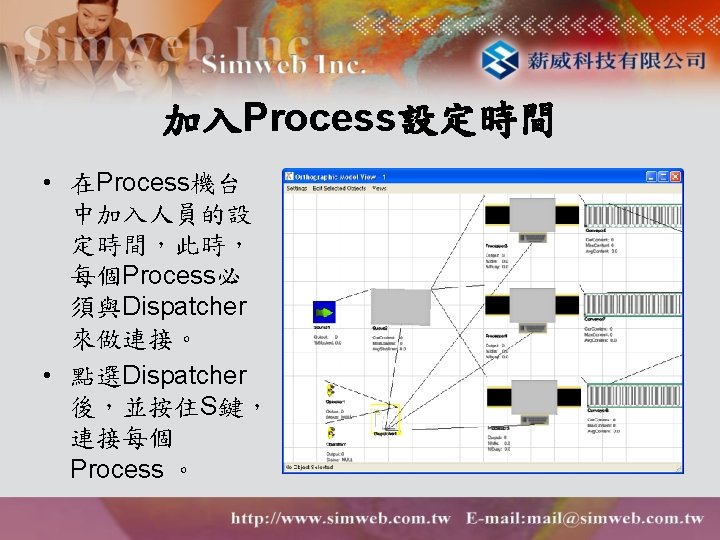
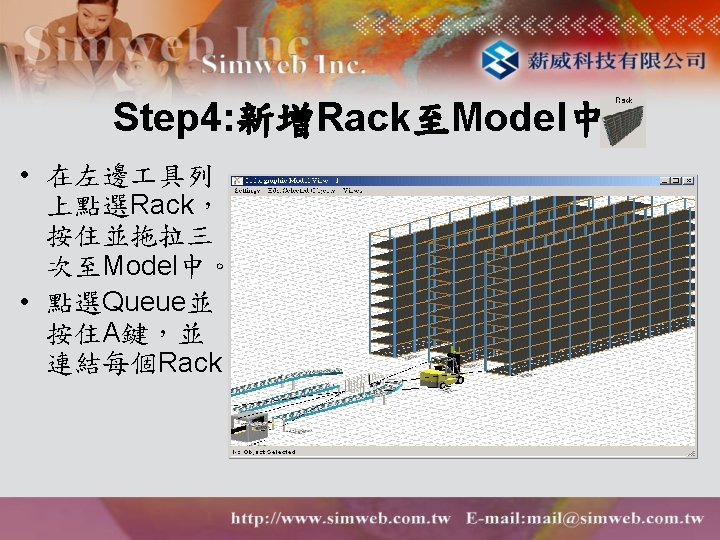
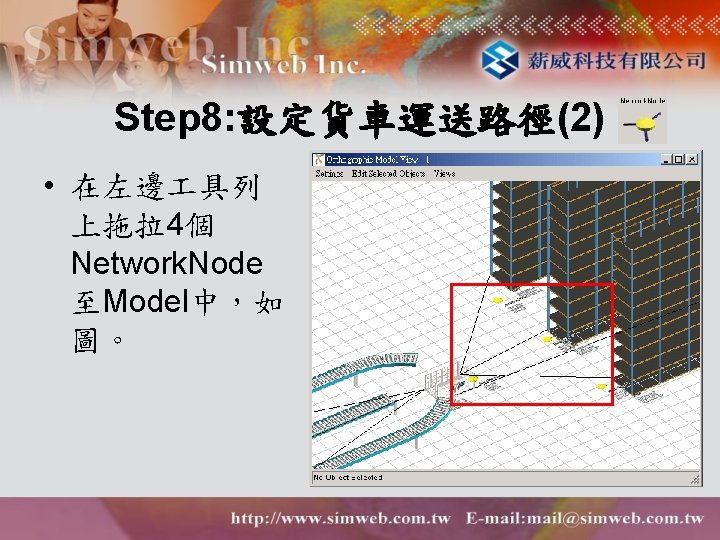
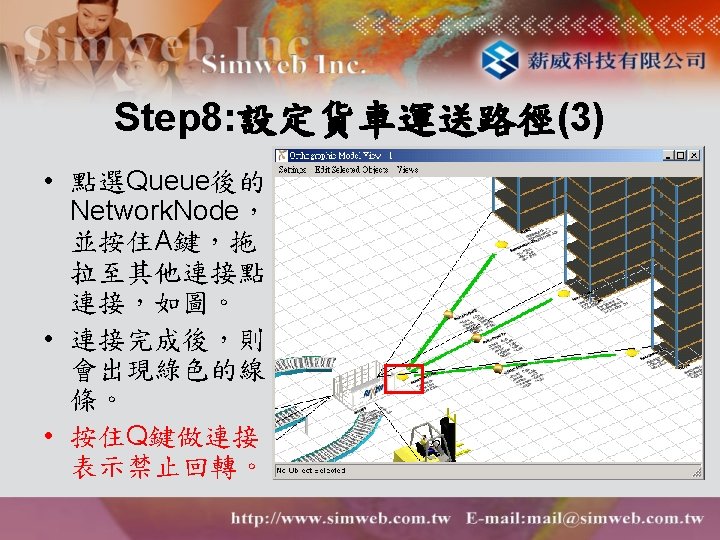
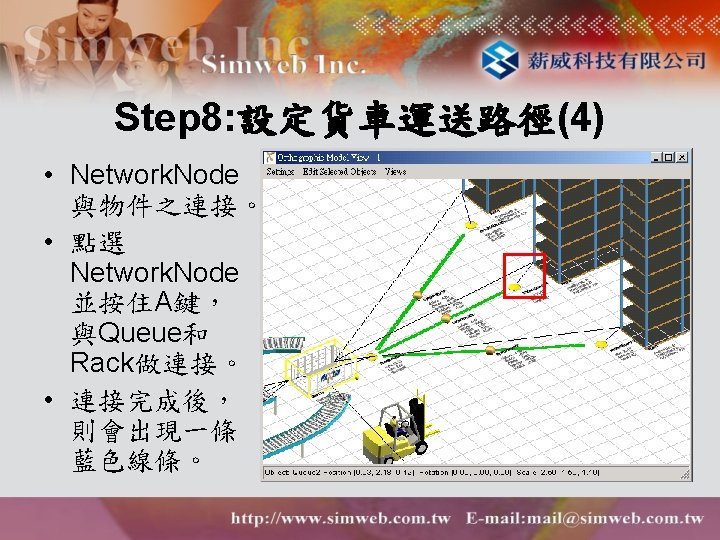
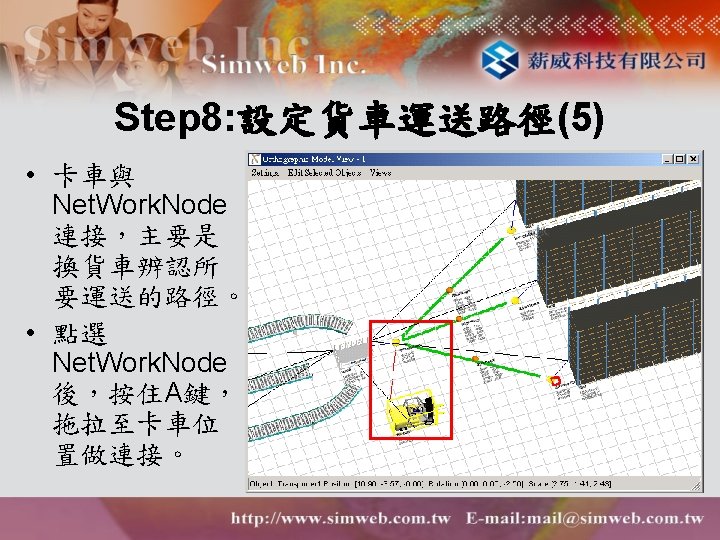
Model描述 Source Queue Dispatcher Tester 1 Conveyor Tester 2 Conveyor Tester 3 Conveyor • • • Rack 1 Queue Rack 2 Rack 3 利用Dispatcher分派人員 作。 將Itemtype 1送至Rack 2 將Itemtype 2送至Rack 3 將Itemtype 3送至Rack 1 設定卡車的運送路線。
Step 1: 讀取Tutorial 2 • 讀取Tutorial 2檔案,並compile。 • Tutorial 2編輯後的Model如下。
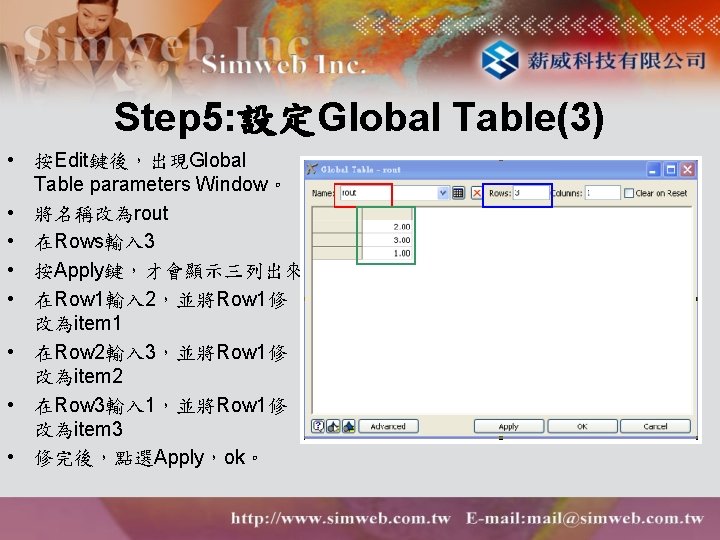
Step 5: 設定Global Table(1) • • • 設定Global Table來指定物件從Queue送至Racks的路徑。 設定全部的Flowitem 1送至Rack 2。 設定全部的Flowitem 2送至Rack 3。 設定全部的Flowitem 3送至Rack 1。 在上方 具列上點選Tool. Box。 點選完後會出現Global Modeling Tool視窗。 在Global Tables的表格內按Add鍵來新增一Global Table。 再點選Edit鍵來定義此表格。 在Global Table parameters Window下,修改表格名稱為 “rout”
Step 5: 設定Global Table(2)
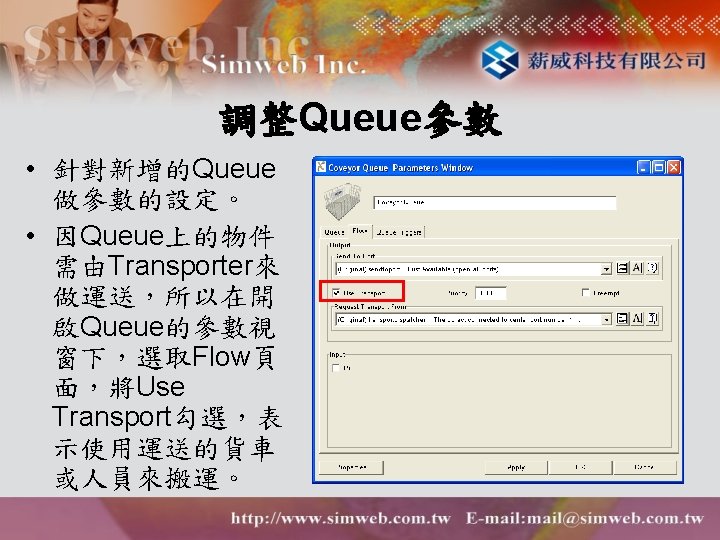
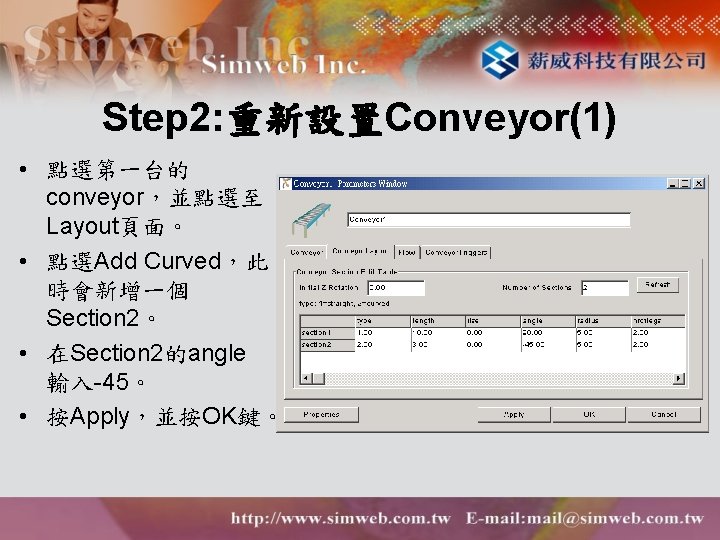
Step 6: 調整Queue的Send to Port(1) • 設定Conveyor後 之Queue的Send To Port。 • 至Flow的頁面。 • 在Send to Port的 選單下點選By Lookup Table。 • 點選 來設定查 詢的表格方式。
Step 6: 調整Queue的Send to Port(2) • 將 defaulttable 改為在 Tool. Box所設 定的表格名 稱rout。 • 按Ok鍵。
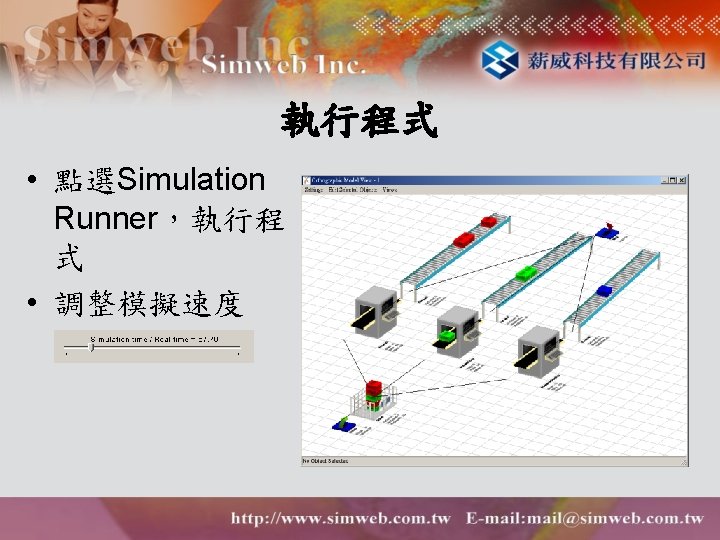
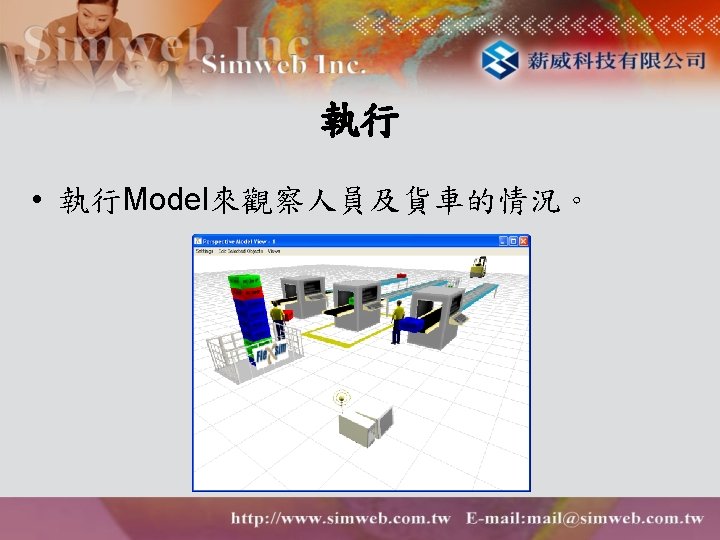
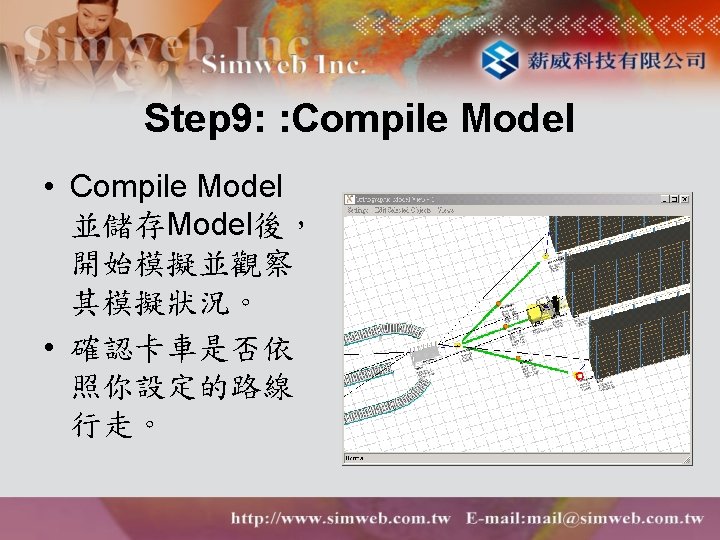
Step 7: Compile Model • Compile Model並儲存Model後,開始模擬並觀察其模擬 狀況。 • 觀察模擬結果為 – item 1放至rack 2 – item 2放至rack 3 – item 3放至rack 1
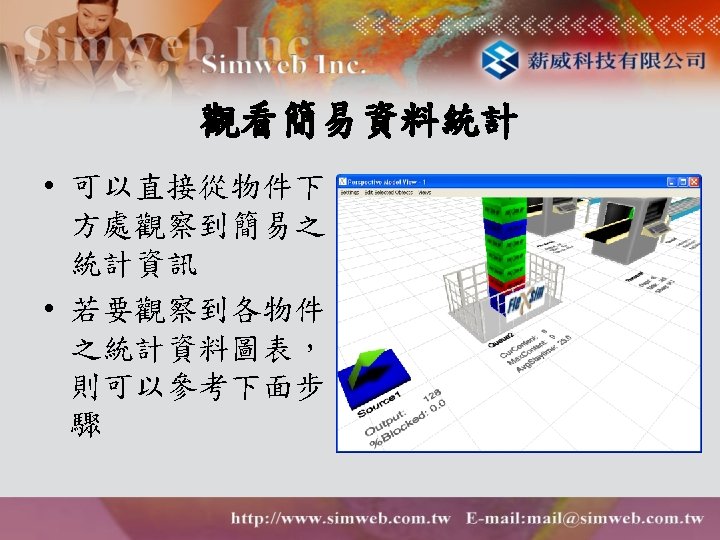
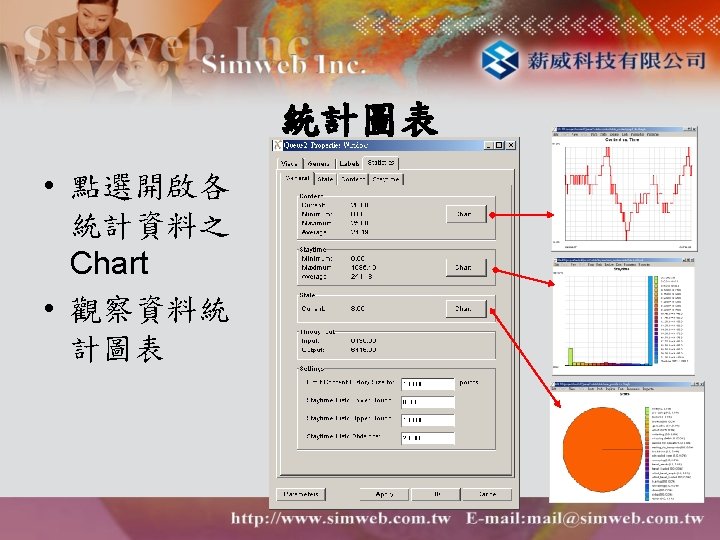
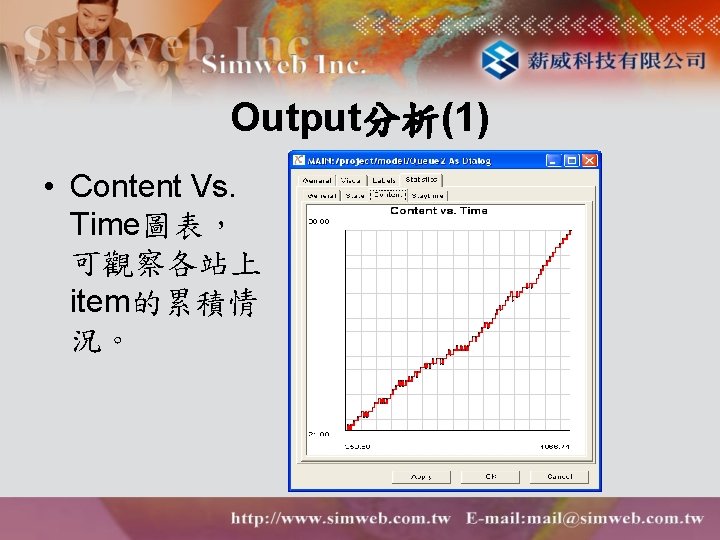
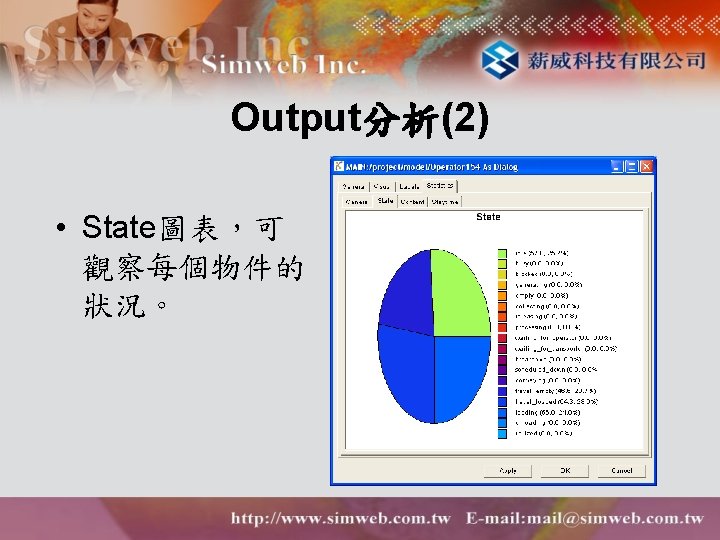
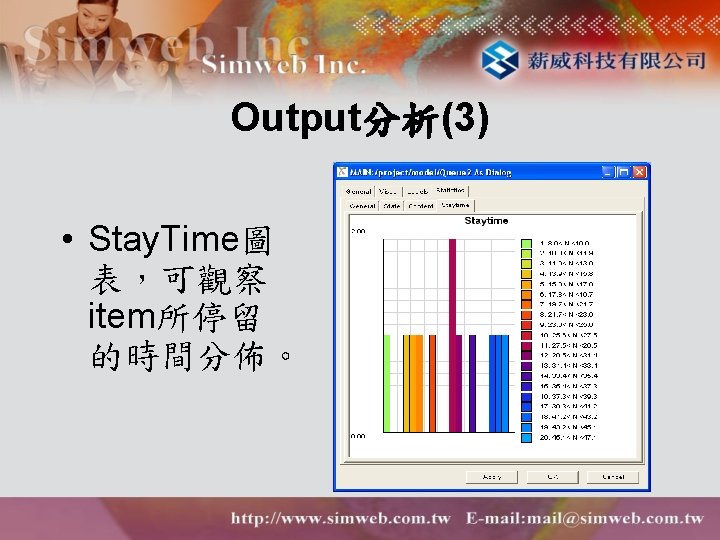
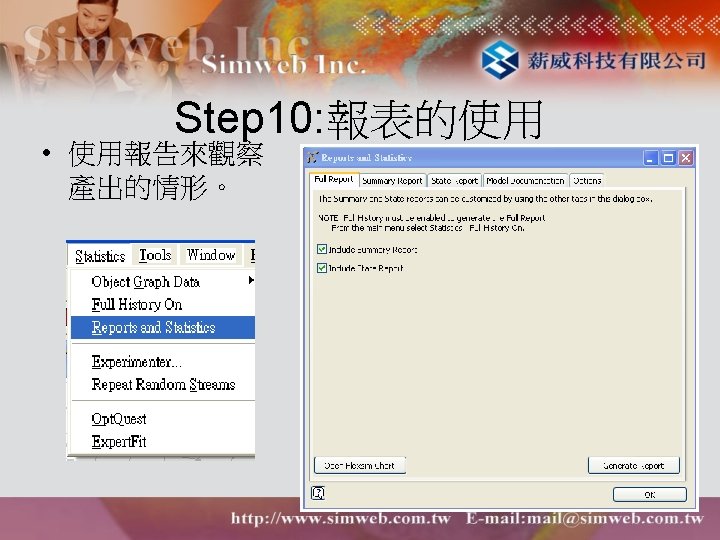
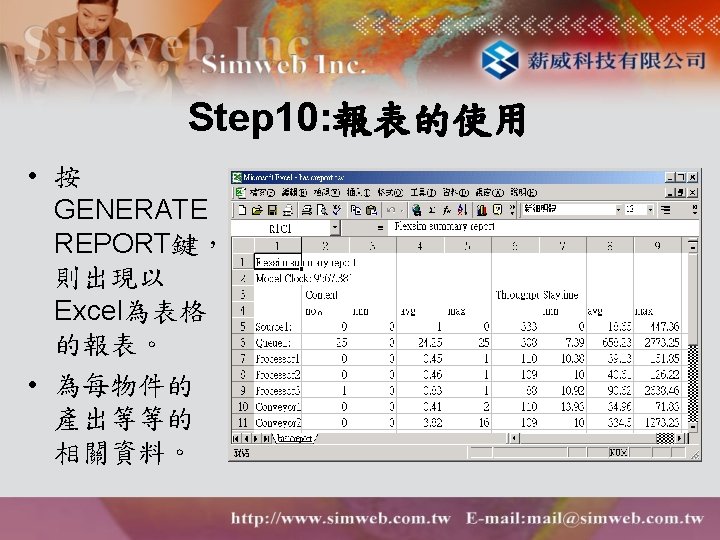
Step 10: 報表的使用 • 至Stats點選 Standard Reports,出現 Standard Report Setup視窗。