Tracker Alignment System Progress 3 dimensional position control
- Slides: 20

Tracker Alignment System Progress 3 -dimensional position control for the AMS-02 tracker with 3/6/2021 ww infrared Laser beams • • AMS TIM Geneva W. Wallraff • • RWTH Aachen February 1, 2006 IBM-ac 01 -ww C: Dokumente und Einstellungenwwall 1Eigene. Dateienww@ibmtravel@ibmTIM 01. 02. 2006 00: 02 7. 100. 416 01 ii 06_TASww. TIM_1 a. ppt slide 1

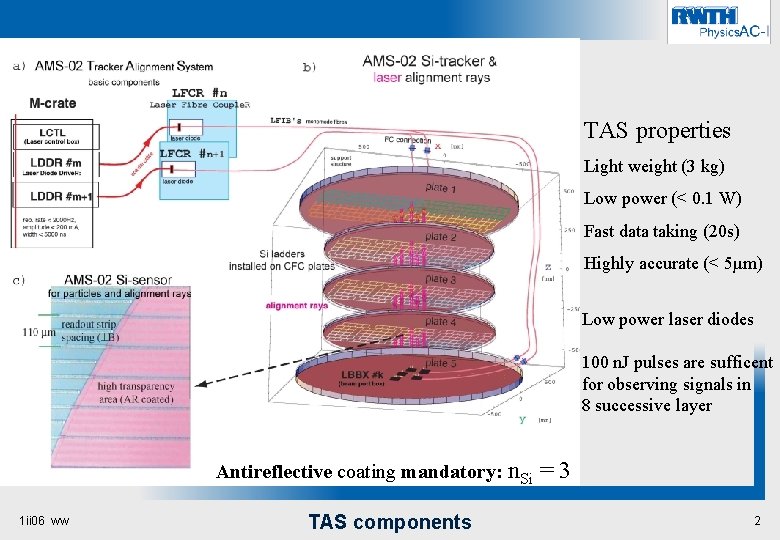
TAS properties Light weight (3 kg) Low power (< 0. 1 W) Fast data taking (20 s) Highly accurate (< 5µm) Low power laser diodes 100 n. J pulses are sufficent for observing signals in 8 successive layer Antireflective coating mandatory: 1 ii 06 ww TAS components n. Si = 3 2

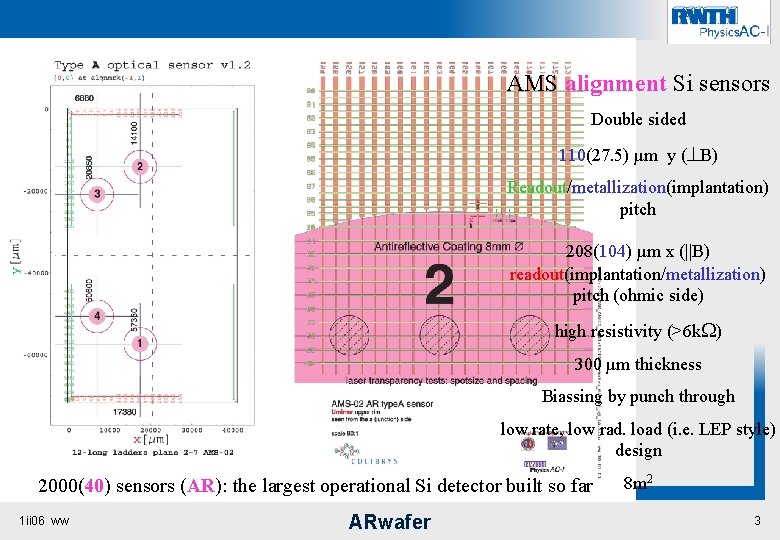
AMS alignment Si sensors Double sided 110(27. 5) µm y (^B) Readout/metallization(implantation) pitch 208(104) µm x (||B) readout(implantation/metallization) pitch (ohmic side) high resistivity (>6 k. W) 300 µm thickness Biassing by punch through low rate, low rad. load (i. e. LEP style) design 2000(40) sensors (AR): the largest operational Si detector built so far 1 ii 06 ww ARwafer 8 m 2 3

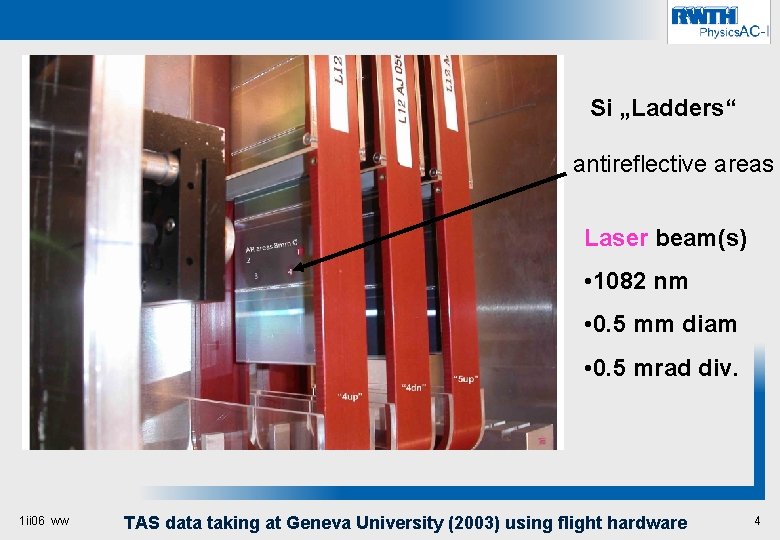
Si „Ladders“ antireflective areas Laser beam(s) • 1082 nm • 0. 5 mm diam • 0. 5 mrad div. 1 ii 06 ww TAS data taking at Geneva University (2003) using flight hardware 4

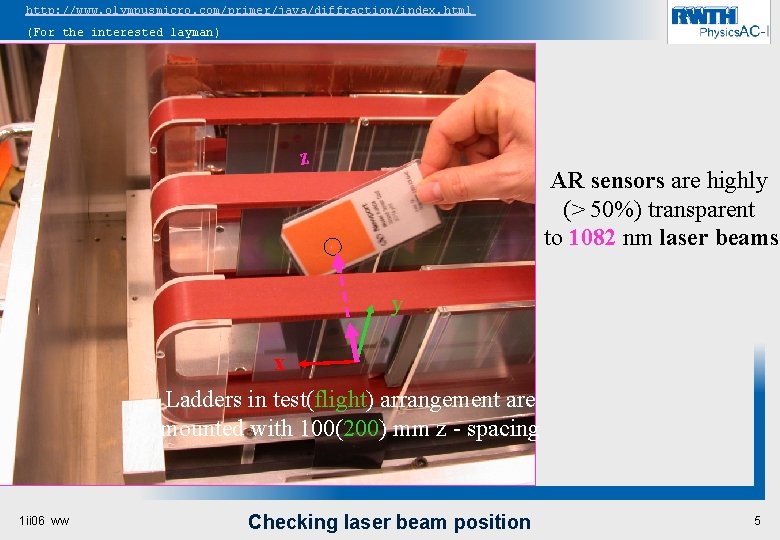
http: //www. olympusmicro. com/primer/java/diffraction/index. html (For the interested layman) z AR sensors are highly (> 50%) transparent to 1082 nm laser beams y x Ladders in test(flight) arrangement are mounted with 100(200) mm z - spacing 1 ii 06 ww Checking laser beam position 5

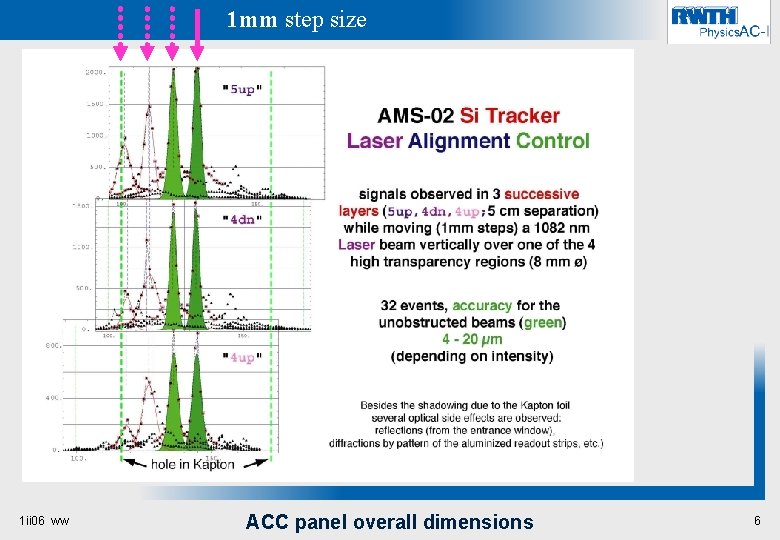
1 mm step size 8 mm 1 ii 06 ww ACC panel overall dimensions 6

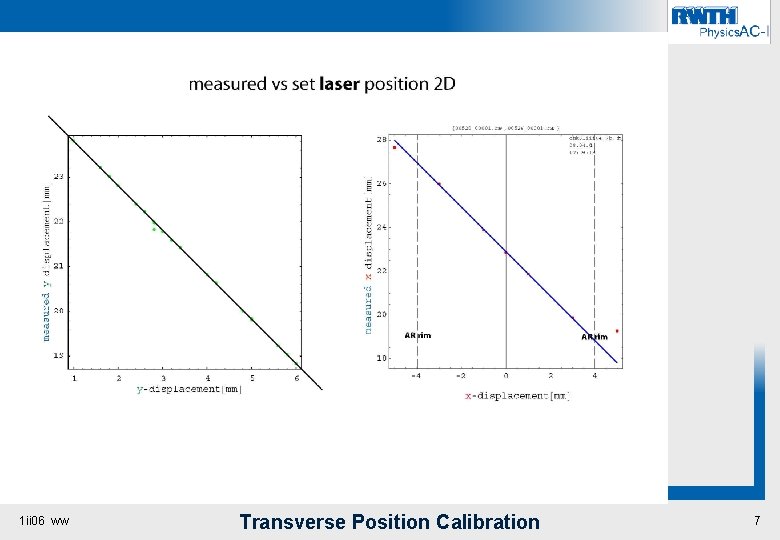
1 ii 06 ww Transverse Position Calibration 7

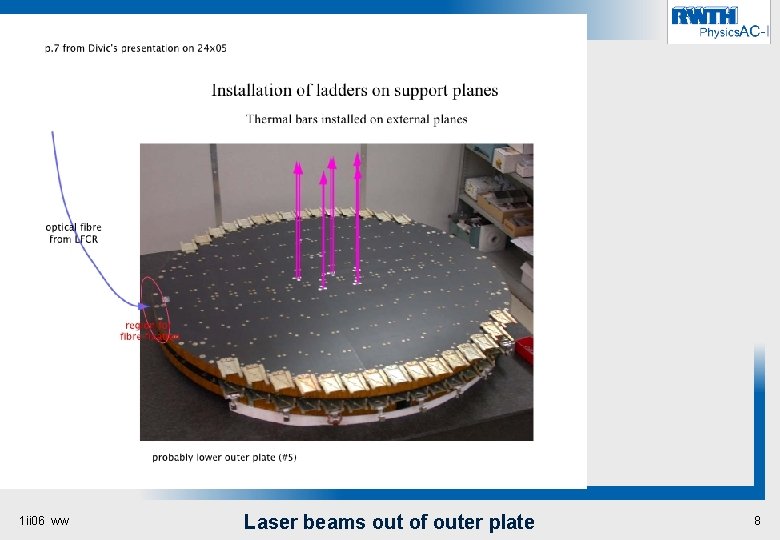
1 ii 06 ww Laser beams out of outer plate 8

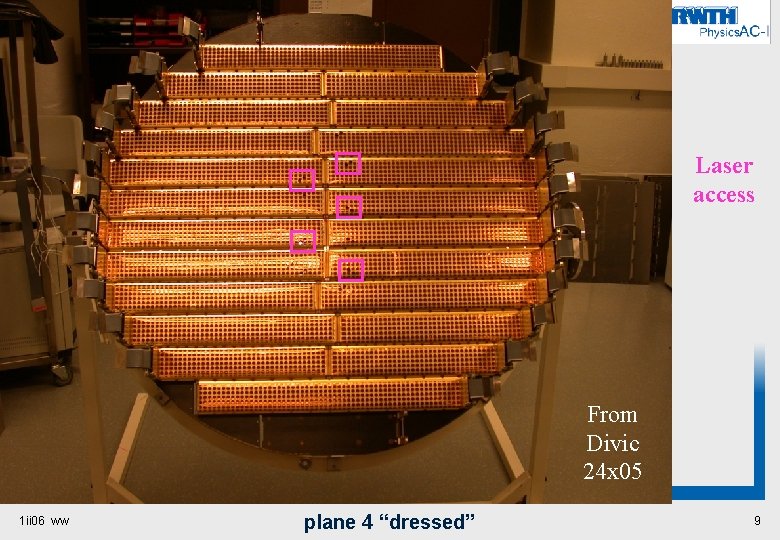
Laser access From Divic 24 x 05 1 ii 06 ww plane 4 “dressed” 9

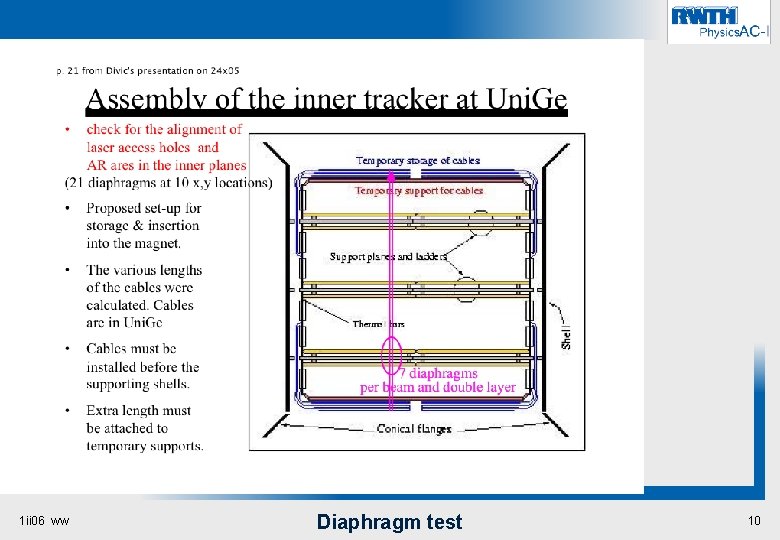
1 ii 06 ww Diaphragm test 10

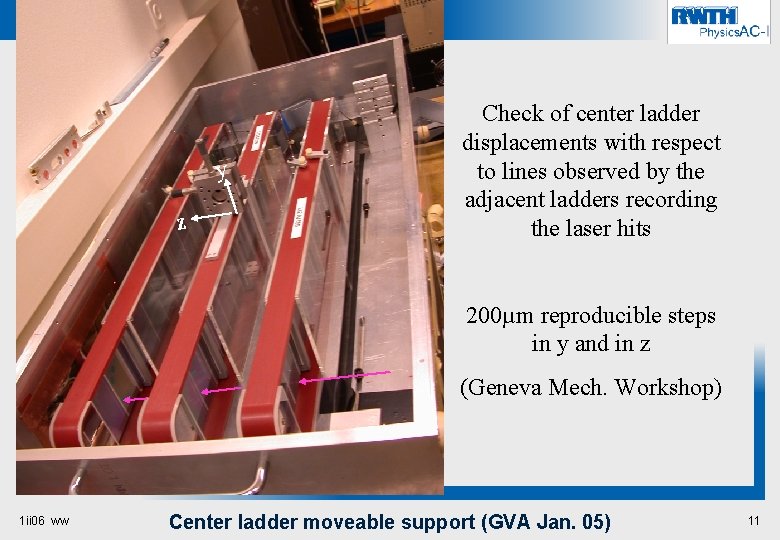
y z Check of center ladder displacements with respect to lines observed by the adjacent ladders recording the laser hits 200µm reproducible steps in y and in z (Geneva Mech. Workshop) 1 ii 06 ww Center ladder moveable support (GVA Jan. 05) 11

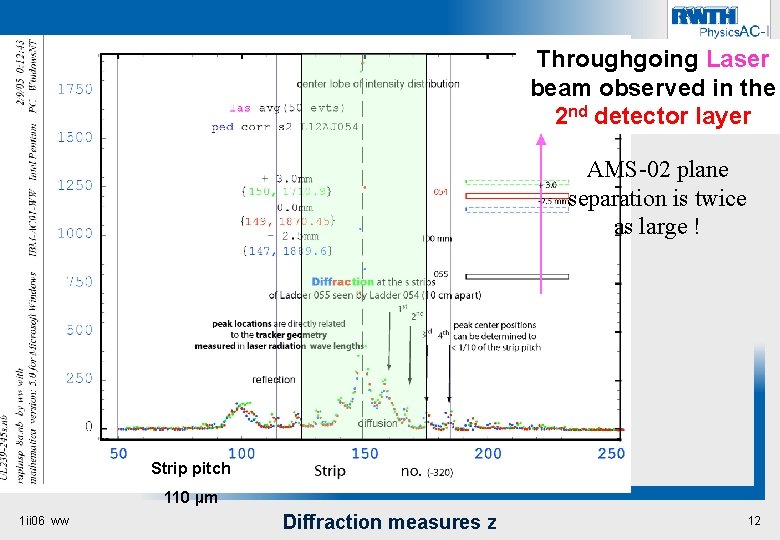
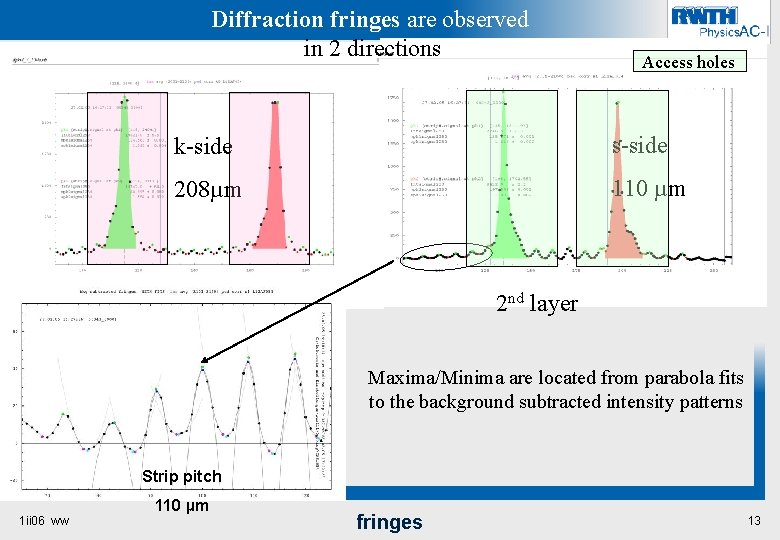
Throughgoing Laser beam observed in the 2 nd detector layer AMS-02 plane separation is twice as large ! Strip pitch 110 µm 1 ii 06 ww Diffraction measures z 12

Diffraction fringes are observed in 2 directions Access holes k-side s-side 208µm 110 µm 2 nd layer Maxima/Minima are located from parabola fits to the background subtracted intensity patterns Strip pitch 110 µm 1 ii 06 ww fringes 13

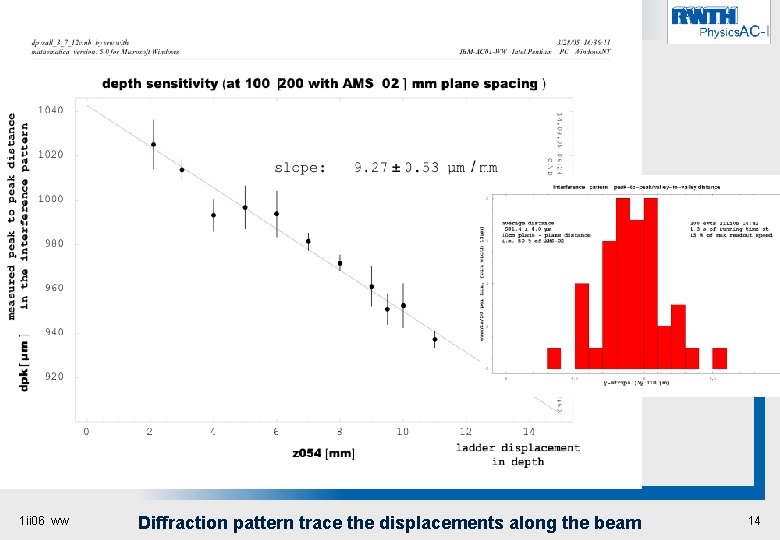
50 evts 200 evts DAQ can be/was run at 2/0. 165 k. Hz 1 ii 06 ww Diffraction pattern trace the displacements along the beam 14

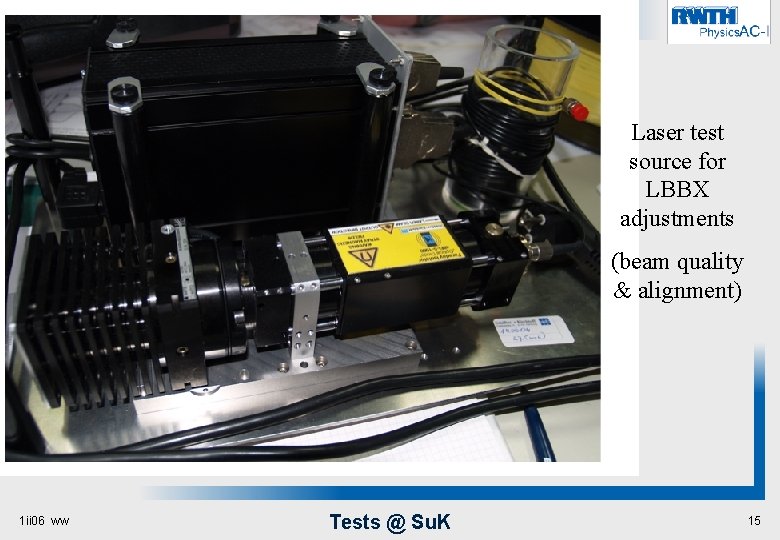
Laser test source for LBBX adjustments (beam quality & alignment) 1 ii 06 ww Tests @ Su. K 15

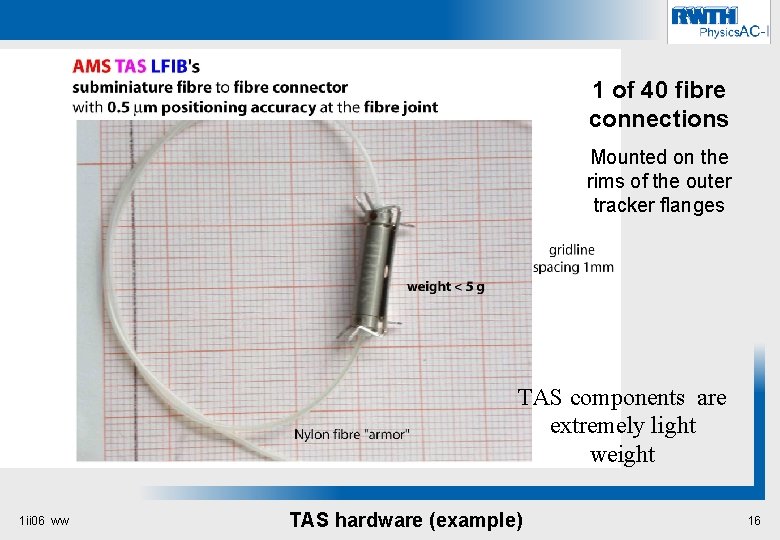
1 of 40 fibre connections Mounted on the rims of the outer tracker flanges TAS components are extremely light weight 1 ii 06 ww TAS hardware (example) 16

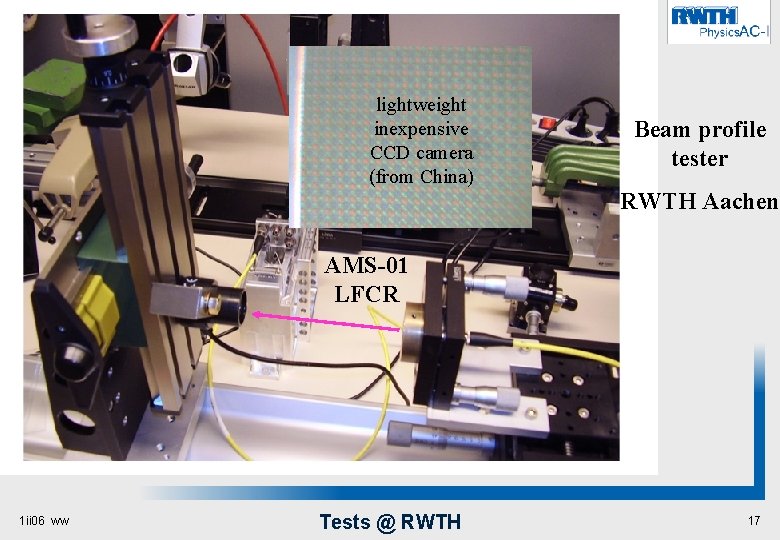
lightweight inexpensive CCD camera (from China) Beam profile tester RWTH Aachen AMS-01 LFCR 1 ii 06 ww Tests @ RWTH 17

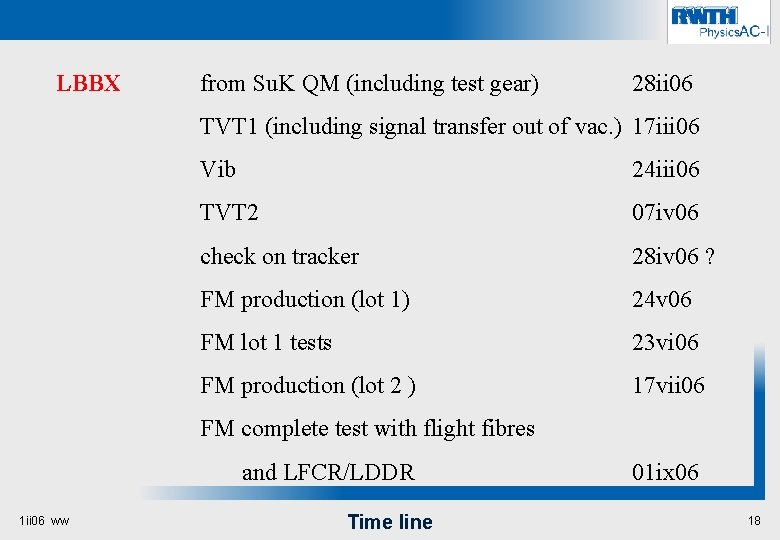
LBBX from Su. K QM (including test gear) 28 ii 06 TVT 1 (including signal transfer out of vac. ) 17 iii 06 Vib 24 iii 06 TVT 2 07 iv 06 check on tracker 28 iv 06 ? FM production (lot 1) 24 v 06 FM lot 1 tests 23 vi 06 FM production (lot 2 ) 17 vii 06 FM complete test with flight fibres and LFCR/LDDR 1 ii 06 ww Time line 01 ix 06 18

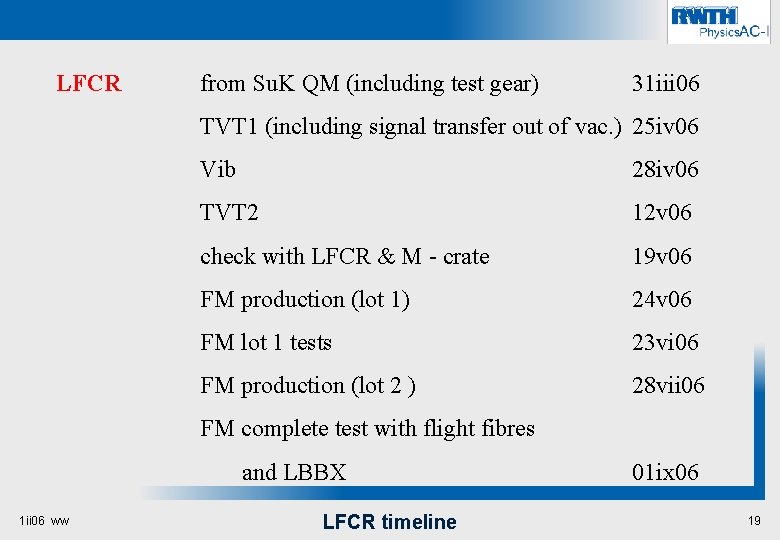
LFCR from Su. K QM (including test gear) 31 iii 06 TVT 1 (including signal transfer out of vac. ) 25 iv 06 Vib 28 iv 06 TVT 2 12 v 06 check with LFCR & M - crate 19 v 06 FM production (lot 1) 24 v 06 FM lot 1 tests 23 vi 06 FM production (lot 2 ) 28 vii 06 FM complete test with flight fibres and LBBX 1 ii 06 ww LFCR timeline 01 ix 06 19

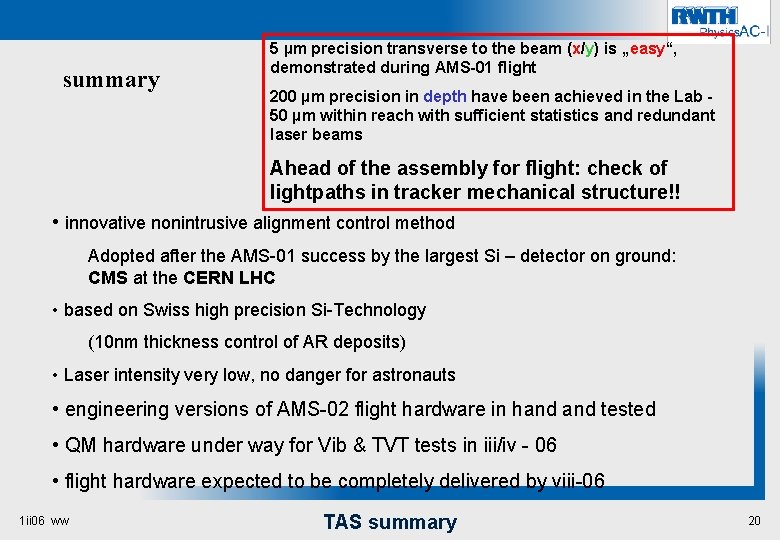
summary 5 µm precision transverse to the beam (x/y) is „easy“, demonstrated during AMS-01 flight 200 µm precision in depth have been achieved in the Lab 50 µm within reach with sufficient statistics and redundant laser beams Ahead of the assembly for flight: check of lightpaths in tracker mechanical structure!! • innovative nonintrusive alignment control method Adopted after the AMS-01 success by the largest Si – detector on ground: CMS at the CERN LHC • based on Swiss high precision Si-Technology (10 nm thickness control of AR deposits) • Laser intensity very low, no danger for astronauts • engineering versions of AMS-02 flight hardware in hand tested • QM hardware under way for Vib & TVT tests in iii/iv - 06 • flight hardware expected to be completely delivered by viii-06 1 ii 06 ww TAS summary 20