Towards Automatic Defect Recognition using Active Infrared Thermography

- Slides: 1

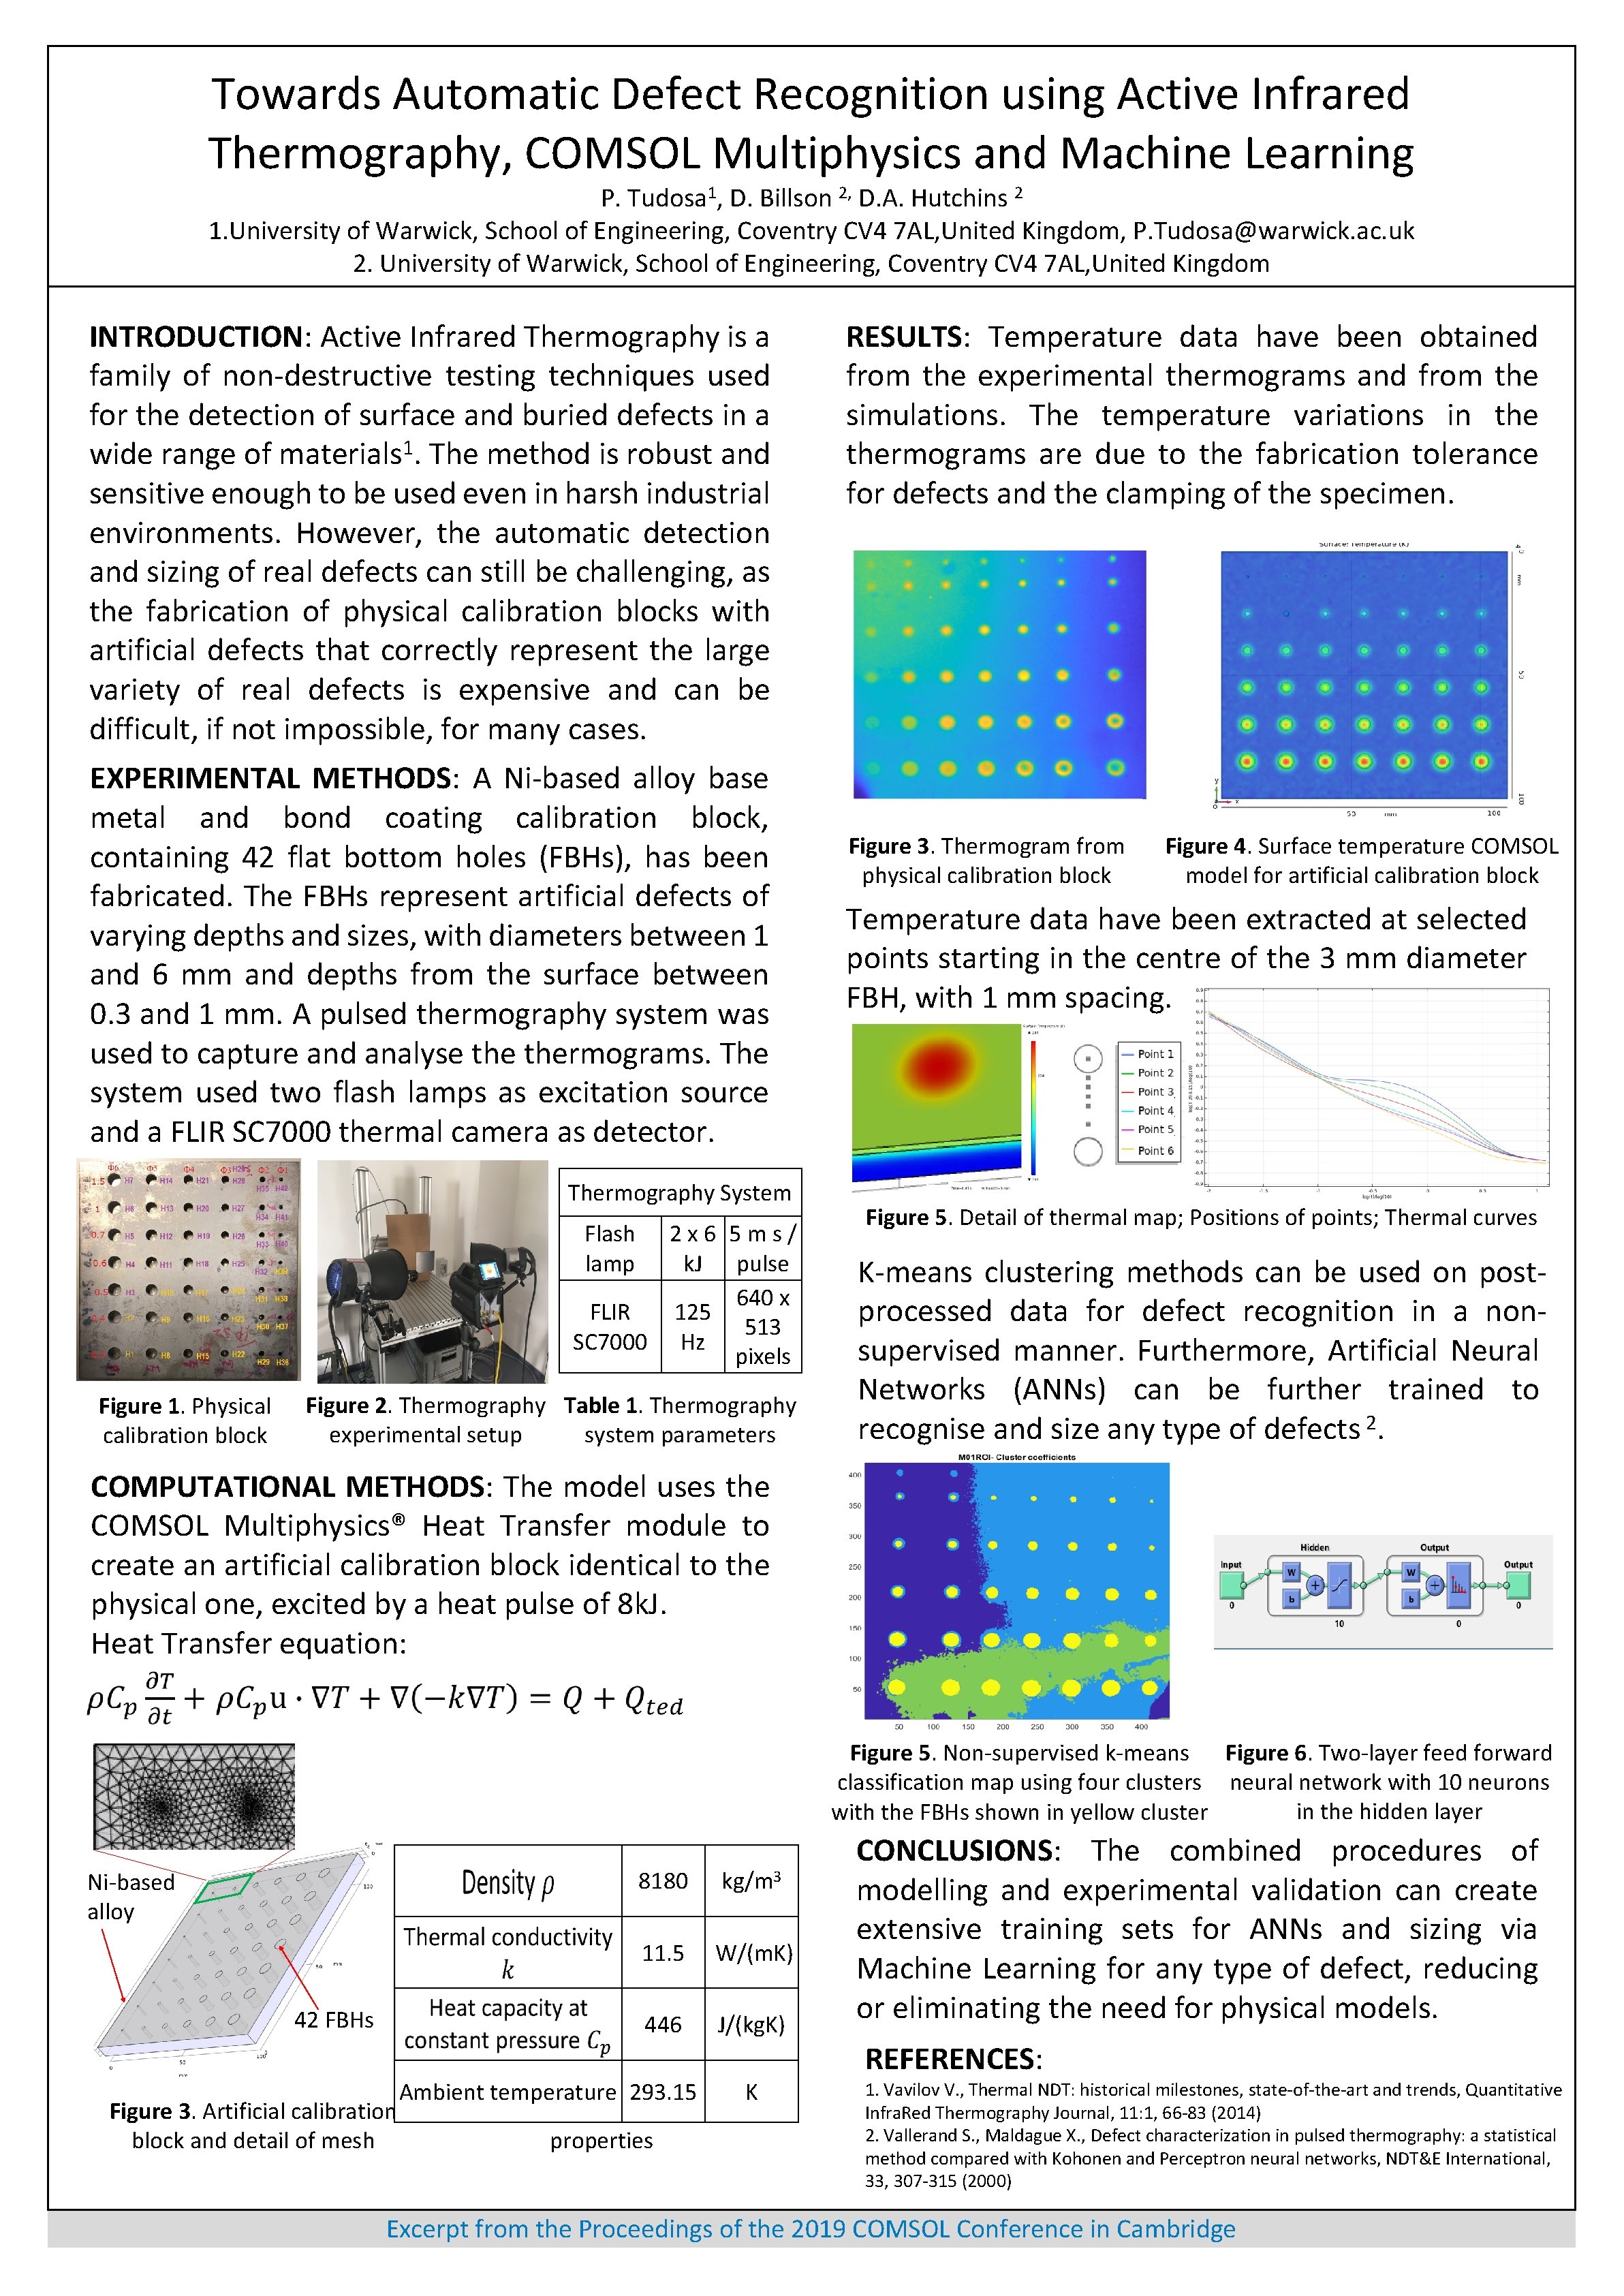
Towards Automatic Defect Recognition using Active Infrared Thermography, COMSOL Multiphysics and Machine Learning P. Tudosa 1, D. Billson 2, D. A. Hutchins 2 1. University of Warwick, School of Engineering, Coventry CV 4 7 AL, United Kingdom, P. Tudosa@warwick. ac. uk 2. University of Warwick, School of Engineering, Coventry CV 4 7 AL, United Kingdom INTRODUCTION: Active Infrared Thermography is a family of non-destructive testing techniques used for the detection of surface and buried defects in a 1 wide range of materials. The method is robust and sensitive enough to be used even in harsh industrial environments. However, the automatic detection and sizing of real defects can still be challenging, as the fabrication of physical calibration blocks with artificial defects that correctly represent the large variety of real defects is expensive and can be difficult, if not impossible, for many cases. EXPERIMENTAL METHODS: A Ni-based alloy base metal and bond coating calibration block, containing 42 flat bottom holes (FBHs), has been fabricated. The FBHs represent artificial defects of varying depths and sizes, with diameters between 1 and 6 mm and depths from the surface between 0. 3 and 1 mm. A pulsed thermography system was used to capture and analyse thermograms. The system used two flash lamps as excitation source and a FLIR SC 7000 thermal camera as detector. Thermography System Flash lamp 2 x 6 5 ms/ k. J pulse 640 x FLIR 125 513 SC 7000 Hz pixels Figure 1. Physical calibration block Figure 2. Thermography Table 1. Thermography experimental setup system parameters RESULTS: Temperature data have been obtained from the experimental thermograms and from the simulations. The temperature variations in thermograms are due to the fabrication tolerance for defects and the clamping of the specimen. Figure 3. Thermogram from physical calibration block Figure 4. Surface temperature COMSOL model for artificial calibration block Temperature data have been extracted at selected points starting in the centre of the 3 mm diameter FBH, with 1 mm spacing. Figure 5. Detail of thermal map; Positions of points; Thermal curves K-means clustering methods can be used on postprocessed data for defect recognition in a nonsupervised manner. Furthermore, Artificial Neural Networks (ANNs) can be further trained to 2 recognise and size any type of defects. COMPUTATIONAL METHODS: The model uses the COMSOL Multiphysics® Heat Transfer module to create an artificial calibration block identical to the physical one, excited by a heat pulse of 8 k. J. Heat Transfer equation: Figure 5. Non-supervised k-means Figure 6. Two-layer feed forward classification map using four clusters neural network with 10 neurons in the hidden layer with the FBHs shown in yellow cluster Ni-based alloy 42 FBHs 8180 kg/m 3 11. 5 W/(m. K) 446 J/(kg. K) Ambient temperature 293. 15 Figure 3. Artificial calibration Table 2. Material block and detail of mesh properties K CONCLUSIONS: The combined procedures of modelling and experimental validation can create extensive training sets for ANNs and sizing via Machine Learning for any type of defect, reducing or eliminating the need for physical models. REFERENCES: 1. Vavilov V. , Thermal NDT: historical milestones, state-of-the-art and trends, Quantitative Infra. Red Thermography Journal, 11: 1, 66 -83 (2014) 2. Vallerand S. , Maldague X. , Defect characterization in pulsed thermography: a statistical method compared with Kohonen and Perceptron neural networks, NDT&E International, 33, 307 -315 (2000) Excerpt from the Proceedings of the 2019 COMSOL Conference in Cambridge