The Microscope Why do we use a microscope


 lens")


- Slides: 30
The Microscope
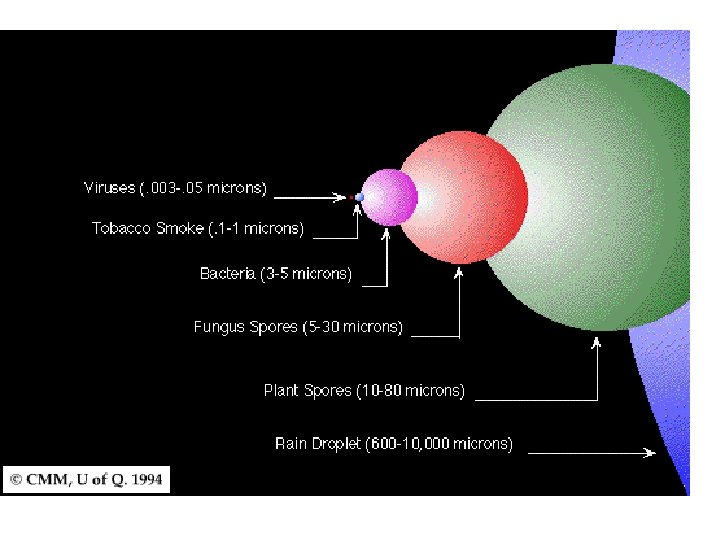
Why do we use a microscope? • Many things are smaller than we can see with the naked eye. To accurately study Biology we need a tool to help us see these tiny things.
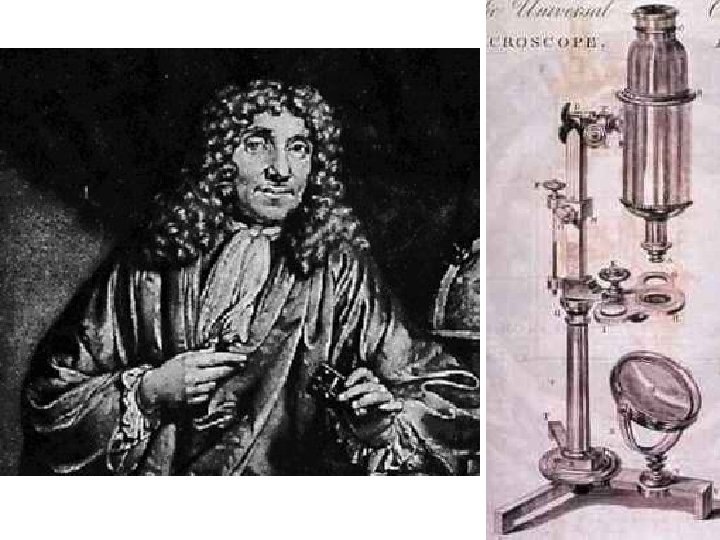
History • Antony van Leeuwenhoek is credited with developing the first microscope in about 1665. Although the compound microscope was already in use, what made Antony’s invention special was that he was able to magnify his ‘wee beasties’ by up to 270 X. • Antony was the first to see bacteria, red blood cells, yeast and so much more!
Types of Microscopes
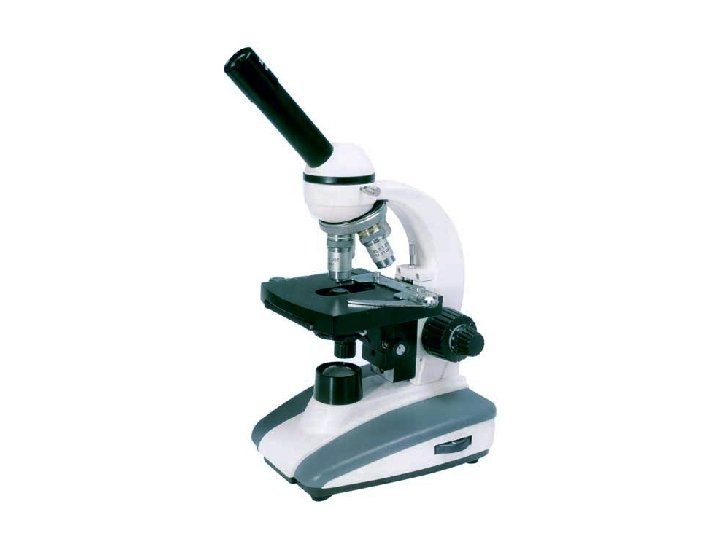
Compound Light Microscope • Combines the power of lenses and light to enlarge the subject being viewed. • Typically, the eyepiece itself allows for 10 X or 15 X magnification and when combined with the three or four objective lenses, produce higher magnification to a maximum of around 1000 X generally. • The compound light microscope is popular among botanists for studying plant cells, in biology to view bacteria and parasites as well as a variety of human/animal cells.
Electron Microscopes • Objects smaller than 0. 2 um can be seen with an electron microscope. (Viruses, internal cellular structures)
Scanning Electron Microscope • Scanning Electron Microscope – Image appears in 3 -dimensions and in black and white. • The magnification is usually 1000 X to 10, 000 X. • It is particularly useful for studying the surfaces of cells and viruses.
Scanning Electron Microscope
Weevil, 75 X Mosquito head, 200 X
Red blood cells, color enhanced
Transmission Electron Microscope • The item to be viewed is sliced into very thin slices, the image is a slice of the cell. • These images are used to cross sections of cells and their intracellular structures. • Magnification can be as much as 10, 000 X to 100, 000 X.
Sperm cross section TEM, Mycobacterium tuberculosis TEM
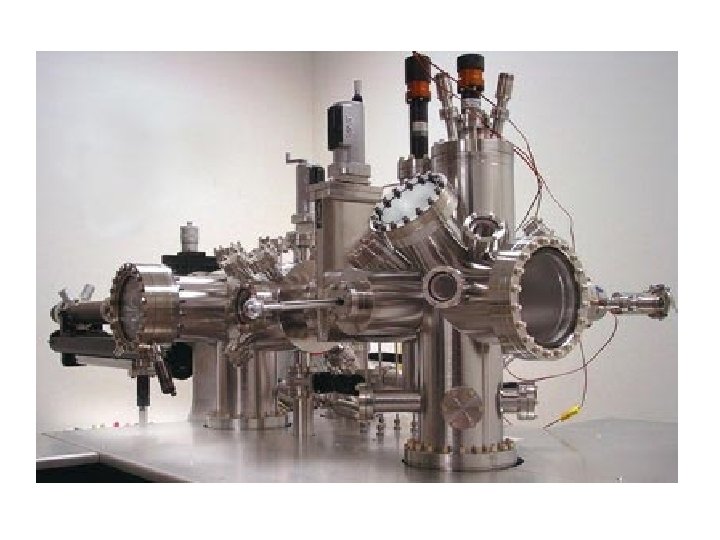
STM: Scanning Tunneling Microscope • Used for looking at images on an atomic level • When a conducting tip is brought very near to the surface to be examined, a bias (voltage difference) applied between the two can allow electrons to tunnel through the vacuum between them
VENN DIAGRAM TIME!! • Compare and Contrast the 4 types of microscopes we have spoken about: • Compound Light • Scanning Electron • Transmission Electron • Scanning Tunneling • Write a small +/- next to each point.
More microscope resources • http: //www. microscopemaster. com/differenttypes-of-microscopes. html • http: //www. biologydiscussion. com/biology/5 important-types-of-microscopes-used-inbiology-with-diagram/2635 • http: //www. easybiologyclass. com/lightmicroscope-vs-electron-microscopesimilarities-differences-comparison-table/
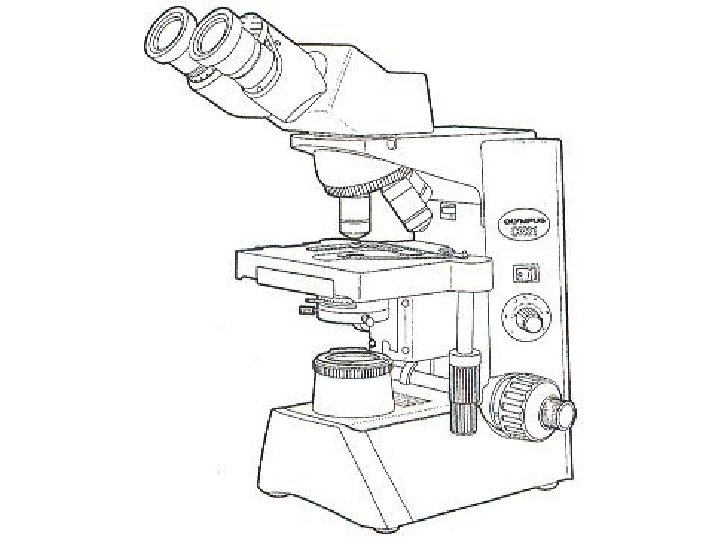
Know the following Microscope parts and their function. • • Eyepiece Ocular lens Nosepiece Objective lens Stage clip Light switch Light intensity knob • • Fine adjustment Coarse adjustment Stage manipulator knobs Condenser Light source Iris diaphragm knob Cord holder Microscope body
Total Magnification • When the image travels through the objective lens and the ocular lens it magnifies the magnification of the objective lens by 10 X. Ocular lens Objective lens Total magnification 10 X Red 4 X 40 X 10 X Blue 10 X Yellow 40 X White 100 X 10 X 400 X 1000 X
The proper way to carry your microscope. • Always carry the microscope with two hands, holding it close to your body.
Improper carrying. • Carrying the microscope like this could result in your ruining a $1500. 00 piece of equipment. • This will not score you brownie points with your instructor!
Proper usage • At the lab table, unwrap only as much cord as you need, the rest should remain stored around the cord wrap.
• The microscope should always be stored with the 4 X (red) lens in place and the stage in its lowest position.
• Always store your microscope in its numbered position, with the dust cover in place.
How to focus your image • Place the slide on the stage, held in place by the stage clip. • ALWAYS start with the 4 X lens. Focus your image. • Move to the 10 X lens, focus. • NEVER use the coarse focus higher than 4 X. • Repeat at the 40 X lens, focus using the fine focus.
Distance between lens and slide • Use only the fine focus knob with the 40 X and 100 X lens.