Technical drawing 3 ways to produce technical drawings
- Slides: 23

Technical drawing

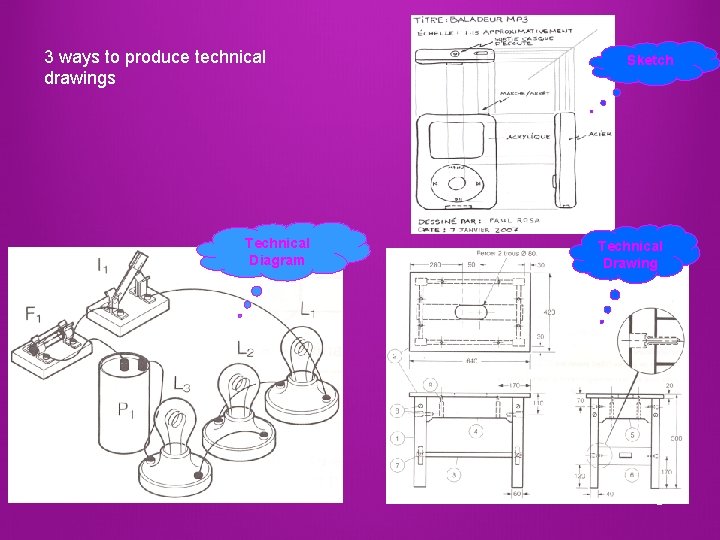
3 ways to produce technical drawings Technical Diagram Sketch Technical Drawing 2

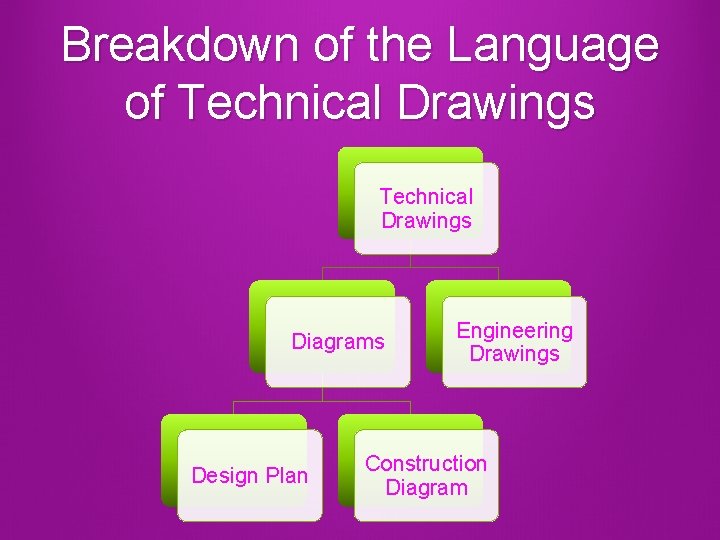
Breakdown of the Language of Technical Drawings Diagrams Design Plan Engineering Drawings Construction Diagram

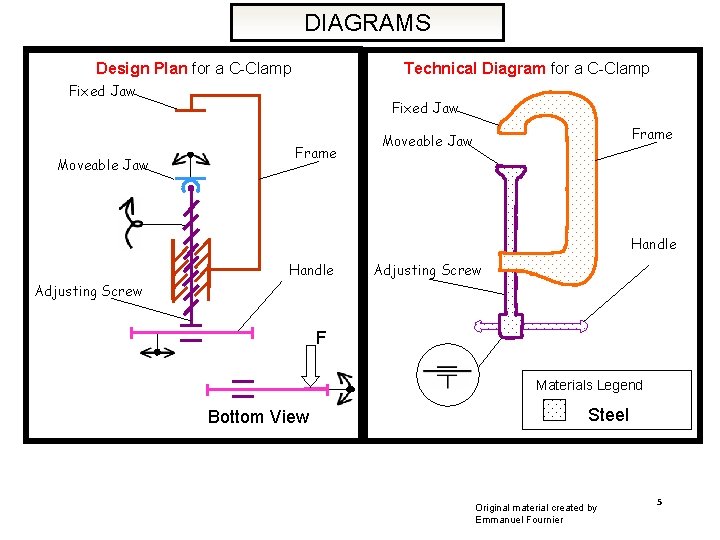
What’s the difference between an engineering drawing and a diagram?

DIAGRAMS Design Plan for a C-Clamp Technical Diagram for a C-Clamp Fixed Jaw Moveable Jaw Fixed Jaw Frame Moveable Jaw Handle Adjusting Screw F Materials Legend Bottom View Steel Original material created by Emmanuel Fournier 5

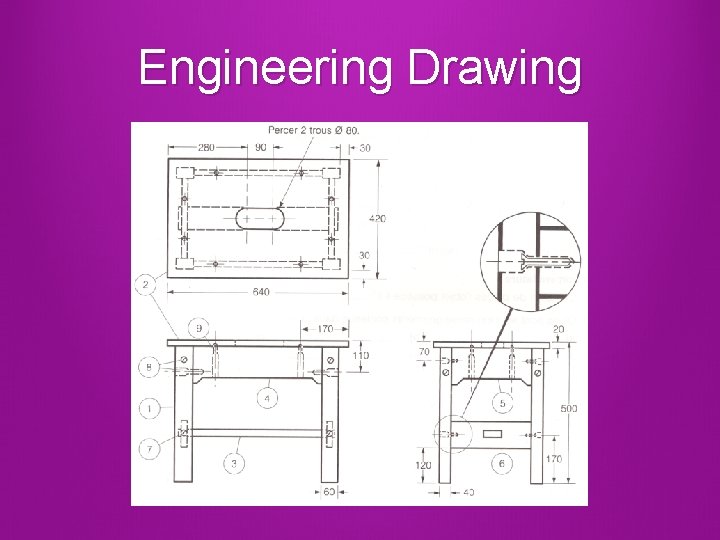
Engineering Drawing

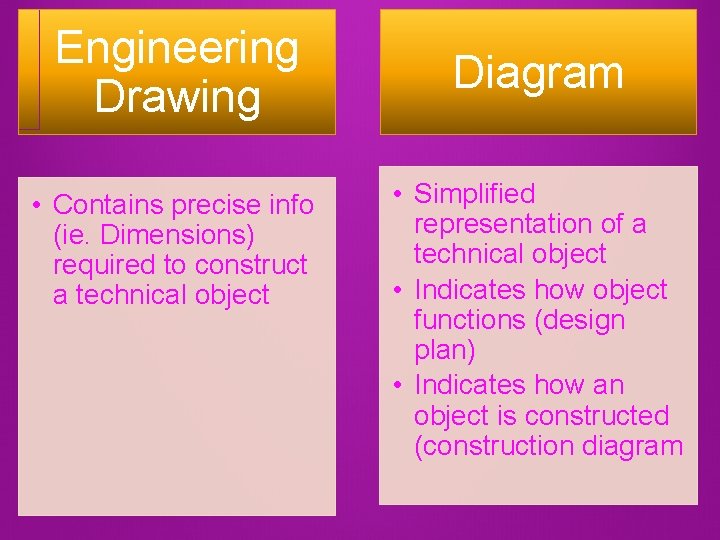
Engineering Drawing • Contains precise info (ie. Dimensions) required to construct a technical object Diagram • Simplified representation of a technical object • Indicates how object functions (design plan) • Indicates how an object is constructed (construction diagram

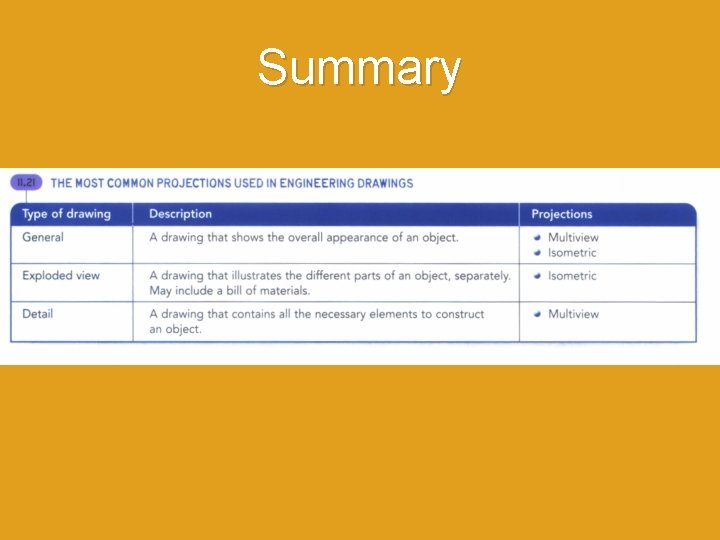
Types of Engineering Drawings 1. General 2. Exploded view 3. Detail drawing

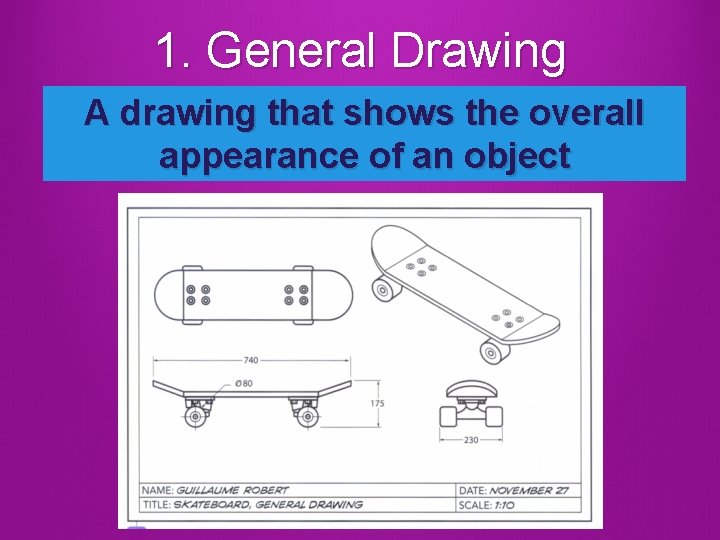
1. General Drawing A drawing that shows the overall appearance of an object

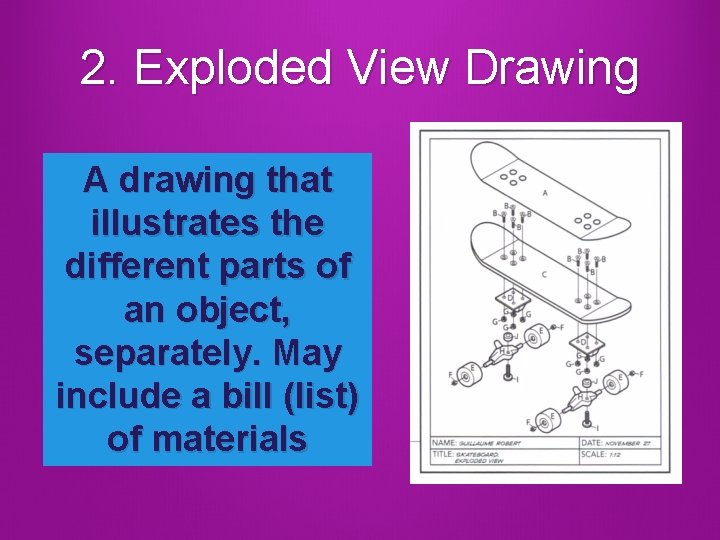
2. Exploded View Drawing A drawing that illustrates the different parts of an object, separately. May include a bill (list) of materials

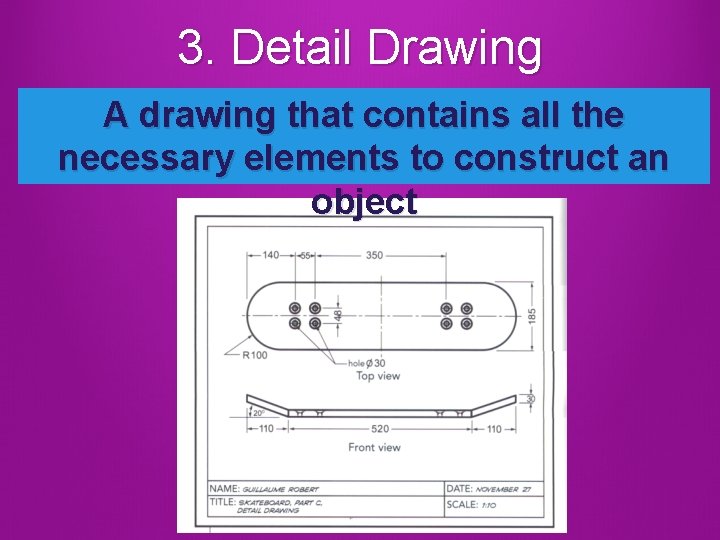
3. Detail Drawing A drawing that contains all the necessary elements to construct an object

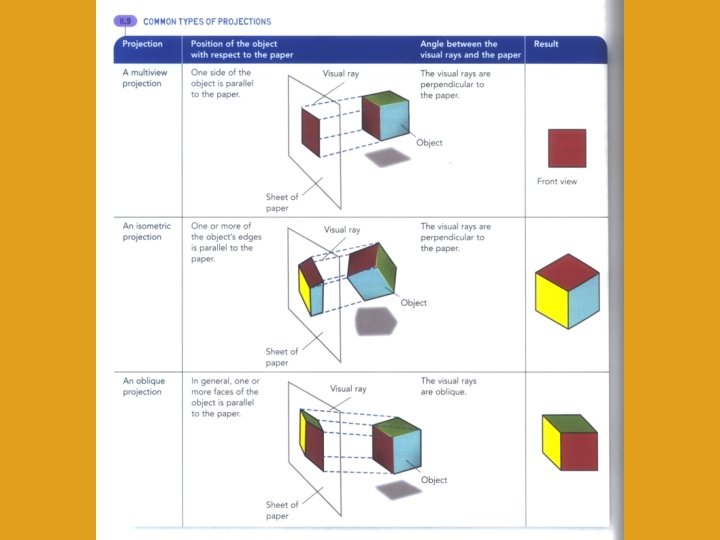
How do we represent 3 D technical objects in 2 D? “A projection is a representation of a 3 dimensional object in 2 dimensions. ”

3 Types of Projections 1. Multiview Perspective Drawings : show all 3 dimensions of an object 2. Isometric 3. Oblique

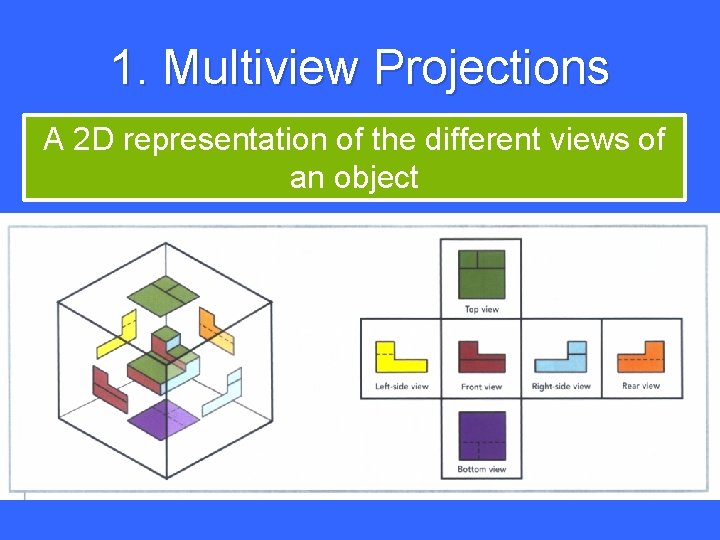
1. Multiview Projections A 2 D representation of the different views of an object

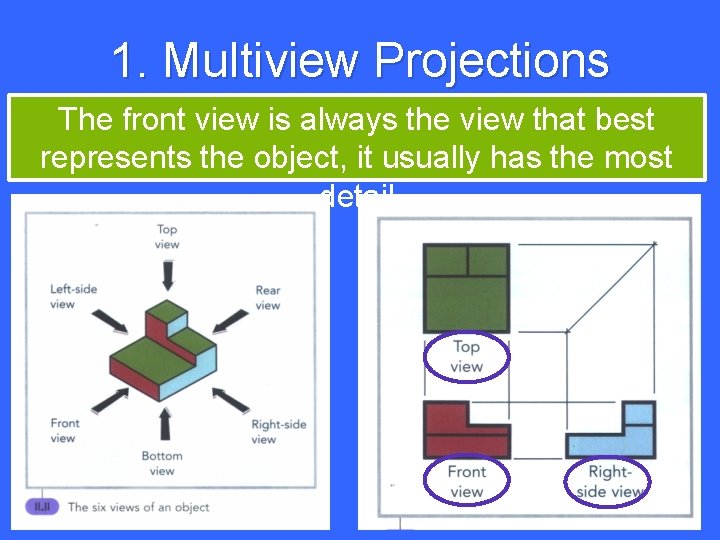
1. Multiview Projections The front view is always the view that best represents the object, it usually has the most detail

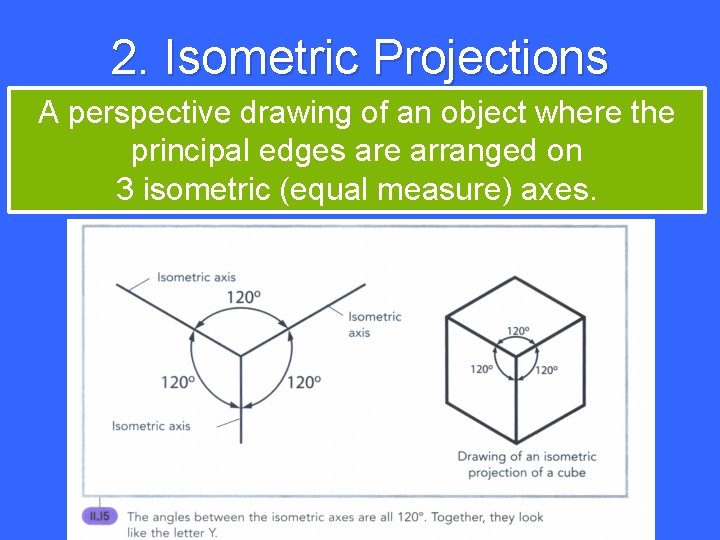
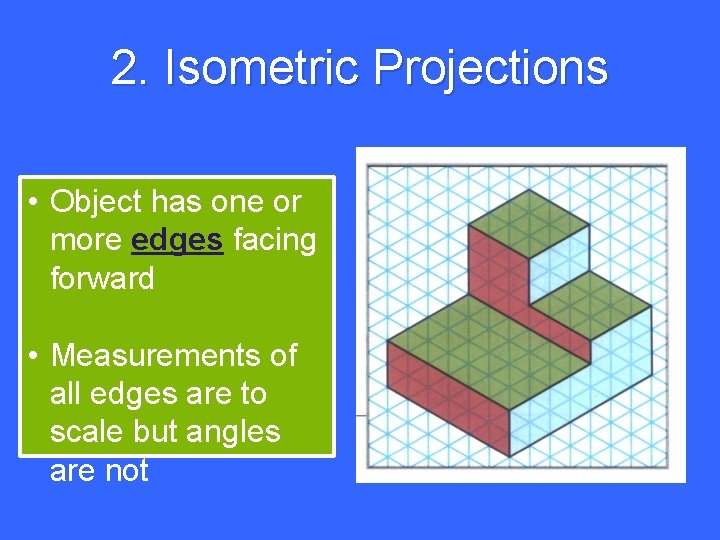
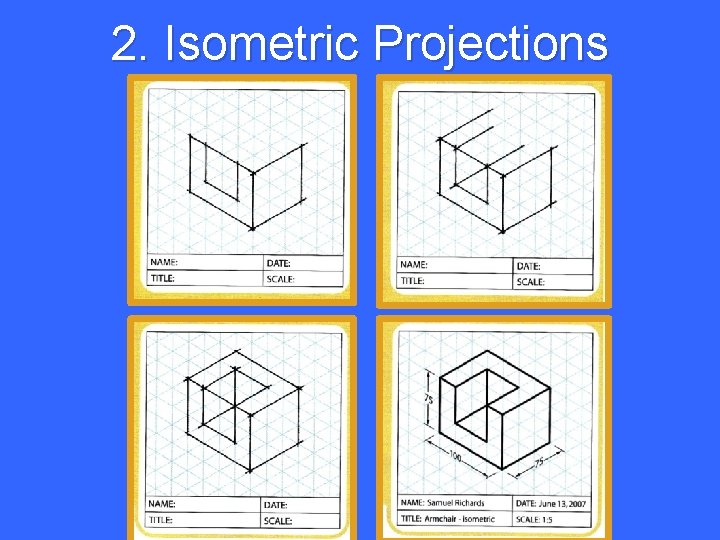
2. Isometric Projections A perspective drawing of an object where the principal edges are arranged on 3 isometric (equal measure) axes.

2. Isometric Projections • Object has one or more edges facing forward • Measurements of all edges are to scale but angles are not

2. Isometric Projections

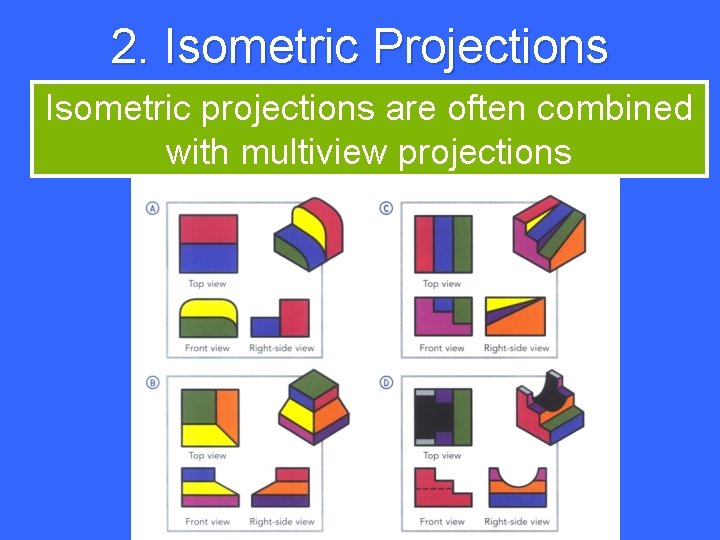
2. Isometric Projections Isometric projections are often combined with multiview projections

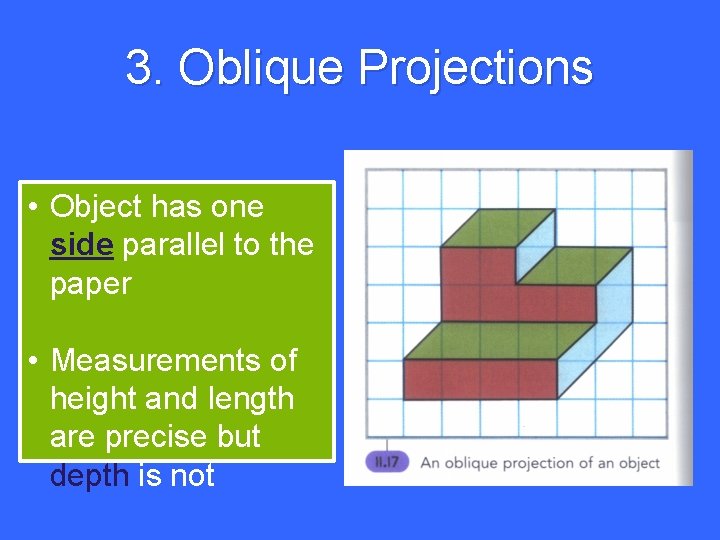
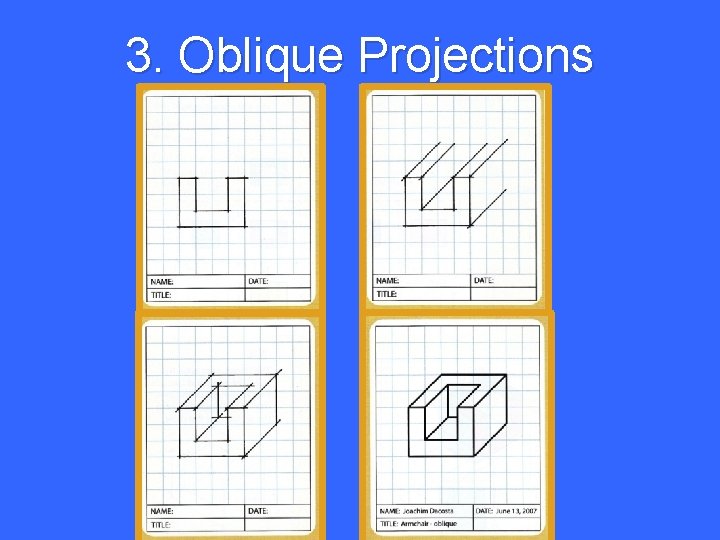
3. Oblique Projections • Object has one side parallel to the paper • Measurements of height and length are precise but depth is not

3. Oblique Projections


Summary