Task A Hello Trema Hello Trema Trema cd


 // Packet-in handling in Floodlight public Command receive(IOFSwitch sw, . .")


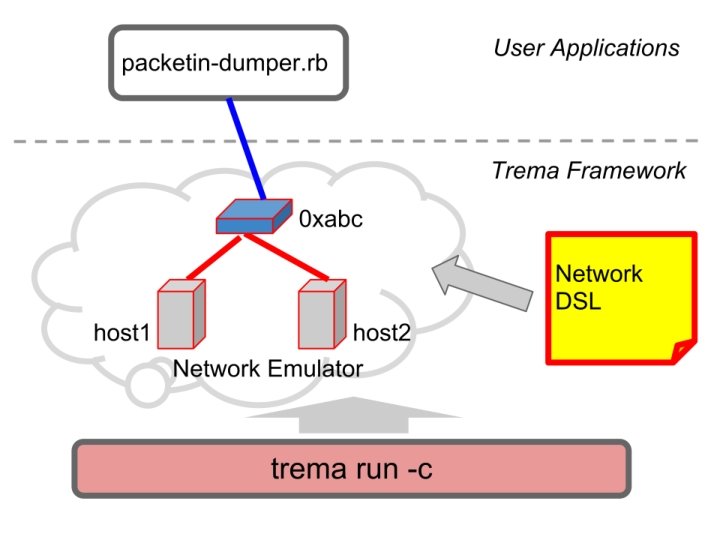
 を作り、仮想スイッチ 0 xabc に接続 # Add one")


")

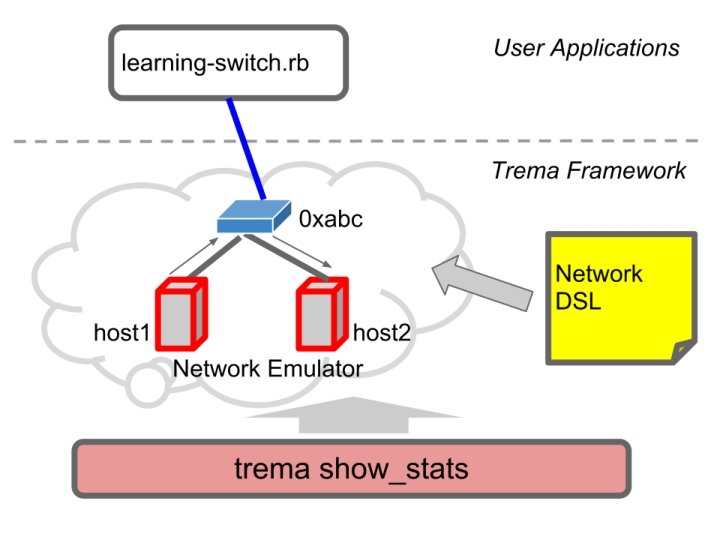
 を起動する: $ trema run learning-switch. rb -c")


` Exact. Match. from( message ) vs Match. new( :")


- Slides: 68
Task A : Hello Trema
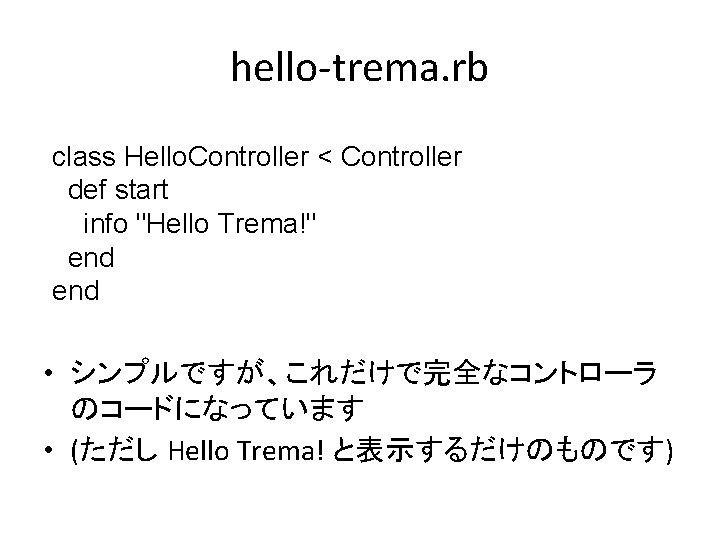
演習: "Hello Trema!" を実行 • 以下のコマンドを入力し、Trema を実行します : $ cd Tutorials/Trema $ trema run hello-trema. rb Hello Trema! # Ctrl-C to quit
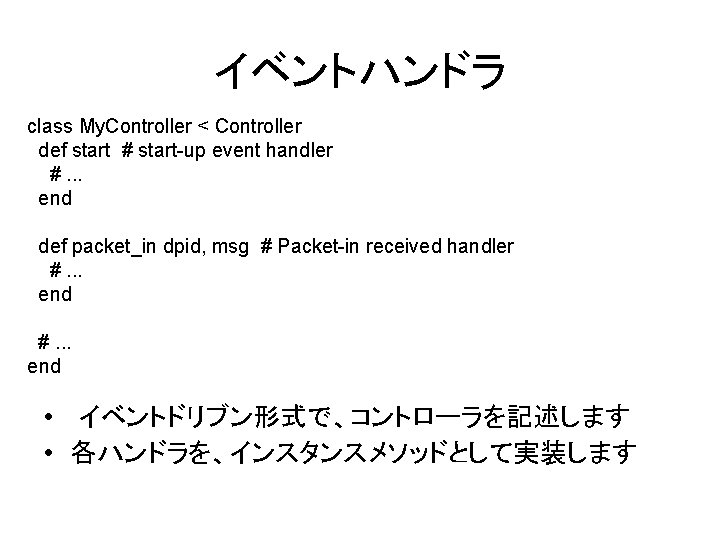
イベントハンドラ (Floodlight の場合) // Packet-in handling in Floodlight public Command receive(IOFSwitch sw, . . . ) { switch (msg. get. Type()) { case PACKET_IN: return this. handle. Packet. In(sw, . . . ); . . . private Command handle. Packet. In(IOFSwitch sw, . . . ) {. . . • Floodlight では、複雑なイベント振り分けが必要です • おまじないが多いため、コードの見通しが悪くなります
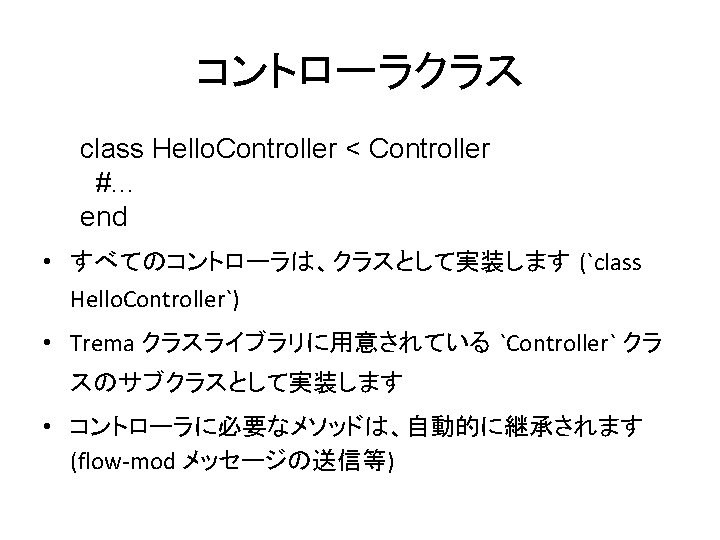
イベントの振り分け # Packet-in handling in Trema class My. Controller < Controller # automatically called at startup def start #. . . end # automatically caled when receiving a packet-in def packet_in dpid, msg #. . . end • Trema はイベントの振り分けにリフレクションを使っています • そのため、複雑になりがちなディスパッチやハンドラ登録を行う必 要はありません
Logging API class Hello. Controller < Controller def start # outputs an info level message info "Hello Trema!" end • ロギングレベル毎に用意されたシンプルな API (debug, info, etc) • `trema ruby` で、Logging API を含む API リファレ ンスを表示
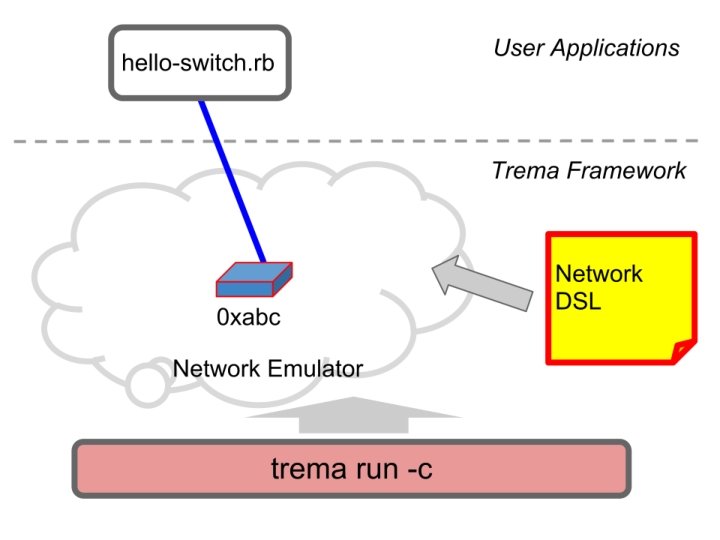
Open. Flow スイッチとコントローラを接続 Task B : Hello Switch
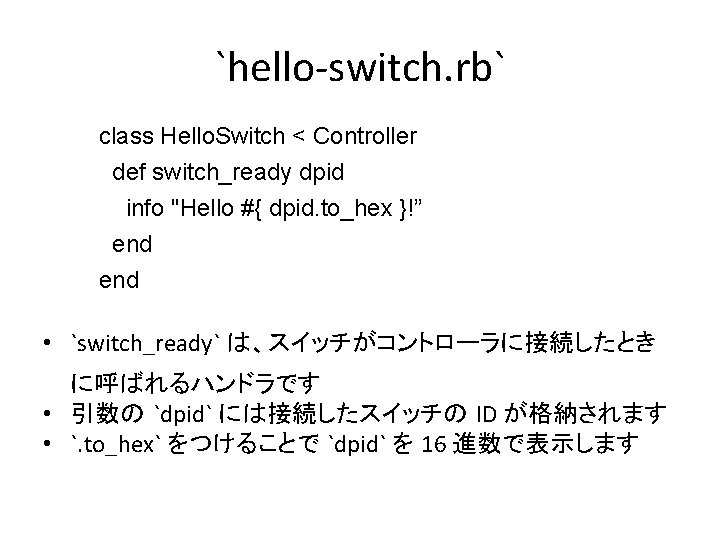
演習 : Hello Switch コントローラ $ trema run hello-switch. rb -c hello-switch. conf Password: xxxx # Enter your password here Hello 0 xabc! # Ctrl-c to quit • ソフトウェア版 Open. Flow スイッチ (dpid = 0 xabc) を起動し、 コントローラと接続します • コントローラは `“Hello 0 xabc!”` と表示します • ソフトウェア版 Open. Flow スイッチの起動は `helloswitch. conf` に定義します
演習: スイッチの追加 # hello-switch. conf vswitch { dpid "0 x 1" } vswitch { dpid "0 x 2" } vswitch { dpid "0 x 3" }. . . $ trema run hello-switch. rb -c hello-switch. conf ? ? ? • `hello-switch. conf` にスイッチを追加して `trema run` したと き、何が表示される? • 注 : 各スイッチの dpid はユニークである必要があります
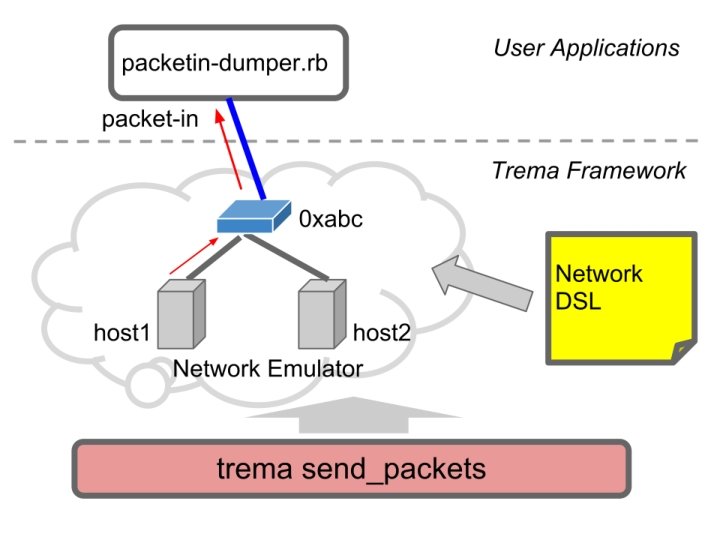
Packet-In メッセージの扱い Task C : Packet-In Dumper
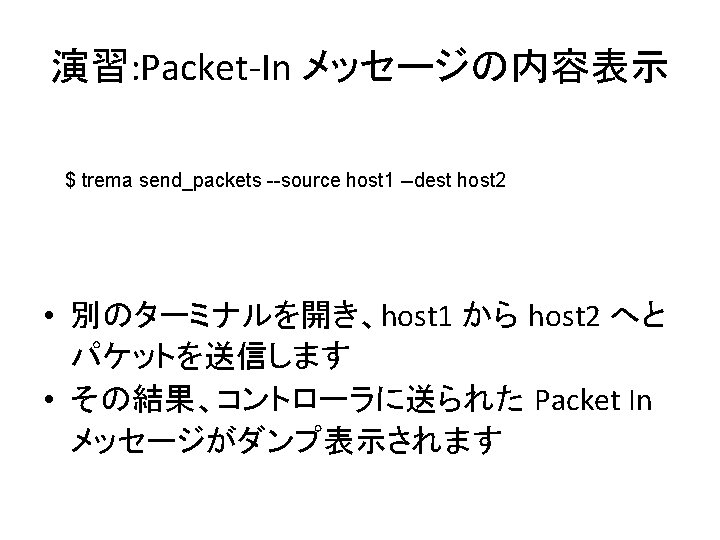
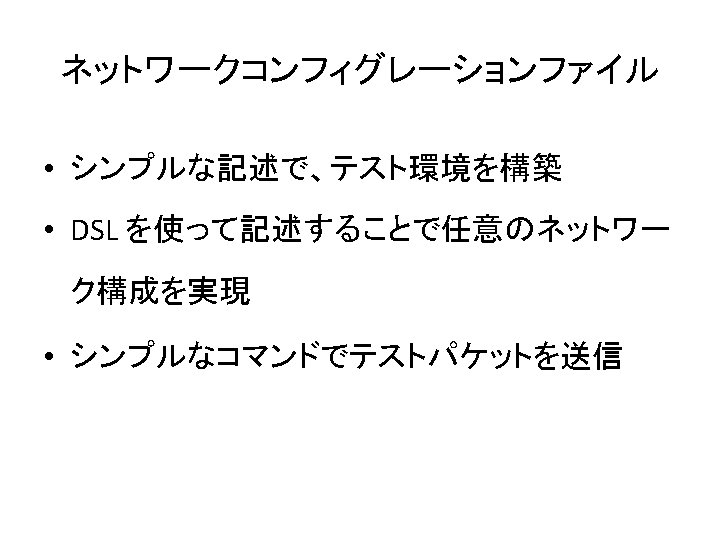
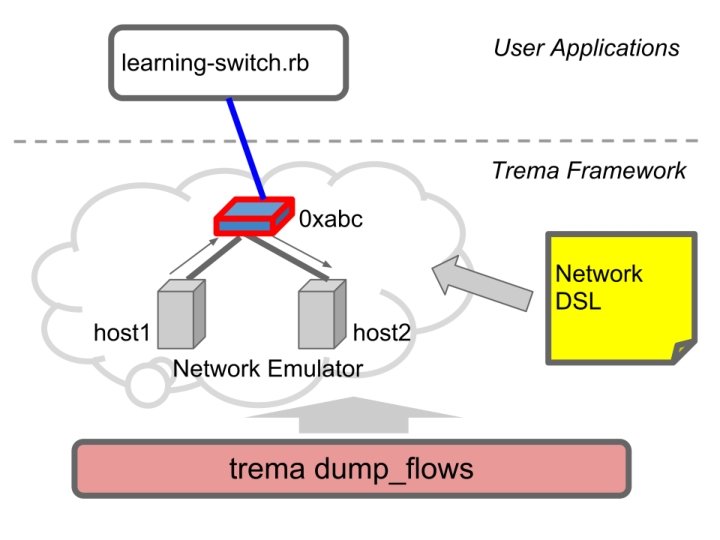
仮想ホストと仮想リンク • 仮想ホスト (host 1, host 2) を作り、仮想スイッチ 0 xabc に接続 # Add one virtual switch vswitch { dpid "0 xabc" } # Add two virtual hosts vhost "host 1” vhost "host 2” # Then connect them to the switch 0 xabc link "0 xabc", "host 1” link "0 xabc", "host 2" • 一方の仮想ホストから他方へ、テストパケットを送る $ trema send_packets --source host 1 --dest host 2
例: より複雑なネットワーク vswitch { dpid "0 x 1" } vswitch { dpid "0 x 2" }. . . vhost "host 1” vhost "host 2” vhost "host 3” vhost "host 4". . . link "0 x 1", "0 x 2. . . link "0 x 1", "host 1” link "0 x 1", "host 2” link "0 x 2", "host 3” link "0 x 2", "host 4”. . .
`Packetin. Dumper#packet_in` # packetin-dumper. rb class Packetin. Dumper < Controller def packet_in dpid, message info "received a packet_in” info "dpid: #{ datapath_id. to_hex }” info "in_port: #{ message. in_port }” end • `packet_in`: dpid と Packet-In メッセージオブジェクト (`message`) が引数 • `message. attribute` : Packet-In メッセージの各種アトリビ ュートを参照
演習: Packet-In の各種アトリビュートを参照 # packetin-dumper. rb class Packetin. Dumper < Controller def packet_in dpid, message info "received a packet_in” info "dpid: #{ datapath_id. to_hex }” info "in_port: #{ message. in_port }” info "total_len: #{ message. total_len }". . . end • 他の Packet-In アトリビュートを表示してみる – (total_len, macsa, macda. . . ) • ヒント: `trema ruby` を使い、Packet In クラス API を参照してみよう
Intermission (10分)
flow_mod と packet_out を送る Task D : Learning Switch
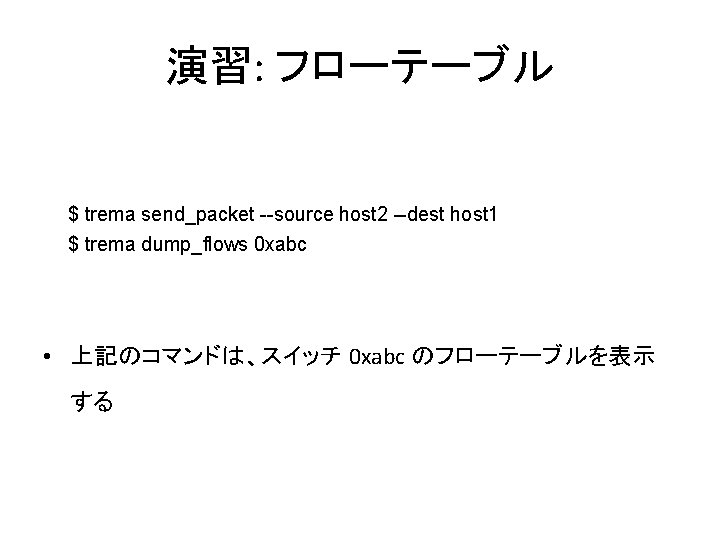
演習: 送受信パケット量を表示する • L 2 スイッチコントローラ (learning_switch) を起動する: $ trema run learning-switch. rb -c learning-switch. conf • 別のターミナルを開き、テストパケットを送る • `show_stats` で送受信パケット量に関する情報を表示する $ trema send_packet --source host 1 --dest host 2 $ trema show_stats host 1 $ trema show_stats host 2
今回使用した Trema のサブコマンド `trema show_stats HOST_NAME` `trema dump_flows SWITCH_NAME` • 様々な統計情報と内部情報を表示
Learning Switch のソースコード
Learning Switch class Learning. Switch < Controller #. . . def packet_in dpid, message @fdb. learn message. macsa, message. in_port_no = @fdb. lookup( message. macda ) if port_no flow_mod dpid, message, port_no packet_out dpid, message, port_no else flood dpid, message end #. . . end • 擬似コードのように簡単に読むことができるはず?
詳しく見ていこう def packet_in dpid, message @fdb. learn message. macsa, message. in_port_no = @fdb. lookup( message. macda ) if port_no flow_mod dpid, message, port_no packet_out dpid, message, port_no else flood dpid, message end • Packet In メッセージが送られてきた時に、送信元 MAC アドレス (macsa) と受信ポート (in_port) を Forwarding DB (FDB) に記録する • 宛先 MAC アドレス (macda) から送出ポートを検索する • もし見つかれば、スイッチのフローテーブルを更新し、パケットを Packet. Out する • 見つからなければ、パケットを flood する
Syntactic Sugar: `Exact. Match. from()` Exact. Match. from( message ) vs Match. new( : in_port => message. in_port, : nw_src => message. nw_src, : nw_dst => message. nw_dst, : tp_src => message. tp_src, : tp_dst => message. tp_dst, : dl_src => message. dl_src, : dl_dst => message. dl_dst, . . . )
Trema vs. NOX Python # Trema send_flow_mod_add( dpid, : match => Exact. Match. from( message ), : actions => Action. Output. new( port_no ) ) vs # NOX Python install_datapath_flow( dpid, extract_flow(packet), CACHE_TIMEOUT, openflow. OFP_FLOW_PERMANENT, [[openflow. OFPAT_OUTPUT, [0, prt[0]]]], bufid, openflow. OFP_DEFAULT_PRIORITY, inport, buf )
Learning Switch: サマリー • 内部の状態表示 – `trema show_stats` – `trema dump_flows` • 短く書くための API – `Exact. Match. from` – `send_flow_mod_add`
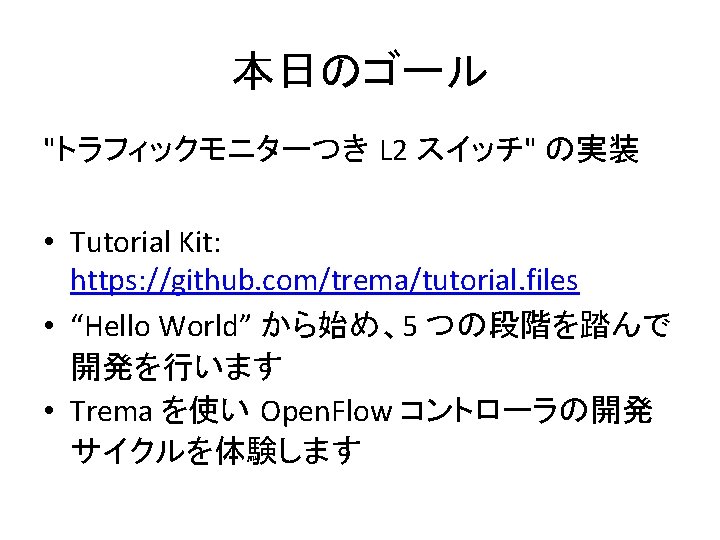
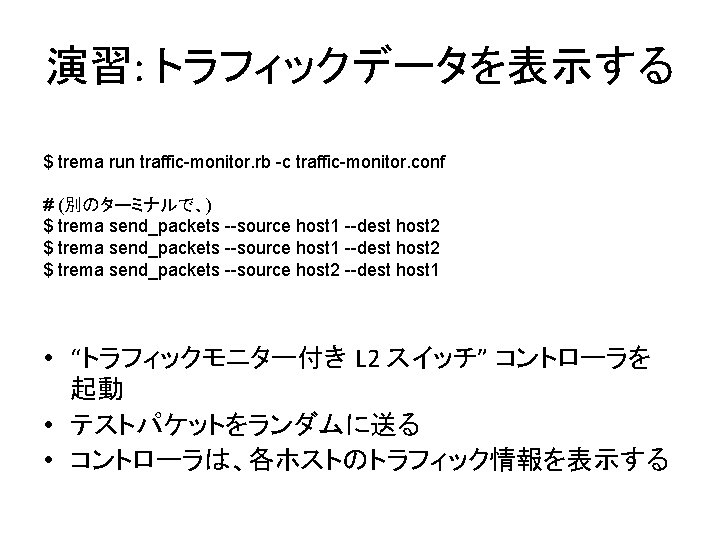
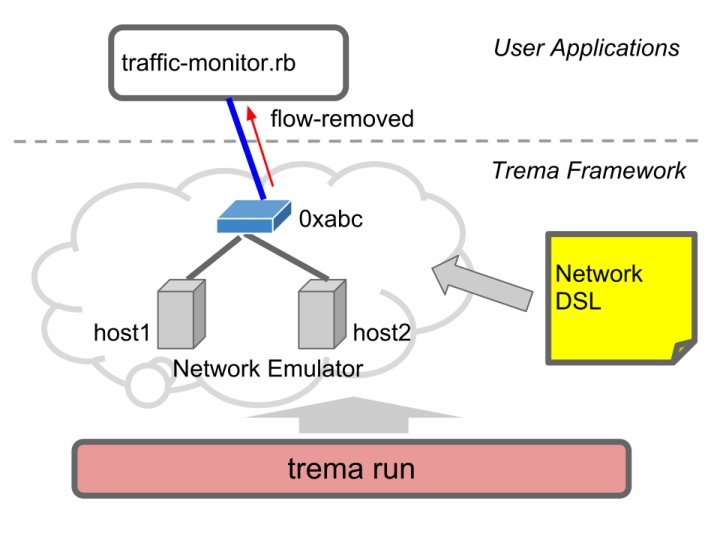
flow_removed メッセージからトラフィックデータを取得 Task E : Traffic Monitor
トラフィック量を取得する class Traffic. Monitor < Controller #. . . def flow_removed dpid, message @counter. add message. match. dl_src, message. byte_count end private def flow_mod dpid, macsa, macda, out_port send_flow_mod_add( dpid, : hard_timeout => 10, # flows lifetime = 10 seconds. : match => Match. new( : dl_src => macsa, : dl_dst => macda ), : actions => Action. Output. new( out_port ) ) end #. . . end • 各フローを 10 秒でタイムアウトさせる • フローがタイムアウトした時に送られる flow_removed メッセージをハンド リングする • フローにより転送されたトラフィック量を記録する
トラフィック量を表示する class Traffic. Monitor < Controller periodic_timer_event : show_counter, 10 #. . . private def show_counter puts Time. now @counter. each_pair do | mac, nbytes | puts "#{ mac } #{ nbytes } bytes” end #. . . end • 現在時刻と、`@counter` に記録されているトラフィック 量を 10 秒ごとに表示
Timer Attribute class Traffic. Monitor < Controller periodic_timer_event : show_counter, 10 #. . . def show_counter. . . end • クラスアトリビュートのようにタイマーハンドラを定義 • スレッドを使った実装などを独自に行う必要がない • coding by convention の一例
Love Ruby?
Love C?
Trema C • Trema は Ruby と C 両方のライブラリを提供 – 開発者が選択可能 • Trema C もまた Trema Ruby のようにシンプル $ gcc myapp. c `trema-config -c -l` -o myapp $ trema run myapp
Sources This Tutorial: http: //github. com/trema/tutorial-ja Trema: http: //github. com/trema/ Trema/Apps: http: //github. com/trema/apps/ Web Page: http: //trema. github. com/trema/ Twitter: http: //twitter. com/trema_news Mailing List: https: //groups. google. com/group/trema-dev • Bugs: https: //github. com/trema/issues • • •
Question?